Thru Screwed Steel Screws – Pull-Over and Pull-Out
Hi, my name is Mike, and I am addicted to watching engineering disaster videos.
No, there is not yet a 12 step program for this addiction.
I have learned a few things from my addiction. When it comes to construction failures, most of them come down to connections. Connections (at least when wood is involved) take fasteners – screws, bolts, nails, wooden dowels, etc.
Now if one is getting parts manufactured say in China (as an example), there is a high probability they are going to fail under load – due to manufacturing process shortcuts. Biggest shortcut (and impossible to detect by eye) is under strength material.
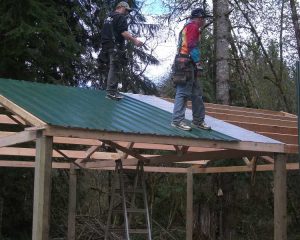
When it comes to post-frame construction, most buildings are clad with roll formed steel roofing and siding. It is extremely durable, very cost effective and easily installed by use of thru screws.
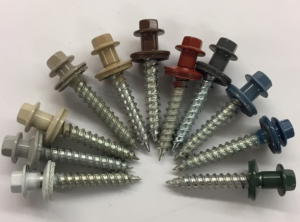 At Hansen Pole Buildings, we provide only Diaphragm screws manufactured in Canada using North America components. These screws are a #12 diameter and 1-1/2 inches in length.
Now why would an assembly with a thru screw structurally fail (assuming product is manufactured of proper strength steel)?
Screws could pull out of wood. This would be a problem.
Over three decades ago, at an Alumax testing facility east of Los Angeles (Perris Valley), we constructed a full scale roof to test shear strength of steel panels. Our testing resulted in some surprises. Initially we felt our weak link would be framing under roof steel. We were totally in error and surprised at our results. Our assembly was done to match industry standards and included fastening steel to roof purlins using #10 x 1” screws every nine inches. As we placed horizontal loads into this roof, before ripples even appeared in steel roofing, screws started to pull out of framing. This pull out problem was solved by using 1-1/2” long screws.
Our next problem was roof steel began to slot beneath screw grommets. Solution here was to use larger diameter screws in high stress areas (at eave and ridge) and to place screws in this area on each side of each high rib, rather than along one side only. Only after all of these screw issues were solved, were we finally able to test our steel to failure. These results showed some fairly significant values. This test’s results are published in NFBA’s Post Frame Building Design Manual https://bse.wisc.edu/bohnhoff/Publications/Copyrighted/NFBA_Design_Manual.pdf See Table 6.1 (assemblies 13 and 14).
After our test was completed, Alumax’s design engineer, Merle Townsend, designed a screw specifically to solve weaknesses demonstrated by our test. Labeled as a “diaphragm” screw (https://lelandindustries.com/screws/tapping-wood-screws/) this 1-1/2” part features a larger diameter shank than standard screws. A side benefit of this screw is this larger diameter helps prevent screw heads from twisting off during installation.
I did some looking at what published pull out values are for those #9 x 1” industry standard screws – only value I could find was 542# and it did not specify species of wood being driven into. Our diaphragm screw has minimum pull out values of 910# (Canadian SPF) and 1060# (Douglas Fir). in some instances – nearly double industry standard!
Besides pull out, another source of structural failure is pull-over. This is where screw remains in wood and steel roofing flies away. Besides washer/grommet configuration of screw, this is also going to be a function of steel panel thickness. Graph on Leland’s website displays a 26 gauge pull-over value of roughly 500#. Converting by dividing by 26 gauge minimum thickness (0.0187) and multiplying by 29 gauge minimum thickness (0.0142) provides a pull over value of about 380#.
Therefor pull-over is going to dictate before pull-out.
(Author’s note – having searched extensively, I have yet to be able to find a published pull-over value for #9 screws.)
For steel panels, screws in field (not ends of panels) are placed every nine inches. With screws into every purlin, spaced 24 inches on center, each screw is carrying 1.5 square feet of load. Our pull-over value of 380# divided by area gives a resistance per square foot of 253#.
Highest wind load areas are at perimeters of roof (Zone 3). At 200 mph (miles per hour) and a wind exposure C (fully open to wind in one or more directions), load on components and cladding in Zone 3 is 163.65 psf (pounds per square foot), based upon mean roof height of 15 feet. Even in wind exposure D (fully exposed to winds coming over large bodies of water) and making mean roof height 20 feet, load would be 208 psf.
Hansen Pole Buildings, having now provided well in excess of 25,000,000 diaphragm screws, has yet to have had a single screw fail in pull-out or pull-over.
Yes, these screws are more expensive, however we enjoy sleeping well at night knowing our clients’ steel cladding is not going to fail due to any screw issue.
 DEAR POLE BARN GURU: What are the typical sizes of the animal confinement pole barns? Small and Medium including the doors. GARRETT in PAGOSA SPRINGS
 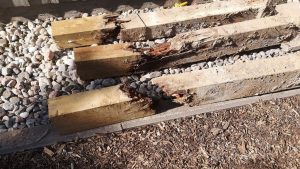 Second – screws do not rot wood. It is a function of one or more of three things – screws improperly seated (screws into high ribs rather than flats; over or under driven; or not driven perpendicular to panels). Or, screws with neoprene gaskets (most are), instead of EPDM. Neoprene is not UV resistant, so quickly becomes brittle and cracks. Standard screws are #9 or #10 diameter and these narrow shanks will cause slotting of steel panels, over time, due to cyclic wind loads. Shanks are acting like knives! We found this when we did full scale diaphragm testing of steel panels over three decades ago. This was solved by our engineer, who did our testing, designing what is now known as “Diaphragm Screws”. Produced by Leland Industries in Canada, Hansen Pole Buildings provides them exclusively for through screwed steel panels. 1-1/2″ long, they are a #12 shank, except right below head (where screw passes through panels) it is a #14 diameter. These screws also have EPDM gaskets, have a JS1000 plating (read more here:
  DEAR KAREN: Hansen Pole Buildings’ warehouse is a roughly 50 year old post frame building with roof steel attached with nails and it leaked like a sieve. We used two cases of “super whammy” caulking to try to seal around nails, it helped some, but ultimately our only solution was new roof steel. Although it sounds painfully expensive, it really is going to be your only true solution. When you order new steel, make sure it comes with a factory applied integral condensation control and use 1-1/2″ diaphragm screws to attach (they are larger diameter, powder coated and have EPDM washers).
 Your new building investment includes full multi-page 24” x 36” structural blueprints detailing the location and attachment of every piece (as well as suitable for obtaining Building Permits), the industry’s best, fully illustrated, step-by-step installation manual, and unlimited technical support from people who have actually built post frame buildings. Even better – it includes our industry leading Limited Lifetime Structural warranty!
 WHITNEY in DANVILLE
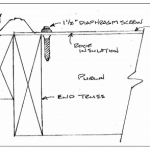 DEAR POLE BARN GURU: Should the screws for exposed fastener metal panel roofing COMPLETELY penetrate the 1/2″ plywood decking/substrate? STEVE in WARREN
 DEAR TIM: Header beam (aka truss carrier) requirements can be determined by a Registered Professional Engineer and are based upon this formula:
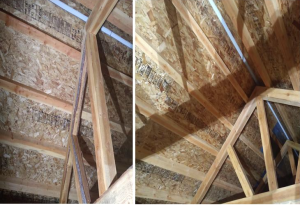 DEAR RICK: Code will not allow you to place batt insulation between your purlins unless you have at least an inch of continuous airflow above from eave to ridge. Impossible to do given orientation of roof purlins.
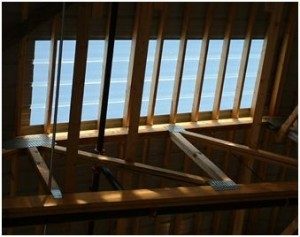 Now, considering your entire roof is 40 years old – it would be possible to replace only skylight panels. This would be providing rib configuration of steel can be matched. Over 40 years many patterns have been discontinued.
 Today the fasteners of choice for corrugated roofing are gasketed hex-head screws with a metal and rubber washer below the head. As the screws are driven, the washer presses against the metal roofing to form a waterproof seal. If the screws are driven correctly, fastening through either the valleys or the ridges of the roofing is considered acceptable in this country. Valid arguments can be made for both preferences. If the fasteners on your roof were all properly driven, it is unlikely that they are the source of your leaks, regardless of whether they were driven through valleys or ridges.
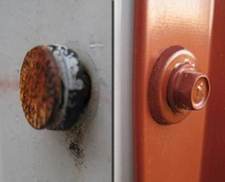 As soon as I got back to our warehouse I grabbed a different color of screw and a couple different stitch screws for fastening trims to see how they fared. Unfortunately it was the same results regardless of type of screw or color. My first thought was, “where are all the customer complaints on this”? To me this was a major malfunction. I called our supplier and explained what I was seeing and sent photos to go along with our experience. They confirmed after some back and forth that there was indeed something very wrong with the paint on these particular screws.


