Tag Archives: building width

Insulation, Truss Spans, and Pit Material

Today’s Ask the Pole Barn Guru discusses reader questions about an option to layer insulation between purlins, the actual building width for 36′ trusses, and the recommendation against the use pit material when performing site prep.

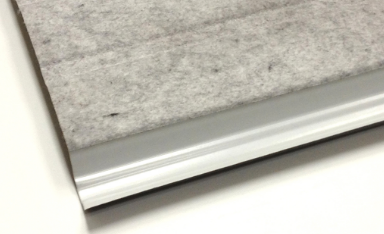
DEAR POLE BARN GURU: Hi, I have the traditional roll type insulation with the white backing. My question is if I’m able to add more insulation between the purlins on top of the existing insulation for added r value and what type would you recommend if so? Thanks OWEN in VIVIAN

DEAR OWEN: Metal Building Insulation (MBI) is not my favorite design solution for post frame insulation (read more here: https://www.hansenpolebuildings.com/2011/11/metal-building-insulation/).

You can add more insulation to interior of what you have, without having to perforate white vinyl of you MBI. I would recommend adding unfaced Rockwool, as it is not affected by moisture and has a relatively high R value per inch of thickness compared to fiberglass or cellulose. Do not add another interior vapor barrier, as this would allow for moisture to become trapped between two vapor barriers.


DEAR POLE BARN GURU: You really are a wealth of knowledge.  I’ve been watching your Youtube videos as well, very helpful.

I’m intrigued by your pole barn kits, and I had just one more question about raised heel trusses:

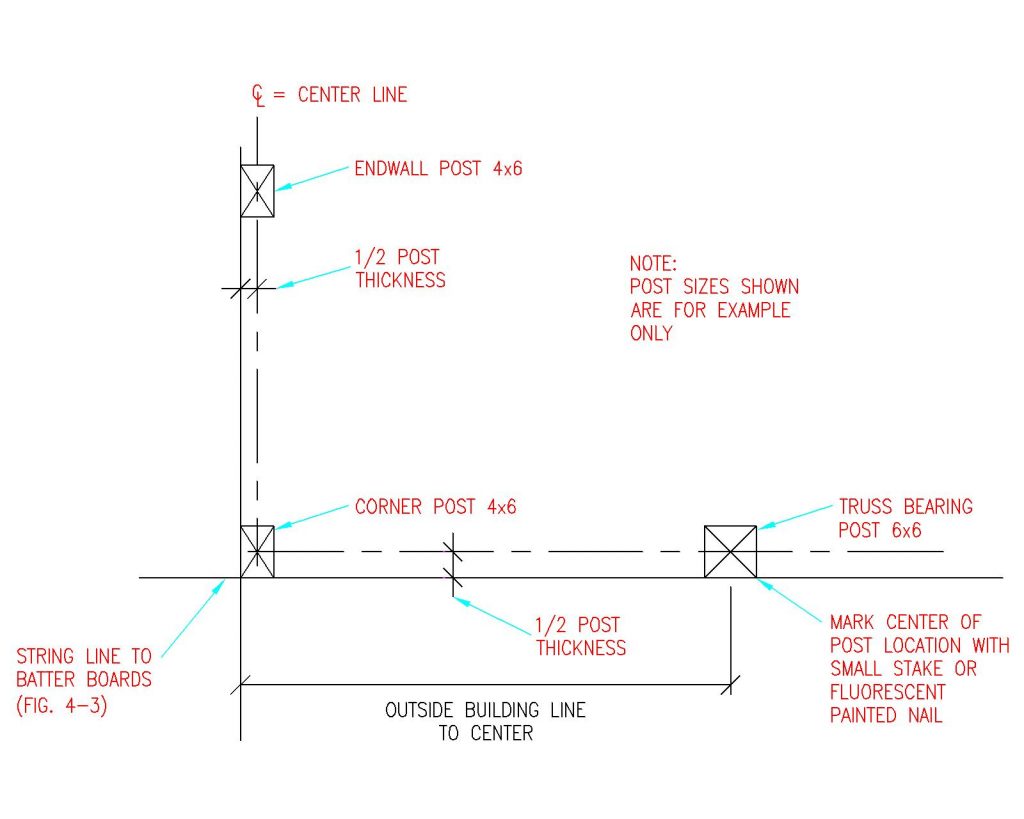
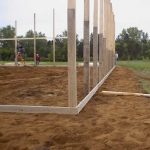
It’s my understanding that post spans are actually building widths minus 3 inches.  So for a 36 foot building, the span between posts is 35’ 9”, correct?  If that’s the case, are raised heel truss lengths in this example also 35’ 9 to the edge of the post?  Or the full 36’, with the eave skirt board resting under the additional 1.5 inches of the bottom chord length?

Thanks again for your time!!! MATT in CHENEY

DEAR MATT: Our buildings (as are most Pacific Northwest Buildings) measure 36 feet from outside of column to outside of column. This allows for 12 sheets of steel plus the lap on the 12th piece (covering 36′ 1-1/2″ roughly) to be installed without having to rip the last steel panel lengthwise. Pressure preservative treated splash planks, headers, etc. will be applied to exterior faces of columns, giving a framed finished width of 36’3″.


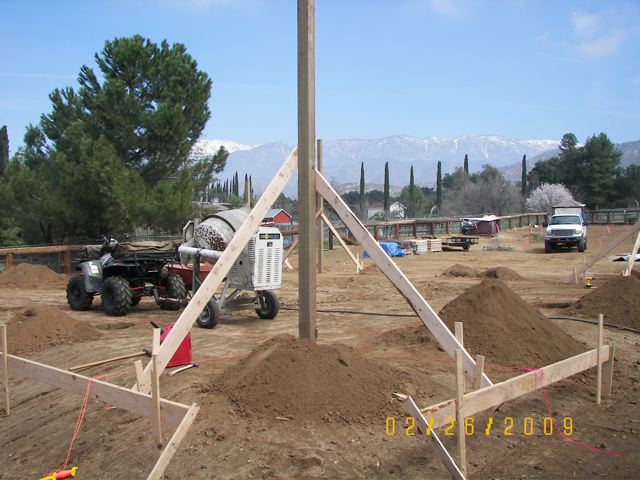
DEAR POLE BARN GURU: Hi. In your building manual it notes not to use pit material on the building pad. If the site is leveled, I’m not sure what the function of any modified is or why no pit material in specific. We’ll be doing a slab at some point and common practice would be to put down some clean 3/4″ so if it’s beneficial to have stone on the building pad would it be more cost efficient to just put the clean stone down to start with? Thanks. KEVIN in WEST CALN

DEAR KEVIN: #1 reason to not use pit run is it is difficult to auger holes through.

#2 because it is round, it does not compact well

#3 It creates voids allowing for free flow of liquid water beneath slab

You do want to allow for two to six inches of clean sand or sandy gravel compacted immediately below your under slab vapor barrier.


Roof Leaks, DIY or Hire Builder, and Building Width

This week the Pole Barn Guru answers reader questions about on old roof that leaks due to nails used in attaching steel, a request for builder referrals, and if a Hansen Building is available in a 48′ width– yes, they are.

DEAR POLE BARN GURU: My older metal barn complete with roofing nails, not screws, leaks badly. If I install eve trim would I use gutters also? Now, the building, 96×40 has neither. It leaks under the eves. Replacing the nails has worked some. KAREN in ELMA

DEAR KAREN: Hansen Pole Buildings’ warehouse is a roughly 50 year old post frame building with roof steel attached with nails and it leaked like a sieve. We used two cases of “super whammy” caulking to try to seal around nails, it helped some, but ultimately our only solution was new roof steel. Although it sounds painfully expensive, it really is going to be your only true solution. When you order new steel, make sure it comes with a factory applied integral condensation control and use 1-1/2″ diaphragm screws to attach (they are larger diameter, powder coated and have EPDM washers).

Continuous seamless gutters are always a good investment, provided you add snow breaks on your roof, if you are in snow country.

DEAR POLE BARN GURU: We are looking for a builder to put up a 70’x40′ pole structure for us — do you have any names of contractors/individuals who have put a Hansen building in the area? ESMEE in WENATCHEE

DEAR ESMEE: Your new building kit is designed for the average physically capable person, who can and will read and follow instructions, to successfully construct your own beautiful building shell (and most of our clients do DIY – saving tens of thousands of dollars). We’ve had clients ranging from septuagenarians to fathers bonding with their teenage daughters erect their own buildings, so chances are – you can as well!

Hansen Buildings Construction Manual
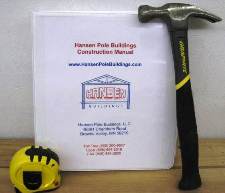
Your new building investment includes full multi-page 24” x 36” structural blueprints detailing the location and attachment of every piece (as well as suitable for obtaining Building Permits), the industry’s best, fully illustrated, step-by-step installation manual, and unlimited technical support from people who have actually built post frame buildings. Even better – it includes our industry leading Limited Lifetime Structural warranty!

Currently (and for the foreseeable future) there is a nationwide shortage of building erectors. Many high quality erectors are booked out into 2023. We would strongly encourage you to consider erecting your own building shell.

For those without the time or inclination, we have an extensive independent Builder Network covering the contiguous 48 states (https://www.hansenpolebuildings.com/find-a-builder/). We can assist you in getting erection labor pricing as well as introducing you to potential builders.

A CAUTION in regards to ANY erector: If an erector tells you they can begin quickly it is generally either a big red flag, or you are being price gouged. ALWAYS THOROUGHLY VET ANY CONTRACTOR https://www.hansenpolebuildings.com/2018/04/vetting-building-contractor/


DEAR POLE BARN GURU: Do your pole barns come in 48’ width?

About Hansen BuildingsWHITNEY in DANVILLE

DEAR WHITNEY: All Hansen Pole Buildings are 100% custom designed to best meet our client’s wants and needs. You may have any width, length or height you desire – down to even fractions of an inch, without having to pay a premium for some perceived standard.


Span, Vapor Barriers, and Planning a Pole Barn

This week the Pole Barn Guru answers reader questions about the widest span a post frame building can be built, vapor barrier on a roof only structure, and the proper steps for planning a pole barn.

DEAR POLE BARN GURU: How wide can you span? And approx cost per sq ft for an erected shell, (no floor Hvac or electric. 100’x110′ bldg.. JOHN in LEWES

Arena Interior

DEAR JOHN: While we have quoted fully engineered post frame buildings up to 140′ clearspan with prefabricated wood trusses, 100′ is widest we have provided. Due to possible shipping and fabrication challenges, these spans are not available in all markets and further research would need to be done based upon your location and load conditions. A Hansen Pole Buildings’ Designer will be reaching out to you for further discussion.


DEAR POLE BARN GURU: Is a vapor barrier needed for metal roof if it is open, no walls? CRAIG.

DEAR CRAIG: While Building Codes do not require one – if it is absent you are likely to have periods (especially in Spring and Fall) where it will rain inside of your building. Most people erect new buildings with an idea of protecting contents from climactic conditions such as rain, so this result may be less than desirable.

I would recommend you order roof steel with a factory applied Integral Condensation Control (ICC). ICC is available with trade names such as Dripstop and Condenstop.


DEAR POLE BARN GURU: My wife and I may be obtaining property in western Oregon and have been kicking the idea around building such a structure. We really don’t know where to start and what this all entails. We really like the idea of having a simple open concept with a decent size shop attached so all our vehicles and RV can be stored inside. I was just really hoping to get a starting point and go from there. Thank you for your time! COLE in OREGON

DEAR COLE: Thank you for reaching out to us. Links in this article should assist you in getting off to a start in the right direction: https://www.hansenpolebuildings.com/2019/10/show-me-your-barndominium-plans-please/


Pole Building Layout for Drilling Holes

Building Layout for Drilling Holes

Reader ROGER in LISBON asks: “What is fastest way to layout a building for drilling holes?” From Hansen Pole Buildings’ Construction Manual:

Building Layout

The building layout establishes exact reference lines and elevations. Care in layout makes construction easier and helps keep building square. 

REMINDER:  Building width and length are from corner column outside to corner column outside!  

After installing all framing, finished framework will normally be 3” wider and longer than ordered or “call out” dimensions. Ignoring this will result in more effort during construction.

Calculating Diagonal Lengths

Example: building is 50 feet wide and 84 feet long. 

Explanation: A picture helps greatly with this problem, so we begin with a rectangular post frame building.

Distance (drawn in red) is diagonal of our rectangle, or k. We should also note this diagonal divides our rectangle into two congruent right triangles. We can therefore find the length of our diagonal by focusing on one of these triangles and determining hypotenuse. This can be done with the Pythagorean Theorem, giving us:

50^2 + 84^2 = k^2

2500 +7056 = k^2

9556 = k^2

Taking square root gives us

k=97.754795 feet or 97’ 9-1/16” 

See Table 4-1 below.

DECIMAL OF A FOOT TO INCH CONVERSION
Feet Inches Feet Inches
      0.9167 11 0.0781 15/16
      0.8333 10 0.0729 7/8
      0.75 9 0.0677 13/16
      0.6667 8 0.0625 3/4
      0.5833 7 0.0573 11/16
      0.5 6 0.0521 5/8
      0.4167 5 0.0469 9/16
      0.3333 4 0.0417 1/2
      0.25 3 0.0365 7/16
      0.1667 2 0.0313 3/8
      0.0833 1 0.0260 5/16
0.0208 1/4
0.0156 3/16
0.0104 1/8
0.0052 1/16

Table 4-1

To start, stake out a “base” line string.  This will become either building front or side. If trying to align a building with an existing structure, roadway or property lines, have the first wall line parallel to reference point. See Figure 4-1 

Figure 4-1: Base String Line

Locate and set front corner stake “A” along the baseline. Drive a nail partially into the stake top as a reference point.  See Figure 4-2

Figure 4-2: Placing Stakes

Hook a tape measure on nail at Stake A. Measure building length along base line from Stake A and set corner Stake B.  See Figure 4-3

Use a construction level (transit) and drive Stake B in so Stake A and B tops are level. Drive a nail partially into Stake B top at exact building length (as measured from column outside to column outside). 

Figure 4-3: Batter Boards

Next make endwall perpendicular to sidewall. Measure 12 feet along the base line from Stake A and set a temporary stake. Intersection point 20 feet from this temporary stake and 16’ from Stake A is perpendicular to the base line. Set a second temporary stake at this point. (Figure 4-3)

Measure outside building width along this line and set Stake D. Drive Stake D into ground…level with Stake A and B tops. Drive a nail partially into Stake D top at exact outside building width. (Figure 4-3)

From nail in Stake D top, measure the outside building length. From nail in Stake B, measure outside building width. At two measurement intersection, drive last corner Stake C, with top level with previous three corner stake tops. As before, partially drive a nail into Stake C top, at exact outside corner point. (Figure 4-3)

Before proceeding, make certain all four corner stakes tops are level.  Then double check, in this order – baseline length (A to B), Width B-C and A-D and then length C-D. Adjust nails or stakes B, C, or D as needed.

Diagonals AC and BD are to be equal for a rectangular building. Adjust by shifting C and D along the rear wall line. 

Do NOT move A or B. 

Keep widths B-C and A-D equal. Recheck any shifted stake levels.

Drive batter board stakes 8 to 12 feet from all corners. While specific batter board materials are not provided with building kit, girts make excellent batter boards, as long as they remain uncut and undamaged. Batter boards provide a level reference plane for building layout. Place to avoid interfering with excavation, pre-mix deliveries or construction and to remain undisturbed until columns are backfilled.

Level and fasten batter boards to stakes at same heights as corner stake tops.

Stretch building string lines between batter boards, barely touching nails on corner stake tops. Partially drive nails into batter board tops to line up string lines. 

Temporary and corner stakes can now be removed. Corners will be located where lines cross.

Photo above shows corner column in hole with batter boards in place.

Mark Column Locations 

Measuring along building lines, use small temporary stakes or nails painted with fluorescent paint to mark each column location center.  

Remember to locate column center, ½ column thickness inside string lines. (Example: 5-1/2” column, column center is 2-3/4” inside string lines.)   See Figure 4-4

Figure 4-4: Offset String Lines

Figure 4-4 shows column centers as compared to “outside” building line. 

After column centers have been located, offset (move) building line strings 1-1/2” (splash plank width), from column face outsides.  

Why offset string lines? While this may sound confusing, failure to offset string lines could result in crooked finished walls, due to columns inadvertently touching lines. We’ve seen professional builders make this error far too often, and in this case, an ounce of prevention, is worth a pound of cure.

Once offset, building string lines will now measure 3” greater in dimension than building width and length (column outside to column outside). 

Measure in from building string line 1-1/2 inches to set each column.  Rather than having to use a tape measure each time, a 2×4 or 2×6 scrap block (happens to be 1-1/2” in thickness) can be placed between column and string line.