This Wednesday the Pole Barn Guru addresses a reader question regarding whether erecting a complete pole barn that has been sitting bundled for eight years might be okay, how easy might it be to convert a stick built floor plan in to a post frame design, and a quote for an indoor soccer field.
DEAR POLE BARN GURU: I bought a property and it has a complete pole barn sitting on 4×4 post laying flat still all banded together it’s been here 8 years never put together the truss s look great but the rest of the lumber looks good do you think it would be safe to build it. ROBERT in LAS VEGAS
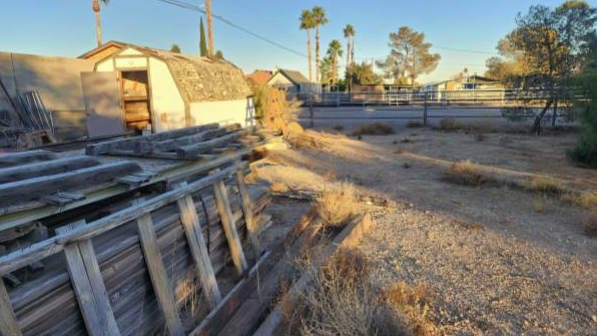
DEAR ROBERT: Provided your lumber is merely suntanned and not actually decayed, it should be structurally fine. You may have some challenges obtaining a building permit as building codes have changed several times over eight years. Best of success to you.
DEAR POLE BARN GURU: So, I found a stick-framed floorplan that I like but I want to turn it into a post-frame, the problem is it is 32’x80′ house, the shop portion is 32’x 28′ leaving the home portion 32’x 52′ and 32′ wide post-frames don’t seem common. How much more expensive is a 32′ wide building vs. sizing up to 36′ or down to 30′. Financially speaking I think I would have to size down but is it worth the effort? or is 32′ wide not that much more? Thanks, SHAN in WANATAH
DEAR SHAN: As we have our own prefabricated wood truss manufacturing facility, as well as doing every building as custom, your 32 foot width is perfect in our eyes. With identical features, as your square footage increases, your price per square foot will generally decrease (keep in mind, we are talking pennies per square foot, not dollars). Please forward your plans to Caleb@HansenPoleBuildings.com, along with site address and best contact number, and we will get you pricing.
DEAR POLE BARN GURU: I am looking for a building quote to have an indoor soccer field built. I am not sure of the availability in measurements and looking for more information and quotes. Are there any assistance in finding a location, who would build the building, etc.? I would like to start a business down the line and train soccer players as a side job, ideally 12-21 yrs of age. Nothing fancy, just a place to play with ac/heat, turf, some benches and nice accommodations for the parents. Thank you very much and look forward to hearing from you. Sincerely, AL in WARETOWN

DEAR AL: Indoor soccer fields for this age group are typically 85′ x 200′ x at least 20′ of ceiling height. Minimum dimension would be 60′ x 140′. This is well within our capabilities. You would need to reach out to a local realtor to assist with a location, in most markets, we can help find a builder erector for you.
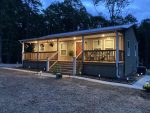 DEAR POLE BARN GURU: Do your home kits come as a frame tight to the weather. Are the rooms already framed? GREGORY in SPRING HILL
  DEAR JOHN: It is highly unlikely any of your 4x posts will be structurally adequate to carry imposed loads. Depending upon grade of lumber being used for trusses, applied wind, snow or dead loads, they may or may not be adequate. I would strongly suggest you engage a registered professional engineer to visit your building, inspect it and make recommendations for any fixes in order to prevent a catastrophic collapse.
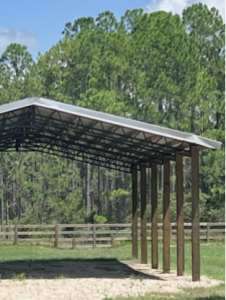 My question is are 7 poles every 6′ center overkill or can I get away with 5 poles. Roof will be 26ga. Galvalume.
 DEAR STEVE: Before you get too deeply into this, you really should engage a Registered Professional Engineer to visit your building to determine if it is structurally capable of being converted for residential use. Most pole barns are not designed to residential standards, so your engineer can advise as to what repairs/upgrades will need to be made.
 DEAR KAITLIN: Most pole barns are built either without being engineered or to Risk Category I. For residential purposes, it would need to meet more stringent structural requirements of Risk Category II. You will probably have to add some perimeter slab insulation in order to meet Energy Code requirements. My best recommendation is to engage a Utah Registered Professional Engineer to do a physical evaluation of your existing building and to design needed structural upgrades.
 DEAR WESLEY: I have seen many far less well thought out wall systems without exterior sheathing not experience issues with condensation. As far as air sealing, you could get a blower door test done to find out exactly what your situation is. For extended reading, please see
  DEAR TRIPPE: We always suspend our columns eight (8) inches above bottom of holes and mono-pour footing and concrete encasement in a single pour (saves on paying for short haul charges). While concrete typically reaches 75% of compressive strength in seven days, when I was building we would pour one day and start building next day. For slabs on grade, it is recommended to not walk on them for 24-48 hours after a pour. Keep in mind, concrete compressive strength is in psi (pounds per square inch) and soil bearing capacity under footing is in psf (pounds per square foot). Most soil will support a maximum of 2000 psf or 13.88 psi, so your concrete (at 2500-3000 psi) is going to be much stronger, even after a very short time span, than soils beneath. You can increase concrete strength by ordering a higher cement mix and speed curing time by use of hot water (avoid use of chemical additives to speed curing).


