Post Frame Plywood Slab-on-grade
As concrete and excavation costs have increased steadily buildings are more frequently turning to slab-on-grade foundations. These assemblies require less concrete and labor than full basements and have a number of advantages over crawlspaces: better thermal performance, much lower risk for water and animal intrusion, and lower maintenance overall. Slab-on grade foundations also make universal design easier to achieve.
In our ongoing quest to improve residential post-frame construction methods, we’ve embraced a number of new approaches to slab-on grade foundations, one of those approaches is concrete-free slabs.
| WHY WE DITCHED CONCRETE
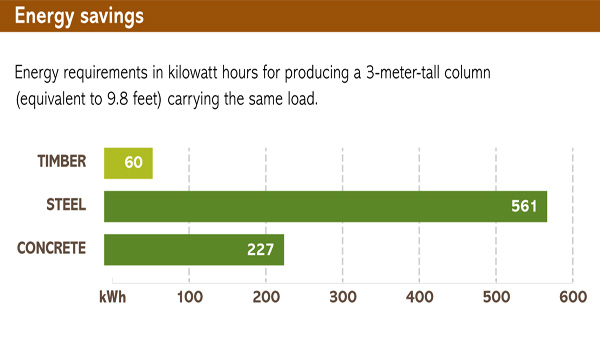
REDUCED EMBODIED CARBON Concrete has a high amount of embodied carbon, and companies like ours specializing in high-performance, environmentally conscious construction are always looking for innovative ways to use less of it. Roughly 40% of all United States greenhouse-gas (GHG) emissions come from our buildings, 11% from carbon embodied in materials used to make those buildings. One biggest single contributors to GHG emissions is concrete, responsible for 8% of total emissions on our planet. So it makes sense to reduce not only energy amounts used in operating our buildings but also concrete amount we use to build them. FEWER DELAYS AND MOISTURE REDUCTION A plywood slab is not only more environmentally sound than a full concrete approach, but it offers a number of practical benefits too. D-I-Yers can build slabs themselves, saving on costs and allowing to better control timelines, avoiding delays due to subcontractor schedules and more. Unlike concrete, plywood slabs do not load significant moisture into building envelopes during curing processes. HASSLE-FREE FLOORING Another big advantage of a plywood slab is finished flooring can be installed directly onto it—no different than installing flooring on a plywood-and-joist floor. To install flooring on a concrete slab a vapor barrier must be applied over top with additional accommodations—such as wood sleepers and a plywood subfloor—depending on flooring chosen. To make a plywood slab as durable as possible, choose a vapor-permeable flooring for slab’s largest areas. This allows any incidental moisture—from spills, toilet overflows, or whatever else happens above floor—to dry to interior and not build up in plywood. This said, we feel comfortable using impermeable flooring such as tile in smaller areas (kitchens and baths, for example) as long as it’s installed over a decoupling membrane to allow slab to flex and move below it and as long as there are adjacent permeable areas for plywood to dry to. Bottom line: plywood won’t degrade as long as it has more of an opportunity to dry than it has potential for retaining moisture. |
Start off on right footing
 Building codes in many climate zones (3 or greater) require a minimum R-10 thermal break at concrete slab edges, where up to 60% of heat loss occurs. Compared to concrete, however, a plywood slab-on-grade has very little thermal loss at edges because it’s only 1-1⁄2 in. thick, and it’s wood. One could reasonably argue standard level of slab-edge insulation isn’t as necessary with a plywood slab-on grade. However, making this argument to your local building inspector might not be worth the accompanying headaches; as code has no guidance on anything other than concrete slabs.
LAYER 1: STABLE SOIL IS AN IMPORTANT FIRST STEP: First layer is native, undisturbed soil or engineered fill slab bears on. Most post frame buildings have no interior point loads, all bearing is on perimeter columns and their footings, and slab has no structural function. When we have a building with point loads or load-bearing walls on the interior, add interior footings, just as done with a concrete slab.
LAYER 2: CRUSHED STONE ACTS AS A CAPILLARY BREAK Second layer is a minimum four inch compacted, 3⁄4-in. crushed stone with no fines. Its primary function is to act as a capillary break, preventing moisture from being wicked up through the slab and into the building. This second layer also functions as a “pressure field extender” for the soil-gas ventilation system, with perforated pipes either passively or actively keeping radon from entering home, depending on local requirements.
LAYER 3: Gravel keeps things level under concrete-free slab
On a concrete-free slab-on grade, add a 2-in. to 3-in. 1⁄4-in.-minus gravel layer above capillary-break stone. This layer is much easier to screed level and flat so foam-insulation layers can be set in full contact without any voids or settling (this could create bouncy or uneven floors). Set a laser line on wall columns for reference and use a grading rake to get gravel close to level; checking with a tape measure. After this use a 2×4 as a screed, working it back and forth to set the grade perfectly flat, with top even with pressure preservative treated splash plank bottom.
LAYER 4: Rigid foam eliminates cold feet
Run rigid insulation horizontally under the entire slab. It’s not very costly to do in comparison to usual approaches, and barndominium owner benefits are significant. First is comfort. People don’t want to feel cold underfoot, and they tend to complain if they do. An insulation full layer under the slab mitigates this problem significantly. Just as importantly, there is a big benefit in energy efficiency. For a floating plywood slab, this continuous insulation layer is essential, providing a flat, stable surface for floating T&G plywood floating raft. Use two layers of one inch thick EPS foamboard, oriented perpendicular to one another with seams offset to ensure minimal air gaps.
LAYER 5: 10-mil poly blocks moisture migration through concrete-free slab
Fifth layer—above insulation and directly below slab itself, is a polyethylene sheet acting as a Class 1 vapor barrier. This vapor barrier isolates concrete-free slab from ground and water and vapor it contains. Climate regardless, ground relative humidity always approaches 100%. If this layer were omitted, concrete or plywood would draw moisture into the building, inviting rot, mold, and humidity issues.
Using a 10-mil polyethylene sheet is a big reason concrete-free slabs are a durable, long-term approach. It’s critical to use compatible tapes for sealing seams and to ensure complete adhesion. Any penetrations, such as plumbing or radon vents, must be taped completely from pipe to poly without gaps, folds, or other sloppy work. Fill gaps around plumbing penetrations with canned spray foam, and tape those areas carefully
LAYER 6: Two plywood layers is last step to finish concrete-free slab before interior walls go up
Sixth and final layer, resting on vapor barrier, is material creating this concrete-free slab. Plywood is standard 3⁄4-in. T&G CDX subfloor material. Pressure-treated plywood is not only unnecessary but would add chemicals and VOCs to the interior environment. Install two layers, with the second set perpendicular to the first and joints offset.
Leave a 1⁄2-in. gap between outside edges and perimeter EPS insulation or splash plank to allow T&G plywood to expand and contract. These two layers are allowed to float on layers below and are joined together with construction adhesive and 1-1⁄4-in. screws, sized so they don’t penetrate the vapor barrier below.