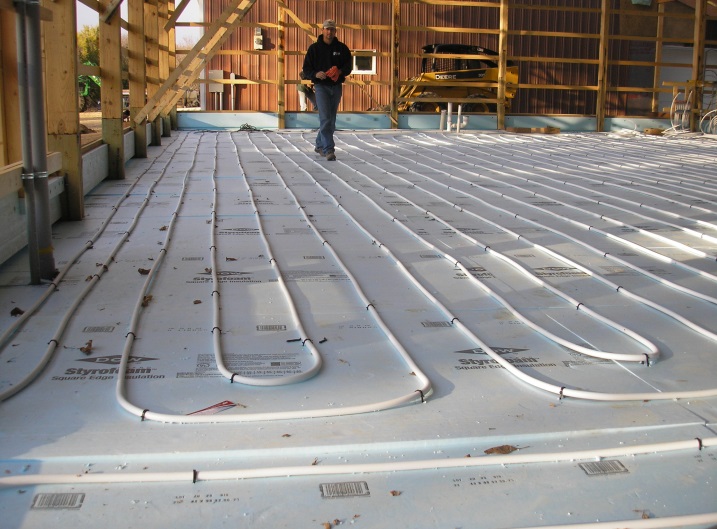
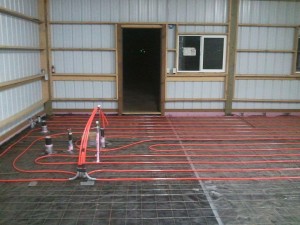
PEX Tubing for radiant floor heat in post frame buildings.
I’ve espoused previously on the joys of hydronic radiant floor heating (https://www.hansenpolebuildings.com/2012/08/radiant-floor-heating/) and would encourage anyone who is going to install a concrete slab on grade in their new (or existing) post frame (pole) building to consider at least making a provision for it in the future.
As we all realize, once a concrete floor is poured, it is literally “cast in stone”. Without huge expenses, there really is no going back for a do over.
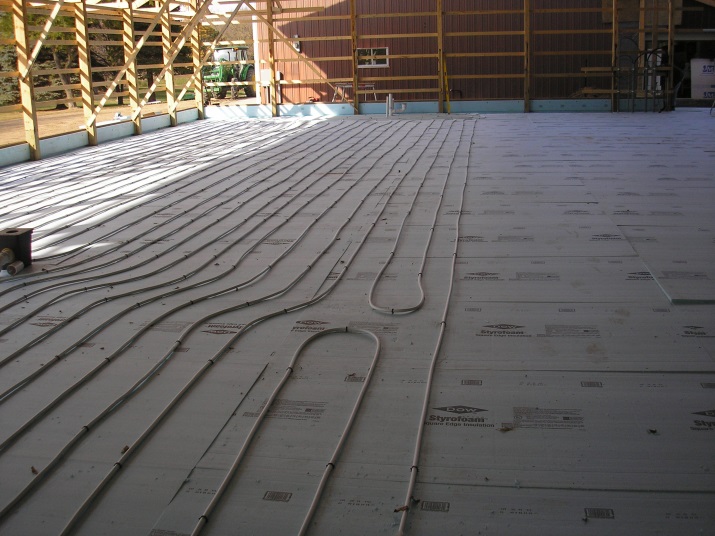
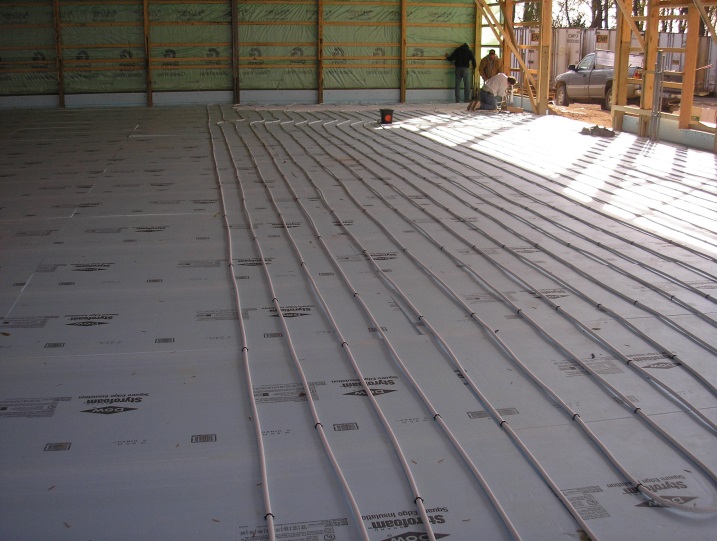
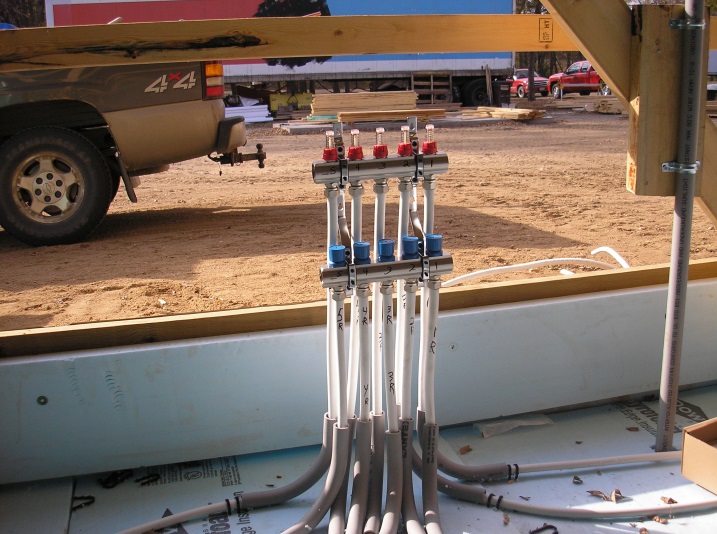
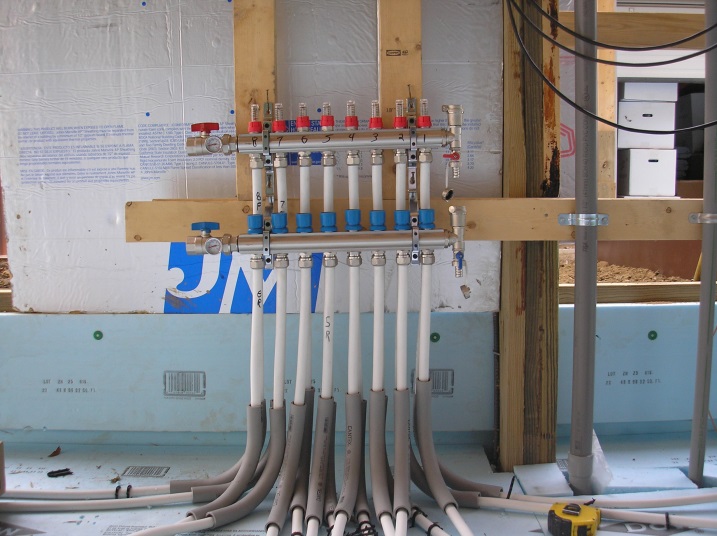
 The key to being prepared for the future, is to have PEX tubing installed in the concrete slab at time of pour.
PEX (or crosslinked polyethylene) is part of a water supply piping system which has several advantages over metal pipe (copper, iron, lead) or rigid plastic pipe (PVC, CPVC, ABS) systems. It is flexible, resistant to scale and chlorine, doesn’t corrode or develop pinholes, is faster to install than metal or rigid plastic, and has fewer connections and fittings.
PEX tubing is made from crosslinked HDPE (high density polyethylene) polymer. The HDPE is melted and continuously extruded into tube. The crosslinking of the HDPE is accomplished in one of three different methods.
Crosslinking is a chemical reaction which occurs between polyethylene polymer chains. Crosslinking causes the HDPE to become stronger and resistant to cold temperature cracking or brittleness on impact while retaining its flexibility. The three methods of crosslinking HDPE are the Engels method (PEX-a), the Silane Method (PEX-b), and the Radiation method (PEX-c). Several industry participants claim the PEX-a method yields more flexible tubing than the other methods. All three types of PEX tubing meet the ASTM, NSF and CSA standards.
Some applications require PEX with added oxygen barrier properties. Radiant floor heating (or hydronic heating systems) may include some ferrous (iron-containing) components which will corrode over time if exposed to oxygen. Since standard PEX tubing allows some oxygen to penetrate through the tube walls, various “Oxygen Barrier PEX” tubing has been designed to prevent diffusion of oxygen into these systems. Two types of specialty PEX pipe are offered:
Oxygen barrier PEX has a layer of polymer laminated to the outside surface (or sandwiched internally between PEX layers) which prevents oxygen from penetrating. The polymer film is usually EVOH (ethyl vinyl alcohol copolymer), used in the food industry as an oxygen barrier.
PEX-Al-PEX (or PEX-Aluminum-PEX or “PAP”) is a specialty PEX tubing manufactured by several suppliers. This tubing has a layer of aluminum embedded between layers of PEX to provide an oxygen barrier. PEX-Al-PEX may also be called multilayer pipe or composite plastic aluminum pipe. PEX-Al-PEX will also retain shape when bent, and may also exhibit less expansion and shrinkage during temperature fluctuations, but may be less flexible than PEX tubing. PEX-AL-PEX costs about 30% more than standard PEX.
As with so many things construction, there is one opportunity to do something right or wrong, personally I would recommend making the extra investment in PEX-Al-PEX. The few extra dollars can lead to a lifetime of happy heating for your new pole building.
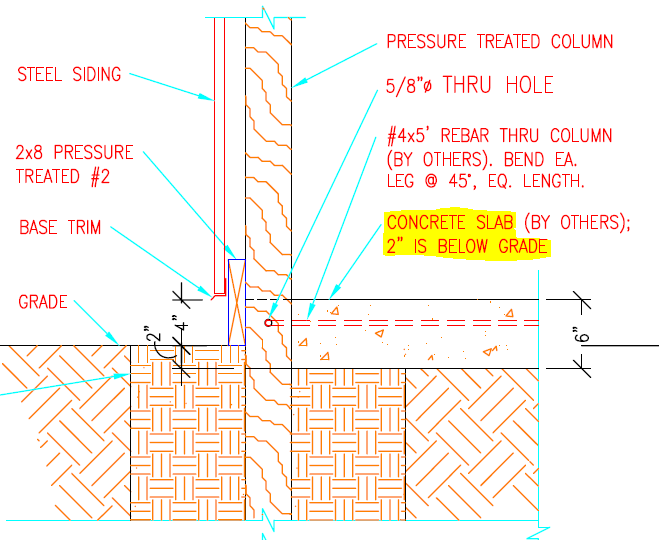
 Your area is in Climate Zone 5 – meaning underfloor insulation would need to be a minimum of R-30. As you will need to protect the underside of your floor system from fire, you might consider using Rockwool batt insulation (it will not burn and is unaffected by moisture) with steel panels underneath.
 On your particular building, if your order is placed assuming “no concrete floor”, your building dimensions are such as for wind shear loads to not be an issue and plans will be engineered without hairpins.
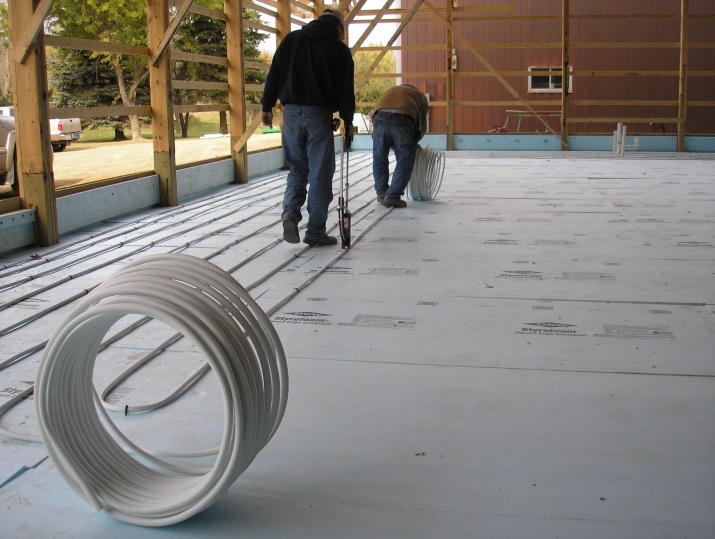
 While I always recommend you closely follow layout plans with your tubes and take photos of tube placements prior to pouring, neither of these is a guarantee of missing tubes. You could rent a thermal imaging device to find your tubes, or do it in a more low-tech fashion: turn heat on high and once heated mop water over the entire floor surface. Areas drying first are tube locations. Use chalk to mark them.