Tag Archives: I joists

A Floor Raising Exercise: I Joists

For some obscure reason people planning new buildings tend to scrimp on height. In most instances, designing a new fully engineered post frame building – whether for a barndominium, shop house (shouse), garage, shop, etc., just a little bit taller is a relatively inexpensive proposition and can save many more dollars and mental anguish than having to alter after construction.

Reader CHRIS in SNOHOMISH writes:

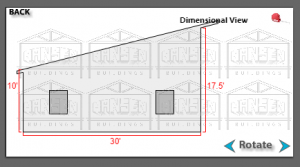
“I have a pole barn with a center door for Rv, above is an additional living space, the width is 12’6” depth of 41’ height of 13’, I need to shorten the truss’s so I can gain 6” height , current truss are HY floor joists, question is can I put 2×6” spaced every 8”’s and have the same weight carrying capacity?”

Mike the Pole Barn Guru writes:

HY floor joists are wood prefabricated I joists. Let’s take a look at Chris’ proposed design solution (please keep in mind, any structural design solution should be reviewed by your building’s engineer to confirm structural adequacy):

FLOOR JOIST DESIGN

Assumptions:

Joist span 12.5-ft.
joist spacing = 8″ o.c.

joist  live load = 40 psf
joist_dead_load = 10 psf

Fb: allowable bending pressure
Fb‘ = Fb * CD * CM * Ct * CL * CF * Cfu * Ci * Cr
CD: load duration factor
CD = 1 NDS 2.3.2
CM: wet service factor
CM = 1 because floor joists are protected from moisture by roof
Ct: temperature factor
Ct = 1 NDS 2.3.3
CL: beam stability factor
CL = 1 NDS 4.4.1
CF: size factor
CF = 1.3 NDS Supplement table 4A
Cfu: flat use factor
Cfu = 1 NDS Supplement table 4A
Ci: incising factor
Ci = 1 NDS 4.3.8
Cr: repetitive member factor
Cr = 1.15 NDS 4.3.9
Fb = 900 psi NDS Supplement Table 4-A
Fb‘ = 900 psi * 1 * 1 * 1 * 1 * 1.3 * 1 * 1 * 1.15
Fb‘ = 1345.5 psi

fb: bending stress from live/dead loads
fb = live + dead load * joist spacing / 12 / 12 * (sf * 12 – 1.5)2 / 8 / (b * d2 / 6)
fb = 50 psf * 8″ / 12 in./ft. / 12 in./ft. * (12.5′ * 12 in./ft. – 1.5″)2 / 8 / (1.5″ * 5.5″2 / 6)
fb = 1012.5 psi <= 1345.5 psi so okay in bending

Δallow: allowable deflection
Δallow = sf * 12 / 360 IBC 1604.3
Δallow = 12.5′ * 12 in./ft. / 360
Δallow = 0.4167″

Δmax: maximum deflection
Δmax = 5 * live load * joist spacing / 12 / 12 * (sf * 12 – 1.5)4 / 384 / 1600000 / b / d3 * 12 from http://www.awc.org/pdf/DA6-BeamFormulas.pdf p.4
Δmax = 5 * 40 psf * 8″ / 12 in./ft. / 12 in./ft. * (12.5′ * 12 in./ft. – 1.5)4 / 384 / 1600000 / 1.5″ / 5.5″3 * 12
Δmax = 0.423″ > 0.4167:
2×6 #2 DougFir joists will not work at 8″ on center due to not meeting deflection criteria

Chris’ options are to buy #1 or Select Structural graded 2×6 DougFir or go to 6″ on center spacing.

Wood I-Joists for Your Barndominium

With many barndominiums being multi-storied, or at least having lofts or mezzanines, there are several methods of structural support. These would include dimensional lumber, wood trusses and I-joists.

In our own post frame barndominium, we utilized I-joists as rafters for both side sheds. They are also floor joists for my lovely bride’s mezzanine sewing loft – a partial third floor above our master bedroom.

When I began my prefabricated metal connector plated wood truss career back in 1977, one of my first jobs was cutting webs for wood floor trusses. Then, wood floor trusses were a fairly new concept, they allowed for much longer clearspans than dimensional lumber, were consistent in size and made for very fast framing.

Floor trusses were (and are) in direct competition with I-joists. I-joists were invented in 1969 and are engineered wood products used for both floors and roofs. They have a great deal of strength in relationship to size and weight.

I-joists require correct installation – meaning a requirement for more experience and training than a dimensional lumber framed floor. Most common mistake is misplacing or improperly sizing holes in OSB (Oriented Strand Board) webs. This can compromise I-joist strength, potentially leading to structural failure. Other common installation mistakes include cutting or chiseling flanges, improperly size joist hangers, improper nailing and wrong sized nails. Rim joists much also match I-joist size as mismatches can strain joists. When an I-joist crosses a main beam, squash blocks must be installed alongside I-joists to transfer loads from I-joist to beam. Missed nails and glue setting too fast can lead to an uneven or squeaky floor. Field modification or repairs usually require manufacturer’s consultation.

I-joists need to be drilled for mechanical installations (e.g. HVAC, electrical, plumbing, etc.) leading to lost-time and effort as compared to open web floor trusses. in order to meet IRC (International Residential Code), I-joists must be covered on both sides of their full solid web with fire resistive chemicals or cladding. I-joists often do not perform well when exposed to fire or water. Thin I-joist webs can be relatively easily damaged or burned through by fire. OSB I-joist webs can be swelled by excessive moisture absorption causing web weakening. Top and bottom flanges (usually 2×4) can exhibit cupping, warping or splitting from excessive swelling due to moisture absorption.

For vibration control, both web stiffeners and blockings can be necessary to obtain desired floor stiffness.

Floor trusses have a distinct advantage for being mechanical equipment friendly. With the ability to design chase openings for ductwork through them, this is a big advantage. But let’s say there is a job site change and the truss company was not informed (never happens right?) and the ductwork must be shifted. Openings in webbing will allow for this adjustment to happen seamlessly. With this type of flexibility, who wouldn’t want floor trusses?

With I –Joists, holes you can actually cut into each joist can be pretty small. These holes also must follow certain parameters. Sometimes this is very limiting and you must stay within certain locations to place holes. Let’s not forget if you cut into a flange, a big no-no, you’re going to need a new joist.

Floor trusses can clear-span with the same floor ratings much further than any I-Joist product. This is very beneficial to frugal barndominium builders and owners out there. Let’s face it though; aren’t we all trying to be more frugal with everything we do? Who wants to put in an extra steel beam and posts or 3-4ply LVL to carry some “I’s” those extra 3’ or 4’ because their span rating is good for distance required? Those beams could add up to several hundred (even thousands) of dollars.

I-Joists may need an increased depth or decreased spacing to span very same distances, using very same design criteria. Bridging and blocking can be increased to “shore” up a floor, but this runs a risk of them being omitted.

In my mind, floor trusses are a winning answer. Are they for you?

Imagining a Retirement Barndominium

Let us face it – I am among those greying in America. According to United States demographic statistics 14.7% of us (over 41 million) have reached a 62 year-old milestone!

What are we looking forward to in our probably final home of our own? We want to be able to spend our time enjoying life, rather than being slaves to home upkeep.

Loyal reader RUSS in PIPERSVILLE writes:

“We are currently in the “imagining” phase of our retirement home. We hope to be building in Maryland very close to the Chesapeake Bay.

We are trying to plan it as an aging in place home. The building will have the top of floor at 4ft. so as to accommodate the recorded last worst flood tide of 11 feet on the bay. Building dimensions are approx. 30 x 60 with a 9ft interior ceiling height. Do you favor engineered floor joists over dimensional lumber and why?

Planning to use Roxul insulation in the walls for R-30. A 2×8 bookshelf girt is 7.25 in. the same as the insulation batts. Can the insulation be place directly
against steel siding if we choose that system?

Also pretty sure that we will be specifying raised heel trusses for the roof. Can the steel siding accommodate the shear requirements for the trusses and an upgrade of wind load specs, or would something like tall wall or storm side sheathing become more practical? 

I am convinced that you folks are the only company that we will trust with the design and supply of our home. Your blog and learning posts have been an incredible help in this process. Without the information that you folks publish we probably would have made a serious mistake in looking elsewhere for this.”


Mike the Pole Barn Guru says:
Thank you very much Russ for your kind words, they are appreciated.

My thoughts:

I would consider setting underside of my floor framing to be above the highest recorded flood tide and probably give it an extra six inches. As the floor is being elevated, might as well make sure it is never going to be an issue.

I’d look at 10′ ceilings, as well as 9′. You are going to be designing for energy efficiency so heating/cooling differences should be minimal and those 10 foot ceilings are sure nice. Makes everything feel so much more spacious.

About Hansen Buildings
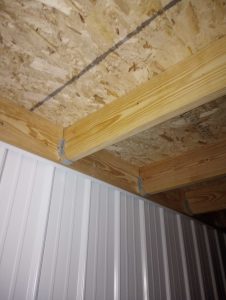
My preference is engineered prefabricated wood floor trusses. To me, I joists always feel spongy. Dimensional lumber varies greatly in both height dimension as well as stiffness of each piece leading to a feeling of lots of ups and downs as you walk across a floor. Both of the last two make running duct work and plumbing within floor cavity near impossible – leaving things having to hang below the floor’s finished underside.

You can place Roxul directly against wall steel inside, however I would use a Weather Resistant Barrier if going this direction. Me personally, I would flash spray two inches of closed cell foam to wall steel inside and then use 5-1/2 inch batts. Closed cell spray foam completely seals your walls and adds rigidity. You would end up with roughly R-37 walls.

Because your trusses are connected directly to sidewall columns, raised truss heels do not create a greater shear load for sidewall steel.

Try to plan your interior spaces to best fit your needs, rather than to try to fit your needs inside into a preconceived exterior box, a difference of a few cents per square foot is not worth the sacrifice of a needed space. Maximize southern windows and minimize or eliminate north facing ones. Plan southern roof overhangs to shield windows from summer sun. 

I appreciate your well thought out questions and looking forward to being with you on your continued journey.

Designing a Single Slope Pole Building

Designing a Single Slope Finished Pole Barn

Reader JIM in ROCHESTER writes:

“I am looking for an immediate response.

I am building a 30×50 single pitch pole barn that I will eventually insulate and drywall. I plan to run a row of posts down the center of the barn to support the rafters. I will be using I joists for the rafters. I chose this way over trusses because the trusses would be too tall at the high side. I have two main questions:

1. What is the best way to connect the header beams to the top of the posts to support the I joists. I will be using brackets to attach the I joist to the header but if I put a header on the inside and outside of the posts then the I joist will only be resting on the insider header thus not bearing the load on both header boards. I’ve thought of notching the posts but it would be a very large notch considering I’d probably be using a 2×12.

2. As for insulation it seems better to maybe use commercial style girts however my posts are 4.5″x5.5″ and using a 2×8 girts spaced 1 1/2″ outside of the posts would leave a 1/4″ still outside of the posts on the interior of the barn this would not allow my drywall to sit flush against the posts. Is this any issue or am i missing something? “

Mike the Pole Barn Guru responds:

You have given a lot of thought to this, so I will offer the same back.

I have no idea what the ultimate use of the building is, so I will have to run with some generalities.

First – for most uses a single sloping roof is not very efficient. If you are going to insulate and drywall, it leads me to follow you will be climate controlling as well. Finishing the bottom of your proposed I joist rafters means you are going to be heating a lot of dead air space at the high side of your single slope. Interior columns are going to possibly place limitations upon how the building space can be used not only now, but in the future. If you have a roof slope of less than 3/12, the warranty on the paint of the roof steel will be void. If you are totally sold upon single slope, you could use a monopitch truss with a raised heel on the low side to keep from having the one wall so tall, or you could use a parallel chord truss set at an angle. Either of these would get away from having interior columns.

If you have not yet hired an engineer to provide the structural design for your building – please do it now, post frame buildings are far too complex structurally to just wing it. Or better yet, buy an engineered post frame building kit (engineered as in providing engineer sealed plans specifically for your building at your site).

Without knowing the spacing of your sidewall columns, or the snow loads at your specific site…..it is unlikely a pair of 2x12s will be an adequate header. If they are, they could be set at different heights to allow the I joists to bear directly upon each of them. More probably a single LVL header would be more appropriate. In either case, the headers can be notched into the columns, which is a far superior bearing system than trying to attach them to the faces of the columns. You will need to provide adequate blocking, at the bearings, between the I joists to keep them from rotating.

Also, have you considered the issue of how to ventilate your single slope? It is a Code requirement and you will have challenges if not done properly.

If your posts are 4.5″ x 5.5″ you must be nailing up three 2×6 to form a post. Provided they are full length and not spliced, they might be adequate for strength as long as they are properly braced in the weak direction. Take care to get material which is treated to UC-4B specifications for structural in ground use. Few lumberyards will have this material in stock, it is typically only available by special order. You can still use these with 2×8 commercial girts. The 1/4″ projecting inside of the column is no problem – just run the gypsum wallboard right across.

Now, if it was my own building and assuming there is no pervasive reasoning to go with a single sloped roof…..I’d use a gabled roof with at least a 4/12 roof slope. I’d place two ply prefabricated trusses, probably every 10 feet, built with energy heels so I could blow in R-60 insulation. Overhangs with vented soffits and a vented ridge to provide adequate ventilation to the dead attic airspace. Dripstop under the roof steel to solve condensation issues. On the walls, commercial girts, with building wrap between the framing and siding.