You Have Questions, We Have Answers
Long time readers are aware I will answer any questions – even when they become highly technical.
Loyal reader CORY in NEBRASKA will be a fantastic client, because he wants to know how everything works, in advance – leaving nothing to chance.
 He writes (in italics):
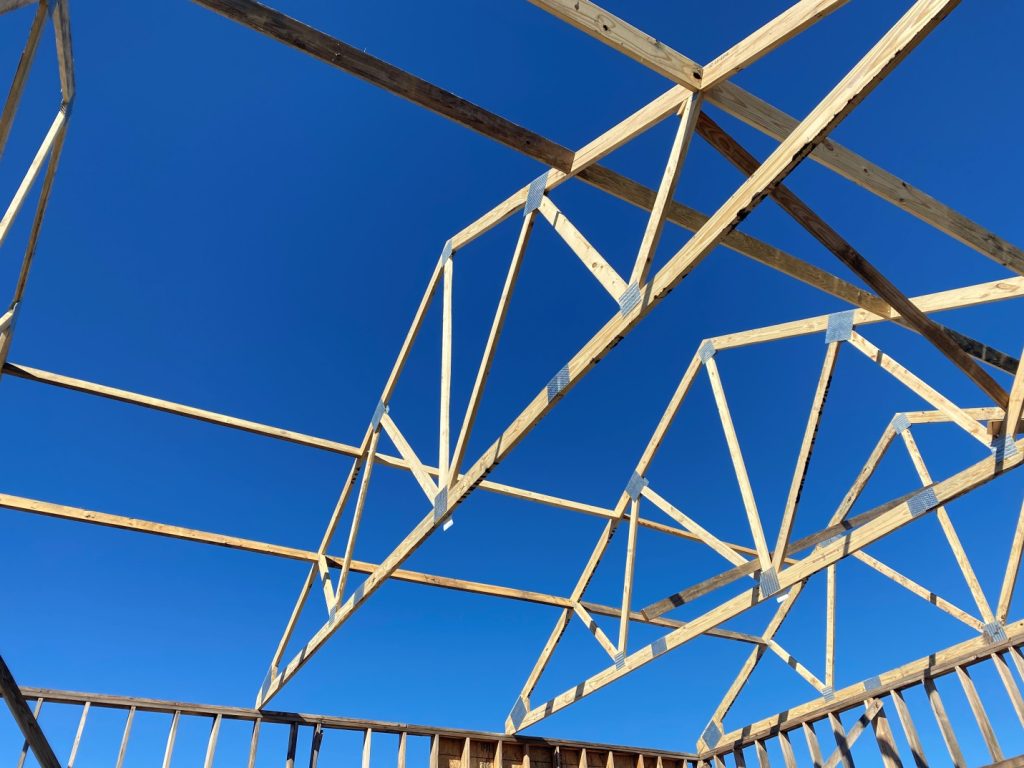
“I would really like to have clear space of 12’ 6” from top of concrete to bottom of bottom truss chord. According to Zach’s calculations (and mine) with the way I had planned only there is only 12’ 3”. With the 18 foot columns , if the frost line is 39” and I now set posts 42” down in concrete (instead of 48 “), pour 5” concrete floor and truss has a heel height of 16”+/- that would yield a clear distance of 12’ 7”. Check my work: 18’ x 12 = 216 “, 216 – 16″ heel = 200 – 5″ concrete = 195 – 42″ sitting depth = 153” of 12’ 7” clear distance. Do you or your engineers think the 42” depth will be a detriment re loading? If 48” buried is preferred, what is actual length of 18’ 3 ply post from bottom to notch? If that measurement is less than 18’ ( meaning a post of 18’ is measured from bottom to top of outside plies, can one safely add a 4″ or 6” block into notch with adhesive and secure with either screws or nails through all 3 plies and then remove outside ply to set double truss? (Mike the Pole Barn Guru says: Good try but would not get engineer’s seal probably! )”
Mike the Pole Barn Guru answers:
Typically with a 39″ frost line, holes would be dug to 40″ and you would hold posts up 8″ from bottom of hole – to create a mono-poured bottom collar. This puts 32″ of column at below grade. Top of slab (regardless of thickness) will be 3-1/2″ above grade. 12’6″ from top of slab to bottom of truss means we have used up only 15′ 5-1/2″ of columns. Throw in a 16″ heel and you have used 16′ 9-1/2″ of an 18′ column.
“With a double truss on a 3 ply column, cutting away 2 plies to set truss into notch would increase bending moment to notch side, would it not? Also only one ply to hold truss vertical under side stress. I realize that purloins add stability once in place. On 10’ purloins isn’t blocking (or doubling …..expensive) a good idea to eliminate flex out of purloin and keep all straight for steel installation?”
Our engineers check every column for eccentricity (truss loaded to notch in from one side) and only with a tremendously huge snow load and say a 3 ply truss notched into a four ply column, would this even begin to become an area of possible structural concern. Your roof acts as a long deep beam, prohibiting lateral movement of truss heels away from columns. Easiest method to keep purlins straight is to pre-drill roof panels and then adjust purlins towards or away from ridge so purlins fall in line with holes. It is quite simple to do and avoids having to add other members or blocking.
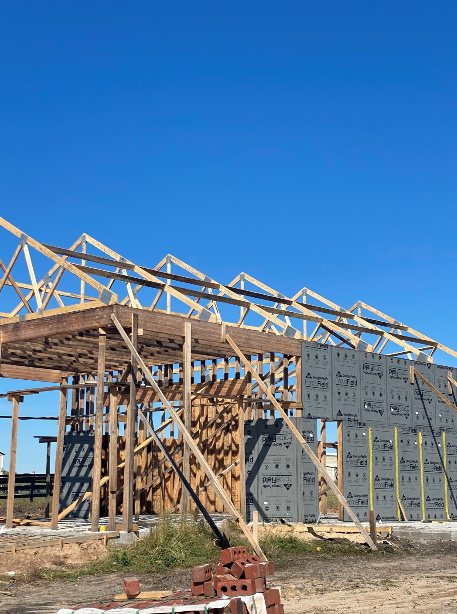
“I sent two plans to Zach , same building but roof peak at 90 degrees to each other. Zach has sent a sketch of the one ( east / west roof peak ) with the gable end facing the West , ( prevailing westerly wind as well as storms ) I believe that 40 foot width frontal height would be just under 21 feet with 14’ sidewalls and 4:12 pitch roof with 12” overhang. I thought that the North / South roof peak with longer 50 foot eave side with 24” overhangs and 14 ‘ sidewall and might have less wind load. Am I wrong? Is the 24” overhang a greater uplift hazard?”
Assuming eave heights, roof slopes and footprints are the same, 50′ span roof does add 20″ of overall roof height, however you only have 40′ of overall length to deal with. Endwall shear on the 40′ truss version is 3287.36#, 50′ truss version is 2962.8#. Overhang lengths are factored into the truss/column connections and frankly are such a small proportion of your total roof area so as to be near inconsequential.
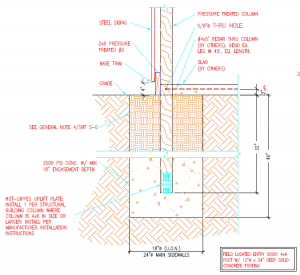
“I used to work in the power line industry and to overcome forces from tensioning lines or angles, etc., the glulam poles we set had 4″ angle iron “ears” bolted vertically the bottom 6 or 8 feet to maintain plumb. Would adding 2” x 2” x 8” pieces of angle iron horizontally about halfway down the buried portion void your warranty? I feel it would counter uplift better than the pieces you sell.”
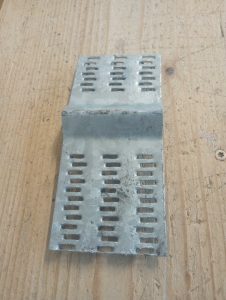
Our uplift plates are approved and have published validated numbers for uplift resistance. Should you desire to add angle irons ears, it would not void any warranty provided appropriate measures are taken to seal any column penetrations, although there is really no structural need for them.
 FEATURE
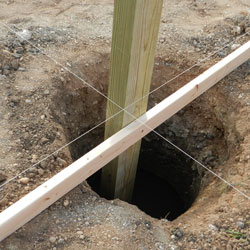 DEAR NORMA: Despite what might be voiced by naysayers – properly pressure preservative treated lumber should, under most circumstances, last longer than you and I (or our grandchildren) will be around to see. If you are curious, excavate the top eight to 12 inches of soil around one or more of the columns and check on the condition of them. We are currently adding onto our warehouse – a 40 year old post frame building. Some of the existing columns were dug alongside and it was determined there had been no noticeable decay at all. I would suspect yours will be the same.
 \DEAR GLENN: Hansen Pole Buildings now supplies (as a standard feature) one or more UP-Lift plates per each structural column (the required number will depend upon analysis by the Engineer of Record). It would require a significant number of large diameter nails to equal the holding power of a single UP-Lift plate. Rebar through the column might prove to be adequate, however it does involve a significant amount of effort to drill the holes through the column, cut rebar to short lengths and seal the rebar at the edges of the column to prevent water infiltration. In any case, the ultimate responsibility for design of adequate uplift resistance should be left up to the engineer who designs your building.


