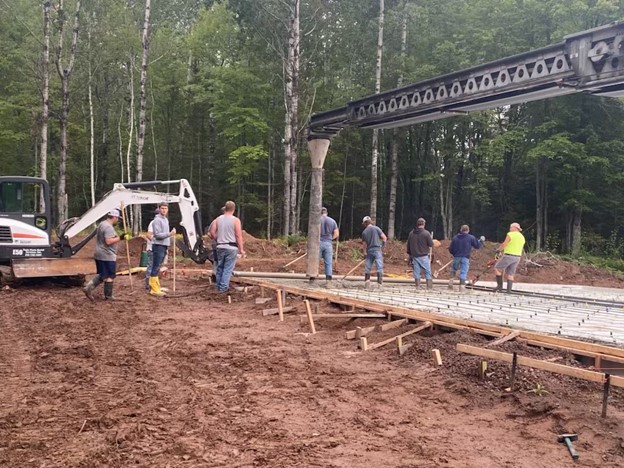
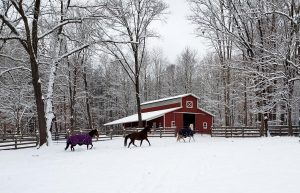
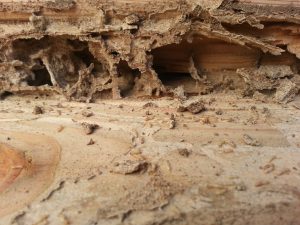
Do the poles start to rot out after so many years? That depends on whether or not they are pressure treated.
This question was recently posed to me by reader MARK in WOLCOTT. Typically my answer would include some snarky comment such as: “Most certainly, however it might not be during your grandchildren’s grandchildren’s lives!”
The reality is, I know lots and lots of people in the lumber and post frame building industry. Having spent my entire adult life in it tends to add to these. I have yet to meet anyone, who can tell me they have actually experienced a properly pressure preservative treated wood building column rot.
Of course there are always those who have stories such as, “My Uncle’s cousin says he knows of somebody, who knew somebody who had all of their pole barn poles rot off”. Could be – and they probably were not pressure preservative treated at all!
In order to put this matter to rest and ease my already untroubled mind, I utilized the power of the internet and Google to do some research.
Well, it turns out four fine people named Stan Lebow, Bessie Woodward, Grant Kirker and Patricia Lebow got their collective thinking caps together and wrote an article entitled “Long-Term Durability of Pressure-Treated Wood in a Severe Test Site”. Said article was published in Advances in Civil Engineering Materials, Vol. 2 No. 1, 2013 on pages 178-188 (for those of you who want to read it in its full and unabridged glory: https://www.fpl.fs.fed.us/documnts/pdf2013/fpl_2013_lebow001.pdf).
Our team of authors was motivated, as stated in the introduction to the article, by this:
“Pressure-treated wood has been widely used as a durable construction material in the United States for over a century. However, despite its long history of use, there are relatively few reports on the long-term decay and insect resistance of pressure-treated wood”.
 Now, as it so happens, the USDAFS (U.S. Department of Agriculture Forest Service) has a test site located near Saucier, Mississippi. The plot has a relatively high annual rainfall and warm temperatures which create a harsh decay environment. Eastern subterranean termites are active at the site. The location is within American Wood Protection Association (AWPA) Deterioration Zone 5, Severe Hazard, which is the most severe hazard classification.
As a control, some untreated posts were placed and all failed in less than three years!
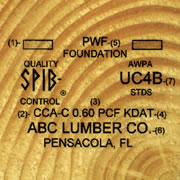
The current Code standard for pressure-preservative treated lumber for structural use is UC-4B (read one of my better articles of all time regarding pressure-preservative treating here: https://www.hansenpolebuildings.com/2012/10/pressure-treated-posts-2/). UC-4B requires a chemical retention for many water borne treatments such as ACZA, CCA-B and CCA-C of 0.60 lb/ft^3 (pounds of chemical per cubic foot of lumber). With retention levels LESS than the current UC-4B requirement, there have been ZERO failures in these chemicals in tests of up to 61 years!
I will stand upon my initial remarks for lifespan.
 I first met Tony back in my early days in the post frame industry when I managed the light gauge metal connector plated wood truss plant for Lucas Plywood and Lumber in Salem, Oregon. Tony was retired from his first career and needed a garage/shop to tinker in. He invested in a post frame building kit package from me, which he and his son constructed. They had so much fun with putting the building up, they decided to make it a profession. Along the way, they set aside enough money in two years of building, to pay for the son’s college education!
Tony was pretty astute and I learned a few secrets from him. One of these I have shared previously:
I first met Tony back in my early days in the post frame industry when I managed the light gauge metal connector plated wood truss plant for Lucas Plywood and Lumber in Salem, Oregon. Tony was retired from his first career and needed a garage/shop to tinker in. He invested in a post frame building kit package from me, which he and his son constructed. They had so much fun with putting the building up, they decided to make it a profession. Along the way, they set aside enough money in two years of building, to pay for the son’s college education!
Tony was pretty astute and I learned a few secrets from him. One of these I have shared previously: 
 words (not just about buildings) you publish as the Guru.
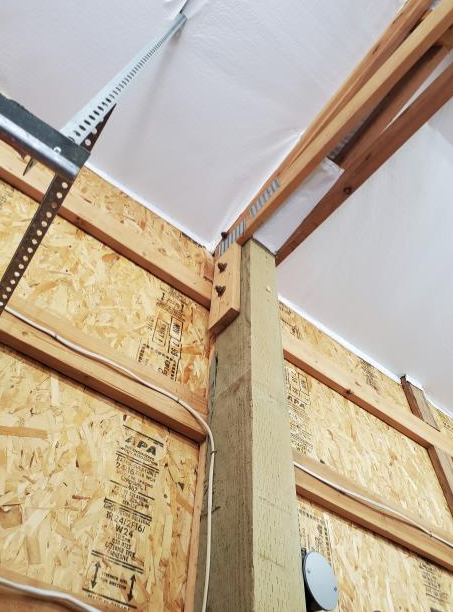
 DEAR POLE BARN GURU: I remember you had a checklist to follow when building a barndominium or pole barn but I’m not sure where I saw it. Can you email where I can find it again? Thank you! Appreciate your time. MONICA in COLOMA
 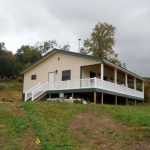 DEAR POLE BARN GURU: The area where I plan to build a pole barn required fill to bring the grade up to the driveway level. My plan is to install concrete piers with the column brackets installed on top of the pier. My question is do I need to have the concrete pier depth into the virgin ground? The fill was not compacted but has been setting for one year. Also, if the pier does need to engage with virgin ground, how deep into the virgin ground does the pier need to be? CRAIG in EAST WATERBORO
  DEAR POLE BARN GURU: My contractor failed to plumb, level and square up the wall of my 40×40 pole barn before he installed the trusses and purlins. Can this be fixed before he installs the sheathing for the standing seam metal roof? Thanks in advance, PAUL in SMITHFIELD
  Reader BRAYTON in NORTHEAST WASHINGTON writes: “I’ve been previewing your website and am glad I found it!
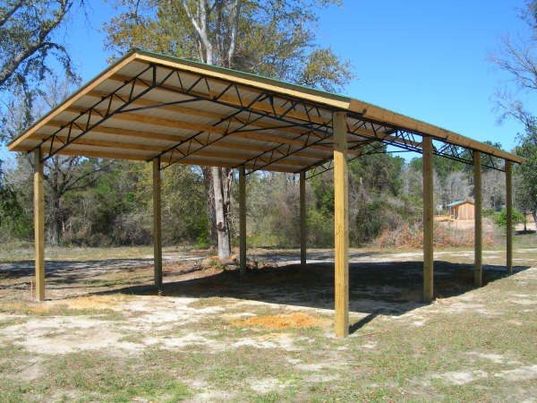
 DEAR POLE BARN GURU: Was wondering if I could ask you a question I’m getting ready to build a barndo was going to use wet set brackets do you recommend me using sheeting on it as well or just house wrap? Having problems with this issue thanks. DOUG in INDIANA
 Fully engineered post frame (pole barn) lends itself very well to multiple story buildings of nearly any type – especially homes (barndominiums and shouses – shop/house combinations). I built my first personal barndominium back in the mid 1990’s, three stories! Our current shouse has 8000 square feet of finished space on two stories plus a mezzanine (yes, we have not one, but two elevators).
 BUILDING CODES:
 DEAR POLE BARN GURU:
  DEAR RAYMUNDO:
  DEAR RAY: If your building is still under construction (in framed up stage) you should be able to stand in middle of roof and rock building back and forth by several inches, just by shifting your weight. Here is where temporary diagonal bracing of wall columns comes into play (especially if some or all of your building columns are not backfilled with pre-mix concrete.
 “Size matters when you build a pole barn,” says Piper Porteus, an editor at
  … you can’t make your barn too big either. Although you might be able to fit a lot of things into a large barn, the downside is that it can turn more into an eye sore rather than something to be proud of in your location.
 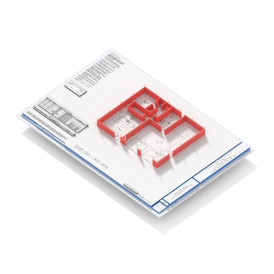 “One of the biggest mistakes that people tend to make during pole barn construction is not having a solid plan for it,” says Eva Gilray, a writer at
  Finally, keep in mind what kinds of materials that you’ll need for your project. Buying the wrong materials, or getting too much or too little materials, can be a costly mistake, especially when taking up a project like this one. This is where your chosen post frame building kit supplier should guarantee they will be providing all materials necessary for assembly per engineered plans.
 Hansen Pole Buildings actually provides more buildings in Washington State than anywhere else in the country! In Cowlitz County alone, I would not be surprised if you couldn’t find well over a hundred of our buildings.
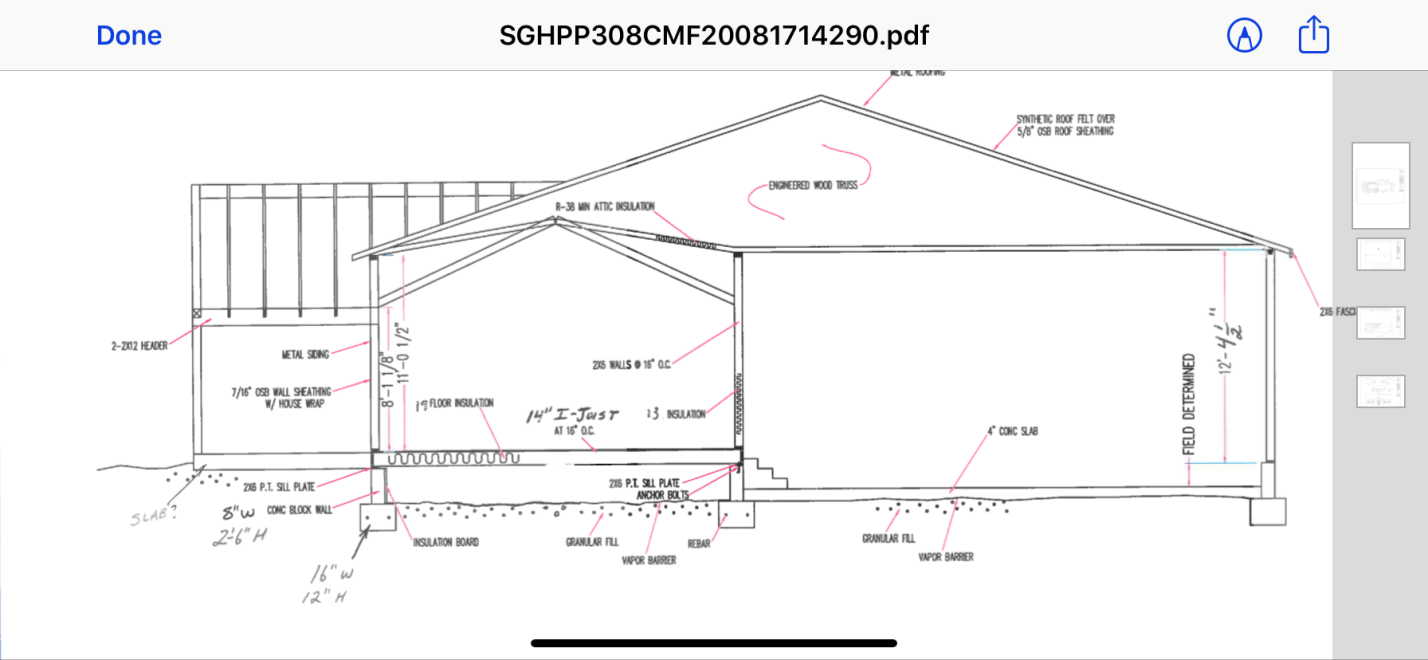
 “What makes some buildings better than others? And at what point does it not matter? (Ex: building A frames with 2x4s. Building B uses 2x6s and building C uses 2x12s obviously B is better than A but C is overkill) Does the metal come down just to the thickness of it? Thicker is probably better but to what end? I’m talking straight materials not warranty or service of a company. Thank you.”
 40 years ago today if you would have told me I was going to embark in an exciting career in post frame buildings I would have looked at you quizzically – and then asked what a post frame building was!
 Now ignorance is bliss and some folks, well they are very, very happy. Legally (not to mention morally) an engineered set of building plans cannot be customized, without a revised set of engineered drawings being produced. An engineer puts his or her career on the line when they seal a set of drawings – it does not come with free rein to make any changes!
 As long as your proposed shouse or barndominium meets planning and zoning requirements – adequate setbacks, allowable footprint, within any height restrictions and doesn’t use unapproved siding and roofing materials you should be good to go. Post frame (pole) buildings are Code conforming – so an attempt to prohibit one strictly due to its structural system is a battle I will take up for you at no charge.
 “Maybe you could have a chapter on how building a new building cost money. And that you shouldn’t expect other people have spent money to just give you their plans and all their knowledge that they spent their own hard-earned money on to get.”
 Polycarbonate panels are tough, requiring no special care. We recommend some cautionary steps: avoid stepping on or driving over the panels while on the ground, or folding during handling and installation. Avoid dragging panels on the ground, scraping against structural elements or any other sharp or rough objects, to keep from getting scratched.
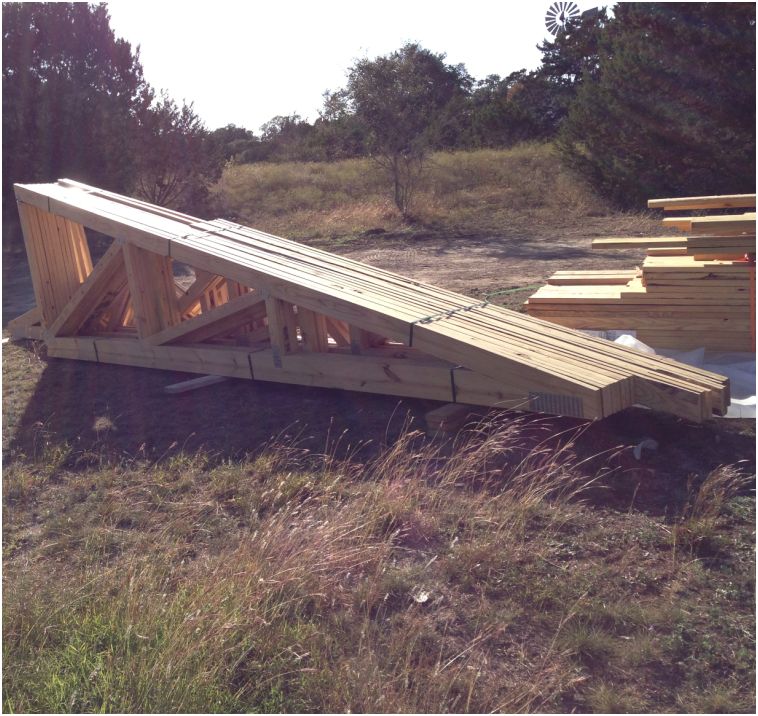

 There is a chance there is someone on their staff who can actually sort of do a material’s list for a pole barn. Keep in mind, there is not a “plan” they are working from, so no one is checking for adequacy of structural design. This list of pieces may, or may not, even be enough pieces to sort of put a building together. My experience is a list such as this will be inaccurate for quantities, will leave things out, add in a few unnecessary pieces and result in waste, confusion and a less than satisfactory end resultant.
 2. This step should probably precede step one….choosing a cloudy day. When you finish with putting on the last piece of trim or driving that last nail or screw, clean up the building site! Piles of cut off lumber, discarded pieces of siding or steel, tarps and garbage cans need to be cleaned up and/or moved. They really stand out in a picture and detract from the beautiful building you have just spent countless hours to build. Take an hour or two to clean up!
 Why a builder would do this totally baffles me, as stitch screws are not any less expensive (at least not good ones). Of course this building is over a year old, so the builder does not have to do anything about it, by statue!
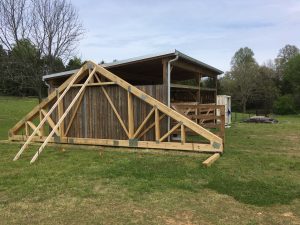
 Gambrel style rooflines are often enticing, they offer the feeling (however not the reality) of getting added space for free. Building your own gambrel barn trusses might appear on the surface like a way to make this even a greater savings.
 The blog provides “relevant education, information and entertainment regarding all things post frame buildings every day Tuesday through Friday PLUS on Mondays (and some bonus Saturdays) an “Ask the Pole Barn Guru” column where three questions from readers are addressed,” nominator
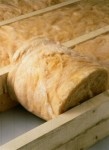
 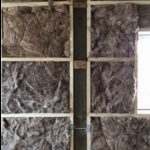 The air barrier issue for post frame construction is resolved the same way a stud framed building would be – utilize a quality building wrap between framing and siding, then insulate between girts (think studs run horizontally). Thermal transference in walls can be reduced by having an interior set of wall girts to support inside finish surfaces such as gypsum wallboard. This is far less material intensive than the double studwall system promoted by some stick frame builders.
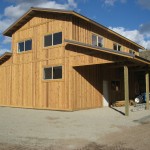 Fireworks store owner Ron Vielee made the request, saying he wants to expand his reach from his current business at 1421 to include a new Halloween store and parking lot in the properties west of the his current store. The council voted to move the request to a third reading following a discussion at Tuesday’s meeting.
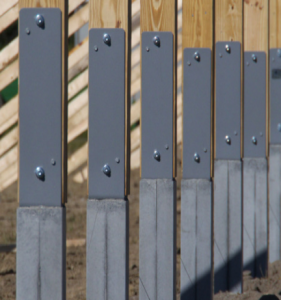
 Of course somewhere along the discussion between the Building Designer and the client this statement always seems to come up:
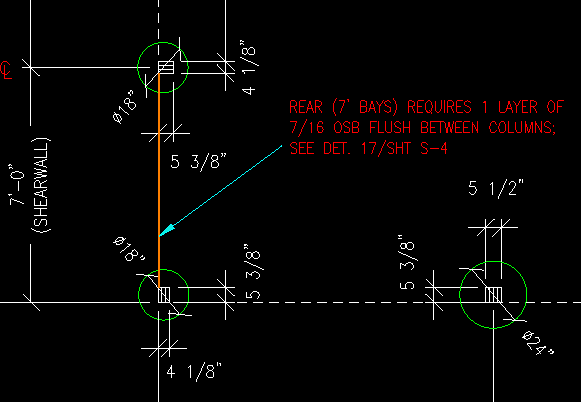
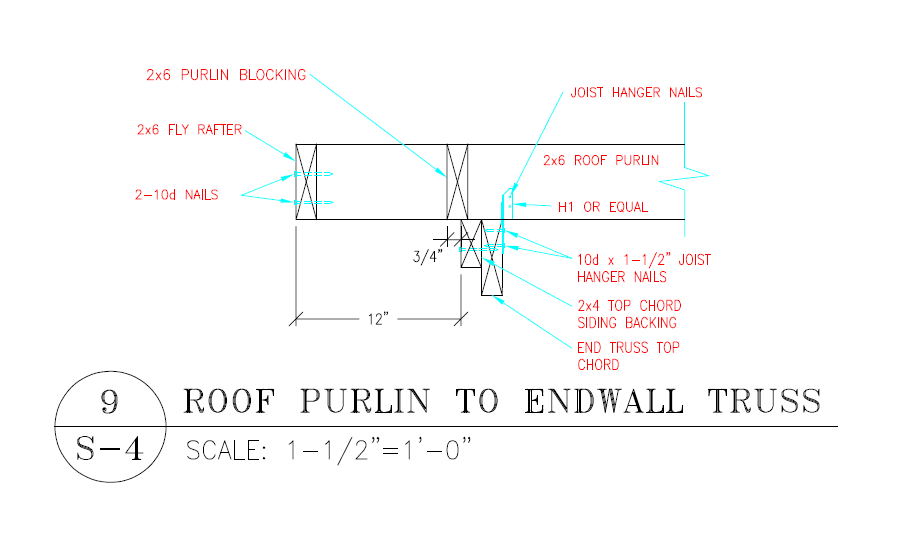
 “We have a Building Official asking for a termite shield for a post frame (pole) building. The building utilizes pressure preservative treated columns embedded in the ground with a treated splash plank around the base of the walls. At the bottom of the steel wall siding is what is known as base trim, it is steel and extends outward from the splash plank 1-1/2″ with the outer edge being a downward bent lip. This should serve to function just like the steel termite shields we have viewed online. 4-5/8″ of the pressure preservative treated splash plank is visible below the base trim. There is a product called a plastiskirt which is vinyl and designed to wrap the splash plank. In your opinion, what would be the best design solution to protect the building from termites as well as to meet the requirements of the Building Code?”
 A quick solve for anywhere in the country and any method of construction – to the eave outside of all corner and sidewall columns, attach a pressure preservative treated 2×6 from grade, up to the level of the trusses. In most cases two 10d galvanized common nails spaced every nine inches will be an adequate connection. As these 2×6 will be in contact with the ground, they should probably be treated to at least a UC-4B standard. Your building’s skirt board and any other exterior mounted framing can now be attached to the face of these 2×6. Using this method allows for siding to be installed normally, without any undue compensations to get it to lay out properly.

 Hello, my wife and I are considering building a post frame home. We contacted a designer who actually had plans for a home that is close to what we were wanting. He suggested it may be difficult to find a builder that would be comfortable building a pole barn home – so that is why I am contacting several builders to develop a list that could be considered in the future if we move in this direction.
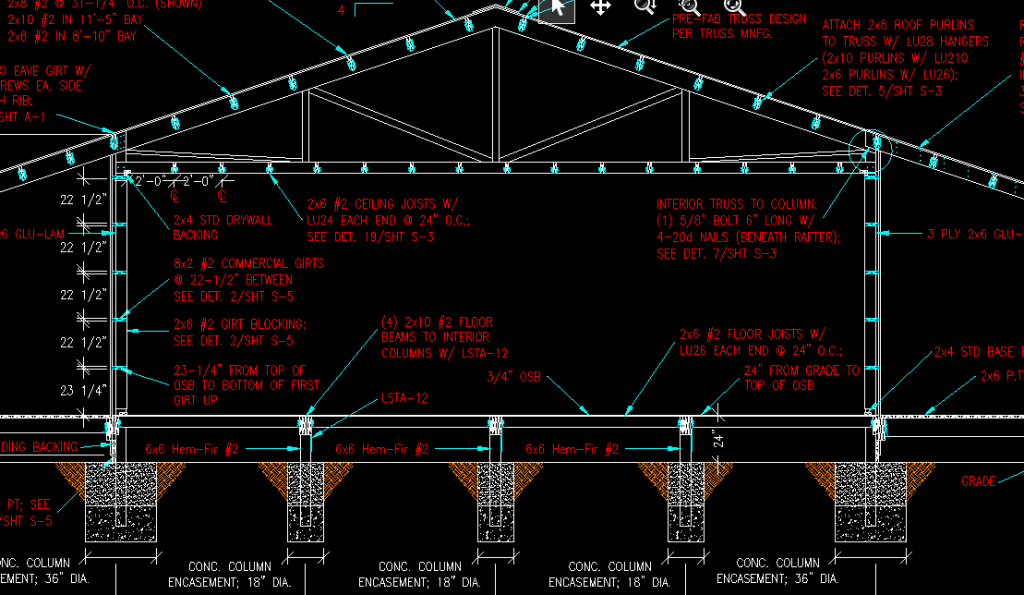
 Hansen Pole Buildings is a supplier and a supplier only. We do not construct buildings anywhere for anyone – even ourselves. Our new post frame building addition of 30 feet x 96 feet is being contracted out to a technician, who happens to do erection work for several of our clients. When you order your new post frame building from us this is clearly reiterated in writing and approved by you:

 Yes, you can dig continuous footings between the posts and, yes, you can frame walls between the posts to try to emulate the characteristics of a conventional building but at that point probably you should have built it conventionally in the first place.
 perhaps even your own personal safety.
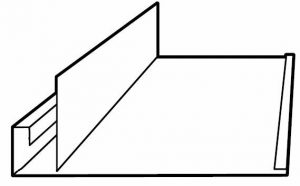 Picture an F channel with the downward leg being attached to a horizontal piece of wall framing, usually by nails. The horizontal “legs” of the F receive the soffit material – usually vinyl, steel or aluminum. From the end of the short (and lower) horizontal leg of the F channel, is another downward leg (envision an inverted J). The sidewall steel then slides up into the J from below.
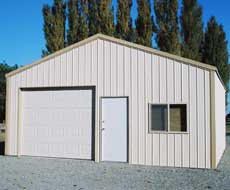 Actually the one foot I have in mind is the difference in width between a standard 36 inch width entry door and a 48 inch wide one. Oh what a difference the extra foot makes!
 Run your eyes up to the top of the eave walls – where screws have been placed on both sides of each high rib. Again, this is not a screw pattern which is shown on our plans or in the instructions. Although there ARE some places for screws to be placed like this – this happens to be none of them.
 Now, move your eyes down a row of screws. At nine feet in from the corner, the screw line has a jog in it of about two inches. I won’t even ask how.
 There are two types of galvanizing: continuous and batch. Continuous galvanization occurs when zinc is applied to a ribbon of steel as it passes through a bath. This steel passes through the bath at very high speeds and is only in the bath for two to four seconds. Once it has been galvanized, the steel is then shaped into the final product. Despite this high galvanization rate, continuous galvanizing is limited in the fact that only very thin, flexible sheets of steel are able to be galvanized in this way. This limitation is due to the fact the steel needs to remain flexible so it can be formed and shaped later.
 Take a minute and go check out my profile,
 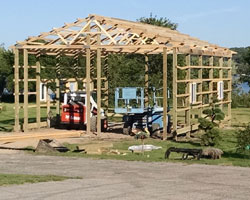 I reserve the right to not disclose the name of the city, as this is the not the first time it has happened – in states other than Wisconsin. It doesn’t happen often, but when it does…I am all over this one!


