Welcome to Ask the Pole Barn Guru – where you can ask questions about building topics, with answers posted on Mondays. With many questions to answer, please be patient to watch for yours to come up on a future Monday segment. If you want a quick answer, please be sure to answer with a “reply-able” email address.
Email all questions to: PoleBarnGuru@HansenPoleBuildings.com
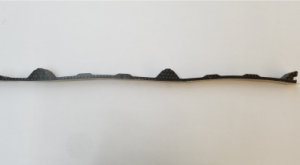
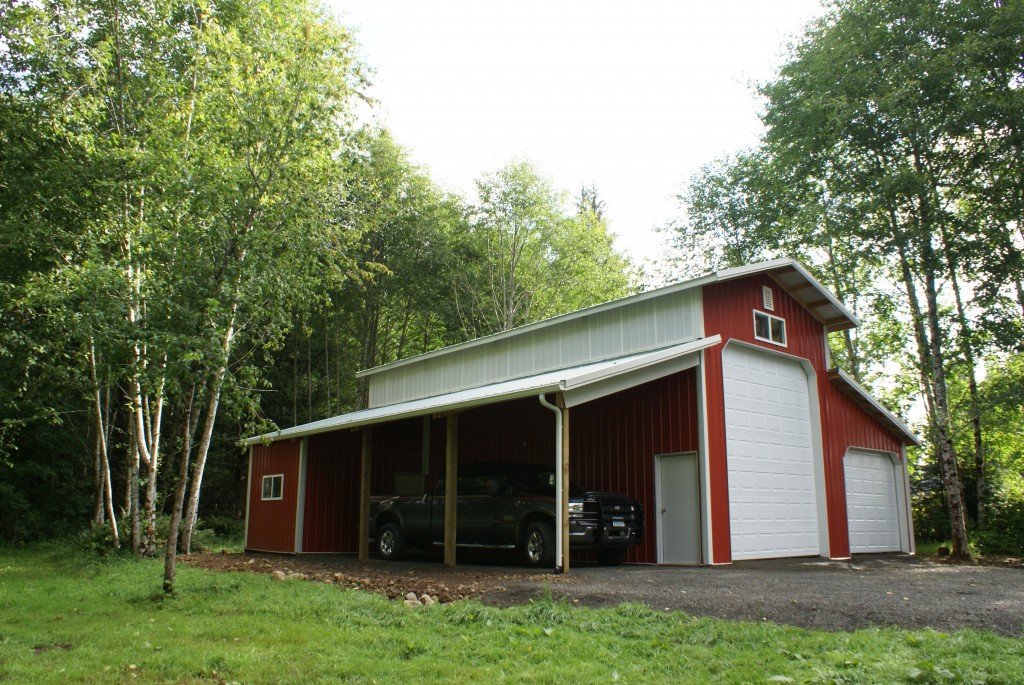
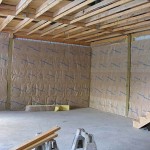
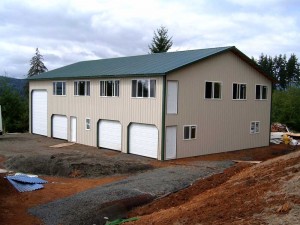
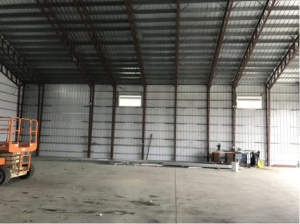
DEAR POLE BARN GURU: I am getting ready to insulate and heat an older pole barn so I have signed up here for some help and advice. So, I have an older pole barn that really has no eave/soffit vents or ridge vents. It’s pretty crude built. I want to insulate and add a ceiling. My concern is condensation in the attic after insulating. I plan on adding some sort of full ridge vent. Then I need some eave venting or add gable vents. The idea of adding gable vents makes me nervous because I don’t know how to seal them properly with the ribs in the metal siding. I will attach pics. Is there a way I can build in some eave vents? The metal roof just comes down the sides of the barn and there is an air gap between the rood and the siding that is covered by the white trim/flashing as seen in the pictures. Any ideas on what to do with this old barn before I start finishing it would be a big help. I also thought about attic fans in the ceiling. CB MAN
DEAR CB: You asked for advice, so here it is….your old building has some challenges when it comes to attempting to heat. The ventilation issue is just one of many. The building has no insulated vapor barrier under the roof steel to prevent condensation, which you have touched upon. Two other factors, either of which could be deal breakers – the building has horizontal sliding doors, which are impossible to properly insulate and seal, without them becoming permanently affixed, and the roof trusses are probably not designed to support the weight of a ceiling.
With all of this said, you have two really good solutions – the least expensive is to just put up another new pole building, designed properly to be climate controlled, using your existing building for cold storage. The other – knock this building to the ground and rebuild at the same location.
Assuming you may not be interested in either of these, and want to pour lots of money into a building you refer to as “crude built”; I will give you some solutions.
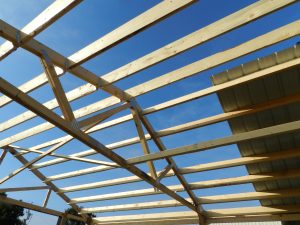
Toughest first – the trusses. As they are prefabricated wood roof trusses, there should be a manufacturers stamp on every truss. The design loadings might be stamped on the trusses (due to the age of your building the “might” is the operative word). With this information and the location of your building, I could probably give you an idea as to adequacy. If the truss manufacturer’s name can be found – see if they are still in business. If so, they can determine adequacy for you (for a small fee) and get an engineered repair if they are not adequate. If those fail, hire a registered engineer to do an evaluation for you.
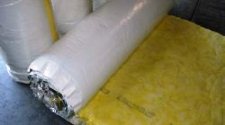
Condensation under the roof steel…as the steel is nailed on, it cannot be removed and an insulated vapor barrier (something like A1V reflective insulation available from www.buyreflectiveinsulation.com) added. The best solution is probably going to be to spray foam insulate the underside of the roof steel.
Adding a ceiling – with the trusses verified for the ability to take the load (and correctively upgraded if needed), 2×4 ceiling joists can be placed between the bottom chords every two feet, with LU24 or similar joist hangers at each end.
Screw on 5/8” Type X gypsum board to the underside of the ceiling joists and trusses (it won’t span four feet, so don’t even attempt to). Leave an attic access hole somewhere close to the center, so insulators can blow in the desired thickness of insulation. Do NOT place a vapor barrier between the ceiling drywall and the framing above.
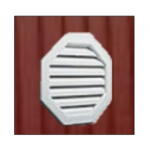
Ventilation – the new codes do not allow for gable vents to be mixed with eave and ridge vents. It is…use one or the other. Take the square footage of the footprint of your building, and divide by 300. This gives the net square inches of ventilating area which must be provided in each gable end of the attic. Hansen Pole Buildings has vinyl gable vents, in a myriad of colors, with snap rings. A hole is cut in the steel (using the snap ring as a template), the vent is pushed through from the inside, and the snap ring is then pushed on from the outside (this is a two person job). These vents are designed to accommodate ribs on steel panels.
Now the roof is taken care of, the walls are the next challenge. Remove the sliding doors and frame the openings down in size to fit insulated steel sectional overhead doors. You may be able to salvage the steel off the sliding doors, and if done carefully, use the pieces to fill in the gaps.
Again, the nailed on wall steel becomes a limiting factor….spray foam for the walls is probably the best solution. Keep in mind, you will need to put either drywall or a steel liner panel on the inside of the columns, as Code does not allow spray foam to be left exposed to heated areas.
Good luck – and let me know what choice you make and how it turns out.
DEAR POLE BARN GURU: We just made a phone call to Menard’s to order over a hundred bags of blown-in cellulose. While talking to the guy in the building department, he asked if this is for a pole barn, Told him yep. He then strongly emphasized to NOT use blown-in cellulose above the metal ceiling because the flame retardant material will rust and eat up the ceiling. This is the first I have heard of, so I did some quick research online and it looks like they have some kind of acid that act as a flame retardant.
Right now, our 30×48 gambrel pole barn with loft are being built. The shop will be finished with R-19 fiberglass in the walls and then T1-11 panelings will be installed. The ceiling is going to be a metal liner, obviously. The loft will be used for storage and man cave, so half of the loft would be finished in the future. There will be Low-E condensation barrier below the roofing, so the contractor told us there is no need for a vapor barrier in the shop ceiling where I would be blowing the cellulose.
Right now I am not sure what to think. Several months ago I did some research and have decided to plan on blown-in cellulose. Is this something I should be concerned about? What should I do to avoid the rusting issue the guy told me about? BTW, he told me to instead use blown in fiberglass which is something I am not thrilled about. Thanks. PERPLEXED
DEAR PERPLEXED: If the fiberglass and cellulose insulation people would spend more time promoting what each of them do as good, and less time shooting broadsides at each other, life would be so much better and they would probably each sell more product.
There have always been concerns about insulation causing corrosion when in direct contact with metal building components such as sweaty pipes, electrical wires or metal boxes, etc. Consequently, ASTM (American Society for Testing and Materials) standards for every insulation material contain testing which specifically addresses these concerns. In addition, in 1979, the CPSC (Consumer Product Safety Commission) promulgated a law, which regulated the fire and corrosive characteristics of cellulose insulation. A statement of compliance with these requirements is required on every bag of cellulose insulation. The types of metal tested with all insulation materials are copper, aluminum, steel, and additionally in Canada, galvanized steel. The test requires placing soaking-wet cellulose insulation with an imbedded .003-inch thick metal coupon inside a humidity chamber under conditions that are ideal for promoting corrosion. After 14 days, the metal coupons are removed, cleaned, and examined under a light to detect the smallest pinhole. In all, there are two coupons of each metal and all must be free of even one pinhole. This is a very strict test!
My recommendations are to make sure your attic area is adequately vented (no less than 1/300th of the attic footprint area in venting, provided at least ½ of the vent area is in the top ½ of the attic), make sure the insulation stays dry (no roof leaks), and do not have a vapor barrier between the ceiling and the insulation. Whether you choose fiberglass or cellulose, either should be fine.
 DEAR MARK: Communication – we as humans do so much of it and all too often do not fully convey our intentions. I am just as guilty as any other person, so do not feel like you are alone in this. This is one reason we strive to do everything in writing, so both parties are clear on each other’s expectations.
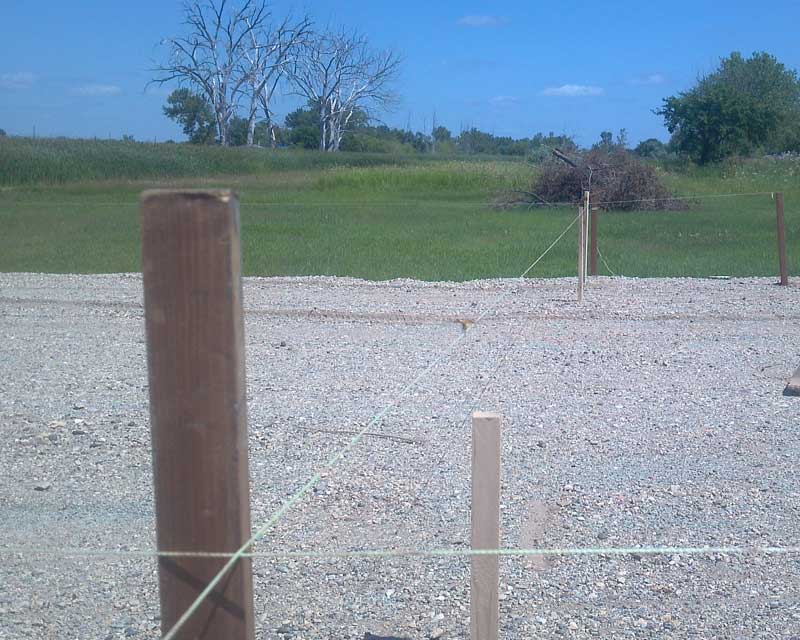
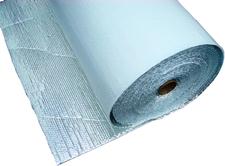
 DEAR DYLAN: My first alternate choice would be to use an I.C.C. (Integral Condensation Control) https://www.hansenpolebuildings.com/2020/09/integral-condensation-control-2/ easy to install and no seams to worry about. Next choice would be a Reflective Radiant Barrier – we have it in six foot wide rolls with an adhesive pull strip to seal joints. Contact Materials@HansenPoleBuildings.com for delivered pricing (rolls are 128′ long).
 DEAR POLE BARN GURU:
 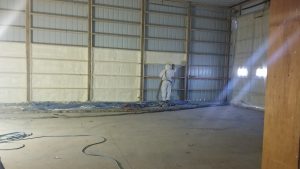 DEAR TOM:
 DEAR POLE BARN GURU:
 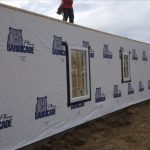 DEAR POLE BARN GURU:
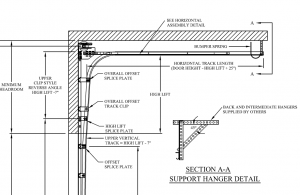
 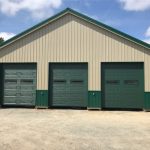 DEAR ANDREW: You actually probably need at least a 12′ ceiling for a lift. I always recommend at least 3′ from a wall and 3′ in between (it avoids door dings). With a 40′ wall – this will not quite work out (in my ideal world). I like 10′ wide doors, as they keep mirrors on much better. I also like 8′ tall doors, hardly any more than 7′ and gives room for racks, most lifts, etc.
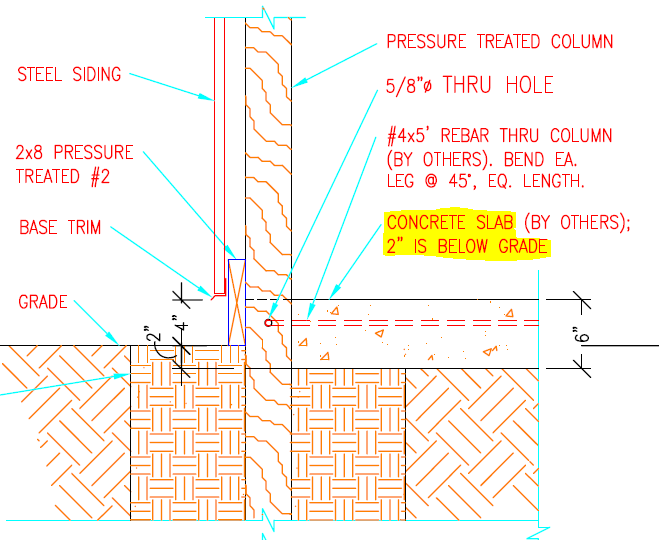
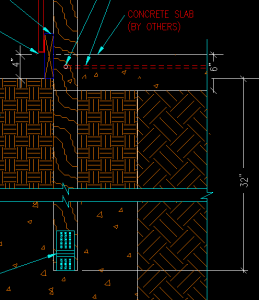
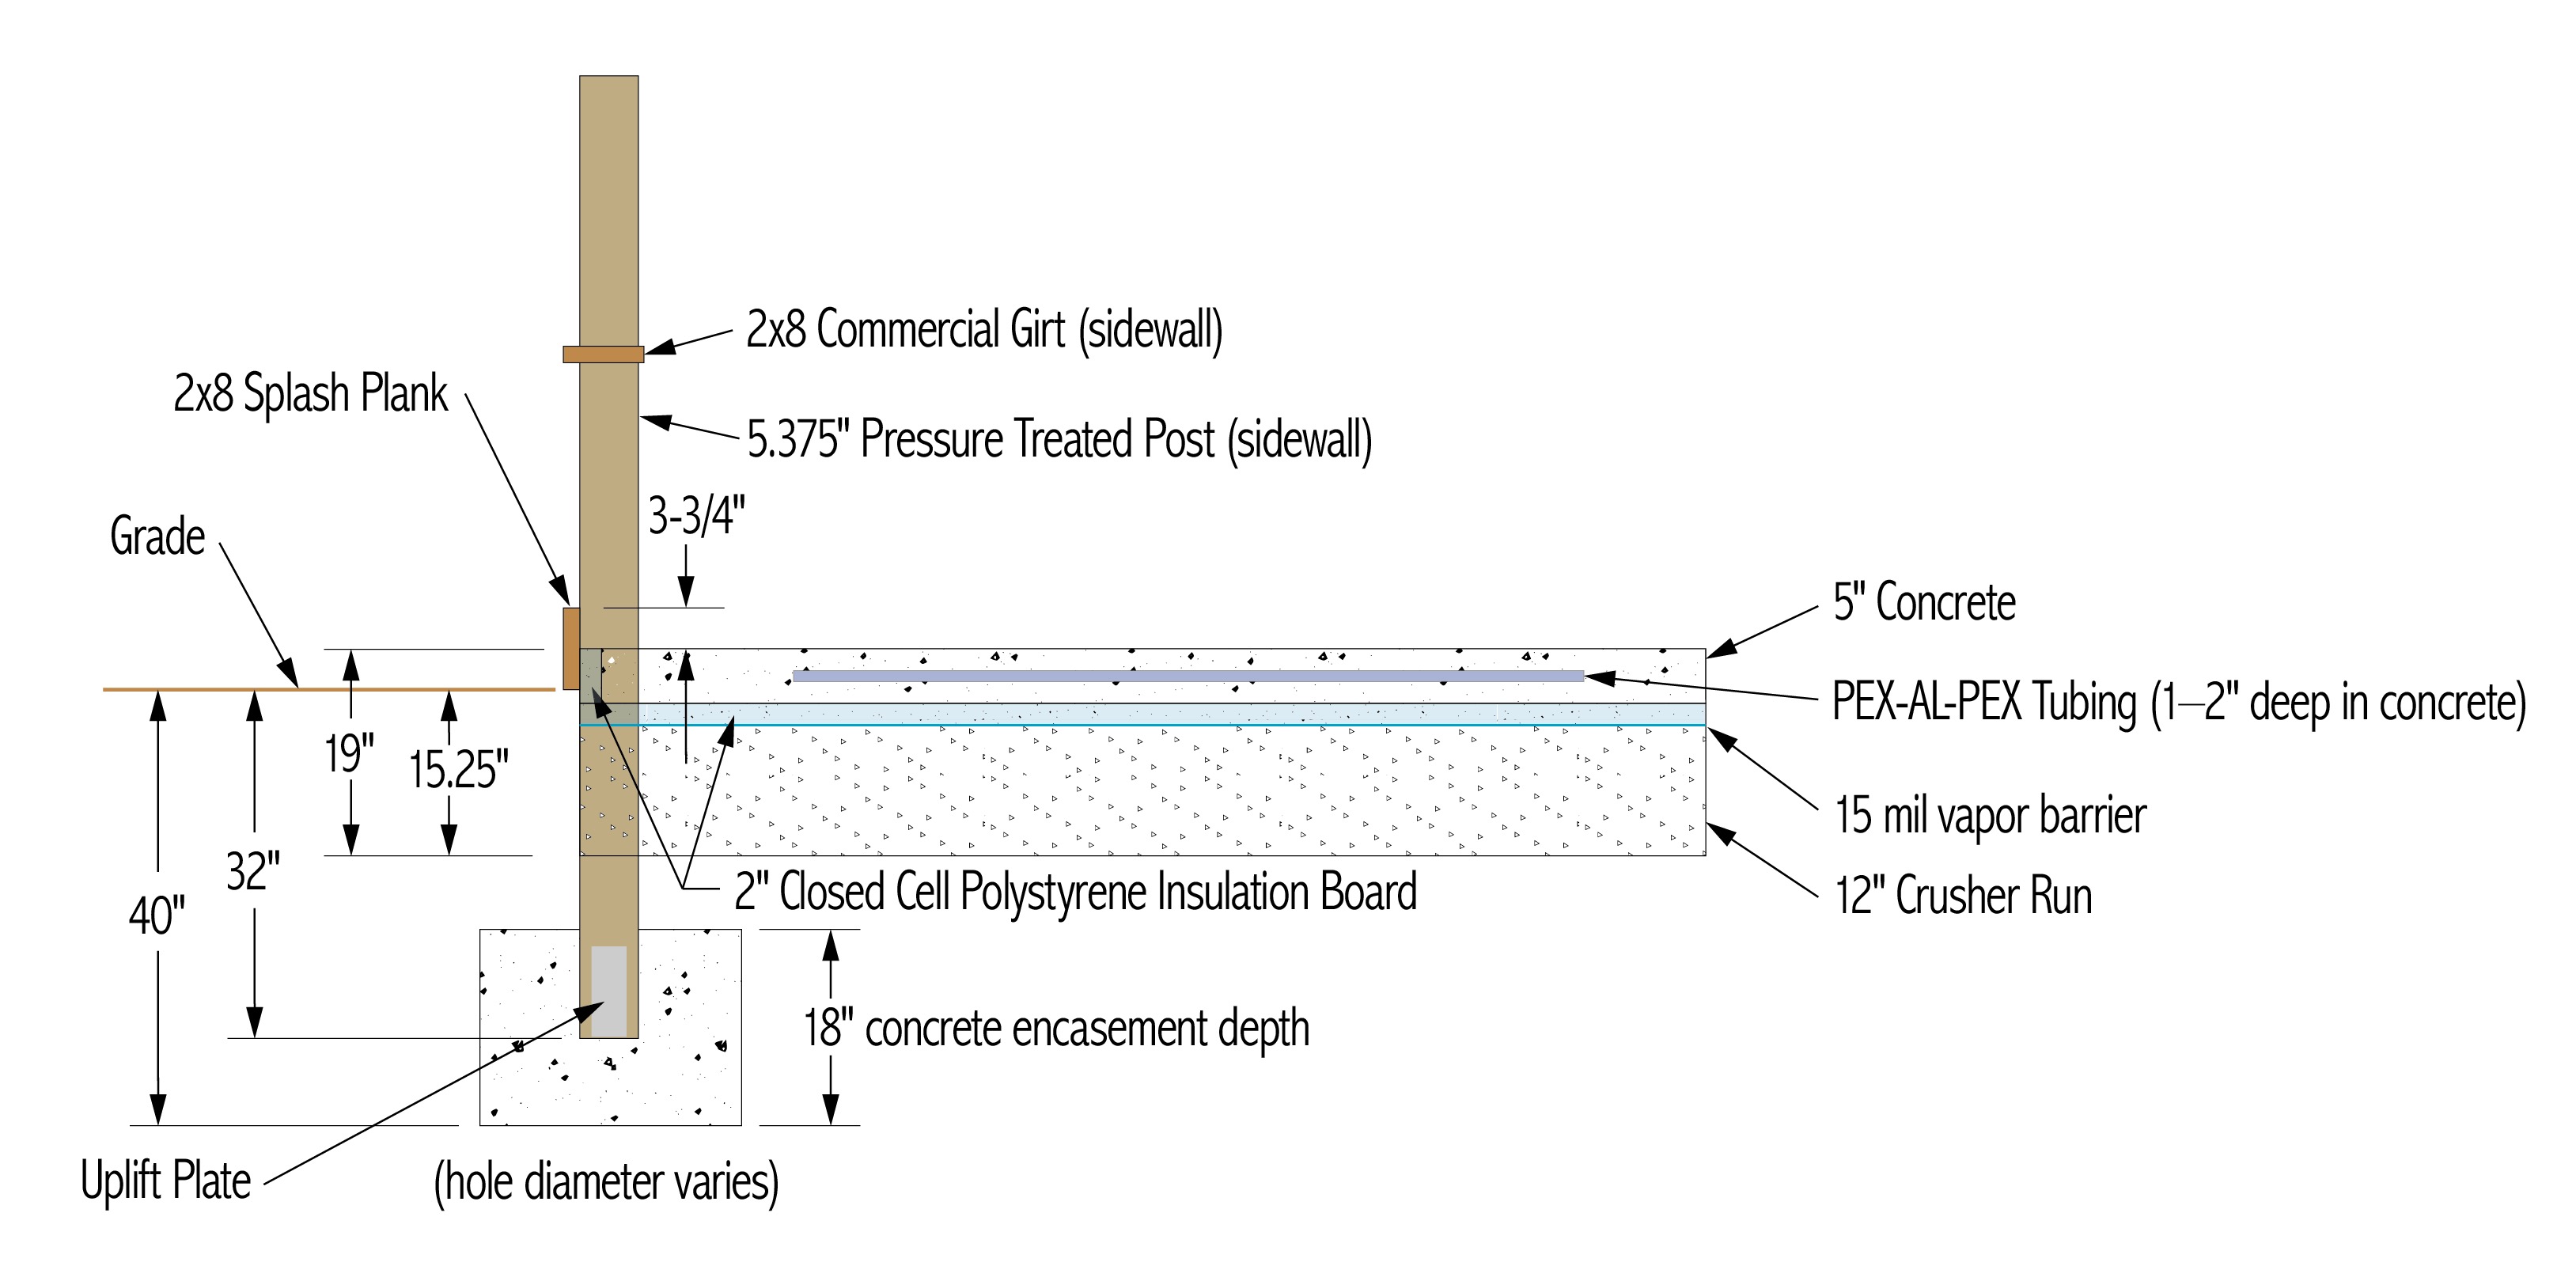
 I am having trouble deciding on how to insulate the perimeter slab. Oregon requires minimum R-15 for slab edge insulation. Ideally I would prefer to see concrete at exterior perimeter vs treated grade board that’s visible, however the treated grade board seems to be most cost effective in design. TRENT in WALLA WALLA
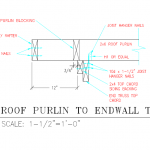 DEAR BRYCE: By Code you are unable to count any contribution from gable end soffits and areas between overhanging end purlins should be blocked solid to prevent airflow (and to properly create a load path to transfer shear forces from roof to ground). A construction flaw (such as daylight coming in under trim, probably should be fixed, rather than counted. By Code requirement is 3.84 square feet or 552.96 square inches of net free ventilating area located in upper 1/2 of your building’s attic space. My recommendation would be to install gable vents sufficient to provide airflow requirements.
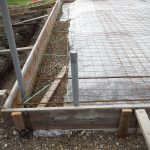 You should install a well-sealed vapor barrier under your slab while Code requirement is 6mil, however 15mil is far less likely to be damaged during a pour. Run vapor barrier up sides and onto top of 2×8 splash planks Overlap seams by at least 6″ and tape. Most often we see 1/2″ rebar on a 16″ grid.
 DEAR POLE BARN GURU:
  DEAR POLE BARN GURU:
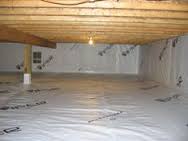
 So… if this is not going to be a building I heat 24/7 and never cool. Can I get by with reflectix under the metal roofing and insulating between the purlins with unfaced insulation, if I’m only going to heat it when I’m in it during the winter (heat with a wood stove).
  DEAR POLE BARN GURU:
 DEAR MARK:
 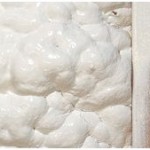 First I want to say I love your web site, the information I’ve been reading is invaluable! I am located in Spokane County. I have a 24x24x10 post frame garage that was here when I purchased the house. The walls have commercial girts R19 insulation. I would like to heat this garage and use it as a woodworking shop. Right now the ceiling is open and there is no insulation. The roof is sheeted with OSB, then felt then steel roofing panels. There is no ventilation or overhangs to install soffit vents. The roof has 4:12 pitch.
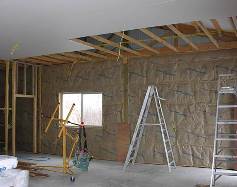
 Plastic vapor barriers should only be installed in vented attics in climates with more than 8,000 heating degree days. You can forego the plastic and use a vapor retarder (kraft-faced insulation or latex ceiling paint) in all other climates except hot-humid or hot-dry climates. In hot-humid climates, attics should not be vented and vapor retarders should not be installed on the interior of assemblies.
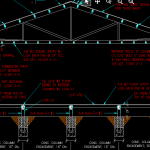
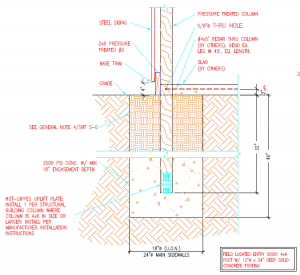 DEAR JAMES: This information should have been clearly indicated on engineer sealed plans you are using for construction. Actual required depth, diameter and amount of concrete required to prevent settling, uplift and overturning is carefully calculated by your building’s engineer, once all factors can be considered. These include, but are not limited to: soil strength at your site, building wall height, roof slope, weight of building itself, snow load, wind speed and wind exposure, seismic considerations, whether building is fully or partially enclosed or is ‘open’, as well as spacing of columns. In most cases, I would expect to see an engineered design of roughly 40 inches in depth, 18 inches in diameter, with a minimum of 18 inches depth of concrete in bottom of hole (a bottom collar) and base of column held up eight inches from bottom of hole. A steel uplift plate is typically placed on columns in concreted area to prevent uplift. All of these factors as well as typical suggestions above should be fully reviewed and sealed by your building’s engineer prior to your moving forward.
 DEAR RON: If I was going to do this I would use 15mil black plastic as 6mil will just not hold up over time. I would seal it to my building’s pressure preservative treated splash plank and make sure to have ground sloping away from my building beneath plastic minimum of 5% (three inches in five feet).
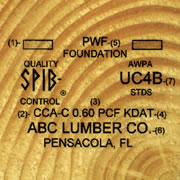 DEAR MATT: In my humble opinion, this could be resolved by having clear markings on Pressure Preservative Treated wood to not leave any doubt as to what proper use is. I have stomped my feet on this very issue for years:
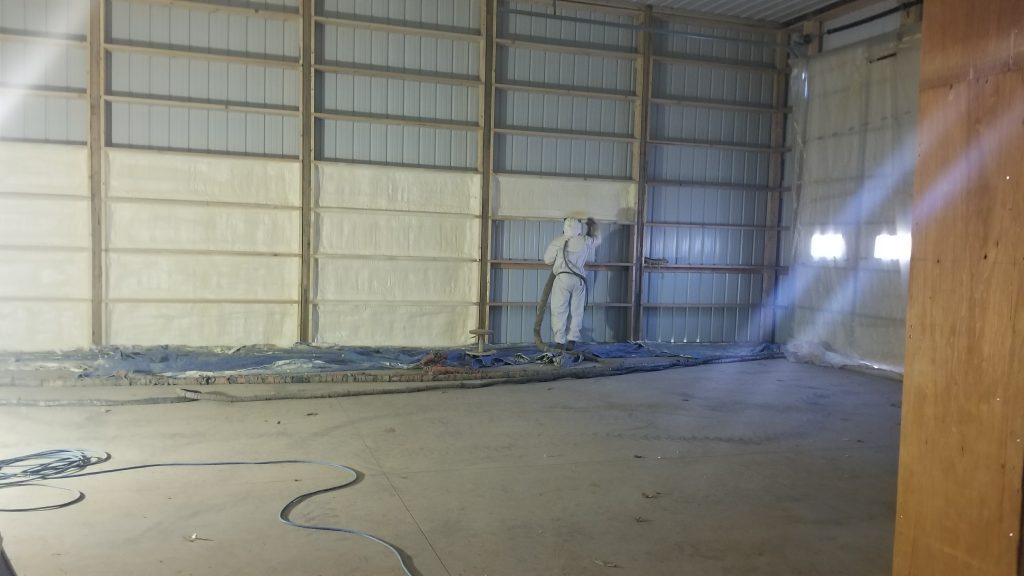
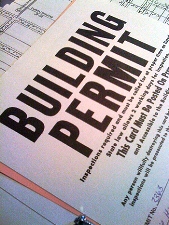 DEAR POLE BARN GURU: Can I build my pole barn in Hernando County without any problems from the county for permitting which is located in Brooksville, Florida? CHARLES in BROOKSVILLE
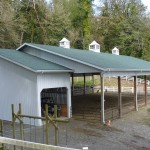 DEAR JANE: Before making changes to your building, such as this, it would behoove you to consult with engineer who originally designed. If they are unknown or unavailable, you should consult with an engineer who can evaluate what you have and what you want done, in order to determine if structural upgrades will be necessary. Many pole barns with little or no sides were not originally designed to support this added wind load, and it is best to be safe, rather than sorry.
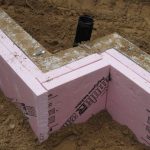 DEAR POLE BARN GURU:
 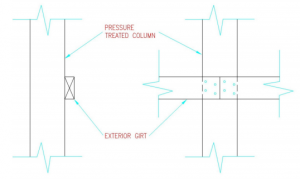 Wall girts flat on column exteriors are inadequate to carry imposed loads and will not meet deflection limitations. I would suggest you reinforce each of them to create either an “L” or a “T”. Assuming you have 6×6 wall columns, you could place a 2×8 bookshelf style girt on top or bottom of each girt, nailing through 2×8 into existing girts with a 10d common nail at say 12 inches on center. This will create an insulation cavity and allow for easy interior finish.
 Least expensive financially, but does take some extra labor hours, especially if it is windy – a single air cell layer reflective radiant barrier. Six foot widths will install much quicker than four foot. Make sure to order with a six foot width NET COVERAGE and an adhesive tab along one edge with a pull strip. Without an adhesive tab all butt edges will require seam tape, not expensive, but adds lots of time. Do not waste your money on adding an extra approximate R 0.5 for double bubble (two layers of air cells).
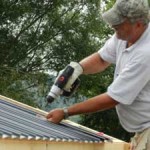 As much as we would like to believe otherwise, not every client or contractor is morally trustworthy. We have provided builder information to potential clients and had these same wonderful clients try to get builders to go around us and cut a better deal for their building materials. Conversely, we have had builders tell our clients to buy everything direct from them and they will get a better deal.
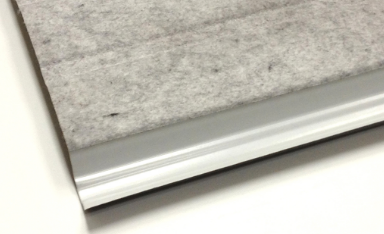 Absolutely, you should be concerned about attic condensation. Warm moist air from inside your conditioned space will rise into attic and when it comes in contact with your building’s roof steel’s cooler surface it will condense (even with ventilation). For sake of ease of construction I would recommend an integrated Condensation Control Membrane (
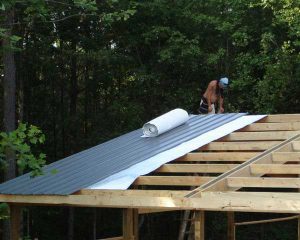 Properly sealed Radiant Reflective Barrier, Steel with Condenstop or Dripstop factory applied, 30# felt or Ice/Snow Shield over plywood or OSB, or (if none of those previously mentioned) two inches of closed cell spray foam. Me, I’d vote for Condenstop/Dripstop as it is a relatively low investment and easy to install. Blow in insulation on top of your ceiling.
 DEAR JOSEPH: From Hansen Pole Buildings’ Construction Manual, Chapter 2:
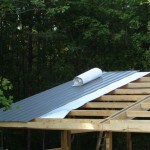
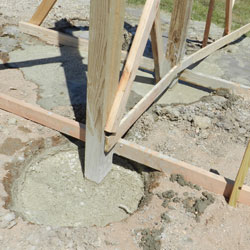 DEAR PAUL: I am guessing you are talking about concrete poured for a footing pad under the columns.
  As only incidental heat will be provided into crawl space areas, using rigid foam insulation boards beneath a thin concrete slab might very well prove to be an undue expense.
  DEAR POLE BARN GURU:
  DEAR JIM:
 DEAR POLE BARN GURU: I am planning on building a post frame home with a standard wood framed floor structure. It will have a crawlspace below but will not have concrete stem walls. The building site slopes down, some of the crawlspace may be excavated below grade, some areas will be above grade. Looking for ideas for skirting the crawlspace to provide the most appealing look at exterior side and keep out water and pests. TRENT in WALLA WALLA
 Replace your present overhead and sliding doors with insulated overhead doors. Tear out foil “insulation” and throw it away. Keeping eave and ridge vents sealed, use closed cell spray foam insulation across walls and underside of roof deck. An absolute minimum thickness will be two inches, providing approximately R-14. You will need to weigh benefits of greater R values against investment.
 DEAR POLE BARN GURU: Pole Barns for Stilt Construction – Just read your Kitty Hawk story – And FEMA backs you up. From FEMA-DRs-4085-NY Foundation Requirements and Recommendations for Elevated Home – Piles can be used with or without grade beams. When used without grade beams, piles extend to the lowest floor of the elevated home. Improved performance is achieved when the piles extend beyond the lowest floor to an upper floor level, although owners should check with an insurance agent to understand how the extended piles will be rated for flood insurance. Using grade beams provides resistance to rotation (also called “fixity”) in the top of the embedded piles and improves stiffness of the pile foundation system against lateral loading. So extending the piling up as the wall structure is the way to go. Thanks for your site – just starting to look at building a RV style (really for a 14-foot tall boat) pole barn in a flood zone area. (recently downgraded from a “V” area fortunately). So I was interested in piles instead of the typical foundation anchoring. Need to install pilings under the concrete pad as well. Your site has been informative. Thinking about a 30 x 48 x 16 but need to work up a design I can get thru our HOA architectural review board. MARK in GREENBACKVILLE
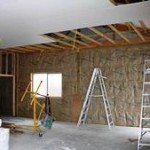 DEAR ROB: A downside of most HVAC duct work – little or no thought becomes involved in how to effectively insulate it. Wrapping ducts with a thin layer of fiberglass or radiant reflective barrier happens to be more for show than being effective. Unless your plan has roof plane insulation, I would place ductwork as close to ceiling level as practical and bury them within blown in insulation (I’d even pay a little extra for insulation to be thicker over ducting).
 DEAR ANDREA: My father’s family came to be United States citizens after arriving from Norway prior to 1900, so I have always had an affinity towards all things Norse. (A little snippet of my Norsk history here:
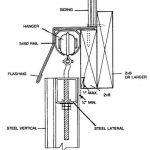
 DEAR LONNIE: A consideration would be to design entire building to be able to be climate controlled, as you may decide to expand your office space, or building may be re-purposed in future and require some or all of remainder to be conditioned.
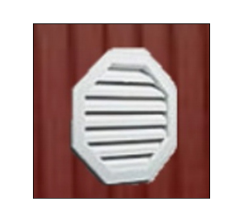 If this does not resolve problems, then you need ventilation. I will surmise your building does not have enclosed vented soffits and a vented ridge. Can’t go back and correct lack of overhang issues now, but you can add gable vents – a minimum of 242 square inches net free ventilation area in each endwall with vents located in top half of each gable.
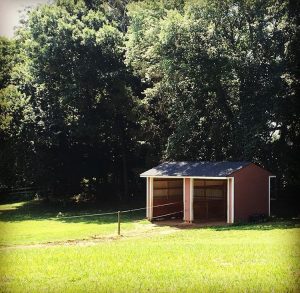 Detached cold storage buildings are constructed with a sole purpose of producing or storing goods in low temperatures. Think of them as typical heated buildings turned inside out. Instead of keeping heat in during cold weather, they keep heat out during warm weather.
 Building access should be through a wide 14 foot tall insulated overhead door in each endwall. Industry standard storage bins are four feet square and three feet tall. Bins can be stacked five high, leaving room for mechanical equipment above with a 20 foot interior clear height.
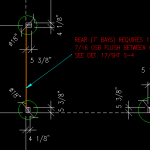 DEAR SCOTT: Regardless of whether your addition will be open, enclosed, or somewhere in between uplift should always be a consideration. Ideally the original EOR (Engineer of Record) who designed your 40′ x 80′ building would be consulted, not only because of a potential uplift issue, but also due to what affect open carport will have upon existing building. You may be placing wind shear issues upon endwall closest to addition and these will need to be addressed, as well as if endwall column footings will be adequate to support added weight (not just dead load, but also potential weight of a snowfall). An issue of drifting needs to be reviewed also, as snow could build up upon carport roof against existing endwall.
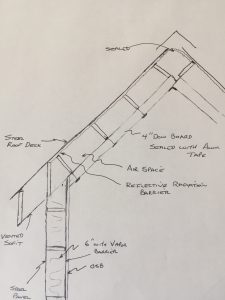 I love my two pole buildings I purchased from you guys. Just need some help on insulating the roof on my last building.
  DEAR PATRICK: Back when I was a contractor we would run into this situation occasionally. Our solution then was to stand columns in holes, brace them and then backfill with pre-mix concrete with very little water in it. Concrete weight would displace water in hole. It did take a significant amount of concrete, however it was only about $30 a yard then.
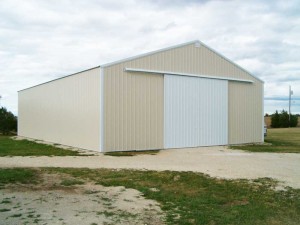 DEAR POLE BARN GURU: Many years ago I had a friend that made a good income renting heated storage space in a very large pole barn to boat owners. He complained of the heating costs involved. I told him he could heat the space for a fraction if he would insulate with hay bales encapsulated with foam. He also thought the idea was a little odd (do you notice a pattern with how people receive my ideas? 😉 I don’t know if anyone has ever done it, but I may give it a try before my time is up.
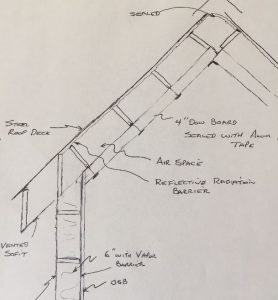
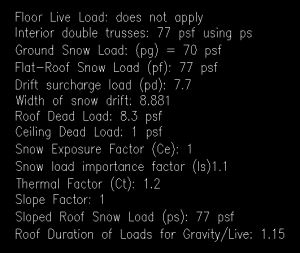 DEAR POLE BARN GURU: Can your building be designed to handle a 40# snow load? 24 x 30. JIM in WISCONSIN RAPIDS
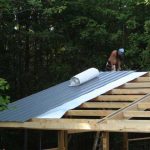 DEAR JOHN: My first choice would be closed cell spray foam. While it is going to be more expensive, you will save greatly in labor as opposed to using a radiant reflective barrier. Radiant Reflective Barrier, installed correctly, might give you the performance you are seeking. If you do go with the barrier, single cell will perform pretty much as well as single cell. Buy six foot wide rolls with a tab. The tabs should have a pull strip over adhesive, which eliminates the need for taping seams. The six foot wide rolls mean fewer pieces to handle and overlaps to seal.
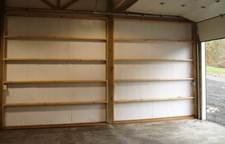
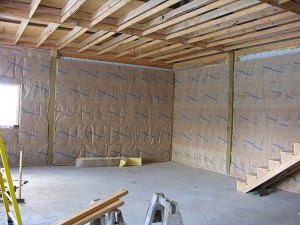 On the two outside walls of the shop I placed 1 ½ inch foam board between each of the barn wall girts then built 2×6 stud walls in between the pole legs. I then placed built two remaining free standing 2×6 walls to complete the shop walls. I placed faced R19 insulation in all the stud walls and finished them off with ACX plywood on the inside of the shop and CDX on the outside (free standing) shop walls. I then placed 22 foot long TGI’s as ceiling joists so I can have storage above the shop which I then placed ¾ inch tongue and groove plywood on top. I am now at the point to insulate the ceiling and finishing it off with a suspended ceiling with a gypsum type ceiling tile. I plan on placing R30 unfaced insulation in each of the shop ceiling bays but don’t know if I should use a poly type barrier before putting up the suspended ceiling.
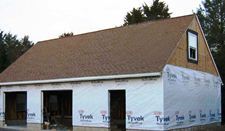
 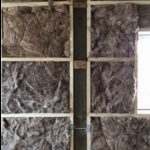 DEAR MIKE: You should remove the wall steel, a wall at a time, placing a well sealed quality building wrap (like Tyvek) over the wall framing – then reinstall the steel siding. Use unfaced fiberglass blanket insulation, thick enough to entirely fill the wall cavity, then a 6mil clear visqueen vapor barrier on the inside before installing the gypsum wallboard on the interior. Make sure to tape all seams, tears or rips in the visqueen.
 DEAR PRESTON: I hate to break this to you, but contractor number one is clueless – post frame (pole barn) style is going to be less expensive than stick frame, for a full hipped roof (or any roof style). The $3800 more for a set of hipped roof trusses sounds fairly steep unless you are somewhere with a significantly high snow load. My recommendation – order a fully engineered post frame building kit package and then have a competent contractor assemble it for you (or save some real money and assemble it yourself).
 DEAR RON:
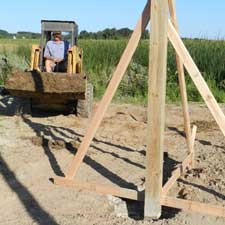
  DEAR STAN: The rationale behind installing the columns first is very few people have fill adequately compacted when they bring it in. I’ve written a series of articles about proper site preparation and compaction which begins here:
  DEAR KENNY: You should remove the wall steel (one wall at a time) and install a housewrap between the wall framing and the wall steel, then reapply the siding after making certain any tears or seams have been properly taped. If you use unfaced fiberglass wall insulation you should place a 6ml clear visqueen vapor barrier on the inside (running from concrete slab to the bottom of the trusses), immediately prior to installing the gypsum wallboard (or other interior finishes). Again make sure to seal all rears or seams.
 DEAR DOUG: You do not want a vapor barrier between the insulation and the siding, you DO want a building wrap (such as Tyvek). You should remove the wall steel, a wall at a time, install housewrap then put the siding back on. Use unfaced fiberglass batts and then a clear visqueen vapor barrier on the inside (make sure to seal any seams, rips or tears.
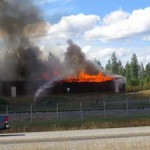 DEAR JON:
  Since January 1973 anemograph stations within the United Kingdom have tabulated for each clock hour the mean hourly speed and the maximum gust (of approximately three second duration). The ratio of maximum gust speed to the mean speed for individual hours as an effective height of 10 meters is referred to as the gust ratio. The mean wind ration is the ratio of the extreme gust speed to the extreme hourly mean speed, both having a return period of 50 years. This ratio turns out to be 1.60.
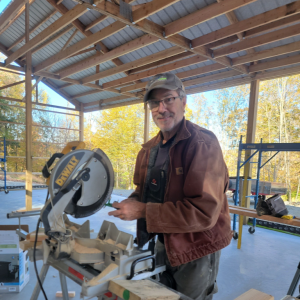


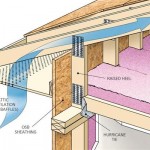

 DEAR RAY: If your new pole barn (post frame building) was designed with raised heel trusses and for the trusses to carry a ceiling load, I’d be looking at blowing in R-60 fiberglass or cellulose above the finished ceiling. This requires adequate ventilation – either 260 square inches on net free area at the eaves and ridge, or the same in each gable end in the top ½ of the attic space. This requires an air baffle to allow air to flow in from the eaves above the insulation.
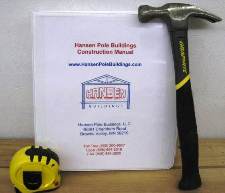 DEAR RALPH: From Chapter 14 of the Hansen Pole Buildings’ Installation Guide: Using a minimum 5/16” galvanized staple, staple through insulation to eave purlin top. As an alternative to staples, 1” galvanized roofing nails (with the big plastic washers) also work well.
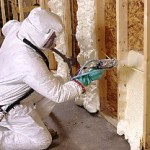


 Now some recommendations – when you have a ceiling, ventilation is required. The best way to do it is to have enclosed vented overhangs and a vented ridge. This gives both an air intake as well as an exhaust and gives smooth airflow throughout the entire enclosed attic space. If you are planning upon insulating the ceiling, raised heel trusses are the way to go (read more on the hows and whys of raised heel trusses here:
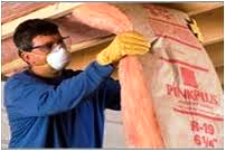
 In most relationships, success (or lack thereof) is created by communication. Lots of clear, concise dialogue makes for a happy marriage (whether a marriage of two partners in matrimony, or between client and pole barn provider). Don’t talk so much, or don’t pay attention to what the other party is saying, and a rocky road can result.


