This Wednesday the Pole Barn Guru answers reader questions about concerns that water might damage girts with use of spray foam, a replacement for A1V, and a request for “sold comps” in the state of Washington.
DEAR POLE BARN GURU: Hello, I am very early in the stages of considering self-building a post frame home. Spending a lot of time researching and learning as much as possible, mostly on Hansen Buildings since you provide such a wealth of information, thanks! My question: How do you go about weather protecting the girts against potential water intrusion from the siding/windows when using closed cell spray foam? I know with other insulation types, a weather barrier like Tyvek is used but this is not usually advisable for spray foam. My concern is that I build my home and water finds a way in and then rots away at my girts since the girts are on the outside of the vapor barrier but under my steel and it can’t dry out well enough. Am I worrying about something that is a non-issue? I am not 100% sold on closed cell spray foam for this reason, however, I do seem to gravitate back to it due to its ability to air seal well and high R value for the thickness. Thanks, CALVIN in HARTFORD
DEAR CALVIN: Appreciate your kind words.
 Closed cell spray foam does provide a 100% water seal. If you are using bookshelf wall girts (highly recommended), then vinyl window’s 1-1/2″ nailing flange entirely covers framing around window openings. Even if water where to somehow penetrate steel siding around a window, it would be stopped by closed cell spray foam at juncture with nailing flange – so no way for water to ever get to wood.
While I used closed cell spray foam to insulate when I added an elevator shaft to our barndominium in Northeast South Dakota, I am just not convinced it is economically practical in northern climates.
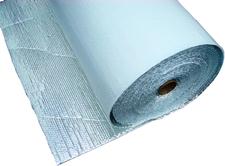
DEAR POLE BARN GURU: Tried to buy the A1V radiant barrier you suggest in your blogs. Apparently it’s no longer available. What product do you suggest in its place? Is there something that can be applied after metal installation that can be sprayed on? I have seen some products that claim to be a condensation stop and sprayed on after the fact which seems like a great idea if it works and is more cost effective than close cell spray foam. Thanks TIMOTHY in CLINTON
DEAR TIMOTHY: You are oh-so-close to my favorite stop for cinnamon rolls! (shameless plug here: https://www.rivercitygrillmissoula.com/)
We discontinued A1V radiant reflective barriers several years ago – as shipping six foot wide rolls became a challenge and trying to install in even moderate winds resembled juggling cats. Every effort has been made to remove older blog articles recommending this as a possible option.
 We have been offering to our clients factory applied integral condensation controls (read more here: https://www.hansenpolebuildings.com/2020/09/integral-condensation-control-2/).
As far as products able to be sprayed on after roofing is installed, only two inches or more of closed cell spray foam appears to actually work.
DEAR POLE BARN GURU: Our lender is asking for sold comps in order to put together our loan package with land and building costs. Do you keep a list of comps in Washington State? Thank you! SANDRA in GALLUP
 DEAR SANDRA: Your sold comps will be any custom designed home, they do not have to be steel roofed and/or sided or even post frame. If your lender cannot grasp this, it might be time to seek a different lender. Many of our clients have used https://www.ffbkc.com/borrow/build-a-home/barndominium-financing/ as they understand barndominiums (and loan in Washington state).
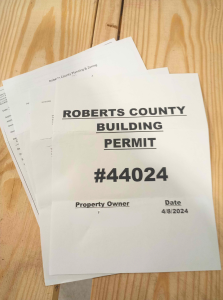 DEAR POLE BARN GURU: 28W x 30L pole barn, single 10’w x 9’t garage door, single entry door…need plans for county permit. Where can I get? DOUG in HAVRE DE GRACE
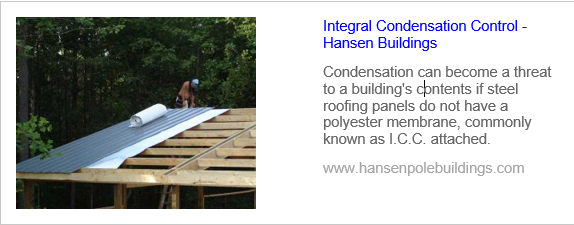
 DEAR DALE: Thank you for your interest in a new Hansen Pole Building. We have provided over 1000 fully engineered post frame buildings to our clients in Washington State, more than any other state!
 DEAR POLE BARN GURU: Going to build 2 pole barns on my property in Wewahitchka Florida about 15 miles from Mexico Beach. Water table on property is high and in a three foot post hole the water will seep and maintain 2 foot of water. Besides having a potential of hurricane winds what do you feel is best to withstand the water and winds over time for the supporting posts? Some I have read say wet set anchors are a pivot point not good for hurricane situations? Some posts in the ground not to weaken the post when blown by hurricane winds. Please inform best way and I am putting in for a quote from your company. ED in WEWAHITCHKA
  DEAR ROB: After roughly 20,000 buildings, I have yet to have any client wish they would have installed sliding doors, rather than sectional steel overhead doors.
 DEAR POLE BARN GURU: Hi Mike, I built a 32’X40’X12′ pole building, (Shop) I used 1 1/2″ foam board on the inside walls, (on the inside of the girts) I can’t decide how I should insulate the underside of the roof. I have had a couple Spray Foam guy’s quote it , that’s pricy. Of course, the best R Value etc. at the most reasonable price is what I am looking for. In some of your post you have mentioned Rockwool that has gotten my attention. I see they make it up to R30. One thing that sticks in my mind is, my builder suggested not to use an insulation that will give insects a place to live. What would be your suggestion for underside of Roof insulation. Thank you. JIM in SPRING HILL
 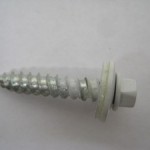 DEAR POLE BARN GURU: What screw is best for installing metal panels on the ceiling to wood trusses. MICHAEL in WENTZVILLE
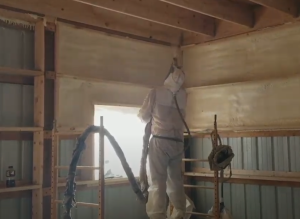
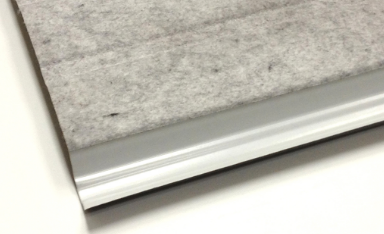
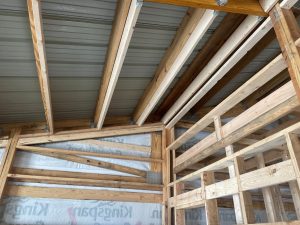
 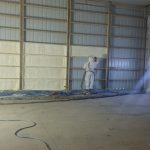 When it comes to insulating a building envelope, there are various methods that can be used depending on the building’s purpose and the required level of insulation. However, combining metal roof and wall panels with spray polyurethane foam insulation (SPF) is widely considered one of the most effective ways to achieve secure, strong, and long-lasting insulation. Utilizing this method of insulation offers numerous benefits including the sealing of panel joints, creating a vapor barrier, providing thermal insulation, and producing air barriers.
 The thickness of the initial pass fillet during picture framing should be at least 0.5 inch and should not exceed the maximum pass thickness recommended by the foam manufacturer. The minimum thickness of the initial pass is specified to provide enough material to activate the blowing agent and initiate the cure. After picture framing the perimeter of the area, the applicator fills in the center of the cavity using the maximum thickness recommended by the foam manufacturer. Maximum pass thickness varies by foam formulation and is listed in the technical data for each SPF product. Excessive pass thickness can result in inferior quality due to the increase in foam temperature during curing. For most closed-cell SPF, the maximum pass thickness is 1.5 to 2 inches. It is important for applicators of closed-cell SPF to follow manufacturers’ installation instructions on pass thickness limits and proper cooling times between subsequent passes made if they wish to develop the desired total thickness of the insulation.
 DEAR GREG: Sounds like you are creating a dead attic space. You should order roof steel with a Integral Condensation Control (
 achieved using post-frame construction, most building uses do not have this sort of requirement. In general, it will be far more cost effective to get your 10,000 square feet with a rectangular footprint of 60 to 80 foot in clearspan width. If you are limited, by property constraints to 100 x 100, but do not necessarily have to have a clearspan, a row or two of strategically placed interior columns can assist in keeping your building investment down.
 replacement panels with an Integral Condensation Control factory applied and throw away your old double bubble. Please read more here:
 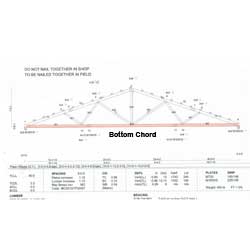 DEAR LYNNE: Transportation can often be a limiting factor. In order to avoid pilot cars and over width permits, maximum truss height is limited to 102″ (8’6″). A 50′ span, 4/12 slope truss will normally be roughly 108″ tall, plus any overhang “tails”. So, this would entail an over width permit. Now most truss companies purchase year-long over width permits for their trucks, so this cost is negligible. Most states do not require pilot cars, unless loads are 12 foot or greater in width. This allows for 60 foot span trusses to be hauled without expensive pilot vehicles. As to procurement, while you will pay more per lineal foot of truss as spans increase, you will also need fewer trusses. For an agricultural building, I always encourage clients to build as large as they can economically justify and have space to build on, as it will never be too big. Keeping your building length to three times building width will also help with your budget, as these ratios are typically within shear load carrying capabilities of properly fastened steel roofing and siding.
 DEAR POLE BARN GURU: Building a 50x36x12 pole barn with 4:12 roof pitch. Attic space will be unconditioned with blown in cellulose insulation in ceiling and batten on walls. Attic will be vented with soffit and ridge vent. Walls will have exterior house wrap under metal panels. Question is, what to put under the roof panels? Just a vapor barrier or a dual purpose vapor/radiant barrier? I hear different opinions on placing radiant barrier under roof. STEVEN in SUGAR LAND
 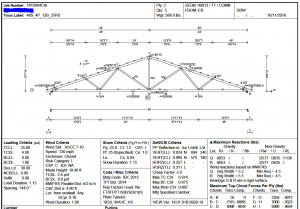 Most pole barn trusses are designed for a one psf (pounds per square foot) bottom chord dead load (BDCL) – inadequate for any type of ceiling. On truss spans of up to and including 40 feet, we include a five psf BCDL as a matter of practice (too many clients decide later on they want a ceiling) and if we know in advance a ceiling is to be installed, we use 10 psf BCDL. You have been fortunate to have at least a five psf BCDL. Your 10 psf bottom chord live load is a non-concurrent (assumes no other live loads are being applied such as snow) one and basically is there to provide a minimum degree of structural integrity allowing for occasional access to an attic space for maintenance purposes.
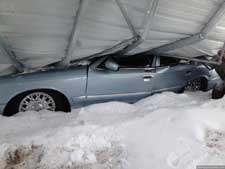 High winds and/or snow loads can damage light-weight tube framing (you can read about a snow collapse here:
  DEAR POLE BARN GURU: What is the standard width of a skylight on a pole building?
 DEAR TODD: Lack of ventilation is a harbinger of future condensation problems with well-sealed buildings. Your building has roughly 51,000 cubic feet of interior air volume, meaning a 5000 cfm powered fan will turn your air roughly every six minutes (or 10 times per hour). This should be adequate, however a greater capacity might be worth considering. You will also want to look at actual NFVA (net free ventilation area) of your intake, as lack of intake area can restrict performance of your exhaust fan.
 DEAR JOE: I would look at doing bays of 12′ – 14′ – 12′ first, however you should discuss options with whoever is going to engineer your building plans. Depending upon what you will be using this building for, it may be less expensive to cover one or both 24′ endwalls from roof to ground, than to have a roof only. A Hansen Pole Buildings’ Designer will be reaching out to you to discuss your needs, as we have provided roughly 1000 fully engineered post frame buildings to our clients in Washington State.
 I was going to lay some fanfold insulation down on the roof to create a flat surface for the metal. Any other suggestions? I don’t want to rip off all the shingles if I don’t have to.
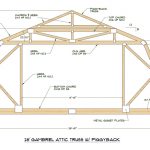 DEAR POLE BARN GURU: Hello. We are wanting to build a 2 story pole barn winery. First floor winery and second would be air-bnb type rental. We aren’t sure if we should use attic truss or complete the build with a traditional second floor. Cost is probably biggest concern. Space second as we know attic truss would be less room. Would you do an attic truss or traditional 2nd floor type build and roughly cost difference between the 2? Building size will be roughly 40×60. Thank you for your time. CRAIG in ROCK CREEK
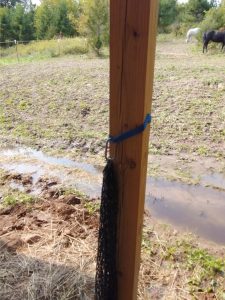 DEAR POLE BARN GURU: I built a pole barn for my r/v a couple of years ago. I used 4×4 for my posts with a metal roof and purlins with no siding. The posts are set 3′ into the soil with no concrete. Posts are 10′ out of the ground. When we get a strong wind the posts bend slightly at ground level allowing the structure to flex. Is there a way to add strength to the posts or do I need to replace with a larger size post and should I embed the post in concrete or will it rot? MARK in BRADENTON
 DEAR POLE BARN GURU: What do you charge to take my floor plan and send me engineered drawings? SHANNON in JONESBOROUGH
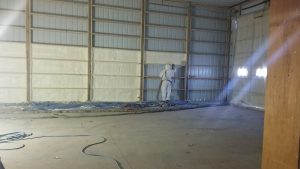 DEAR POLE BARN GURU: Hello! I have recently purchased a pole building that is not insulated & It does not have the vapor barrier/plastic installed between the wood framing and the sheet metal. We would like to insulate this building. We are thinking spray foam because I have heard you can apply it directly to the steel. Do we have any other options for insulating this? Any advice is greatly appreciated. Thank you!! KRYSTA in SPOKANE
 DEAR POLE BARN GURU: I need to pour a concrete sill at the 18’ wide entry to my pole shed in South central Wisconsin. The interior of shed is compacted crushed limestone, the apron leading up to it will be asphalt so a concrete sill seems like a good idea to protect asphalt edge. I can’t find any advice online so I hope you can help me out with your expert thoughts. First, good idea? Second, thickness. It would be about 12” wide. The base is 30 years old, thick and well compacted. Any help would be greatly appreciated. Thanks for your time. JAPH in WISCONSIN
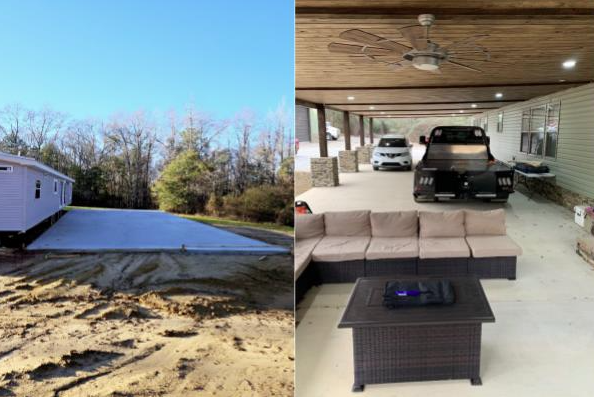
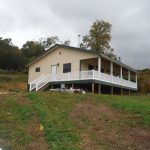 Most crawl spaces are created with dirt floors, face it, they are low budget and meet Code with a 6mil black Visqueen Vapor Barrier installed. Now retired Hansen Pole Buildings’ Designer Rick Carr built himself a hunting cabin over a crawl space a year ago and decided to take a slightly different route. He opted to do a thin layer of concrete to cover ground in his crawl space, with an idea of being able to roll around using a mechanic’s creeper, should he need to work on sub-floor utilities. Here is an excerpt from part of Rick’s planning:
 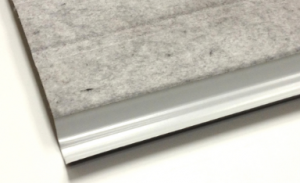 DEAR SHARON: Typically when I hear people talk about birds having destroyed pole building insulation I think of what is commonly known as Metal Building Insulation. Usually this is a thin layer of fiberglass with a white vinyl face – and once birds get started into it, there is no turning back
 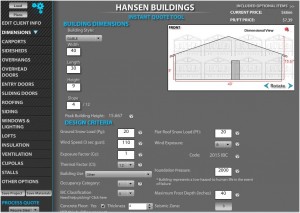 DEAR TIM: Always a pleasure to hear from a “lumber guy”. Our blueprints are actually drafted individually on AutoCAD, however we are gradually transitioning to where most fairly straightforward work will be automated from our trademarked and proprietary “Instant Pricing” system. We searched everywhere trying to find a computer program able to actually accurately do a structural analysis of post frame buildings and found none existed. We created our own and added to it abilities to do real time quotes for any climactic condition and anywhere in America. Our program does quotes, invoices, material takeoffs, creates purchase orders and interfaces with our client data base.
 DEAR POLE BARN GURU:
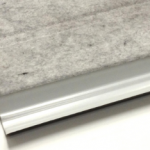
 “I am currently re-siding/re-roofing an existing pole building in order to match the exterior of the building I recently purchased from you. This building is roughly 32 x34 and the roof purlins are 2×6 on end roughly every 2 feet. I’m using Fabral’s grand rib 3 29ga for the roof and it will have fully vented soffit overhangs and a vented ridge cap. I am trying to figure out what I’m going to do for at least a vapor barrier under the roof steel, I see you seem to recommend foil faced bubble insulation but that is not very common in my area. I am seeing a lot of people using lamtec wmp-vrr (fiberglass insulation with a poly backing) 3″ thick and I believe they lay these wide rolls on top of the purlins and then place the metal roofing on top of that then screw down the roofing compressing the fiberglass insulation between the metal roofing and the purlins. Have you seen this style of insulating before? Do you think it is an acceptable way of doing it? I see as killing two birds with one stone. I may be insulating this shop in the future so if I do then the roof is already insulated plus I believe it acts as a vapor barrier which is the main reason to do it as I don’t want any condensation dripping down on the inside of the shop. I live in the Seattle area if that helps to know what my climate is like. Thanks in advance for your input.”
 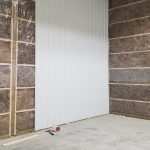 My recommendation would be to place a well-sealed WRB (Weather Resistant Barrier) between all wall framing and siding. Use commercial style bookshelf girts to create an insulation cavity
  This insulation issue brought me to a comment from a Bob in Paisley, PA, talking about a local feed store, “The feed store has had issues with theirs and the original owner said it was a bad choice. They had a company come in and spray adhesive type insulation to the entire inside. As the metal expands and contracts portions of the insulation failed to follow the same rates which in turn resulted in chunks of
 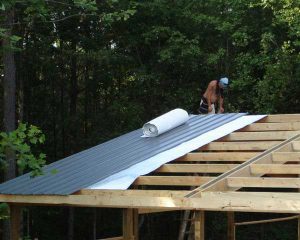 DEAR SCOTT: You actually have several things going on here. First, single bubble reflective radiant barrier will do everything double bubble will, at a far lesser investment. The difference in the minimal R value is a fraction of one! Your building ceiling should not have an additional vapor barrier, you want the moisture from inside the building to be able to migrate through into the ventilated attic space. Blowing in an appropriate thickness of fiberglass or cellulose insulation will be far more effective, probably less expensive and will allow the moisture through. Make sure to have adequate intake at the eaves and exhaust at the ridge to be able to properly vent the dead attic space.
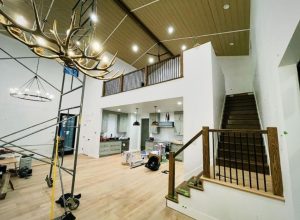
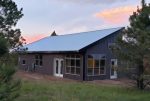
 DEAR RICK: Most certainly you can. I have a post frame building on the back of our property outside of Spokane, Washington. The site has 12 feet of grade change across the 40 foot width. After excavating the area where the building would be placed to level, ICF blocks were placed 12 feet high along the southern wall, stepping down with the slope on the east wall, with the other two walls being “daylight” and utilizing traditional columns embedded in the ground. You can read more about my building here: