Tag Archives: attic space

Attic Space, Cost Effective Size, and Column Sizing

This week the Pole barn Guru answers reader questions regarding a 6ft attic space over a 30×44 pole barn, the most “cost effective” method to build, and the point at which a post increased from a 6×6 to a 6×8.

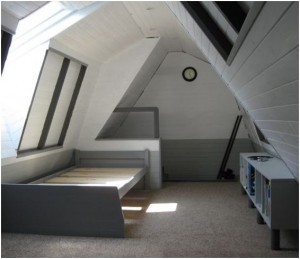
DEAR POLE BARN GURU: We want a decent-height (a bit over 6ft) attic space in our 30×44 pole barn (on a concrete slab foundation), can we use steel trusses or would wood trusses be a better option for this? The ground floor ceiling height is 8ft. Thnx for the help. RON in TONEY

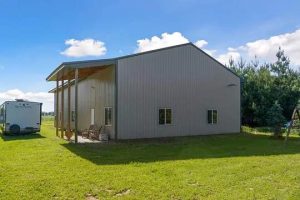
DEAR RON: Lots of possible design solutions available. To begin with, I would recommend wood trusses – should you ever want to finish a ceiling, or if you want to have a product fabricated under strict quality control standards, then wood trusses are your best choice. On to options…. #1 My favorite. Make your building tall enough to have a full second floor. This will give you greatest usable space and best resale value. By using prefabricated wood floor trusses, you can still have a clearspan floor (no posts below) and it provides an unencumbered space below without columns to dodge. Yes, it will be a greater investment, but one you will probably never regret. #2 Prefab wood ‘bonus room’ trusses. With a steep enough slope (roughly 8/12) you can end up with an eight foot ceiling height at center and a room roughly 10-12 feet in width. For amount of space being gained, this is a fairly costly design solution. #3 Increase sidewall height and use scissor trusses to allow for a central mezzanine supported by columns. While likely to be your least expensive design solution, you will be faced with columns below (unless opting to again add in floor trusses.


DEAR POLE BARN GURU: What is the most cost efficient size to build (Can I save money by buying a specific width/ length/ height?) What are the pros and cons of choosing metal frame or post frame? Is it still true that you can add square footage more affordably by building up (adding a second floor)? Can you put a basement under a Barn House? ANNIE in FORT LUPTON

DEAR ANNIE: As you get closest to square, your costs per square foot will decrease slightly. This is due to having less exterior wall surface, although it does not necessarily lend itself best to layout of rooms. For post frame construction, your most efficient use of materials typically comes from multiples of 12 feet in width and length. Work from inside out – do not try to fit your wants and needs within a pre-ordained box just because someone said using a “standard” size might be cheaper. Differences in dimensions from “standard” are pennies per square foot, not dollars. Post frame will always be your most cost effective structural design solution: https://hansenpolebuildings.com/2022/01/why-your-new-barndominium-should-be-post-frame/ Two story is not necessarily your least expensive design solution: https://www.hansenpolebuildings.com/2020/02/barndominium-one-story-or-two/ And yes, fully engineered post frame buildings can include a full, partial or walk-out basement: https://www.hansenpolebuildings.com/2020/02/barndominium-on-a-daylight-basement/


DEAR POLE BARN GURU: At what point do the post size change from 6×6 to 8×8, thanks. JEFF in SOUTH HAVEN

Roof Only Riding Arena
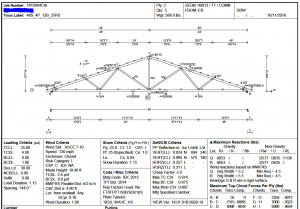
DEAR JEFF: If erecting a roof only “pavilion” style post frame building, column dimensions are often dictated by L/d ratio as there is no wind load on totally open sidewalls. “L” is unsupported length of column (grade or top of concrete slab to bottom of truss connection), divided by least dimension of column. Playing a part in this is a factor known as Ke. Ke is determined by fixity of columns. On a roof only structure, columns act as cantilevers (think of a diving board), so Ke = 2.1. Looking at your 5-1/2″ square 6×6, 5.5″ x 50 / 2.1 = 130.95″ (or just under 10’11”). This means at an unsupported length of 11 feet, a 6×6 would fail. Obviously, truss span, spacing, and loads from dead, wind and any snow must be properly factored into equations to be verified by your building’s engineer. Adding an eave sidewall (or sidewalls) with open endwalls will cause bending forces to fail most 6×6 columns at lesser heights.

Things My Pole Builder Didn’t Discuss With Me

Things My Pole Barn Builder Didn’t Discuss With Me

Somehow I feel as if this should be a Jeopardy question for $400…..

Reader MATT in BUFFALO writes:

“Hi there, my pole barn has recently been constructed and I’m now looking forward to insulating and finishing the inside. My hope is to drywall all interior surfaces including the ceiling. I realized as we were finishing the build that this was never really a discussion with our builder, specifically for the ceiling. I would like to add 2×4 or 2×6 ceiling joists 24″ on center and hang 5/8″ drywall for my ceiling finish and insulate somewhere in the r38 range with fiberglass. I do not intend on having any storage above the bottom chord, but will leave access to the space. My truss plans show a bottom chord dead load of 5.0 psf and states in the notes that the truss has been designed for a 10 psf bottom chord live load, although under loading it shows a bcll of 0.0. It also mentions for bottom chord bracing that a ‘rigid ceiling directly applied or 5-8-15 oc bracing’ is allowed. I think 5.0 psf leaves me just barely enough to finish this how I’d like, but I’d like to run it past someone with experience. I’ve unfortunately had the hardest time getting a hold of the truss designer/manufacturer. Thanks!!”

Mike the Pole Barn Guru writes:

Oh – things somehow never being discussed before a build gets started…..

Don’t get me wrong, I am not blaming you.

Any responsible builder or building provider should thoroughly know their client’s eventual end use for their building and offer some reasonable options to achieve those goals. Sadly – so many “professionals” know only how to sell on a cheap price rather than value added benefits to potential building owners.

Let’s run through possible challenges –

Condensation control. Unless some provision was made to keep warm moist air from rising and touching underside of roof steel, it will “rain” in your attic. Solutions at time of construction (in order of preference) would be: a factory applied integral condensation control (https://www.hansenpolebuildings.com/2020/09/integral-condensation-control-2/), a well-sealed reflective radiant barrier (it really isn’t insulation https://www.hansenpolebuildings.com/2014/04/reflective-insulation-wars/), installing over solid sheathing (OSB or plywood) with 30# felt or a synthetic underlayment, or Metal Building Insulation (https://www.hansenpolebuildings.com/2011/11/metal-building-insulation/).

If no provision has been made, your option now would be two inches of closed cell spray foam applied directly to the underside of roof steel.

Ventilation. When creating a non-conditioned attic space, it must be adequately vented. Gable vents can be Building Code conforming, however from a practicality standpoint, they only ventilate well closest to their location (building ends). Best design solution is intakes at eaves, exhaust through ridge. Here are your requirements: https://www.hansenpolebuildings.com/2018/03/adequate-eave-ridge-ventilation/.

Most pole barn trusses are designed for a one psf (pounds per square foot) bottom chord dead load (BDCL) – inadequate for any type of ceiling. On truss spans of up to and including 40 feet, we include a five psf BCDL as a matter of practice (too many clients decide later on they want a ceiling) and if we know in advance a ceiling is to be installed, we use 10 psf BCDL. You have been fortunate to have at least a five psf BCDL. Your 10 psf bottom chord live load is a non-concurrent (assumes no other live loads are being applied such as snow) one and basically is there to provide a minimum degree of structural integrity allowing for occasional access to an attic space for maintenance purposes.

Depending upon span between trusses, size and grade of ceiling joists can be looked up at www.codes.iccsafe.org/content/IRC2021P2/chapter-8-roof-ceiling-construction#IRC2021P2_Pt03_Ch08_SecR802 scroll down to Table R802.5.1(1). In order to support 5/8″ sheetrock, ceiling joists should be spaced no greater than 24 inches on center.

Your actual dead loads will be roughly 1 psf for truss bottom chord itself (includes minimal wiring, lighting and truss bracing), 2×6 ceiling joists 24″ o.c. (I use one psf although actual load is slightly lower https://www.hansenpolebuildings.com/2013/02/2×6-lumber/) and your blown fiberglass (about a pound per cubic foot), so you should be okay. Cellulose or rock wool insulation are about three times as heavy as fiberglass, pushing to BCDL capacity, although my recommendation would be rock wool over other products as it is unaffected by moisture (fiberglass with even 1.5% moisture content can lose roughly half of its R value).

Ceiling Vapor Barriers in Post Frame Construction

Ceiling Vapor Barriers in Post Frame Construction

A ceiling vapor barrier or no, in post frame (pole building) construction? Good question.

For most of my life I have lived where it tends to get chilly in winter. Here in Northeast South Dakota it can not only be chilly, but downright frigid. It has been drummed into my head for decades to never have a vapor barrier between a conditioned area (think heated) and an attic space above.

Well, there are some instances where, when considering proper modern construction practices, this will not be a best answer. Because I learn new stuff every day – this may contradict some prior advice I have given.

Credit to reader STEVE in DEXTER who piqued my interest when he wrote:

“I am adding a tongue and groove cedar plank ceiling to a heated room in my pole barn. I am attaching the planks directly to the bottom of trusses. Should I have a vapor barrier between the planks and the blown in insulation. I am concerned with air/dust /dirt leakage between the planks. I am considering putting up Poly or tyvek.”

Mike the Pole Barn Guru responds:

Plastic vapor barriers (Visqueen) should only be installed in vented attics in climates with more than 8,000 heating degree days. You can calculate your own heating degree days for free here: https://portfoliomanager.energystar.gov/pm/degreeDaysCalculator.  Vapor retarders (kraft faced insulation, or gypsum wallboard with latex ceiling paint) should be used in all other climates except hot humid or hot dry climates. In hot humid climates, attics should not be vented and vapor retarders should not be installed upon interior of assemblies. In hot dry climates a vapor retarder should also not be installed, but attics can be vented.

All vented and unvented attics should have an air barrier (such as MemBrain™ or Intello® Plus) regardless of climate.

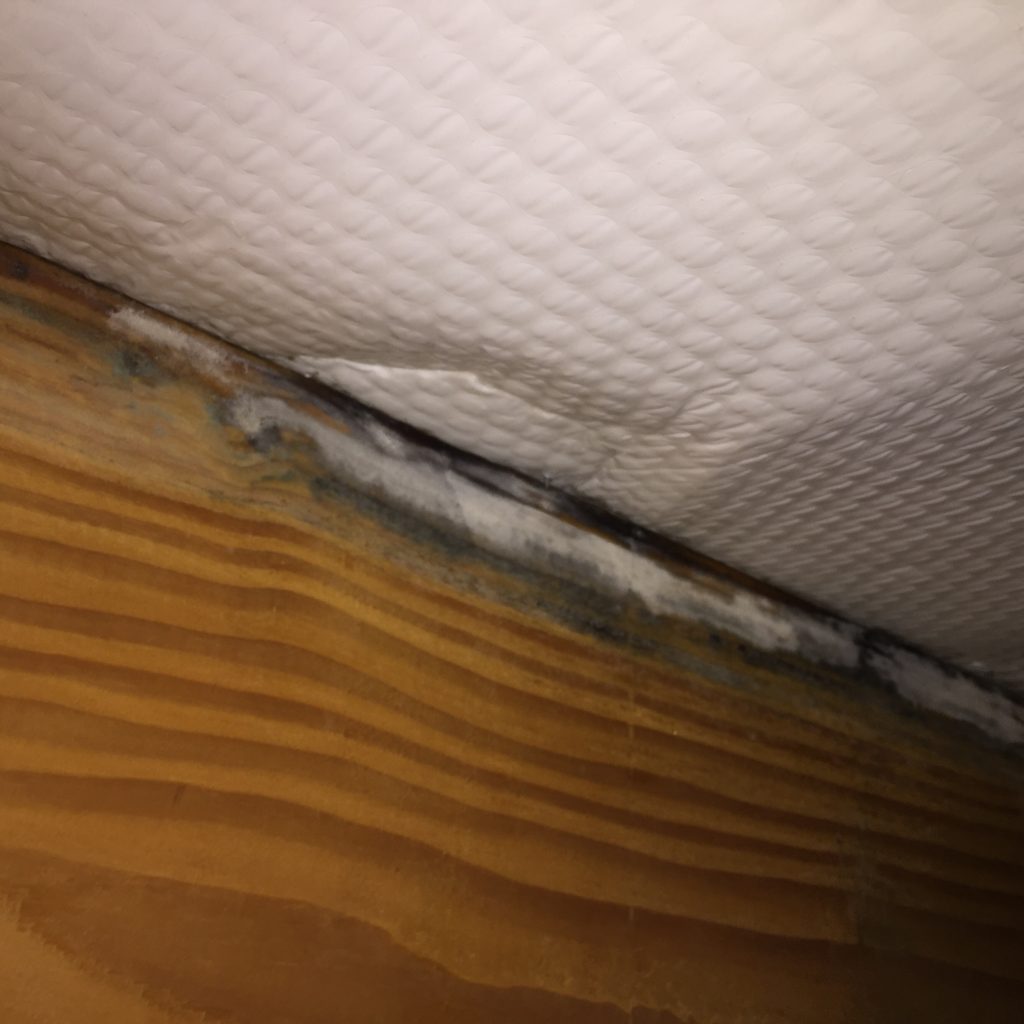
Controlled mechanical ventilation should be used to control and limit interior moisture levels in severe cold, cold and mixed climates, as well as to limit other interior contaminants in all climates. In other words, all conditioned post frame buildings require controlled mechanical ventilation in order to “breathe”. This necessary air change should not happen via construction of a leaky attic ceiling (or leaky walls) and installation of attic vents. Hence requirement for an air barrier and controlled mechanical ventilation in all conditioned post frame buildings regardless of climate.

Some moisture load in conditioned post frame buildings can be relieved via diffusion (hence a vapor retarder in a ceiling rather than a vapor barrier) through a roof assembly able to handle it (example – a vented attic in a moderately cold climate or mixed climate). Understand these are climate specific recommendations. In a well-insulated attic in a severe cold climate (more than 8,000 heating degree days) not enough heat loss occurs into an attic from conditioned post frame building to allow attic ventilation to remove much moisture. Attic ventilation requires heat loss to remove moisture from attics. Cold air can’t hold much moisture. Ventilating a heavily insulated attic with outside air in real cold weather does not remove moisture. We do not want any moisture in an attic in a severe cold climate for this reason. In not so miserably cold locations this changes, leading to a recommendation for a vapor barrier in severe cold climate and only a vapor retarder in most other locations.

In olden days, in severe cold climates, when attics were poorly insulated, it was okay to omit a ceiling plastic vapor barrier. Heat loss from building warmed the attic sufficiently to allow attic ventilation to remove moisture from the attic. Cold outside air was brought into attic and warmed up by escaping heat loss giving this air capacity to pick up moisture. Attic moisture was then picked up and vented to exterior. This approach worked great until large quantities of attic insulation were added. With added insulation, attic and ventilating outside air both stayed cold unable to effectively remove attic moisture. Hence a need to reduce moisture flow into the attic and add a vapor barrier.

One other complication needs to be stated. Vapor moves two ways, by diffusion through materials, and by air leakage through gaps and holes in building assemblies. Between these two, air leakage moves far more moisture than vapor diffusion. A vapor barrier in an attic assembly in a severe cold climate in absence of an air barrier will likely be ineffective. Conversely, an air barrier in absence of a vapor barrier can be effective. We complicate things when we install plastic in ceilings and assume it provides an air barrier. For plastic to be an air barrier it needs to be continuous.


Mold in a Post Frame Building Attic

Hansen Pole Buildings’ client BRENT in WASHOUGAL writes: “We have your 40×80 pole barn built sept. 2014, and it’s having problems with mold forming over the purlins. I’m wanting to know my options to prevent a future problem.

Thanks.”

Mike the Pole Barn Guru responds:

First – get rid of the mold. Mix in the ratio of one cup bleach per gallon of water and use a hand pump sprayer to saturate all moldy surfaces. You can also use a scrub brush to remove the existing mold.

The most common causes of attic mold are leaking roofs, inadequate ventilation and too much humidity in the building itself. If your concrete floor has a vapor barrier underneath it and/or is well sealed, you are probably not drawing in excess moisture from underneath the building – so we will look at the first two.

Mold showing along the tops of the roof purlins and not on the trusses, as well as the streaks down the sides of the purlins leads us to believe you may have screws which were inadequately placed. Screws which are not properly seated so as to compress the rubber washer, will leak. Screws which are driven in at an angle will also cause leaks. The roof should be investigated screw-by-screw to make sure all screws are properly driven. Water leaking around a screw shaft will eventually cause decay of the wood around the shank, so if screws cannot be tightened they should be replaced by a larger diameter and longer screw – in your case a #14 diameter by two inch long part.

Ventilation – in an ideal word your building would have had enclosed vented eave overhangs of 18 inches or greater on both sidewalls for an air intake, as well as a vented ridge to provide an exhaust point. This ventilation system provides for even airflow from eave to ridge throughout the entire attic area. Gable vents can be used to meet Code requirements for ventilation, however the reality is they are not very effective in providing ventilation other than near each end of the building’s attic. The Code requirement would be for 1/300th of the footprint area of the attic to be provided for as net free area of venting, as long as at least 50% of the venting is in the top half of the enclosed attic space. With a 40′ x 80′ building, you have 3200 square feet of footprint, which would require at least 10.67 square feet (or 1536 square inches) of net free ventilating area. To give an example a Mid America (www.midamericacomponents.com) Classic Rectangular vinyl vent 20 inch by 30 inch provides 297 square inches of net free ventilation area, so it would take three of these in each endwall just to meet the requirements of the Code!

There also is a difference between meeting Code requirements and what actually works in a real life situation.

Since you cannot increase the amount of venting in your soffits (as you have none), you’ll need help from power vent fans to exchange the moist air in your attic for dryer, outside air. Attic ventilation fans would help move the moist air out of the attic without giving it time to find a home on the purlins and trusses.

Attic vent fans can be hard-wired and equipped with a thermostat and/or humidity sensor so they automatically cut on at a preset moisture level or temperature. You could also install solar-powered attic vent fans, though it has been found most solar models aren’t powerful enough to be very effective.

To determine what size power vent fan(s) you need for your attic, you first need to know the size of your attic in square feet.

Attic Size

To determine the size of your attic, multiply the width by the length of the attic floor in feet. In your case 40′ wide x 80′ long = 3200 square feet of attic space.

Vent Fan Size

Next, multiply the square feet of attic space by 0.7 to get the minimum number of cubic feet of air per minute the fan should be rated to move. 3200 sft x 0.7 = 2240 CFM minimum fan rating.

Add an additional 20% (CFM x 1.20) if you have a steep roof, and 15% (CFM x 1.15) for a dark roof. Attic vent fans are commonly rated from 800 to 1,600 CFM, making one fan suitable for attics of up to around 1160 square feet, even with a steep, dark colored roof.

Vent Fan Location

Install gable mounted fans on the gable vent at end of the building facing away from the prevailing winds.

Intake Air Vents

It’s also important to have plenty of soffit or gable vents for the fan to draw air into the attic. To find out if you have enough vent space, divide the cubic feet of air per minute the fan(s) is rated for by 300 to come up with the minimum number of square feet of intake vent space needed for that size fan. 2240 CFM ÷ 300 = 7.47 sq. ft. intake vent area

If you prefer the answer in square inches rather than square feet, multiply the answer by 144 and round to the nearest inch (7.47 x 144 = 1075.2 sq. in. vent area).


Do’s and Don’ts of Attic Remodeling

If it is On the Internet, It Must be True

The internet is a great and wonderful place, a highway with a plethora of information rapidly available on nearly any subject. And for me, it has been my livelihood for the past dozen years.

On the ‘net can be found websites like Wikipedia (www.wikipedia.org), or as we refer to it in my household, “the sum of all knowledge”.

Sadly, for every bit of truly great information at one’s fingertips, is some really, really bad information.

One of my Facebook friends posted a link to an article, “What This Man Did to His Attic is Unbelievable. I Can’t Believe It Actually Worked”. https://home-design.diply.com/auntyacid/what-this-man-did-his-attic-is-unbelievable-i/64886/1

attic space
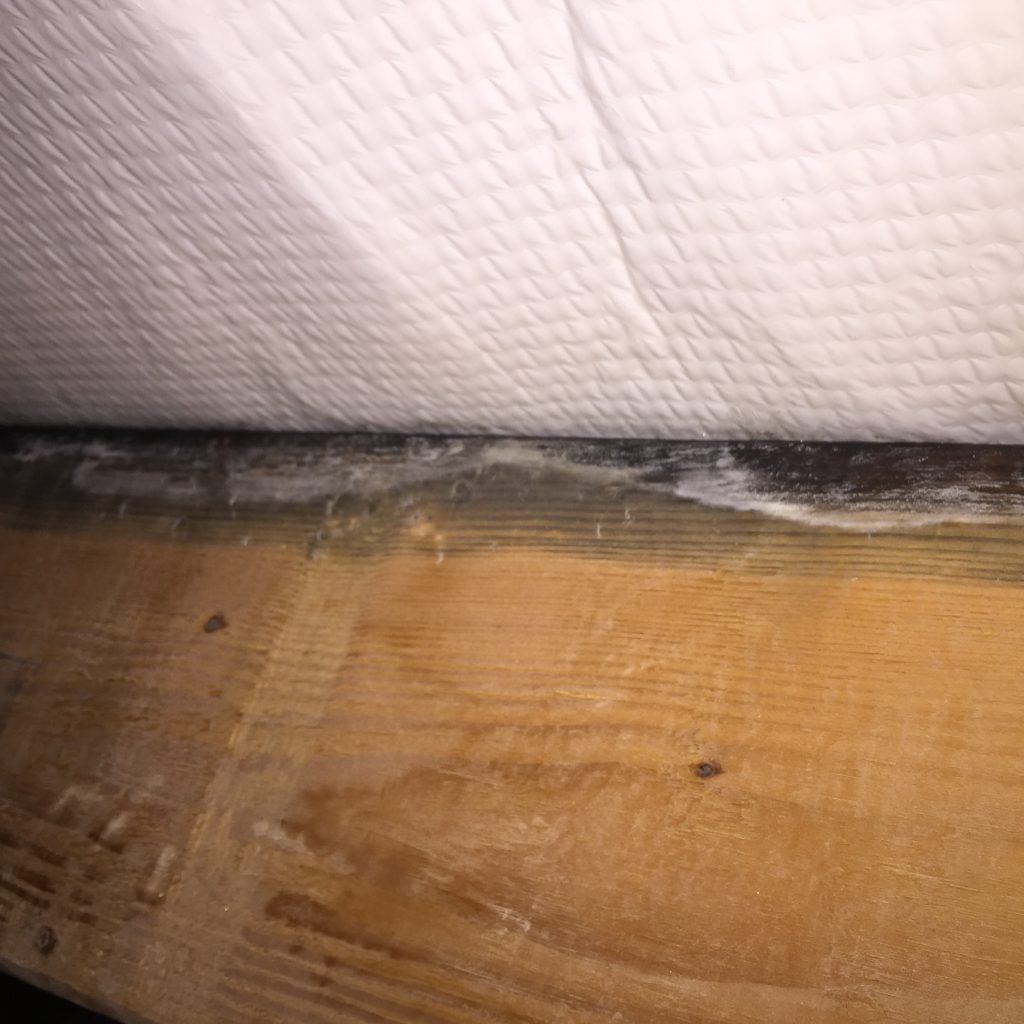
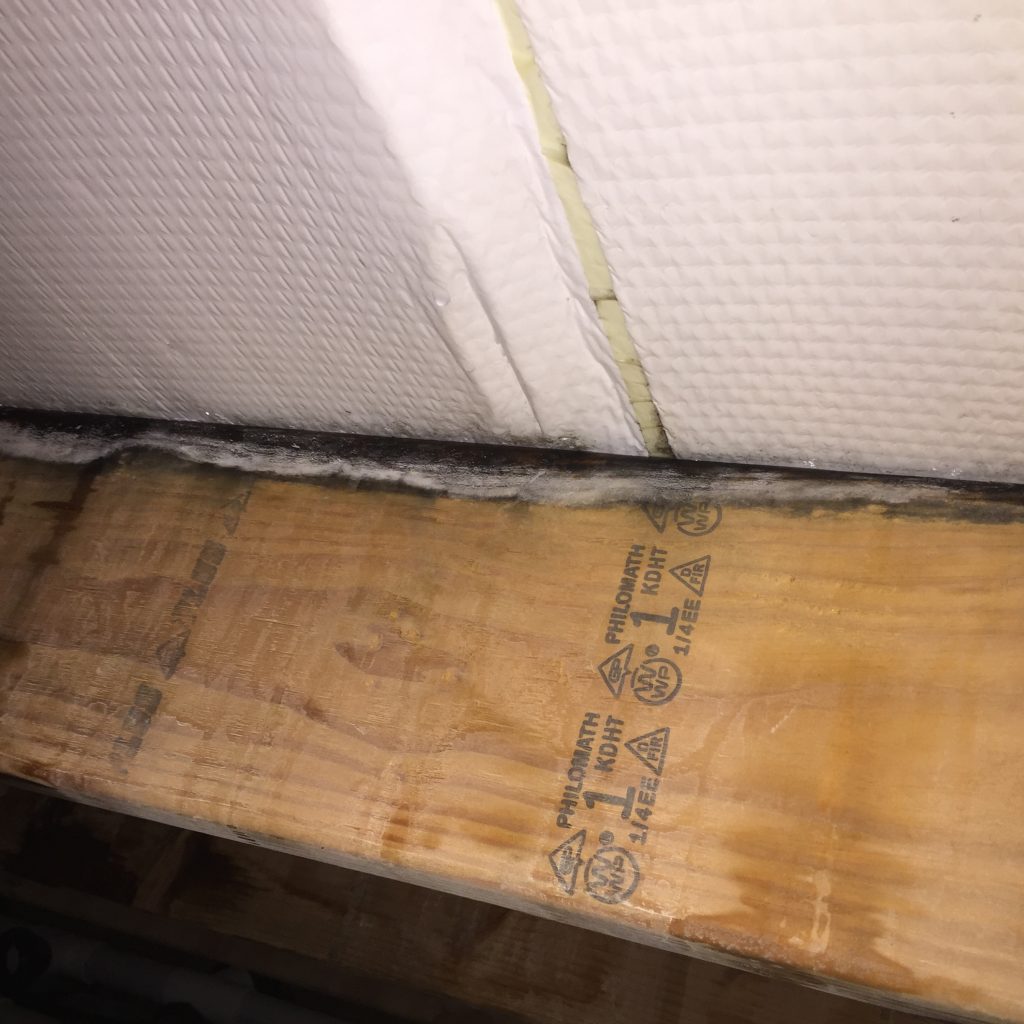
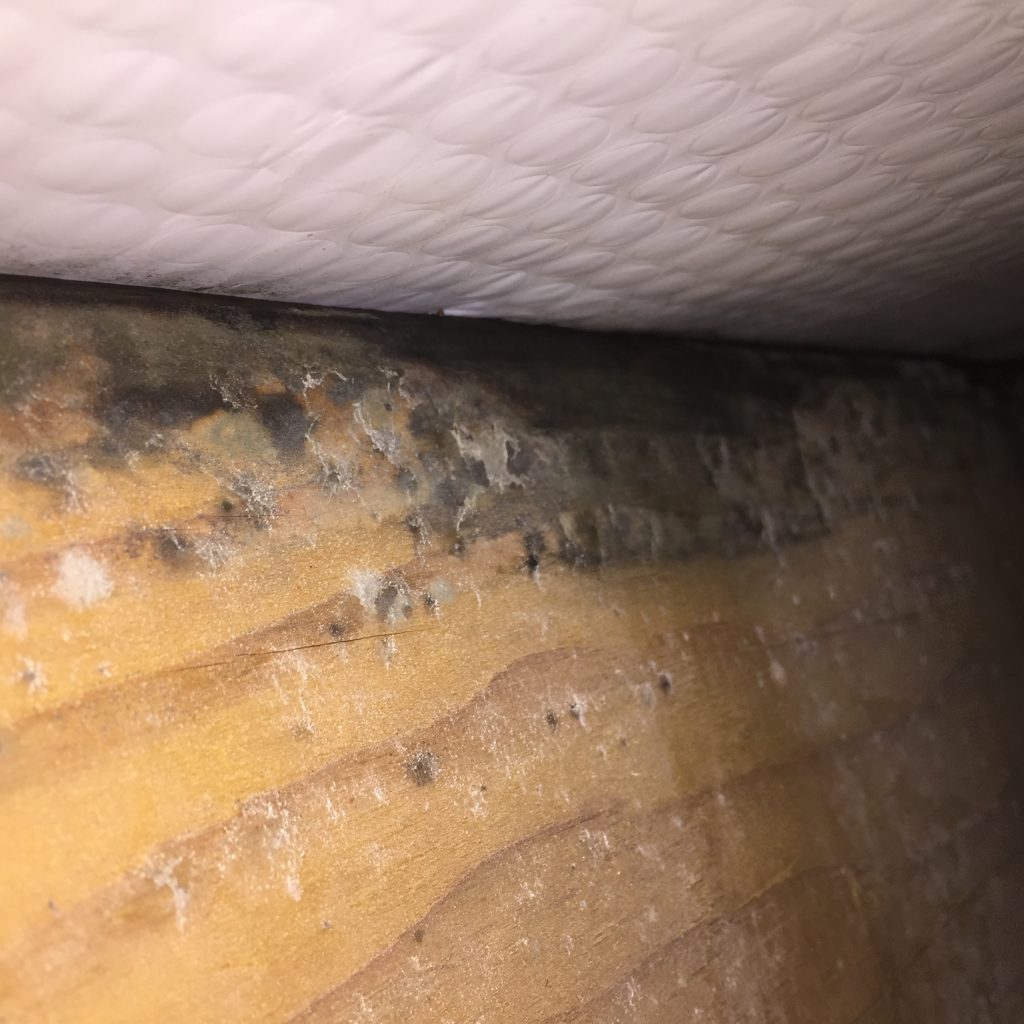
No wonder the writer can’t believe it actually worked is because it doesn’t!

Please, please, please…..never do attic remodeling like this to any pole (post frame) building! When it fails and people are injured or worse, I’d just as soon have had no involvement with it.

So, what is wrong with creating a livable space in an attic? After all, it is just wasted space otherwise.

Done right:

Step Number One would be to have contacted the Planning Department which has jurisdiction over the area where the building exists – to find out if Code will even allow such an attic remodeling space to be created. In most cases, the answer will be yes, however this is not the venue to go ahead first and ask for forgiveness later.

Step Number Two – we are talking about major structural changes here. A Registered Design Professional (RDP – engineer or architect) should be contracted with to design a structural solution which actually works….meaning it is safe for whoever uses the building!

There are so many problems with this particular “man cave”, where to begin in discussing them becomes almost daunting.

How about, “Never Cut A Truss!” I’ve written some about this in one of my Monday columns, “Ask the Pole Barn Guru”: https://www.hansenpolebuildings.com/blog/2014/08/truss-3/

Roof trusses which are designed to support the weight of a ceiling (gypsum wallboard and blown in insulation) could be designed for as little as five psf (pounds per square foot) of dead (permanent) load on the bottom chords. In most cases they are not designed to support ANY other loads.

Trusses can be designed for light weight storage loads, a 20 psf live load, but this would be an exception.

For habitable space within a truss, the minimum live load requirement is 30 psf – which makes it very possible the modified trusses in this article are being subjected to a load SIX TIMES what they were designed for, before they were cut!

Step Number Three – Fire Separation – If the attic remodeling or the access to this space pass through an area which was formerly garage, or are above the garage, adequate fire separation must be provided, which in most cases is going to be at least two layers of 5/8” Type X gypsum wallboard.

Step Number Four – In most jurisdictions, the steepest stairs within the limits of the Code will be a rise of 7-3/4 inches and a run of 10 inches, with a minimum width of three feet. At the top and bottom of the stairs, a landing must be provided which has a minimum dimension equal to the width of the stairs. (Learn more about stairs here: https://www.hansenpolebuildings.com/blog/2012/03/stairway/).

What has been created, by this building owner, is a structure which probably cannot be resold, as it has a non-Code conforming “room” which was constructed without a Building Permit!

Designing for a Bonus Room

One of the most asked for and least understood option for a pole building is designing for an attic “bonus room”. A bonus room is exactly what it sounds like – it is extra space, a “bonus”.

For sake of simplicity, let’s think about this in the realm of only a gable style roof. A gable roof has a slope on each side and the peak directly in the center. While we can engineer some very sophisticated areas, the idea here is to create some affordable space.

In order to maximize the usable space, it is best to go with the steepest possible roof slope. The limitation will be most prefabricated roof truss companies can only build and deliver trusses which have a 12’ overall height. This means the roof slope limitations are about 11/12 for 24’ wide buildings, 9/12 for 30’ wide, 7/12 for 36’ wide and 6.5/12 for 40’ wide. Clearspan widths of greater than 40’ are just not practical or affordable.

Now the fun parts! How wide and tall will this room be? The room width will be approximately ½ of the span of the truss. As the truss span increases, the room width will become slightly less than ½. How tall will it be? Plan on a 7’6” tall finished ceiling. Allowing for ¾” oriented strand board (osb) on the floor and 5/8” drywall, the framed height is usually 7’8”.

If you are drawing this out on paper, you will see a portion of this room is going to have a sloped ceiling. The areas towards the eave sides of this room become far too short to walk, or even crawl in.

How will this room be accessed? As you are now creating a building with a mixed occupancy – with garage/shop/storage below and living space above, the two areas must be separated by a one hour fire assembly. This will typically entail two layers of 5/8” Type X drywall on the ceiling of the lower level. Stairs require the same degree of fire protection, so often it is most practical to create a deck off one end of the building, with a door into the bonus room from the deck, and stairs to the deck.

If the floor level of the bonus room is over 12’ above grade, a landing will need to be provided in the run of stairs. The landing dimensions must be at least equal to the width of the stairs.

Prudent design would also place a window large enough for egress in the end of the bonus room opposite the stairs. A four foot square sliding or single hung window will be adequate for these purposes, and will afford ventilation.

With proper planning a bonus room can be a valuable addition to your property. As a general rule of thumb, the resale value of this created space is double the cost of the improvement!

Attic Access: Let me in!

Let me in…Let me in!

A fair number of pole buildings end up with enclosed attic spaces. An enclosed attic is one where the bottom chord (lowest horizontal or in the case of a vaulted ceiling – slightly sloping) has a ceiling attached or suspended from it.

In the event this is going to happen in your new pole building, access to this area may need to be provided.

I am personally experiencing this the hard way. One of the heating units for my pole barn is in the attic. It needs to be serviced next week, and guess what? Yep – the drywaller neglected to leave an access!

The International Residential and Building Codes address the need for general attic access and the International Mechanical Code expounds upon the requirements, if heating, cooling or other mechanical equipment is located in the attic space. Keep in mind the access rules in the building codes are minimums only; you can provide greater access if you wish.

Attic access is required to attic areas with more than 30 square feet in area (measured at the attic floor) and at least 30 inches high at their highest point.

The rough framed size of the attic access must be no smaller than 22 inches by 30 inches. There must be a minimum of 30 inches of headroom at some point above the attic access opening.

In addition to the general requirements for attic access, attics housing mechanical equipment must have an opening large enough to remove any equipment from the attic. The access opening also must be located no more than 20 feet from the mechanical equipment.

Any passageway leading to mechanical equipment in an attic must have solid flooring at least 24 inches wide, and solid flooring (at least 30 inches by 30 inches) must be provided where necessary to service the equipment. This requirement does not apply if the equipment can be fully serviced and removed through the attic access rough opening (i.e., without entering the attic).

Where there is mechanical equipment in an attic, the clear opening (i.e., the trimmed opening as opposed to the rough opening) must be at least 20 inches by 30 inches.

And moral of the story – it is far easier to create and finish the attic access hole at time of construction, than have to go back and do it after the fact.

Building Plans 101: Loft Storage or Bonus Room

Last week and up through today I have been talking about building plans, how to tell if they are “good ones” or not, before you buy your building.  Whoever you buy a pole building kit from should be able to show you a set of sample plans prior to you plunking down a huge chunk of change to purchase it.  The plans don’t have to be for your specific building.  If you are ordering a custom design, it takes manpower and dollars on their part to configure the design and draft them.  However, they should be able to at least give you an idea of what the plans pages entail for drawings and instructions of how to put it together.  Pole building kits are probably one of the easiest buildings to assemble, compared to all steel buildings or stick built.  But it’s amazing what some companies do to make it look like rocket science in the presentation of their pole barn plans.  It just doesn’t have to be “that hard”.

Plans should be specific, easy to understand and follow.  Obviously a set of plans will only show how to put in a loft, if the building is designed for loft storage of any kind.  If you don’t tell the company you are purchasing a pole building kit from you will “someday” be putting in a loft, your building will not be designed to support one.  Trying to “beef it up later” is just not smart thinking.  I’m sorry, but this is the cold hard reality: be sure to tell the vendor you are purchasing from exactly what you are doing with your building in the future, not just “now”.  Yes, you may never put in the loft storage space you dream of.  But the extra cost now may save you thousands of dollars later.

Or worse yet for those who sort of “ignore” the design loads for adding a loft “later” and think the trusses/roof support system can handle adding “attic space for a few boxes”….Do NOT go there.  I am serious.  Do you really want to risk having your building fall down on your new car, pickup or even worse, family members or friends, because you chose to inadequately design your building?  This is nothing to mess around with!  For a few dollars more you can, at a minimum, have the trusses designed to carry the load of your loft/attic/bonus room.

What you will see on your plan of your loft is exactly what I’ve alluded to here: loft loading values.  Your plans should clearly list the floor live load.  This value varies according to what you are putting up in the loft.  Discuss with your vendor if you are going to use the loft for a “bonus room” such as a room for the pool table, or to store hay, or just to throw a Christmas decoration boxes up there.

Stairs are also shown on the plans, with very code specific guidelines on what you can use for the handrails, guardrails and balusters, besides stair “rise and run”.  These may vary from one state to the next, and even between counties within a state, so it behooves you to ask your county ahead of time.  There are over 7,000 different building departments in the United States!  Although our company tries to keep up with all of them, including changes over time, it helps to have the client on the ball for every bit of county (or borough or city) specific information on lofts and stairs.

Click here to see a sample Lofts/Stairs layout: https://www.hansenpolebuildings.com/sample-plans.htm

What are elevation drawings and who needs them?  Come back tomorrow and find out!