Planning a Post Frame Building Upon Sandstone
Reader GEORGE in FARMINGTON writes:
“Mike, in the early stages of planning a pole barn 32’x48’x12′ on a newly acquired piece of property. We’ve cleared the land and found the area we want to erect the building is 100% sandstone. Everywhere we’d have to drill for poles is sandstone as the ground in-between so the sandstone would be the base for the slab as well. Drills real easy but I’m getting conflicting stories from concrete contractors regarding the slab. One says we should “de-couple” the pad from the sandstone by spreading a layer of crushed stone between the sandstone and the slab while another says we should drill into the sandstone and epoxy rebar verticals into it then tie that rebar into the slab rebar. Really don’t know how to proceed as both of these guys appear to be authoritative in their opinions. The de-couple guy claims the sandstone could “heave” the slab up and crack it whereas the other guy says by epoxying vertical rebar to the horizontal rebar, we’ll avoid any issues. Help!”
Mike the Pole Barn Guru responds:
Thank you for reaching out to me. I have never before been faced with building upon sandstone, so I will give you a logical answer and then advice as to what I would do personally.
In regards to our “de-couple” guy’s advice, if the sandstone would heave your slab up on its own, placing a layer of crushed stone between sandstone and slab seemingly would not prevent slab movement in a “heave event”. Rock types such as bedrock, limestone, sandstone, shale and hard chalk have high bearing capacities. These are very strong and good for supporting foundations because of their stability and depth. As long as sandstone is level your slab will be well supported. My question to him would be more of, “What could possibly cause such a heave event?”
From my research, it appears concrete adheres well to sandstone as long as lime is not added to concrete mixture. This seemingly precludes epoxying rebar verticals into it to tie them together.
Now – what I would do. I would search out a Geotechnical Engineer in your area and broach this situation to him or her. This way you get an expert opinion and it should be a reasonably priced solution.
 Perhaps stick built construction’s biggest advantage is builders and tradespeople are very comfortable working in and around stick framing. All registered architects and most building inspectors are very familiar with stick framing. International Residential Code (IRC) provides a prescriptive ‘cook book’ to follow for adequate structural assembly, within certain limitations. These limitations include, but are not limited to, no story height of greater than 11 feet 7 inches (R301.3), no hurricane prone areas with a design wind speed of 130 mph or greater located south of Virginia, or 140 mph elsewhere (R301.2(5)B), and no ground snow loads over 70 psf (R301.2.3).
 Starting with your door end (which I will assume is uphill), I would add enough fill so this end could have holes dug to 40″, filling balance of site accordingly. All fill should be compacted in no less than six-inch lifts to a minimum of 90% of Modified Proctor Density (you may need to invest in a Geotechnical Engineer to verify compaction).
 My own particular site was once shallow lake bottom – probably closest to silty clay. In order to build upon it, we removed several feet of native soil, then built the site up using roughly five feet of compactable fill, in lifts of no greater than six inches. Exterior was graded to slope away from the building for 10 or more feet at a 5% or greater grade. As the site has a natural grade from left rear to front right, we should have also added french drains along left sidewall and rear endwall to divert underground water flow (although we have not experienced challenges with this over nearly 20 years of service). We used glu-laminated columns, embedded in ground, with concrete bottom collars and have had no column deterioration or movement problems.
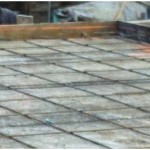 For slab reinforcement, necessary rebar can usually be obtained from a big box store (like The Home Depot®) or your local building supply. Should your specific application be more involved, it may behoove having a fabricator supply rebar. A fabrication supplier can review your building’s engineered drawings and produce a shop drawing with details and identifying tags for each type of rebar to be used in your building. For simpler projects, your building plans should provide spacing requirements and bar sizes. Use these documents to determine where and what rebar is needed in individual locations.
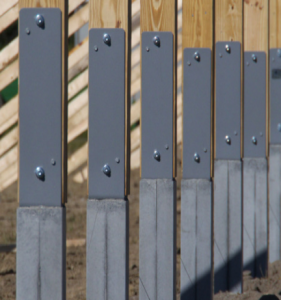
 My recommendation – invest in engineered plans. It becomes an assurance a registered design professional has verified your building will meet Code mandated loading requirements. In some cases, insurance companies offer discounts for buildings designed by an engineer. It’s certainly worth asking your agent for one!
 Your Building Department wants an engineered soils report for your site, not an unusual request in much of Colorado, as there are some fairly unstable soils. You will need to contact a Registered Professional Engineer in your area who specializes in geotechnical work (Google – Geotechnical Engineers near me). They will visit your site and do an analysis to determine if it is even capable of being built upon. With this report in hand you can then take this soils report and your proposed building plans to yet another RDP (Registered Design Professional – architect or engineer) who can prepare a set of sealed drawings for your building. “Truss report” being asked for are engineer sealed drawings for prefabricated trusses you will be utilizing to support your building’s roof. You will need to provide your RDP sealed plans to your choice of truss providers, so they can design trusses adequate to support loads detailed within your sealed plans.


