Tag Archives: bonus room

Attic Space, Cost Effective Size, and Column Sizing

This week the Pole barn Guru answers reader questions regarding a 6ft attic space over a 30×44 pole barn, the most “cost effective” method to build, and the point at which a post increased from a 6×6 to a 6×8.

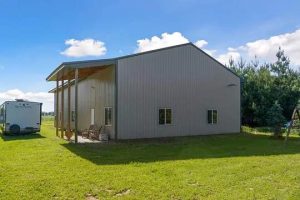
DEAR POLE BARN GURU: We want a decent-height (a bit over 6ft) attic space in our 30×44 pole barn (on a concrete slab foundation), can we use steel trusses or would wood trusses be a better option for this? The ground floor ceiling height is 8ft. Thnx for the help. RON in TONEY
DEAR RON: Lots of possible design solutions available. To begin with, I would recommend wood trusses – should you ever want to finish a ceiling, or if you want to have a product fabricated under strict quality control standards, then wood trusses are your best choice. On to options…. #1 My favorite. Make your building tall enough to have a full second floor. This will give you greatest usable space and best resale value. By using prefabricated wood floor trusses, you can still have a clearspan floor (no posts below) and it provides an unencumbered space below without columns to dodge. Yes, it will be a greater investment, but one you will probably never regret. #2 Prefab wood ‘bonus room’ trusses. With a steep enough slope (roughly 8/12) you can end up with an eight foot ceiling height at center and a room roughly 10-12 feet in width. For amount of space being gained, this is a fairly costly design solution. #3 Increase sidewall height and use scissor trusses to allow for a central mezzanine supported by columns. While likely to be your least expensive design solution, you will be faced with columns below (unless opting to again add in floor trusses.


DEAR POLE BARN GURU: What is the most cost efficient size to build (Can I save money by buying a specific width/ length/ height?) What are the pros and cons of choosing metal frame or post frame? Is it still true that you can add square footage more affordably by building up (adding a second floor)? Can you put a basement under a Barn House? ANNIE in FORT LUPTON
DEAR ANNIE: As you get closest to square, your costs per square foot will decrease slightly. This is due to having less exterior wall surface, although it does not necessarily lend itself best to layout of rooms. For post frame construction, your most efficient use of materials typically comes from multiples of 12 feet in width and length. Work from inside out – do not try to fit your wants and needs within a pre-ordained box just because someone said using a “standard” size might be cheaper. Differences in dimensions from “standard” are pennies per square foot, not dollars. Post frame will always be your most cost effective structural design solution: https://hansenpolebuildings.com/2022/01/why-your-new-barndominium-should-be-post-frame/ Two story is not necessarily your least expensive design solution: https://www.hansenpolebuildings.com/2020/02/barndominium-one-story-or-two/ And yes, fully engineered post frame buildings can include a full, partial or walk-out basement: https://www.hansenpolebuildings.com/2020/02/barndominium-on-a-daylight-basement/


DEAR POLE BARN GURU: At what point do the post size change from 6×6 to 8×8, thanks. JEFF in SOUTH HAVEN
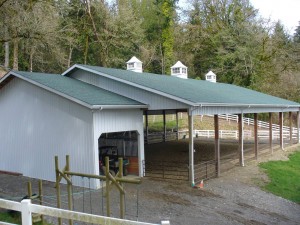
Roof Only Riding ArenaDEAR JEFF: If erecting a roof only “pavilion” style post frame building, column dimensions are often dictated by L/d ratio as there is no wind load on totally open sidewalls. “L” is unsupported length of column (grade or top of concrete slab to bottom of truss connection), divided by least dimension of column. Playing a part in this is a factor known as Ke. Ke is determined by fixity of columns. On a roof only structure, columns act as cantilevers (think of a diving board), so Ke = 2.1. Looking at your 5-1/2″ square 6×6, 5.5″ x 50 / 2.1 = 130.95″ (or just under 10’11”). This means at an unsupported length of 11 feet, a 6×6 would fail. Obviously, truss span, spacing, and loads from dead, wind and any snow must be properly factored into equations to be verified by your building’s engineer. Adding an eave sidewall (or sidewalls) with open endwalls will cause bending forces to fail most 6×6 columns at lesser heights.

When Concrete Contractors Try to Act Like Engineers

Reader JEFFREY in CHARLOTTE writes:

“I want to build a woodworking shop next to my driveway that drops off sharply. I don’t have the space to add fill and slope away as it would put me over the setback on the neighbor’s property line. Local concrete contractor suggested a pole barn style would work best. He suggested I sink posts at the lower grade level 4′ deep at 4′ intervals and then add tongue and groove boards to essentially create a box that I could then backfill with gravel/sand compacting in 4″ lifts. Once that was done and the building was up then I could pour a slab on top of that inside the building. I estimate the grade difference to be roughly 4′ from the driveway to the lowest point where the back wall of the building would be. My building size would be 24′ long and 22′ wide and I want an upper gable room for storage. I would like to be able to stand up inside the “attic”. What do you think of this proposal? To have foundations and poured walls put in would put me way out of my budget.”

This is why concrete contractors are not allowed to engineer buildings (unless they have actually gone to school, passed their boards and gotten registered). As suggested, a large load is going to be placed upon your building’s columns along this wall, resulting possibly in larger columns, greater embedment depth and more concrete around columns. Throw in what you will invest in two sets of four foot high UC-4B pressure preservative treated tongue and groove lumber and you are talking some serious money.
I am always into looking for simple and affordable solutions. To me, building a concrete block retaining wall along my property line would seemingly be an excellent alternative and would not involve having to pay an engineer to design it. You could then bring in compactable fill to get to level and happily build away.

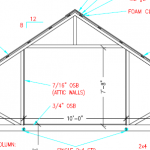
As far as your attic “storage” idea, be wary. By Building Code, light storage areas need to be designed for a 125 psf (pounds per square foot) live load. Even on a 22 foot truss span, these trusses are going to be expensive. Now you could designate this as a ‘bonus room’ and provided your Building Department buys into it, you could have a much lower live load (as little as 30 psf). You would need to remain mindful of what you were actually placing in this area, so as not to overload it and cause an unintended failure.
You will also have to deal with access. While pull down stairs are convenient they provide a very limited opening to get things into this bonus room space. Permanent stairs must be at least three feet in width and meet maximum rise and minimum run standards as well as headroom and clear space at top and bottom of run considerations. When all is said and done, they would chew up a lot of your woodworking space.

Post Frame Homes

Post Frame Homes – Coming Soon to a Neighborhood Near You

After providing or building post frame (pole) buildings for over 40 years, one might think there would be very few things coming as a surprise to me.

Well…..SURPRISE!

Barndominiums and shop houses are no surprise to me at all. I first built one for myself in Northwest Washington State more than 25 years ago (although I suppose we could dial this back to even 1990). This ‘dial back’ was on steeply sloping property where my grandparents had their lake cabin (previously having belonged to my maternal grandfather’s parents since 1937). An aging two-car Model T garage set on cedar posts was showing not only signs of age, but was dimensionally impractical for modern sized vehicles.

My solution then was to tear the old garage down to its elevated floor, build a new post frame building around it, then drop the old floor out. Being as this new, larger footprint (22’ x 24’) garage was on 4 feet of grade change, I was able to construct a 16’ x 22’ studio apartment below it and by using bonus room attic trusses (and a spiral staircase in one corner) was able to have a 10’ x 24’ office space above!

Both of these buildings were on a 60’ x 225’ lot, in the midst of dwellings on both sides. Being as we were located in a forest, it didn’t feel like we had homes right on top of our neighbors.

Now, back to our photo….

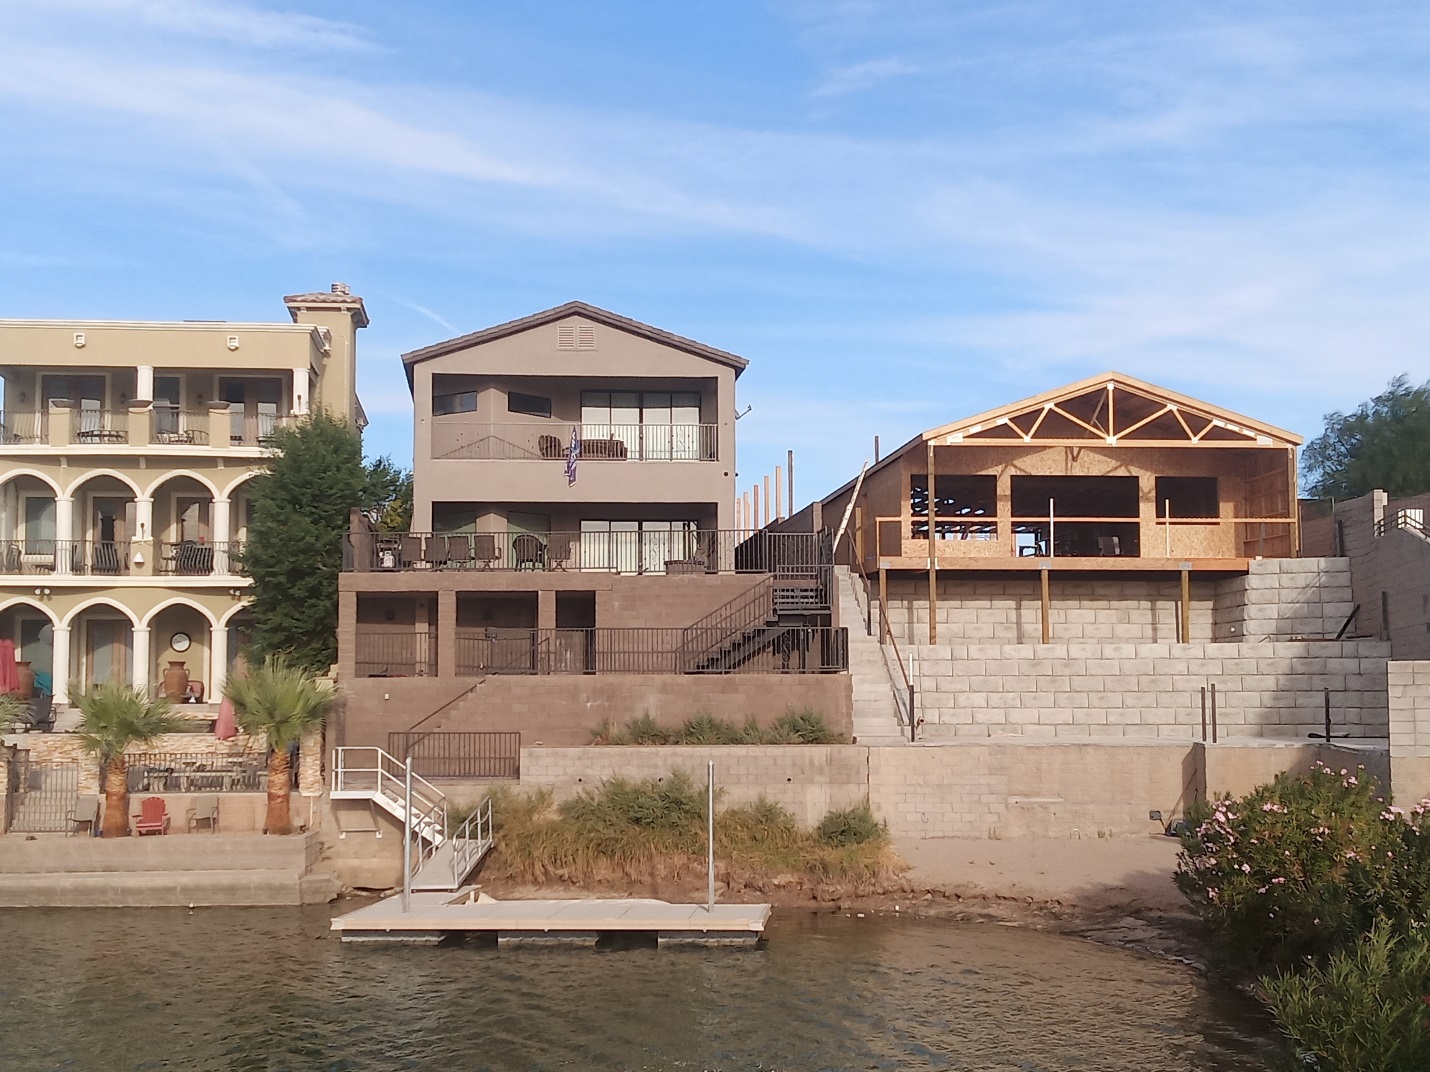
When our client approached us about a post frame home on Lake Havasu, I really didn’t envision it being located tight amongst other homes. Most of our barndominium clients enjoy open space where they can avoid bumping elbows with their neighbors. It wasn’t until this particular client forwarded to us progress photos of their build when I had an ah-ha moment!

This client is building in a neighborhood!

Our client is providing their own tile roofing and applying stucco to their building’s exterior. When all is said and done, no one will be wiser to this being a post frame home, unless they happened to watch it being built.

While post frame barndominiums are renowned for their flexibility of design, I can see some astute building contractors realizing foundation cost savings and speed of erection making for a practical solution for most any neighborhood.

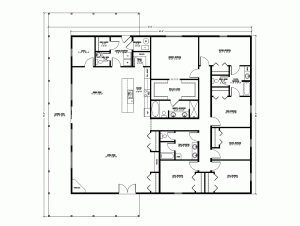
Is This Floor Plan Doable as a Post Frame Barndominium Kit?

Is This Floor Plan Doable as a Post Frame Barndominium Kit?

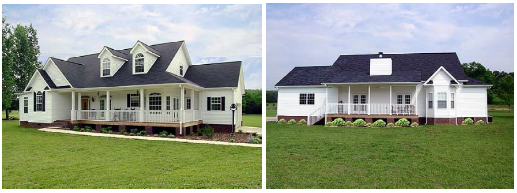
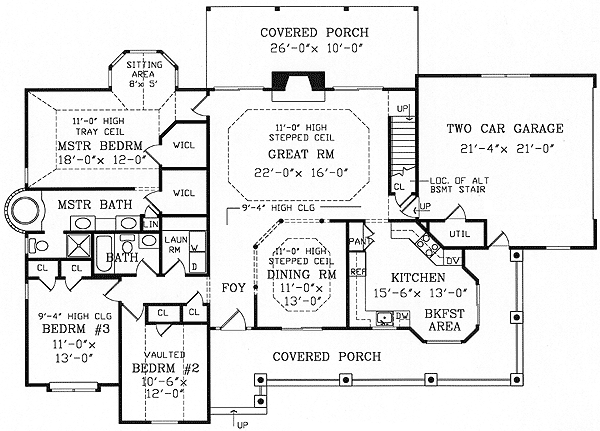
This question was posed by Reader TIFFANY in HOPKINSVILLE. My answer is yes. Whether an existing floor plan or a custom design – virtually anything you can imagine, can be converted to a post frame barndominium kit, provided it is possible to do structurally at all!

When it comes down to it, your only limitations are – your imagination, budget and available space.

Here is an online description of this build:

“This design is of another stunning ranch-farmhouse which brings back a beautiful era. Country-style living is now becoming a trend all over America and there are many reasons why. Sometimes, a peaceful living space is all it takes for one to get a complete lifestyle makeover. The busy city can take a huge toll on one’s health, be it mentally or physically. It’s very hard to relax when you hear the loud honking of cars outside, parties in the next room and a ton of workload. Wouldn’t it be nice to move into a peaceful house where none of those things exist? This beautiful traditional ranch-farmhouse could be your dreamhouse.

A wrap-around porch and a steep roofline is among the many beautiful elements that this house has to offer. Having a traditional ranch-farmhouse for home doesn’t mean you’re going to totally eliminate any sense of modernity. The facade of this house can be tweaked and redecorated to perfectly suit the family. A family of around 5 members can freely occupy the three spacious bedrooms in this layout. Palladian head windows and doors are installed on the walls to provide the house natural sunlight.

A large attic could be utilized as a storage room or a man-cave for hobbyist dads. It can also be turned into another bedroom for new members of the household. The space on the upper level is vast and ideal for any purpose.”


Stats: 1,793 sq. ft., 3 bedrooms, 2 baths, 2 car garage.”

I am a great believer in homes being custom crafted to best meet the wants, needs and budget of those who will live in it, as well as being tailored to best fit upon one’s property. With this said, I fear no canned plan is going to meet this.

In my humble opinion there are some less than ideal features in this plan. These would include:

Lack of accessible features – all doors should be three feet wide, hallways four feet. A step down to a dining room means those 10% of Americans who will be confined to a wheelchair at some point in their life will not be able to eat with everyone else. It is also a trip hazard, especially for guests. Sunken living or dining rooms were possible in he 90’’s but have mostly gone out of vogue. There is no accessible bathroom or roll in shower.

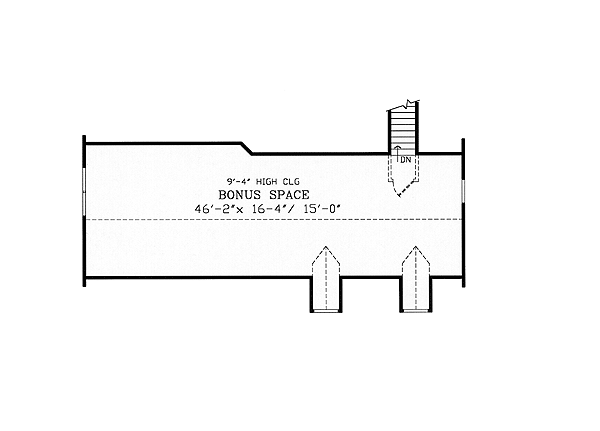
Upstairs bonus room – bonus rooms are not free space by any means. Nor are they accessible. Try to get anything of size around a corner and up those stairs would prove impossible.  Dormers might be cute, however they do come with a premium price and are not adding to usable floor space.

My kitchen is my domain and I would feel shut in with this design. I would do away with the kitchen eating area and open up it and the dining room to create a big open space along with the current great room. Pantry barely big enough to be a small closet – give me a space I can get a second refrigerator and an upright freezer in. Those additional storage areas are priceless.

A design for secondary bedrooms including walk-in closets would be preferable.

Laundry location is going to make for a lot of steps to the master suite. Sitting area looks cute in plans, but how many of us are seriously going to utilize this space? Rarely do those garden tubs ever get used, ditch it for a tiled open shower with a rain head (and roll-in wheelchair accessibility). Soaking tubs or jetted tubs are also very popular.

What about this two car garage would work for anything but two cars? Most of us have stuff (bikes, work benches, golf clubs, ski gear and many more) and “stuff” needs a place.

Barndominium Airplane Hangars and More

I really suppose it is unfair of me to limit this article to just airplane hangars, as I have had instances to design hangars for helicopters as well.

As an elementary school student, my pre-teen friends and I were all very impressed when a girl down our street’s father landed his helicopter in a field behind their house. We made certain to keep this area free from weeds, so he could land more often!

When I was a post frame building contractor, we were approached by a gentleman who lived in a very exclusive neighborhood a few miles north of our office in Millwood, Washington. His idea was to land his helicopter in his driveway and roll it away into its own post frame hangar to be attached to his home. Somehow his neighbors were not overly enamored of this idea and sadly mounted successful efforts to see his idea did not come to fruition.

A project actually coming together as it should have was a barndominium/hangar just outside of Las Vegas. When most think of how difficult it could be to acquire a Building Permit in Clark County, Nevada, they turn tail and run. Either I was not smart enough, or was too stubborn, to realize it could be a challenge and happily dove right in.

Our client wanted to combine living and flying. Moreover, he wanted to live above his hangar. This would be no simple accomplishment, as he required a 42 foot clearspan width to allow for his hangar door as well as to provide enough wall each side of this door to prevent racking due to wind shear. Our client’s original idea was an attic truss, one giving a bonus room at center. This proved to be too limiting as he would end up with only a long and narrow room at the middle of his second floor.
Instead, we designed for a solution using 42 inch deep parallel chord floor trusses and placed a second floor on top of this system. Post frame to his rescue!

Looking to live where you fly? Or fly from where you live? Give Hansen Pole Buildings a call today 1(866)200-9657.

Airplane Hanger

Interested in more light reading on hangars? Go to www.HansenPoleBuildings.com – navigate to SEARCH at upper right and click on it. Type HANGAR in this search box and ENTER. Magically you will be treated to numerous relevant articles on hangars for your reading enjoyment. You can do this with any term, try BARNDOMINIUM for instance.

Solutions! The Key to a Successful Post Frame Building

Solutions! The Key to a Successful Post Frame Building

When one considers the tremendous number of individual components and the thousands of people who touch these pieces from concept to jobsite, it is amazing anything ever gets built!
I ran some numbers once – tracked the rough path of all of the parts for a small post frame garage. As best I could tell, in excess of 4,000 people were in some way responsible for getting those pieces successfully to the client.

The true mark of a construction project success is not in everything going perfect.
Success is measured in how the things which did not go perfect got solved.
Here is a real life scenario…..

A client invests in a new post frame building which has “attic” trusses. These would also be described as “bonus room” trusses. The client also ordered a pair of windows for this same building.

As is true in most of life – communication breakdown is what creates most challenges. There is a passing chance the client and his Building Designer discussed where these windows were to be located in his new post frame building. As the great majority of clients know they want windows, however are unsure of exactly where they will be placed on the finished building, we went with them being “field located”. The purchase order and invoice for the building did not specify a window location.
Therein begins the breakdown. Client wanted a window in the center of each end of the bonus room.

Plans are produced and approved by the client, which did not show the windows located in the center of each end of the bonus room. The client, admittedly, was not overly skilled at reviewing plans, and as such did not notice there was no provision on the plans for the windows to be located where he truly wanted them.

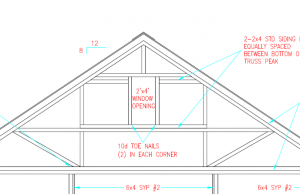
Now this particular structure, like most Hansen Pole Buildings, has a prefabricated roof truss on each end of the building. The saving grace – the end trusses are notched into the columns by 1-1/2 inches and flatwise 2x framing is placed on the face of the truss, in the field, to allow for the attachment of the endwall steel.

Here is a solution, utilizing the siding backing to frame in the window:

“The portion of the window inside of the flange is approximately 1-7/8″ thick (the balance of the window thickness is incorporated in the flange and integrated J Channel of the window itself). As the framing on the face of the truss is 1-1/2″ thick, it will entail having to place some 3/8″ thick shims somewhere in the assembly. I would suggest putting them between the members which will surround the window, and any nearby end truss members which support the underlying framing. This will create a gentle curve in the window supporting framing members, which the steel will easily follow and be imperceptible to the eye from the ground.”

The real keys to success – first, make sure everything which is important to you about your new post frame building is spelled out clearly in the ordering documents. Do not leave anything to chance, or chances are it will pose a later challenge.

Second, and most important, invest in a post frame building kit package from people who have actually built post frame buildings and who have been involved in enough projects to be able to come up with solutions to challenges which work!

Insulating an Attic Bonus Room

Attic bonus rooms seem to be the rage – Hansen Pole Buildings does more than a few of these and the trend seems to be increasing in popularity. With this comes how to properly insulate an attic bonus room.

There are more than a few challenges when it comes to utilization of attic space for a bonus room. Highest amongst them are the space is neither free nor inexpensive. The lack of accessibility becomes another factor. At our home outside of Spokane, Washington, my lovely bride and I have our office in a bonus room above our garage. Now a paraplegic, due to her motorcycle accident in 2015, my wife will probably never be able to access our office there again. Our offices have moved to a handicapped accessible space in our home, and the attic space now becomes a catch all for overflow of what I endearingly call “stuff”.
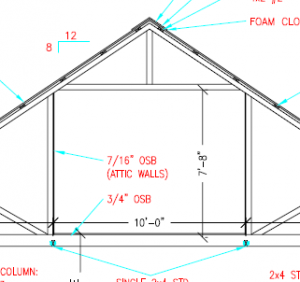
With all of this said, there are still going to be clients looking at attic bonus rooms as a design solution. In an earlier article, I had written about how to insulate the knee walls of bonus rooms: https://www.hansenpolebuildings.com/2013/09/bonus-room-3/.

There are other attic bonus room areas which need to have attention paid to them, however.

Enter closed cell spray foam (read more about spray foam insulation here: https://www.hansenpolebuildings.com/2016/07/advantages-spray-foam-over-batt-insulation/).

There are two perfect areas of the attic bonus room which are ideal for closed cell spray foam as a solution.

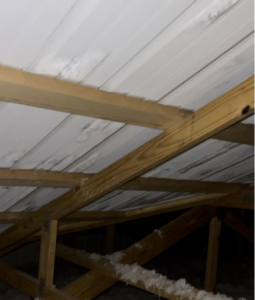
The most important of these is any sloped area which has become part of the bonus room. As heat rises, it is most likely to escape through the narrow areas of the slope, or the edges of the area above the “cross tie” (the flat ceiling at the center of the bonus room). At R-7 per inch, a 2×6 truss top chord can be filled to R-38.5 with closed cell spray foam, as opposed to R-19 with fiberglass batts!

Bonus room floors can also be cold. Often attic bonus rooms (such as my own) are above unheated garage or storage space. By utilizing spray foam directly to the underside of the floor sheathing, cold floors can be minimized.

In any case, be sure to provide adequate ventilation in any enclosed attic spaces. These would include the area above the cross tie and the spaces outside of the knee walls.

Building Plans 101: Loft Storage or Bonus Room

Last week and up through today I have been talking about building plans, how to tell if they are “good ones” or not, before you buy your building.  Whoever you buy a pole building kit from should be able to show you a set of sample plans prior to you plunking down a huge chunk of change to purchase it.  The plans don’t have to be for your specific building.  If you are ordering a custom design, it takes manpower and dollars on their part to configure the design and draft them.  However, they should be able to at least give you an idea of what the plans pages entail for drawings and instructions of how to put it together.  Pole building kits are probably one of the easiest buildings to assemble, compared to all steel buildings or stick built.  But it’s amazing what some companies do to make it look like rocket science in the presentation of their pole barn plans.  It just doesn’t have to be “that hard”.

Plans should be specific, easy to understand and follow.  Obviously a set of plans will only show how to put in a loft, if the building is designed for loft storage of any kind.  If you don’t tell the company you are purchasing a pole building kit from you will “someday” be putting in a loft, your building will not be designed to support one.  Trying to “beef it up later” is just not smart thinking.  I’m sorry, but this is the cold hard reality: be sure to tell the vendor you are purchasing from exactly what you are doing with your building in the future, not just “now”.  Yes, you may never put in the loft storage space you dream of.  But the extra cost now may save you thousands of dollars later.

Or worse yet for those who sort of “ignore” the design loads for adding a loft “later” and think the trusses/roof support system can handle adding “attic space for a few boxes”….Do NOT go there.  I am serious.  Do you really want to risk having your building fall down on your new car, pickup or even worse, family members or friends, because you chose to inadequately design your building?  This is nothing to mess around with!  For a few dollars more you can, at a minimum, have the trusses designed to carry the load of your loft/attic/bonus room.

What you will see on your plan of your loft is exactly what I’ve alluded to here: loft loading values.  Your plans should clearly list the floor live load.  This value varies according to what you are putting up in the loft.  Discuss with your vendor if you are going to use the loft for a “bonus room” such as a room for the pool table, or to store hay, or just to throw a Christmas decoration boxes up there.

Stairs are also shown on the plans, with very code specific guidelines on what you can use for the handrails, guardrails and balusters, besides stair “rise and run”.  These may vary from one state to the next, and even between counties within a state, so it behooves you to ask your county ahead of time.  There are over 7,000 different building departments in the United States!  Although our company tries to keep up with all of them, including changes over time, it helps to have the client on the ball for every bit of county (or borough or city) specific information on lofts and stairs.

Click here to see a sample Lofts/Stairs layout: https://www.hansenpolebuildings.com/sample-plans.htm

What are elevation drawings and who needs them?  Come back tomorrow and find out!