Do Screws Back Out of Steel Roofing?
I had a question posed of me recently which included: “Where will the water go when the screws back out of my steel roofing”? While I answered the question at hand, I didn’t actually get into the why this might happen, or the solutions.
How to avoid the potential problem completely……use the right part, properly installed and driven into the correct material. Three easy steps, should not be so difficult.
The part – most commonly used screws are a #9 diameter by one inch long. When we tested steel roofing to determine sheer strength these screws pulled out of the framing under a minimal load (so minimal the steel didn’t even have ripples in it from the applied load). You can read more about our testing here: https://www.hansenpolebuildings.com/2012/08/this-is-a-test-steel-strength/.
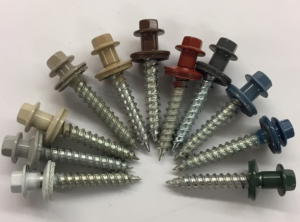 Going to a longer part solved the pull out issues in our testing. We also went to a larger diameter part in our testing, the shank below the screw heading being ¼ inch across, while the threads are a #12. The larger diameter screws also have deeper threads, which means they bite and grip the wood more tightly.
Proper installation – screws which are over or under driven, or driven at an angle are prone to a myriad of problems, all which end in leaks. Over driven screws tend to damage the wood fibers, leaving little solid material to hold the screw. Use a screw gun with a clutch, so screws do not get over driven.
Driving into the right material– what could go wrong? I see folks using OSB or plywood sheathing under roof steel with the idea they can drive the screws into the sheeting and still hold, even when the screw tip misses a purlin. These screws will come back out.
Green lumber (or dried lumber which has been allowed to get wet) will cause screws to be loose as the moisture leaves the lumber once the building is dried inside. Of course green lumber has a myriad of other challenges which can be read about here: https://www.hansenpolebuildings.com/2011/09/499green-lumber-vs-dry-lumber/.
Right part, right screw, right material below – drop the mic and walk off the stage. Three easy steps for proper screw installation and keeping leaks from happening.
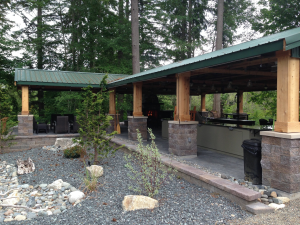 DEAR POLE BARN GURU: Hello again Mike, Our Southern MN town is planning to add an open- air pavilion to a city park and the talk is a heavy-duty concrete pad that would have embedded attachment for the support posts for the roof (presumably steel). The thinking is for a post beam type spec about 30×48 in a park that does NOT have any open lanes for wind. It seems to me the Hansen type of post installation with concrete below and around the post that both supports the weight and serves as anti-lift makes economical sense by requiring less forming and pre-mix costs. PLUS, a certified design that accounts for MN snow and prairie wind exposure would be prudent. (I am assuming your engineers will adapt the construction design to not having metal walls transfer roof loads to the ground.) I will also be recommending to the city to consider adding a partial enclosed area for restrooms and winter warming house for the nearby ice rink that goes over basketball and pickle-ball courts. Thanks for any suggestions or examples you have. BRIAN in LE ROY
  DEAR POLE BARN GURU: Okay… two things. In my quest to find what’s correct, hearing it both ways: live in Iowa. It’s both: cold in the winter, hot in the summer, humidity fluctuates. In my 12×40 addition on my 40×40 pole barn it rains inside daytime in the winter. Because the sun heats the steel. I want to Insulate (rockwool) the 40×40 and heat it: (forced air through water/air radiator, outdoor wood fueled boiler) According to most I put a vapor barrier internally. OK, but the sun is still going to heat the steel and cause moisture in the insulation is it not?? So should the vapor barrier be on the outside?? Secondly: yeah, this house. I hate it. Built in ’76 the old man put sheet plastic over the fiberglass insulation already a vapor barrier. The few places I’ve had to remove drywall I’ve found mold on the back of the drywall. JEFFERY in BLOCKTON
 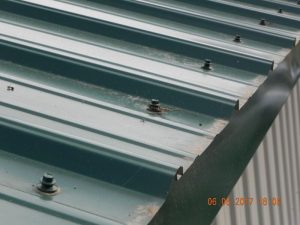 DEAR POLE BARN GURU: My pole barn roof installer missed the purlins with about a third of the screws. His fix was redrive the screws at an angle to catch the purlins and smear some caulk in each screw. I’m pursuing some genuine relief. I’m now concerned the metal seals on each of these angled screws has permanently deformed the roof steel under and around each of these angled seals so that not even a properly straight driven screw will seal in each of these locations. How legitimate is my concern? BOBBY in LINCOLN
 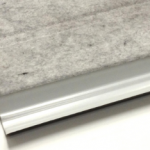 Thank you for your kind words, they are much appreciated. Provided your client will not be doing closed cell spray foam on walls, use house wrap between girts and wall steel. For his roof, housewrap is totally incorrect, as it allows moisture to pass through and become trapped between wrap and roof steel – potentially causing premature degradation. If your client is not closed cell spray foaming directly to roof steel, then order your roof metal with an Integral Condensation Control factory applied (Dripstop, Condenstop or similar)
  DEAR POLE BARN GURU: Hi Mike, I built a 32’X40’X12′ pole building, (Shop) I used 1 1/2″ foam board on the inside walls, (on the inside of the girts) I can’t decide how I should insulate the underside of the roof. I have had a couple Spray Foam guy’s quote it , that’s pricy. Of course, the best R Value etc. at the most reasonable price is what I am looking for. In some of your post you have mentioned Rockwool that has gotten my attention. I see they make it up to R30. One thing that sticks in my mind is, my builder suggested not to use an insulation that will give insects a place to live. What would be your suggestion for underside of Roof insulation. Thank you. JIM in SPRING HILL
 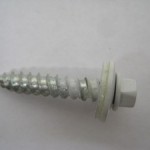 DEAR POLE BARN GURU: What screw is best for installing metal panels on the ceiling to wood trusses. MICHAEL in WENTZVILLE
  DEAR POLE BARN GURU:
 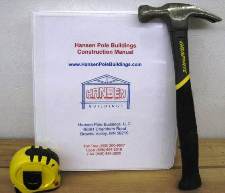 DEAR JEREMY: From Page 24 of Hansen Pole Buildings’ Construction Manual:
 DEAR AMANDA: While your new garage will be designed for an average physically capable person who can and will read instructions to successfully construct your own beautiful buildings (and many of our clients do DIY). Your building will come with full 24” x 36” structural blueprints detailing the location and attachment of every piece (suitable for obtaining Building Permits), a 500 page fully illustrated step-by-step installation manual, as well as unlimited technical support from people who have actually built buildings. For those without the time or inclination, we have an extensive independent Builder Network covering the contiguous 48 states. We can assist you in getting erection labor pricing as well as introducing you to potential builders. However they may not necessarily be local to you as many builders enjoy the variety of travel. Please keep in mind, many builders are already booked out until 2022 and 2023.
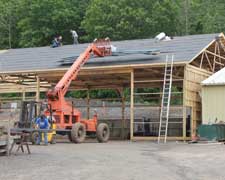 DEAR MARY: Most of our buildings have steel roofing (although any roofing type can be used – shingles, tile, etc.). We recommend using some method of controlling possible condensation on underside of steel roofing – either a Reflective Radiant Barrier (
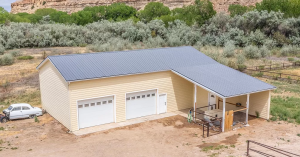 DEAR RICHARD: Comments/reviews posted on The Home Depot® website for our buildings are literally nothing short of hilarious. Obviously these are not from verified purchasers of our engineered post frame buildings kits. All lumber needed for this and any of our buildings is sawn to size. Dimensional lumber has been planed (surfaced), dried to 19% moisture content or less and grade stamped to verify adequacy for structural usage.
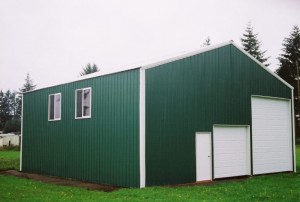 DEAR POLE BARN GURU:


