Do Screws Back Out of Steel Roofing?
I had a question posed of me recently which included: “Where will the water go when the screws back out of my steel roofing”? While I answered the question at hand, I didn’t actually get into the why this might happen, or the solutions.
How to avoid the potential problem completely……use the right part, properly installed and driven into the correct material. Three easy steps, should not be so difficult.
The part – most commonly used screws are a #9 diameter by one inch long. When we tested steel roofing to determine sheer strength these screws pulled out of the framing under a minimal load (so minimal the steel didn’t even have ripples in it from the applied load). You can read more about our testing here: https://www.hansenpolebuildings.com/2012/08/this-is-a-test-steel-strength/.
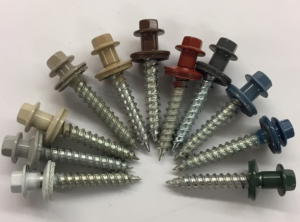 Going to a longer part solved the pull out issues in our testing. We also went to a larger diameter part in our testing, the shank below the screw heading being ¼ inch across, while the threads are a #12. The larger diameter screws also have deeper threads, which means they bite and grip the wood more tightly.
Proper installation – screws which are over or under driven, or driven at an angle are prone to a myriad of problems, all which end in leaks. Over driven screws tend to damage the wood fibers, leaving little solid material to hold the screw. Use a screw gun with a clutch, so screws do not get over driven.
Driving into the right material– what could go wrong? I see folks using OSB or plywood sheathing under roof steel with the idea they can drive the screws into the sheeting and still hold, even when the screw tip misses a purlin. These screws will come back out.
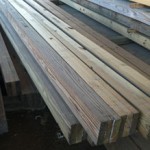
Green lumber (or dried lumber which has been allowed to get wet) will cause screws to be loose as the moisture leaves the lumber once the building is dried inside. Of course green lumber has a myriad of other challenges which can be read about here: https://www.hansenpolebuildings.com/2011/09/499green-lumber-vs-dry-lumber/.
Right part, right screw, right material below – drop the mic and walk off the stage. Three easy steps for proper screw installation and keeping leaks from happening.
 Anyhow, back on point, there were an incredible number of people totally willing to undertake erection of their own pole barns. Even more amazing is – any of them turned out! We provided absolutely no instructions and “plans” (I use this term lightly) were drawn by hand on a few sheets of 8-1/2” x 11” white copy paper.
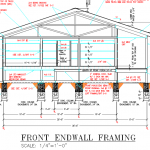
 Your new building investment includes full multi-page 24” x 36” engineer sealed structural blueprints detailing locations and attachments of every piece (as well as suitable for obtaining Building Permits), the industry’s best, fully illustrated, step-by-step installation manual, and unlimited technical support from people who have actually built post frame buildings. Even better – it includes our industry leading Limited Lifetime Structural warranty!
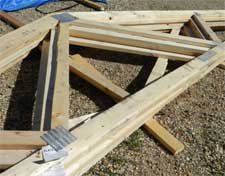 If this wasn’t a sexy use of technology, then I don’t know what would be.
 The lower price of green lumber, in relationship to dry lumber, is negated by the often 15-20% of pieces which cannot be used as originally intended.
 to be more a case of consumers having either had personally, or second hand, an unsatisfactory experience with a lumber species other than what they are requesting. Usually this has nothing to do with the material itself, but is more a function of how the materials were handled or stored on the jobsite, than any other factor.