Bracing Site-Built Trusses For Lateral Loads
Reader in SHINER writes:
“I am building a gambrel style barn, 30×80, in two directions, in plan view, it looks like a cross. I am building the trusses based on an LSU publication, giving sizes of structural members, etc… I have built several structures before, not a gambrel style barn though. My Question, Guru, how do I brace the trusses for lateral/wind/racking/diagonal loads? I want to do an exposed ceiling of 2×10’s T&G, and am worried about how to brace the trusses so they don’t fold over like a deck of cards during and after construction. Surely the nails don’t provide all the lateral bracing? I’ve seen too many leaning barns over the years to know that nails alone don’t provide sufficient wind load protections. How are the trusses braced, one to the next, so they don’t fold/roll over? Your help is so appreciated, Thank you.”
Mike the Pole Barn Guru writes:
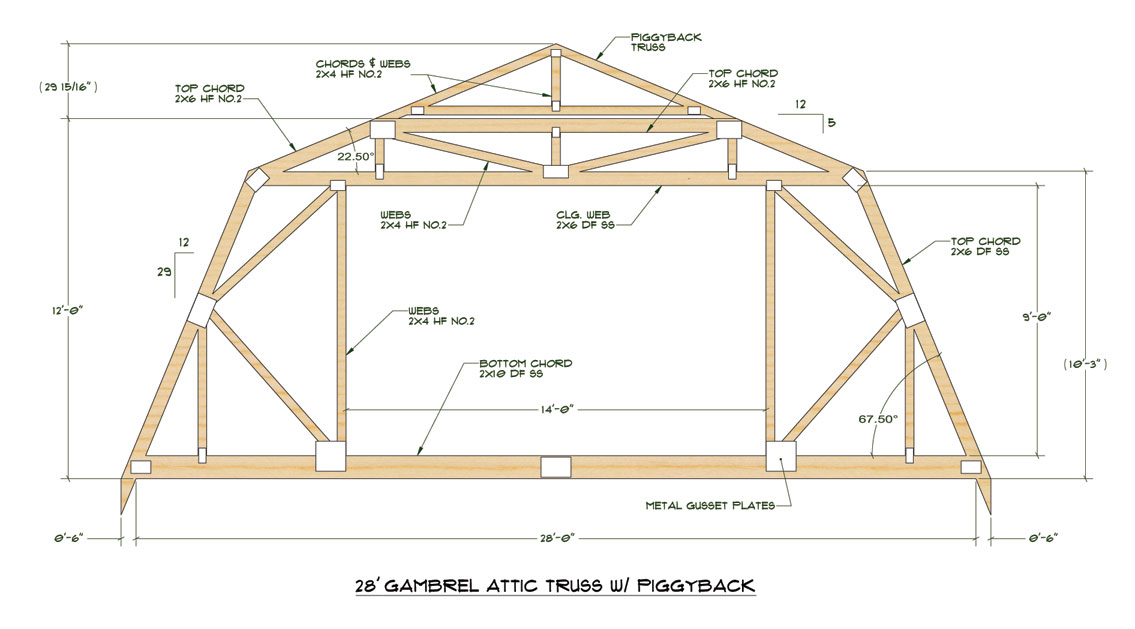
Even with my decades of truss industry experience, I wouldn’t begin to think of field constructing 30-foot span gambrel trusses.
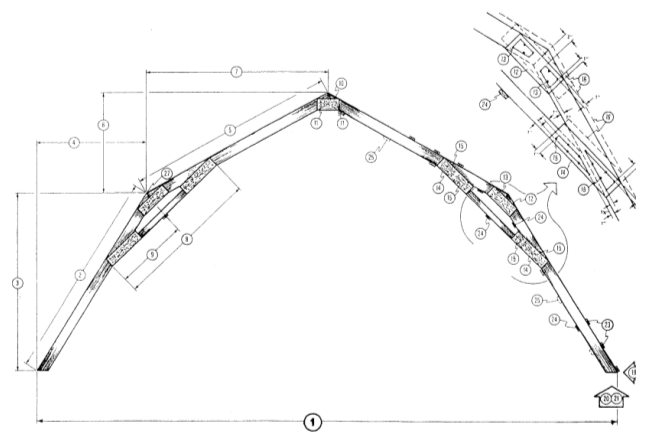
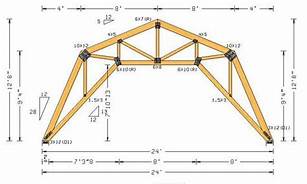
I did review LSU’s “truss” design (these are actually rafters not trusses), it is from 1988 and includes this disclaimer:
“This site makes available conceptual plans that can be helpful in developing building layouts and selecting equipment for various agricultural applications. These plans do not necessarily represent the most current technology or construction codes. They are not construction plans and do not replace the need for competent design assistance in developing safe, legal and well-functioning agricultural building system. The LSU Agriculture Center, the Mid-West Plan Service, the United States Department of Agriculture and none of the cooperating land-grant universities warranty these plans.”
Several problems – no design roof or wind loads are incorporated in their design and design values for Southern Pine lumber were down graded as much as 30% in 2012 https://www.hansenpolebuildings.com/2012/06/southern-pine/

Any permanent roof truss/rafter bracing system should be developed only by a Registered Professional Engineer. Given LSU’s information is highly out dated, should you wish to continue upon this path, I strongly urge you to reach out to a competent Registered Professional Engineer to design a structurally adequate system, including a permanent bracing system you can rely upon.
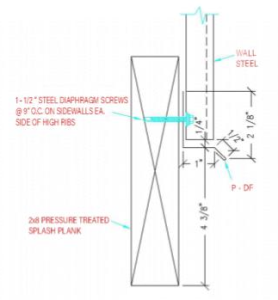 DEAR STEVEN: Your building’s grade board (aka splash plank or skirt board) will be oriented so upper 3-3/4 inches will be above top of slab. In this area, 10d common galvanized nails can be used. Below top of slab, fasten with two 3/16” x 3” Powers (
 DEAR CARL: Installation of housewrap will be a chapter in an upcoming version of our Construction Manual. Although it might be possible to install steel siding over cap staples, we are unaware of anyone who has tried it. To the best of our knowledge everyone has used just enough staples to hold housewrap in place and installed siding immediately. By running housewrap vertically you can place wrap right ahead of installing steel. Make sure to seal all seams with three inch wide tape.
 DEAR HARRY: We are not contractors, so could not assist with any form of construction. As post frame building kit suppliers, we do not use metal joists of any kind.


