Tag Archives: Pre-engineered metal buildings

Pole Barns Verses Red Iron Steel

Pole Barns Verses Red Iron Steel

Reader PAUL in GEORGETOWN writes:

“What advantages or disadvantages are there between your pole barns versus the red iron steel barns? The end use is living space and shop.”

Here are some thoughts comparing our fully engineered post frame buildings to red iron (PEMBs – Pre-engineered Metal Buildings):

A PEMB requires wood framing a home inside of a building shell. Huge steel frames must be hidden, wrapped and thermally broken. Wood is an effective insulator and with bookshelf wall girts and raised heel roof trusses can easily be super insulated.

PEMBs tend to work within defined standard dimensions. For pennies per square foot of investment difference, our post frame buildings can be fully customized in width, length, height, complex shapes and roof slopes to exactly meet your wants and needs.

PEMBs require foundation bolts to be precision placed and bolt holes correct, otherwise expect field structural steel cutting, welding or drilling. Post frame is extremely forgiving with no cutting torches or welding required.

PEMBs require you to hire a third-party engineer to design a foundation plan. Our post frame buildings include engineered foundation plans. PEMBs require significantly more concrete for foundations and may require costly reinforcement requirements in slabs on grade.

Our post frame buildings allow for easy application of alternative roofing materials (shingles and even tile!) as well as a plethora of siding options. If you have seen it on any other structural system, we can do it in post frame.

Our building shells can be erected without having to wait upon a slab-on-grade to be poured. They can easily be built on full, partial, or walkout basement, or have crawl spaces incorporated. These can include precast or poured concrete, ICFs, even permanent wood foundations.

Post frame lends itself well to DIY assembly, unlike PEMBs, no heavy lifting equipment is required.

While insects do not eat steel, steel in contact or close to grade can and will rust. All of our pressure preservative treated wood is a minimum UC-4B rated and Code approved for structural in ground use. Not convinced? We can provide your building with ICC-ESR Code approved wet set brackets for mounting columns above ground.

Any fully engineered structural building system will support climactic conditions as indicated on engineer sealed plans. There is no legitimate claim for excess capacity beyond what has been engineer certified. Our post frame buildings can be engineered to withstand design wind speeds in excess of 200 miles per hour and snow loads over 400 pounds per square foot. We can provide designs up to three stories and 40 foot sidewall heights without a need for fire suppression systems (except where such are mandated by law).

PEMBs do shine if you require a clearspan width in excess of 102 feet.

Your Hansen Pole Building is designed for an average physically capable person, who can and will read and follow instructions, to successfully construct your own beautiful building shell (and most of our clients do DIY – saving tens of thousands of dollars). We’ve had clients ranging from septuagenarians to fathers bonding with their teenage daughters erect their own buildings, so chances are – you can as well! Your new building investment includes full multi-page 24” x 36” structural blueprints detailing location and attachment of every piece (as well as suitable for obtaining Building Permits), our industry’s best, fully illustrated, step-by-step installation manual, and unlimited technical support from people who have actually built post frame buildings. Even better – it includes our industry leading Limited Lifetime Structural warranty!

My New Barndominium

Reader RENE in MICHIGAN is one of a growing tide of Americans looking to build a barndominium. She writes:

“I would like to build a barn with living quarters but I do have unanswered questions!

My property is in Riverside WA 98849 and therefore the first question is whether you service this area?

I have done a lay-out of what I have in mind but with no prior experience, help would be appreciated to point out possible problems or suggestions for improvements.

Would a wood construction be preferred to metal?

Would a wood construction be more affordable than metal?

Would a wood construction be better insulated than metal?

Would my 70′ x 70′ building be more expensive than a smaller downstairs and upstairs building

I am in my senior years and still in very good health but there will be a day when using stairs may become a problem and that is why the square footage is so much. The living quarters are two bedrooms (guest bed 15’x20′, bath 15×10′, laundry 15’x10′)(main 20’x20′, bath 20’x10′,dressing room 20’x10′) 2 bathrooms and open plan Livingroom and kitchen (35’x40′) and would be 70′ x 40′ and the garage/storage/RV space 70′ x 30′

May have more questions later but would like to start off with the most obvious, for me. I have to sell property in MI before I can get going on this side. If you could correspond with me by email, for starters, I would appreciate it. 

Thanks, take care and stay safe!

“GodBless”


Mike the Pole Barn Guru responds:

About Hansen BuildingsThank you for reaching out to us. I also qualify for those senior discounts and fully understand stair issues. When we built our own shouse (shop/house) in Northeast South Dakota 15 years ago we went with two stories and my lovely bride insisted upon having an elevator (we actually now have two of them).

I know Riverside well. Back in my younger days I was a prolific post frame builder based in Spokane. There was one year where we erected over 200 post frame buildings just in Spokane County! Hansen Pole Buildings happens to not only service Riverside, we provide more post frame buildings in Washington than any other state!

In my humble opinion wood post frame is going to have numerous advantages to a PEMB (pre-engineered metal building). While building shell costs are probably similar, it ends there. It is going to be easier to construct without a need for heavy equipment. Our post frame buildings come fully engineered including engineered foundation plans (PEMBs require you to hire another engineer to design foundations). Concrete slabs for PEMBs require significant amounts of rebar, resulting in much greater foundation investments. To have a home inside a PEMB, most usually one has to build a framed home inside of a building shell – unlike post frame where you only have to do it once. Post frame buildings are easily super insulated, whereas PEMB steel frames are a great thermal transfer. My ultimate guide to post frame insulation is here: https://www.hansenpolebuildings.com/2019/11/post-frame-building-insulation/.

I have also written about one story or two: https://www.hansenpolebuildings.com/2020/02/barndominium-one-story-or-two/

Here are a few plan tips to consider:

Direction of access (you do not want to have to drive around your house to access garage doors.)
Curb appeal – what will people see as they drive up?
Any views? You’ll want to access all windows with great views to look at.

North-south alignment. Place few or no windows on the north wall, lots on the south wall.
Have overhangs on the south wall great enough to shade windows from midday summer sun.

Please utilize links in this article to assist with determining needed spaces, sizes and how to get expertly crafted floor plans and elevation drawings: https://www.hansenpolebuildings.com/2019/10/show-me-your-barndominium-plans-please/

Rebar for Post Frame Concrete Slabs on Grade

Building with concrete involves many steps to achieve best results, including grading, forming, placing and finishing. One crucial step is placing reinforcing bars (rebar) correctly.

An engineer should do technical design work and provide specific information regarding sizes, configuration and placement of rebar. Slabs-on-grade for post frame buildings do not usually carry building loads, these are usually carried from roof and walls, through building columns to ground. This makes for far less complicated applications, unlike PEMBs (Pre-engineered Metal Buildings) or “weld ups” either being far more convoluted and beyond the skill level of all but experienced professionals.

rebar
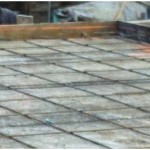
For slab reinforcement, necessary rebar can usually be obtained from a big box store (like The Home Depot®) or your local building supply. Should your specific application be more involved, it may behoove having a fabricator supply rebar. A fabrication supplier can review your building’s engineered drawings and produce a shop drawing with details and identifying tags for each type of rebar to be used in your building. For simpler projects, your building plans should provide spacing requirements and bar sizes. Use these documents to determine where and what rebar is needed in individual locations.

Most often rebar is tied with annealed steel wire, either purchased in four pound bulk rolls, or if using a bag tie spinner, in bundles of pre-cut wire pieces with loops formed on both ends. Bulk rolls are easier for novices to use, however are slightly more expensive.

Prior to placing any rebar, grade and properly compact the ground after all grading and any utility rough-ins are completed. Make sure all compaction testing has been completed and you have your geotechnical engineer’s sealed report in hand before moving forward. Any termite pre-treated should be completed, as well as a moisture barrier installed.

As post frame construction places columns and splash planks prior to pouring your slab, this gives you ready made forms for your slab perimeter.

Determine the size of bars to be used in each direction and mark several of them with layout measurements in each direction (front-to-back and side-to-side). Bars can be marked with a soapstone marker, a paint pen, lumber crayon or even spray paint.

This will be an ordinary slab mat concrete, the force interacting with rebar during placement is minimal. As mat movement is unlikely, a simple single twist of wire around each rebar intersection, twisted together tightly will be adequate. This tie can be done easily with a pair of nine inch lineman’s pliers.

To use your pliers to tie these efficiently, pull feeding end from wire reel with your non-dominant hand (for sake of this article, we will call this your left hand, with pardons to lefties). Grip wire end with pliers in your right hand. Push wire behind (under) rebar at an intersection. Angle end towards where you will be grabbing it, reach from this side, grip it again with pliers, pull towards next location pulling enough slack to complete tie. Hold resistance on wire with left hand, so wire bends snugly against bar being wrapped, at each stage. Release wire so pliers can be used to grip it. Pull end around bar and twist two ends together, pulling wire with pliers so tie is tight.

Once mat is assembled it must be held in place so concrete will cover it completely. Rebar chairs or concrete brick are often used for this. Place these positioners close enough together so rebar will not sag enough to reduce desired coverage of concrete – usually about 1/3rd distance from bottom of slab.

Watch rebar configuration as concrete is placed. If shifting occurs, support rebar with a shovel or alter direction of concrete flow so force is applied in the opposite direction.

Use caution when working around exposed rebar. Construction workers have suffered serious injuries or been killed when falling on projecting rebar.