Tag Archives: kiln dried lumber

You Can Do It!

You Can Do It!

Screamed headlines of my first ever print display ad for pole barn kits in 1981!

I have included below a snippet from one of my first blog posts from 10 years ago:

“In the summer of 1979, home interest rates began to rise. Idaho had a usury limit, home mortgages stopped in Idaho. I set out looking for other opportunities and ended up in Salem, Oregon.

I was offered the position of truss plant manager at Lucas Plywood and Lumber, in August 1979. It would be a smooth transition, as the prior manager would be there for a month or so to ease me into the system. At first glance, the operation was frightening. I was used to trusses being manufactured using hydraulic presses to embed the steel plates into the trusses, not teams of workers banging them in with hammers and pushing them through a set of “rollers”. Even more frightening was when I discovered all the lumber being used was green (I had no idea trusses were built anywhere with lumber which was not kiln dried). But my total heart failure nearly occurred when I found they were using lumber graded as Standard and better for truss chords, as someone had convinced them it was the same as #2 and better. Not even close! Well, the previous plant manager packed up at noon of the first day saying, “Good luck, son”. My first several months were spent on educating the troops and introducing dry lumber, both with some successes. The lumber sales team was my age as well, which helped to gain eager learners. I taught them how to do lumber lists from building plans, so they could quote framing packages.

In January 1980, the housing crunch I had fled from in Idaho hit Oregon. My truss plant, which typically produced 8 to 10 buildings worth of trusses a day, had only four orders in the entire month! Not good – however there was a single common denominator among those four orders, they were all for pole barn trusses. I didn’t have the slightest idea what a pole barn was, but it was time to find out. I picked the brain of a long time pole barn builder, George Evanovich, who explained the basics to me.

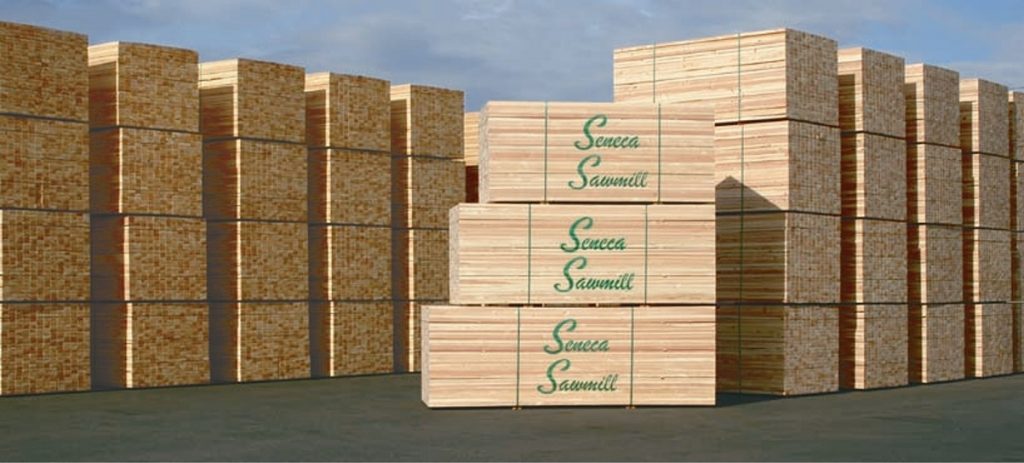
Now I have to confess, I was brought up with, “Wood is good”, so the entire concept of using roll formed steel for roofing and siding was a novel experience for me. Having convinced myself it had its place, we figured out material prices for some fairly typical pole barns and ran ads selling building kits. The response was overwhelming. By April, we were not only running the truss plant full time again (producing primarily pole barn trusses), we had also hired George and his two crews to construct buildings for our clients. By June, the truss plant was operating double shifts, just to keep up with the volume.”

For those of you interested, the full text of this post can be found here: https://www.hansenpolebuildings.com/2011/06/theres-no-education-like-real-life-business-experience/

Anyhow, back on point, there were an incredible number of people totally willing to undertake erection of their own pole barns. Even more amazing is – any of them turned out! We provided absolutely no instructions and “plans” (I use this term lightly) were drawn by hand on a few sheets of 8-1/2” x 11” white copy paper.

Moving forward four decades in time, Hansen Pole Building kits have greatly evolved, and not just in quality, benefits and features – but in ease of assembly for an average D-I-Yer.

Your new Hansen Pole Buildings’ kit is designed for you (an average physically capable person, who can and will read and follow instructions), to successfully construct your own beautiful building shell (and most of our clients do DIY – saving tens of thousands of dollars). We’ve had clients ranging from septuagenarians to fathers bonding with their teenage daughters erect their own buildings, so chances are – you can as well!

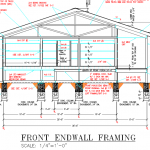
Your new building investment includes full multi-page 24” x 36” engineer sealed structural blueprints detailing locations and attachments of every piece (as well as suitable for obtaining Building Permits), the industry’s best, fully illustrated, step-by-step installation manual, and unlimited technical support from people who have actually built post frame buildings. Even better – it includes our industry leading Limited Lifetime Structural warranty!

Yes – You CAN do it!

How Post Frame Building Lumber is Born

I’ve been blessed with being able to have extensive tours of two very sophisticated lumber mills. The first being the Seneca Sawmill in Eugene, Oregon.

Seneca Sawmill Company is one of the largest producing single-location sawmills in the United States. Their mills are capable of producing over 650 million board feet per year of premium grade green and dry Douglas-fir dimension lumber and studs, and dry Hem-fir studs. To give a perspective, this would be somewhere around 25 rail cars every week day! Seneca’s goal is to produce the best lumber available, while consuming less raw material than any other sawmill in the world. They pride ourselves in the fact they utilize virtually 100 percent of each log brought to their mills from their forestlands.

One of the things which impressed me was Seneca Sawmill’s use of equipment which allows them to “saw size” lumber, eliminating the need for planning! This saves time, equipment, operators and provides for more efficient recovery from the log being sawn.

Our home on Newman Lake, Washington has 26 foot long 2×14 lumber sawn at Seneca.

The lumber which goes into your new post frame building starts off as a tree in the forest

Several reality television programs appear to delve deeply into the world of logging and I would suggest a few views of Ax Men, Swamp Loggers, American Loggers or Extreme Loggers to cover the portion from tree to log on the lumber truck. Some might best be watched with a block of salt as they are, after all, dramas.

Once at the mill, giant mobile unloaders grab the entire truck load in one bite and stack it in long piles, known as log decks. The decks are periodically sprayed with water to prevent the wood from drying out and shrinking, or combusting.

Logs are picked up from the log deck and are placed on a chain conveyor which brings them into the mill. The outer bark of the log is removed, either with sharp-toothed grinding wheels or with a jet of high-pressure water, while the log is slowly rotated. The removed bark is pulverized and may be used as the mill’s furnace fuel or sold as mulch.

Logs are tipped off the conveyor, parallel to the direction the saw will be cutting, and clamped onto a moveable carriage which slides lengthwise on a set of rails. The carriage can position the log in relationship to the saw and can also rotate it 90 or 180 degrees about its length. Optical sensors scan the log and determine its diameter at each end, its length, and any visible defects. Based on this information, a computer then calculates a suggested cutting pattern to maximize the number of pieces of lumber obtainable from the log. This is the exact process I viewed at Seneca Sawmill and I found it to be fascinating.

The pieces of lumber are then moved to an area to be dried, or “seasoned.” This is necessary to prevent decay and to permit the wood to naturally shrink as it dries out. Timbers, (5 inches by 5 inches and larger) because of their large dimensions, are difficult to thoroughly dry and are generally sold wet, or “green.” Dry lumber contains 19% or less moisture. Air-dried lumber is stacked in a covered area with spacers between each piece to allow air to circulate. Kiln-dried lumber is stacked in an enclosed area, while 110-180°F  heated air is circulated through the stack.

Read more about the whys of dried lumber here: https://www.hansenpolebuildings.com/2012/04/drying-wood/.

Each piece of lumber is visually or mechanically inspected and graded according to the amount of defects present. The grade is stamped on each piece, along with information about the moisture content, and a mill identification number. The lumber is then banded into units according to the type of wood, grade, and moisture content. Most dry lumber units are then wrapped and are then ready for shipping.

For more information on mechanically inspected lumber – https://www.hansenpolebuildings.com/2012/12/machine-graded-lumber/.

Reasons for Drying Wood

Yesterday I talked a bit about wood species, and hinted a more pertinent issue than which species lumber is used on a building, is that wood used should be kiln dried. For both technical and performance reasons, drying or seasoning wood is required when making glued wood products such as laminated beams, plywood, particleboard, furniture and many other products. The use of dry framing lumber minimizes negative performance issues in buildings with structural wood framework.

Drying wood to the desired final moisture content minimizes dimensional changes and warping in use. Pieces which might degrade and develop defects during drying can be sorted out at the mill and possibly directed to another use. Such quality control helps to assure performance of products in service and leads to greater customer satisfaction. Lumber which is delivered “green” to wholesalers, retail lumber yards and end users, often has a high percentage of downfall due to the results of natural curing.

The lower price of green lumber, in relationship to dry lumber, is negated by the often 15-20% of pieces which cannot be used as originally intended.

Dry wood provides a better base for paints, finishes and adhesives. Many finishes may not adhere at all to green wood, or the subsequent drying of wood may lead to failures in the paint coat. Adhesives may not bond well (or at all) on green wood.

Water- or oil-borne preservatives cannot be forced under pressure into wood which has free water in its cells. When a preservative cannot penetrate adequately, full protection against attack by decay fungi or insects cannot be obtained.

Drying lumber improves the resistance to decay. Wood which has been dried and kept below 20% moisture content does not have sufficient moisture to support most decay organisms. Also, organisms already in the wood will be killed when exposed to high kiln-drying temperatures for several hours.

Drying wood may increase the strength of wood unless defects developing during drying counteract this trend.

Drying reduces the weight of wood, and since truck and railroad shipping rates are based on weight, shipping costs can be reduced. The lower weight also makes for more efficient handling of lumber on job sites. Construction times are reduced as workers can more easily move and install larger quantities of lumber by hand.

If none of this so far makes an impact, perhaps mentioning green lumber shrinkage will.  The “magic number” where lumber becomes dimensionally stable is 19%.  So, Green lumber at 25 to 30% has a huge potential for shrinkage.  If an 8’ piece of lumber shrinks an inch, on average, how many inches would a 40’ long building shrink?!  5 inches is huge!  I used to wonder why the roof steel on older buildings looked like it was “wavy”, and then I figured out the answer, green lumber shrinkage!

Choosing to “build green” does not mean using green lumber.  Choose dimensionally stable kiln dried lumber, for all of the reasons above.