Spot Problems With This Pole Barn Photo
One of my Facebook friends had posted this as a timeline photo as it brought back to her fond memories of a childhood spent frolicking in hay lofts. It was so bad, I just had to save it.
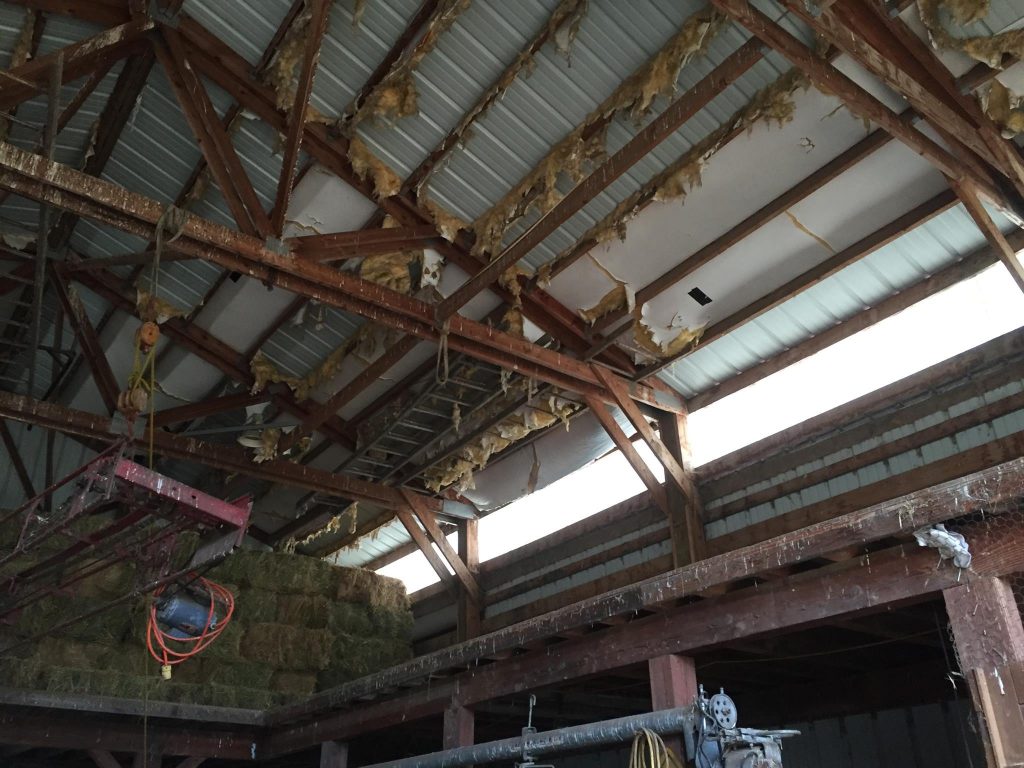
So, what’s wrong with this photo anyhow?
Obviously bird excrement over everything does not pose a structural problem, but one which I would have been trying to minimize, if not avoid. One thing which was leading birds into building – excellent nesting material provided by what was once a vinyl faced fiberglass condensation control blanket (aka Metal Building Insulation).
Long ago I had espoused about joys (or lack thereof) involved in installation of Metal Building Insulation (https://www.hansenpolebuildings.com/2011/11/metal-building-insulation-in-pole-buildings-part-i/). For those of you readers who did not click upon link and read it in full, suffice it to say birds love fiberglass.
Once condensation control blanket was torn apart – there was nothing left to prevent condensation from occurring below roof steel.
Moving forward, just glancing upon structure supporting hay loft, I would suspect a high degree of under design with only chance keeping it from meeting its demise.
All sorts of things are seen hanging from trusses. Amongst these are a block and tackle, which I suspect has been used to lift bales of hay into loft. Fortunately, individual small hay bales are relatively light, as I am pretty sure trusses were not designed to support added point load weights.
While not most effective structurally, trusses can be designed to be placed upon each side of a column – provided they are done correctly. Blocking should be placed between truss bottom chords, in order to prevent weak axis bending. A bare minimum would be every ten feet.
I see no web bracing, making this highly suspect. Older barns tend to have had bracing needs neglected. Single trusses (when placed not nailed directly face-to-face into a pair, they are single) require a great deal of bracing.
Knee braces are what I see as biggest structural issue. Not only are knee braces ineffective (https://www.hansenpolebuildings.com/2012/01/post-frame-construction-knee-braces/), but when installed improperly (as in photo) they are potentially throwing a load into roof truss bottom chords trusses were not designed to withstand.
Feel free to chip in with your observations.
 A very popular method of constructing pole barns in this part of the country is to place a prefabricated roof truss on each side of the interior columns. At every roof purlin location, a short 2×6 block (known as a paddle block) is placed between the two trusses. The length of the block is equal to the thickness of the roof truss top chord plus the size of the roof purlin. With a 2×6 top chord and a 2×6 roof purlin, the length of the block is 11 inches.


