A Free Post Frame Building Critique
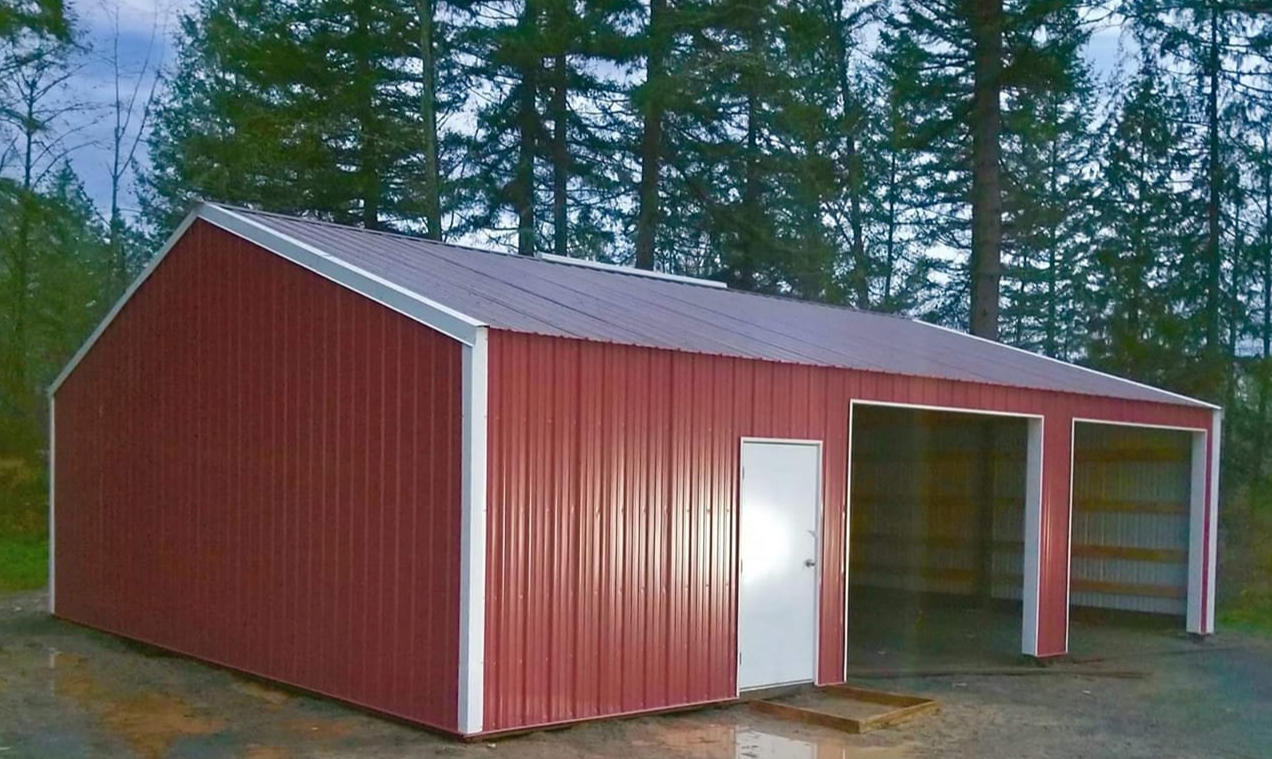
I am going to offer a free critique of this post frame building.
From a design aspect, I wouldn’t consider investing in a residential (or residential accessory) post frame building without overhangs. Not only do they make buildings look far less industrial, they also afford weather protection above doors and push runoff or slide off away from walls. With overhangs building walls stay cleaner and large snow piles sliding off roof are far less likely to dent siding and overhead doors.
Enclosed overhangs, in combination with a vented ridge, provide for adequate air flow from eave to ridge to assist in preventing condensation.
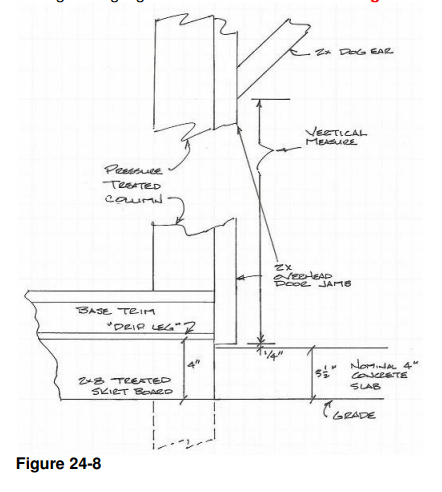
Note there is a very small space between top of overhead door openings and roofline. This means these particular overhead doors will need to have low headroom tracks in order to open. In many cases this precludes an ability to have a remote garage door opener. Low headroom also tends to not open as smoothly. Certainly it would be impossible to have a ceiling installed at a future date (provided trusses were loaded to be adequate to support extra ceiling load).
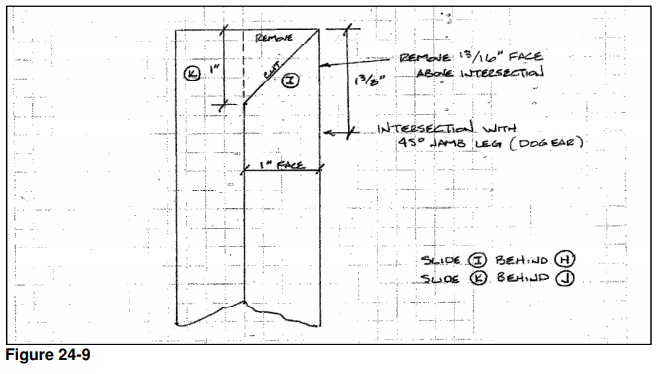
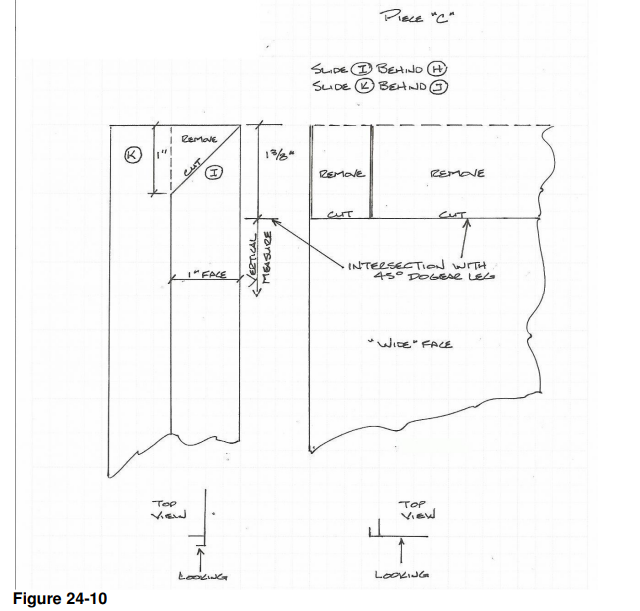
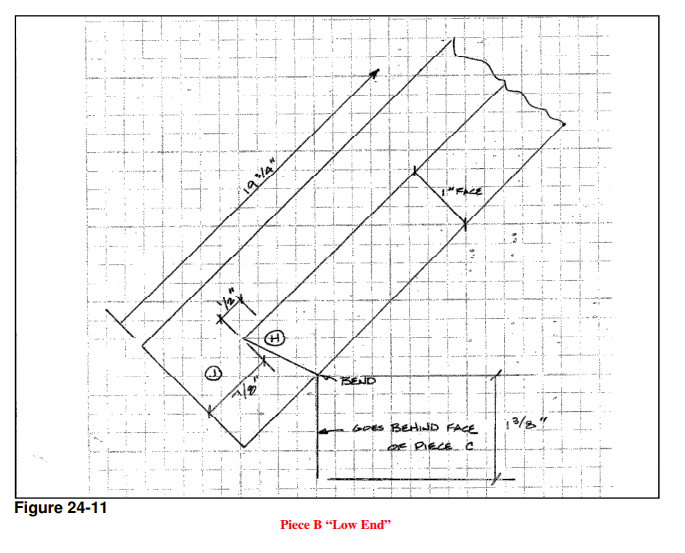
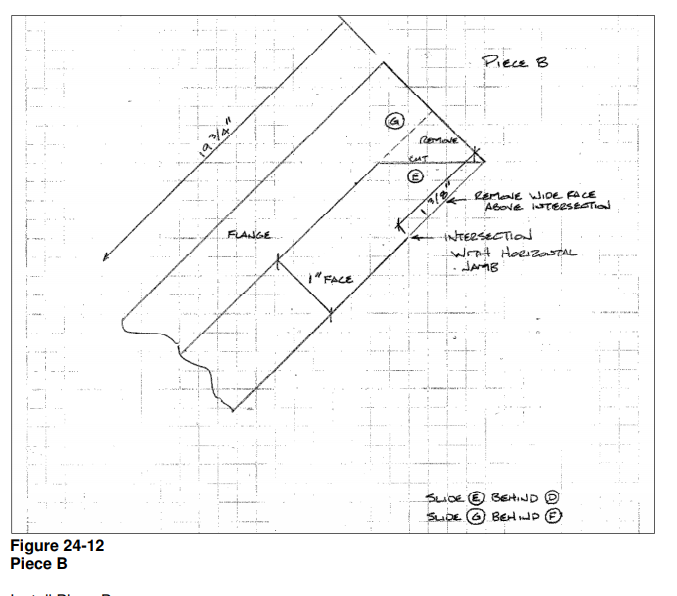
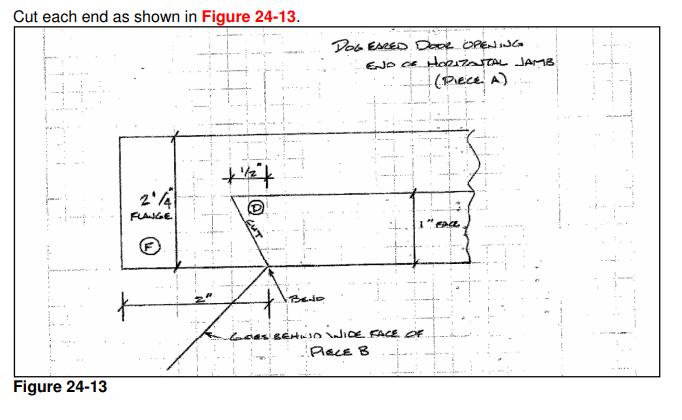
For virtually no extra cost, overhead door openings could have been dog-eared – a 45 placed in opening upper corners. This makes building again look more like it fits in one’s backyard, rather than an industrial park.
Look at wall bottoms. There is maybe two inches of pressure preservative treated splash plank showing. Due to this, when entry door landings or aprons in front of overhead doors are poured, to avoid having concrete poured against steel siding, there will be a significant step. There is also no base trim (aka rat guard) at the base of walls to stop critters from venturing in through steel siding high ribs.
It is very easy to see nearly every roof and wall steel panel overlap. When properly applied, these laps should not show. This is a craftmanship (or lack thereof) issue.
Missing from sidewall tops is any sort of trim. Even though steel siding and roofing is manufactured (in most cases) on machines with computer controlled cutoffs, there is some slight variance. This variance is going to show either at the base of walls, or at the top. By having trim at wall tops, any slight differences can be hidden.
Structurally – wall girts flatwise on column outsides on spans such as these fail due to not meeting Building Code deflection limitations. https://www.hansenpolebuildings.com/2012/03/girts/
All of these items mentioned above would not be an issue with a new Hansen Pole Building. We seriously lay awake at night thinking of ideas to prevent clients from making crucial mistakes – we want to avoid you owning a building you will hate forever!
Looking for a building done right? Call 1(866)200-9657 to speak with a Building Designer today – call is free and there is no obligation or charge!