No Leak Overhead Door Dog Ears
The key to cutting trims for no leak overhead door dog ears for post frame buildings comes from careful cutting and installation of pieces to water flows in front of, rather than getting behind, each piece as it works down the building. It also helps to utilize a trim which covers the jambs and has an integrated J Channel.
Today’s article was prompted by a question posed by reader JOE in TERREBONNE:
“Could you please tell me the process for wrapping the metal trim around overhead doors with diagonal corners so they don’t leak. I’ve heard that using the angled corners will always leak. Any help will be greatly appreciated.”
Mike the Pole Barn Guru Responds:
The following is excerpted from the Hansen Pole Buildings Construction Manual.
All drawings for this depict door opening LEFT side. Mirror image for right side. Drawings are based upon McElroy Metals’ parts (The same process can be used for any manufacturer’s part, provided appropriate adjustments are made for dimensional differences)..
Step #1:
Square cut two P-JFB trim pieces to the measure from 1/4″ above top of concrete slab to 45 degree dog leg bottom and ADD 1-3/8″. See Figure 24-8
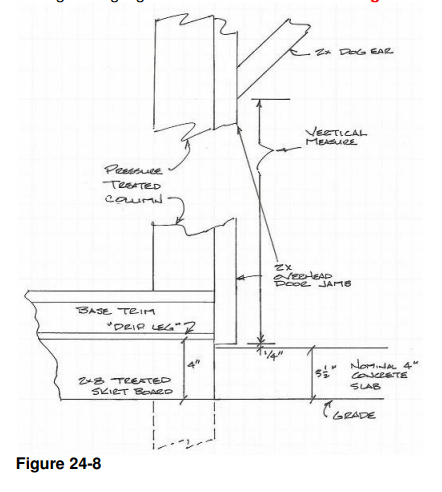
Figure 24-8: Overhead Door Flashing Front View
Cut top end as indicated in Figure 24-9 and Figure 24-10 . This becomes Piece C.
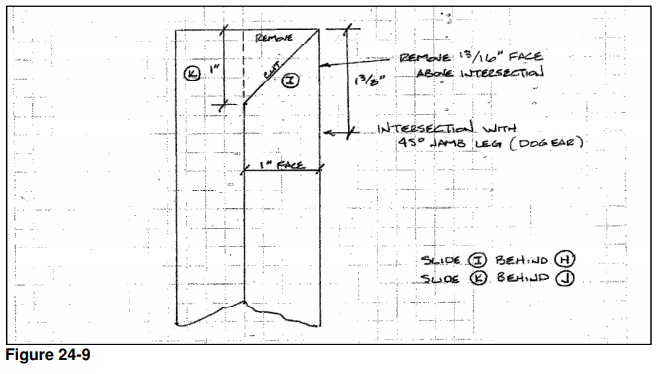
Figure 24-9: Overhead Door Flashing Cutting Diagram
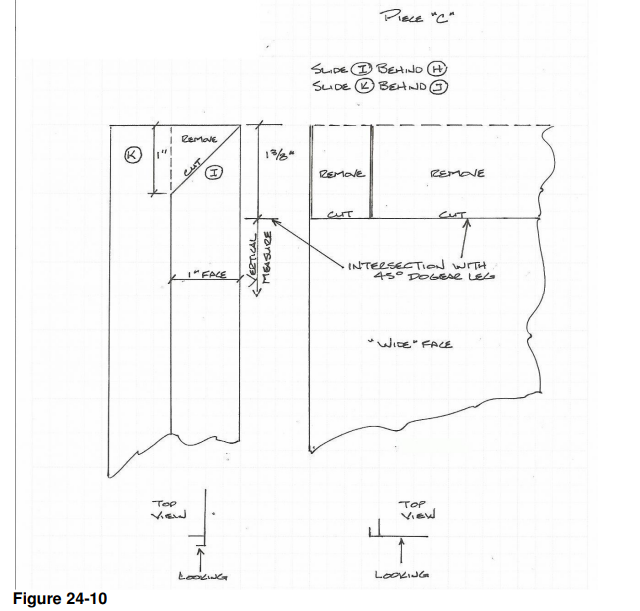
Figure 24-10: Nailing Overhead Door Flashing Into Jamb
Install piece C, using joist hanger nails through approximately 2” back face of the “J” portion into the 1-1/2” edge of the jamb. Nails should be close to each end and approximately every 2’ to 3’.
On the wide inside face of the overhead door jamb the trim will fasten when you are ready to install your overhead door weatherseal to the inside face. Nail your weatherseal on with nails every 3′ on center along the entire jamb.
Step #2:
Square cut two P-JFB pieces to 19-3/4″.
Cut one end as shown in
Figure 24-11.
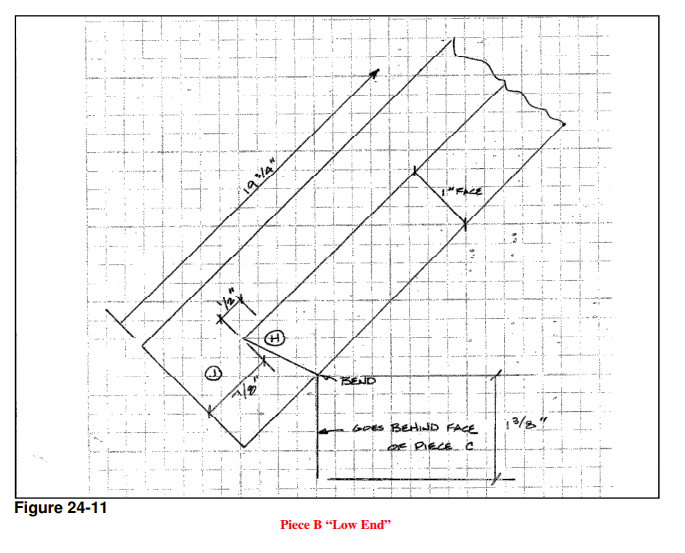
Figure 24-11: P-JFB Piece B Low End
Cut opposite end as shown in Figure 24-12.
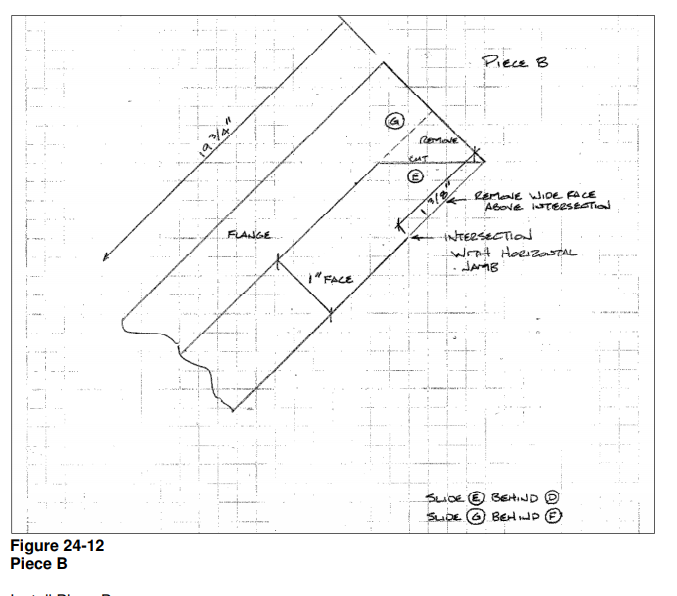
Figure 24-12: P-JFB Piece B Installation
Piece B
Install Piece B
Step #3:
(Depending upon door width, this step may require 2 P-JFB pieces.)
Cut each end as shown in Figure 24-13.
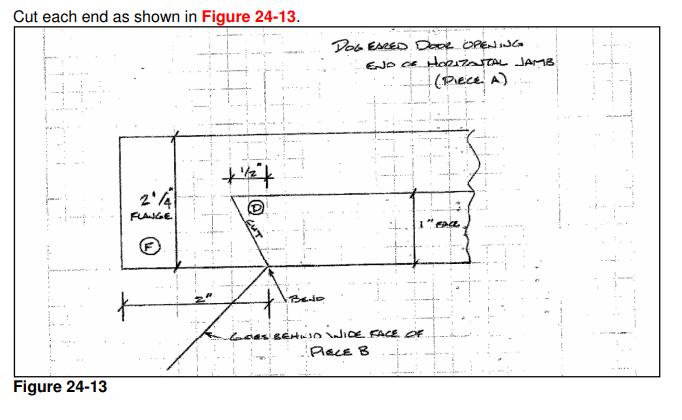
Figure 24-13: P-JFB on Dog Eared Door Openings


