Some Pole Barns Deserve a Proper Burial
Reader STEPHAN in OGDENSBURG writes:
“Dear Pole Barn Guru,
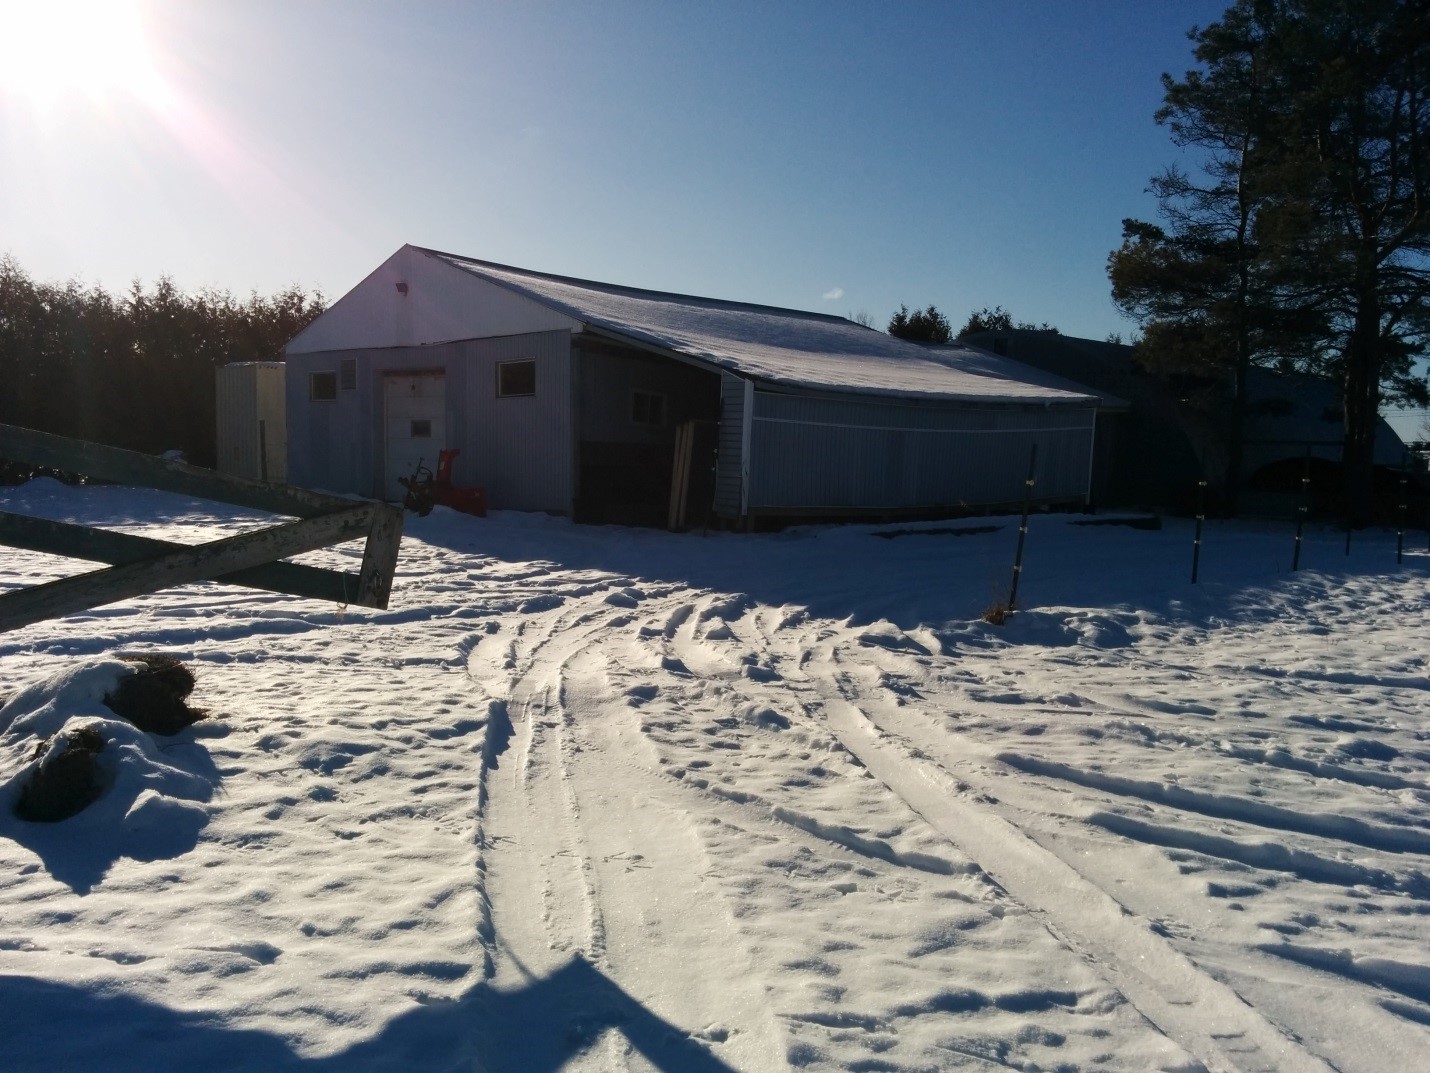
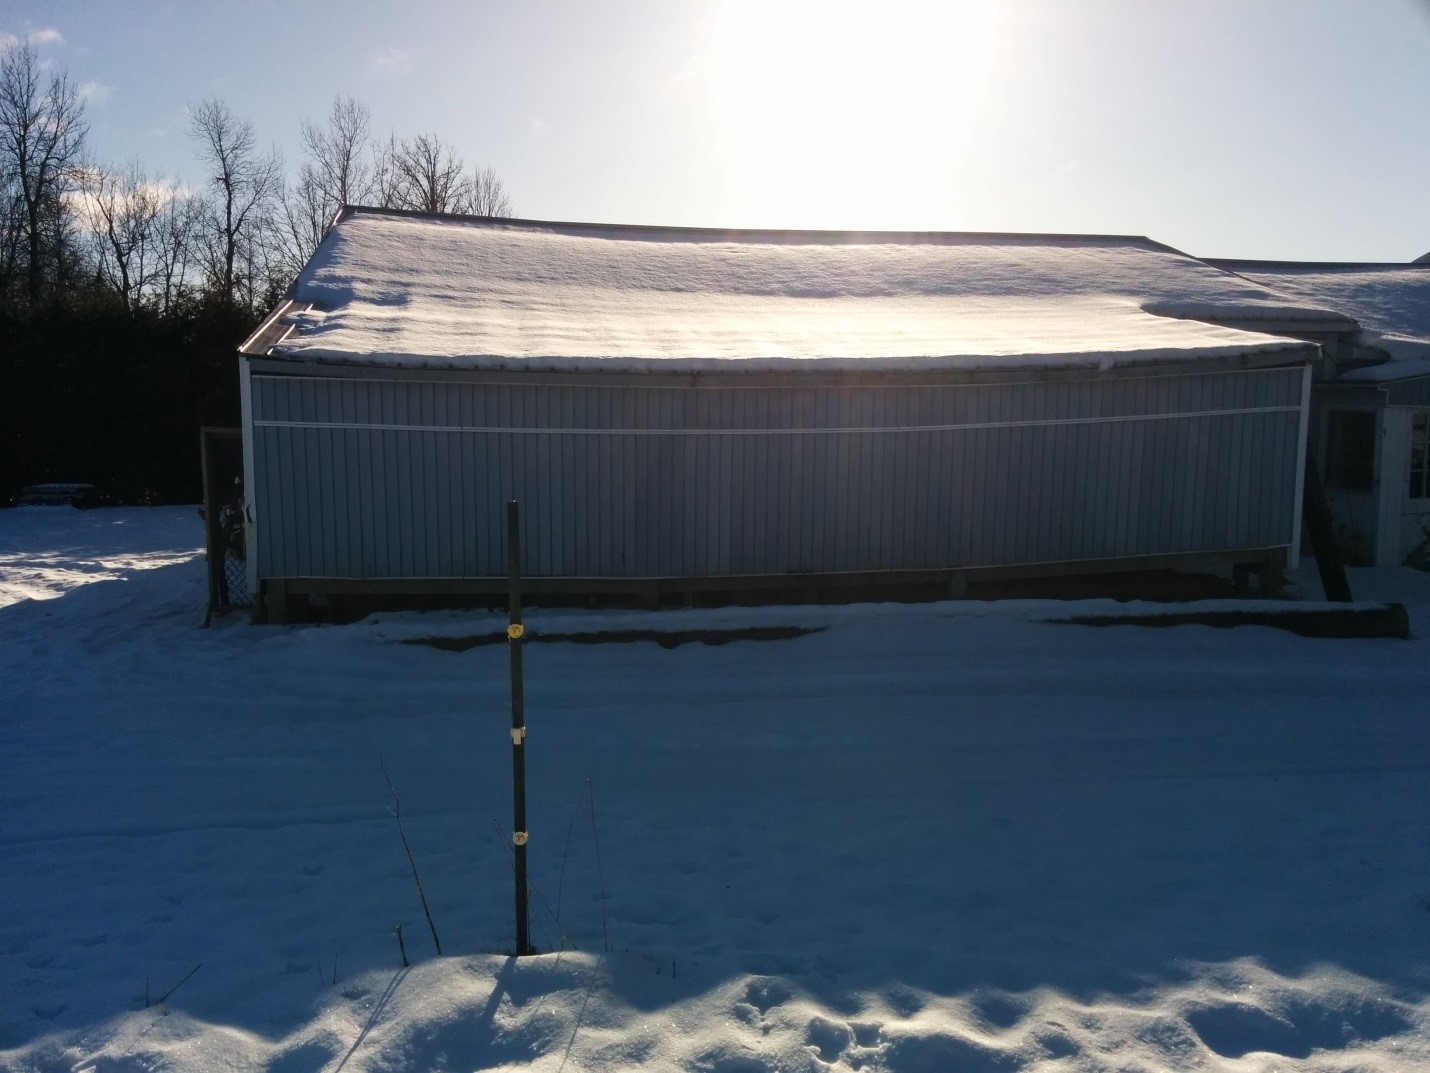
I have a 30ish year old 32 by 54 feet horse pole barn where half the poles heaved some for more than 1 foot over the years. I need to fix it this year because I am afraid that the strain will make the structure collapse. The code in my area says that post must be buried 5 feet because of frost.
The issue is that the bedrock is between 3.5 and 5 feet below grade. I have an 8 foot wide concrete pad/runway in the middle of the barn (the whole length of the barn). I would like to do it right to last many years.
I considered these different options:
– replacing each posts with sonotubes with bigfoot at the bottom sitting on the bedrock (a lot of work if done with bags of concrete because I would have to do them a few at a time to keep the integrity of the structure)
– replacing bottom of each post with footing sitting on the bedrock and permacolumns (a little less work because the volume of concrete is just a little less)
– pouring a “bond beam” or a full slab on the inside against the posts with thicker sides to support the structure (as per engineer) and then building walls on the inside with 2×6’s to support the roof, and then removing the posts ( I will be losing about 6″ all around because the new walls will be inside the existing shell). I like this idea because I could prepare the area over the winter and get it poured in the spring. My issue is what would I do with the existing slab in the middle of the barn? Should I attach it with rebar and epoxy, pour over or remove the existing slab?
If I go with the last option, what would I use to support the lean-to? If the slab does not have a full foundation that would mean that it is “floating”, should the posts supporting the extension also be “floating” to ensure that they move together?
Or do you have a better option to suggest?
I have attached pictures to show how bad it is. You can see how crooked the ends are by the siding angle and the window in the lean-to area. Thank you for your help.”
Mike the Pole Barn Guru responds:
I am not one to pull any punches – I’ll give my honest opinion, even when I don’t feel it is one you want to hear.
There comes a time when reality sets in….in your pole barn’s case reality will be it needs to be knocked flat, bulldozed into a big hole, lit afire and then replaced. Otherwise, you are going to spend a phenomenal amount of time and money for any fix, and all are just band aids for something truly not worth saving.
Your frost heave issues are due to poor site preparation. Please read this information about properly preparing a site: https://www.hansenpolebuildings.com/2011/11/site-preparation/
and preventing frost heaving: https://www.hansenpolebuildings.com/2011/10/pole-building-structure-what-causes-frost-heaves/.
If you absolutely insist upon saving your pole barn, you should hire a geotechnical engineer to evaluate your site and give you expert advice. If you decide to give your barn a proper burial, start over with engineer sealed plans and a kit that gives you a lifetime of safe use…for you and your horses.
 Use duplex (double headed) nails, or similar fasteners, to temporarily attach a roof purlin at “column depth below grade” across what will become the interior face of the column when it is placed in the hole. In most instances, with frost depths of 40 inches or less, this will be 32 inches from the end of the pole which is towards the hole.


