This week the Pole Barn Guru answers reader questions about interior framing for residential homes, costs for the design of a 3-4 bedroom home, and building a pole barn carport for vehicles and equipment.
DEAR POLE BARN GURU: Do you provide interior framing for a residential home? SYDNEY in MILES CITY
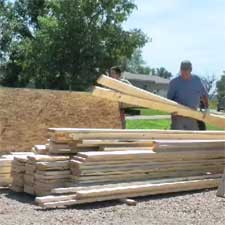
 DEAR SYDNEY: Our mission is to provide everything you need to be ‘dried in’ and structurally complete. This would include any raised wood floors (over basements, crawl spaces, second or even third floors, as well as stairs). We can provide materials for non-structural interior walls, however our ultra-high grade lumber is going to be over-kill for both needed quality, as well as price. History also tells us, these materials (as they are used last on a job site) tend to be stored poorly and/or grow legs and walk off (or get used for other than their original purpose). Your Hansen Pole Buildings’ Designer can discuss this further with you.
DEAR POLE BARN GURU: Hello, My wife and I would need a 3 bedroom 2 bath home. We would like a 4 bedroom or 3 bedroom with an office if possible. What would I be looking at for design and price on that? CHAD in BUCKLEY
 DEAR CHAD: As far as custom floor plans, our designs start at $695 and we will credit you back this amount, in full, should you order your building from us. Please see #3 here for more thoughts on design: https://www.hansenpolebuildings.com/2021/02/a-shortlist-for-smooth-barndominium-sailing/
On your overall cost, our clients are reporting fully engineered post frame homes and barndominiums, modest tastes, DIY, budget roughly $75-85 per sft for conditioned spaces, $35 for all others. Does not include land, site prep, utilities, permits.
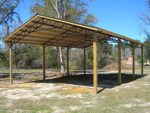 DEAR POLE BARN GURU: I want to build a pole barn carport with solar PV. Specifically, I want to build the carport:- to be 60′ Long x 30′ wide x 12′ high- to use steel gable trusses- for the posts to be 12′ apart to easily pull through an ag tractor and mower, boat, trailer, etc..- that would mean 5 “stalls” about 12′ wide and 30′ long. I have been told the posts should only be 8′ or 10′ apart or the purlins will sag. Given that I also want to add PV on the roof, that makes it more of a concern. I was thinking maybe to use a header board and add another truss in between the poles connected to the header board. That would make the span distance 6′ instead of 12′. But the steel trusses all look like at least 2′ deep and would stick out below when connected to a 2×12″ header board. Another solution might be to use 2×8 purlins instead of the typical 2x6s. What are your thoughts on this? STEPHEN in FREDERICKSBURG
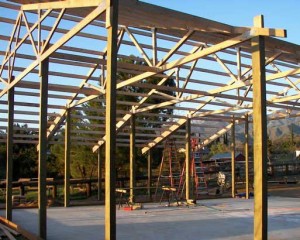
DEAR STEPHEN: A caution – a great majority of steel gable trusses are of questionable design and manufacture, one of my friends just had a collapse of his roof in Kentucky due to his steel trusses failing under just a few inches of snow!
We provide fully engineered post frame buildings every day with columns and prefabricated wood trusses every 12 feet. This immediately simplifies your proposed end resultant, eliminates need for headers (truss carriers) between columns and our 2×6 2400msr roof purlins, recessed between trusses, will easily support your roof with solar panels, without eye perceptible “sag” (deflection).
 DEAR POLE BARN GURU:
  DEAR RACHEL: Your question leads me to believe you do not have structural plans for your building. Said structural plans should be prepared by a Registered Design Professional (RDP – architect or engineer) who can expertly determine structural adequacy of all building components, as well as proper connections.
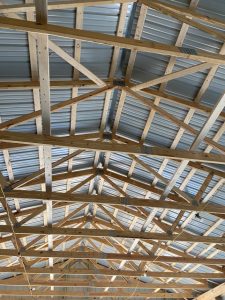 DEAR DOUGLAS: Your trusses should be shown on your building’s engineer sealed plans. You can provide these to any prefabricated wood roof truss manufacturer (or the ProDesk at your nearby The Home Depot) to get a quote delivered to your building site. If it was my own personal building, it would have a single truss on each endwall, and a double truss every 10 feet bearing directly upon wall columns. I would place 2x purlins on edge between truss top chords, using engineered steel joist hangers to support each end.