I Have Limited Experience, Can I Correctly DIY My Pole Building?
Reader MIKE in WISE writes:
orf
“I have been reading a lot of your posts, trying to gain as much knowledge as I can. You are truly the Guru. I have a couple questions that I hope you can answer for me. The first is, how hard is it for someone with limited experience to build a pole barn themselves and do it correctly? Sinking the holes for the poles in the right spots, setting the trusses, and putting on the metal without leaks? The second is, how does one go about framing out the interior? Would I have to build walls along the exterior walls like in a traditional build? Sounds like ridiculous questions, but I guess it’s the only way to learn.”
Mike the Pole Barn Guru writes:
Thank you for your kind words Mike, they are greatly appreciated.
With a Hansen Pole Building, your limited experience is a benefit, as you have no preconceived notion of how to do it ‘wrong’. Included with your building is our now approaching 600 page Construction Manual, walking you through every step of assembling your new building shell. You also get unlimited free Technical Support, in an event you run across any challenges.
 Most of our clients do DIY their builds. I manage our Technical Support Department and 90% or more of our work is due to clients who hired builders, who did not follow plans and directions, and now have problems!
A major fear is setting poles correctly. Given a diagonal measure of a 6×6 is under eight inches and you are placing it in an 18 inch or larger diameter hole – you are shooting at a large target and have flexibility to move it to exactly where you want it. Our Construction Manual shares some great tips and tricks for not only settling columns, but also raising trusses and installing steel leak-free. All are much easier than one might suspect.
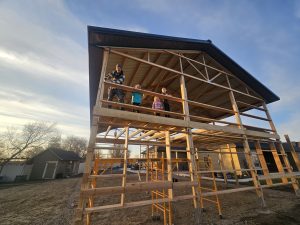
In all reality any average physically capable person, who can and will read and follow instructions, can successfully construct their own beautiful building shell, without extensive prior construction knowledge. We have hundreds and hundreds of clients, every year, who have done exactly this. In most instances, our DIY clients end up with a far better finished product than anything they could have paid to have assembled.
By utilizing commercial bookshelf wall girts, there is no extra framing required in order to have exterior walls drywall ready. https://www.hansenpolebuildings.com/2020/04/creating-extra-work-in-barndominium-framing/
There are no ridiculous questions – so please continue to ask them all until you are satisfied you are making correct decisions for your new building.
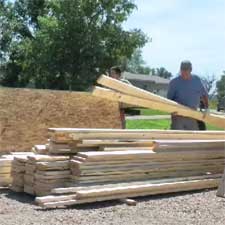 Some discussion will be made here about “allowable defects” in lumber. Our main struggle with lumber quality is clients having unrealistic expectations. Lumber is chosen for strength characteristics, rather than due to “pretty looks”. If an expectation lumber will be clear, vertical grain, knot and wane-free, a severe disappointment will occur. Wood is an organic material. While produced in a “factory” environment (a sawmill), lumber is subjected to naturally occurring defects accounted for in grading rules. These characteristics are taken into account in strength values for allowable design. Minor dimensional differences in individual boards are a function of shrinkage due to moisture content, wood species and even individual tree characteristics. Shrinkage is more prominent across grain – hence variations in the board’s wide face are more pronounced. Ultimately these small dimensional differences do not affect the finished building.


