This Monday the Pole Barn Guru answers reader questions about UC-4B treated columns, advice to connect a new structure to existing building, and if one can customize a monitor style building to eliminate pony wall.
DEAR POLE BARN GURU: We are considering residential post frame construction in southeast Ohio. I’m concerned about wood posts in the ground and trying to avoid permacolumns. I asked the post frame contractor I’m talking to about UC4 treated posts in the ground, specifically UC4B. His response was that building codes changed in the last couple years and all UC4 posts are now treated at the same level, there is no more UC4A/B/C distinction. In your expert opinion, is that information correct? Should I continue discussions with this contractor or walk away? RORY in CHILLICOTHE
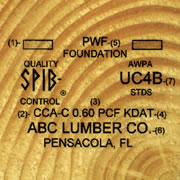 DEAR RORY: Your proposed building contractor is talking out of his……..(not mouth) as he obviously has no clue as to what he is talking about. Building Codes dictate UC-4B pressure treating levels for lumber to be embedded in ground structurally. You can look this up yourself at: https://codes.iccsafe.org/content/IBC2021P1/chapter-18-soils-and-foundations#IBC2021P1_Ch18_Sec1807 Go to subsection 1807.3.1
American Wood Protection Association has a detailed listing relating use categories to placement – please to upper left on Page 3 of this document for definition and where to use UC-4B treated wood. https://awpa.com/images/standards/U1excerpt.pdf
In my humble opinion, it may behoove you to deal with a supplier who can provide you with a fully engineered post frame home to meet Building Code requirements and either erect shell yourself or hire an erector to assemble it for you.
DEAR POLE BARN GURU: The picture is of my existing 30x40x10 Pole Barn. One the back side I’m planning to build an attached a 26X40X16 barn. The peaks of the barns will in the same direction and aligned in the center. There is no rear overhang on the existing barn, just a piece of trim like you can seen in the picture on the front side.
My question: how do I make the connection between the roof on the existing barn and the new wall where they attach? I can see from some of the pictures on your website that this is somewhat common, but couldn’t find any details.
The roof on the existing barn is shingles (not steel), will that pose any problems?
If you need more pictures or any other info let me know and I’ll get it for you.
Thank you very much. JON in WAYNE
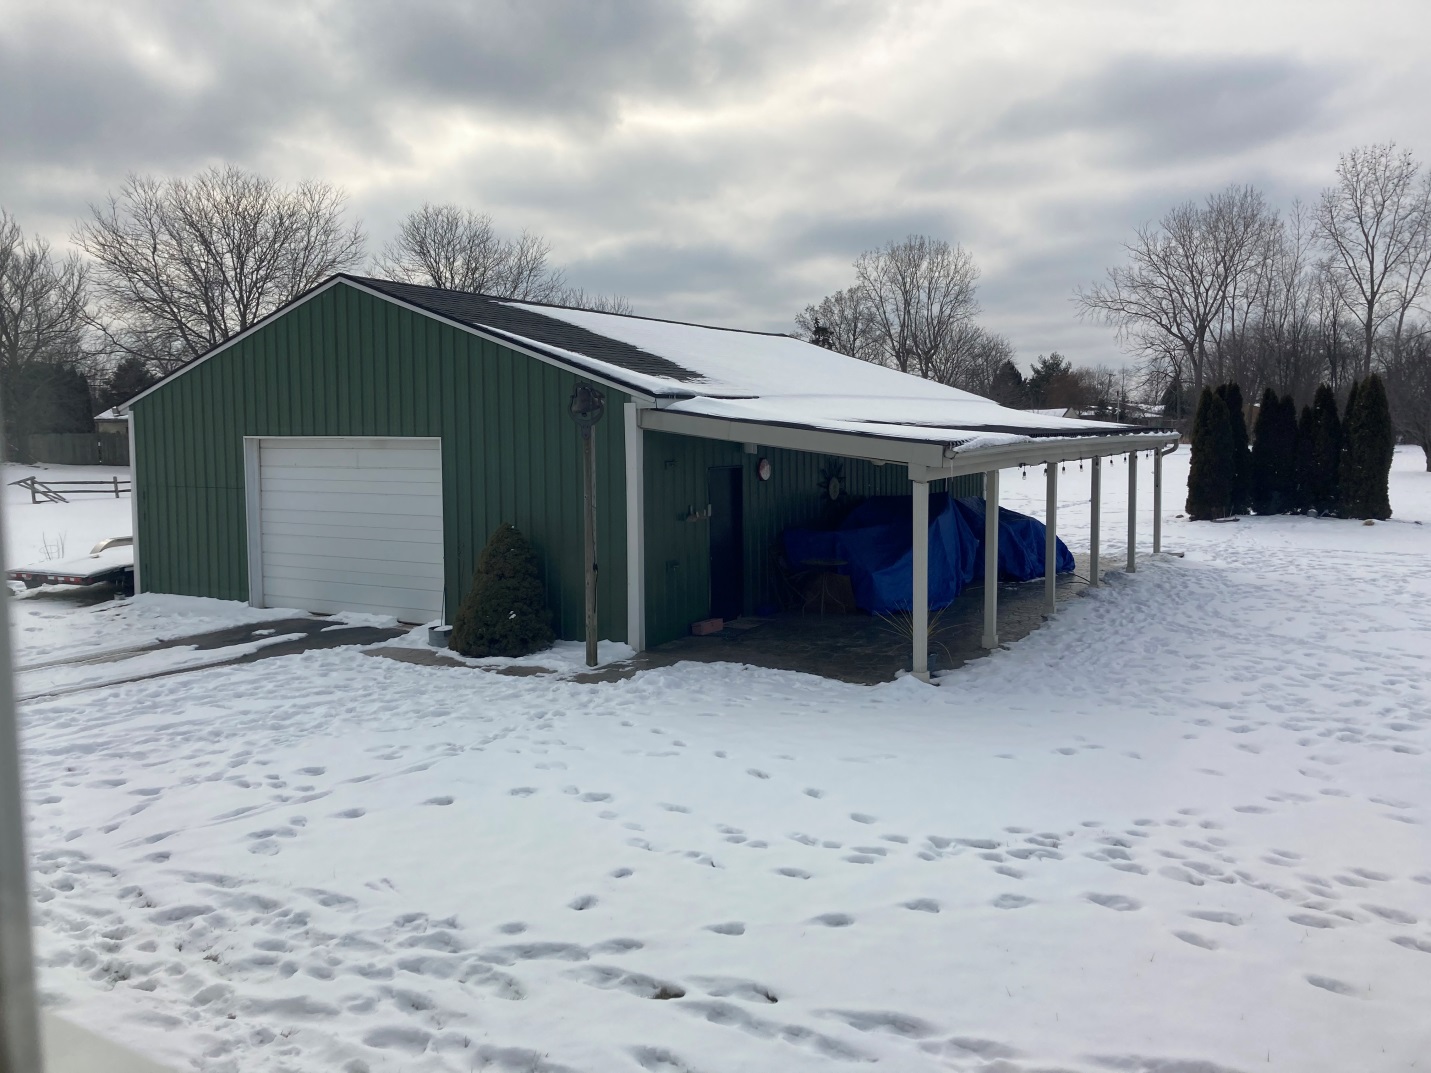
 DEAR JON: Assuming new endwall columns for your addition can be placed directly against your existing endwall – framing will extend 1-1/2″ past these columns (effectively creating an overlap above your existing building). A piece of flashing known as sidewall, will go up your new endwall and lap onto your existing roof. Being as your existing roof has shingles, I would order Emseal expanding closures to use on underside of this flashing to seal against water infiltration. Sticky side of Emseal can be placed on flashing (inside of drip leg) and it will expand after installation to fill any irregularities. Wall steel is then applied to overlap this flashing.
DEAR POLE BARN GURU: Is it reasonable to design a monitor style pole barn home: 1.5 stories With the central roof lines connecting into the shed roof sides, without the traditional short wall seen on most exteriors? Will I run into trouble creating head space in the central alley of the second floor? I have looked at attic trusses and mono trusses…I had thought to get an 18′ wide, alley with pony/short walls of 4′ – 5′. But it looks like the cut off is 16′ wide with a squared off 8′ tall ceiling. I suppose I could do with the more traditional look, but I want to keep a low profile, and would rather have the ceiling follow the roof line on the interior and not have it be squared off. Is this possible with a pre-built truss system?
Thank you, I love your blog. AMY in STANWOOD
 DEAR AMY: Thank you for your kind words. Depending upon width of side sheds, we could probably have your building engineered using rafters at attached to shed eave side columns, main columns and cantilevered over center portion. Same concept could also be done using parallel chord trusses, however they would take up more depth. In either case, you could have a vaulted ceiling to follow roof lines.
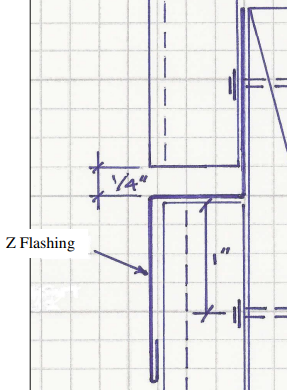 Galvanized Z-flashing, so-called because of its Z-shaped profile, keeps water from getting through horizontal joints between sheets of plywood siding. You set flashing upon top edge of each piece of plywood over a fat bead of caulk and hold it in place with just heads of roofing nails driven into sheathing. Don’t nail through flashing itself or it will eventually leak. Overlap ends of flashing by two or more inches and run a bead of caulk between them. And just before upper plywood panel becomes placed, caulk along top edge of metal as extra protection against water.


