Moisture Buildup in Post Frame Walls
Reader TOM in MONTROSE writes:
“Hi, In the summer of 2025 I build a post frame building (40x72x16) located in MN, 8ft o.c. (on center) post spacing, trusses 4ft o.c. w/14 inch heal height, 24 inch overhangs (plenty of ventilation for the attic). I then placed vertical 2×6 studs 2ft o.c. in-between the posts. I put a house wrap on the outside and covered it with steel. I placed 6mil plastic on the ceiling and lined it with steel. I proceeded to blow in 13 inches of fiberglass insulation. At this point I feel good about the attic. I then installed R19 faced insulation in-between the studs and stapled it to the inside of the studs. I ran OSB half way up the walls, the top half will be steel (not done yet). Had a tube heater installed and it has been running since mid-December! Can you in vision the problem I’m having behind the insulation in the walls with this COLD weather? Moisture build up and I’m planning my attack for correcting this issue this coming spring/summer. I need your advice pole barn Guru about my plan….My plan is to: remove the OSB, remove the faced batt insulation, air/dry the walls out and the insulation. I’m going the remove the paper from the batts and just have unfaced batt insulation. Before I place the batts back into position between the studs, I’m going to nail up an 8 inch wide x 1/4 inch OSB strip running the full length from top to bottom in each stud bay. My thinking behind this is to prevent the insulation from touching/resting on the house wrap as it is currently. And also to provide an air space for any future moisture to dry out. I am than going to place 6 mil poly over the insulation, re-attach my lower OSB and steel the top half. And hope that I never have this moisture problem again!!! Your thoughts Guru? Thank you in advance for your help!!!”
My biggest concern is to determine where moisture is coming from, then eliminate it.
 Best guess is it is coming from your concrete slab – either moisture from it being poured has not fully exited or (and more likely) there is not an adequate vapor barrier under it.
If your slab does not have a vapor barrier underneath – use a good sealant on top of it. Slope finished grade away from building at least 5% for no less than 10 feet. Gutter downspouts need to discharge at least 10 feet away from building. It may be necessary to install a french drain to move underground water away from your building.
Tear out fiberglass wall insulation and throw it away. Once completely saturated it must be replaced to prevent mold, reduced efficiency and/or structural damage. Replace with rockwool insulation with a well-sealed interior vapor barrier. Wall insulation should be in direct contact with your house wrap. This prevents air gaps within wall cavity, improving overall energy efficiency and reducing convective heat loss.
If your house wrap is not breathable, or is installed with printed side in, rather than out – it needs to be removed and replaced.
Once you have cured where moisture is coming from, you should be good forever.
Make sure attic is properly ventilated with soffit vents at eaves and a ridge vent. These need to be properly proportioned to achieve correct amount of air intake and exhaust. There needs to be no less than an inch of clear airflow above attic insulation from eave to ridge. 13 inches of attic insulation would not be considered adequate for our climate, it should be no less than R-60.
 Now, I believe, time has come to stop selling price to post frame building clients and sell benefits. Safety becomes easiest to sell – no one wants to live with a fear of their building collapsing and injuring them, their loved ones, or destroying their valued possessions. Flexibility in future use – also an easy sell, if a future building owner decides they want to add a ceiling they can safely do so.
 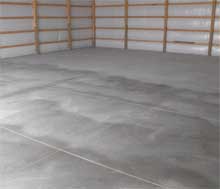 When you apply sealer can be important as well. Allow new concrete to cure completely (28 days or more, as recommended). Most sealers must be applied under dry conditions, since applying sealant to damp concrete could cause haziness or loss of adhesion. Air temperatures are also important and should typically be above 50°F during and for 24 hours or more after sealer application. Always allow sealer to dry completely before exposing it to foot or vehicle traffic. Drying times before exposure to heavy traffic can be as long as three days.


