Finishing a 15 Year Old Pole Barn
Reader BOB in WASHOUGAL writes:
“I have a 30’x60′ pole building. It was constructed in 2003. I would like to finish the inside with a concrete floor, Insulation, and sheet rock. My question is…How long do the posts last before they rot off at ground level? (I have a wooden fence that was built around the same time and 50% of the posts have rotted off at ground level!) I just don’t want to throw good money after bad. I want to end up with a permanent Building when I’m done.”
Mike the Pole Barn Guru responds:
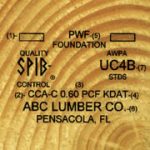 Your fence posts rotted off because they were not treated to the same level of treatment as are your building columns. In fact, most fence posts are just dipped in a chemical solution, they are never actually treated under pressure. In many cases, fence posts are peeler cores (the center remaining after logs are peeled for plywood) which will not take a treatment to begin with, or they are a species which does not treat easily (or at all). I recently wrote an article about the lifespan of properly pressure preservative treated wood, which should put a rest to your fears: https://www.hansenpolebuildings.com/2017/12/will-poles-rot-off/.
Some nonstructural, yet important considerations – before your pour a concrete floor, make sure to install a good vapor barrier, which is well sealed. You should either unscrew the steel siding, place housewrap and reinstall, or spray closed cell foam insulation on the inside of the wall steel. In the event you create a dead attic space, make use of proper ventilation to prevent mold and mildew challenges later on.
 I recommend you consult with a RDP (Registered Design Professional – architect or engineer) who can determine if your building is structurally adequate for the modifications you propose. Post frame buildings with steel siding, which have not been specifically designed for future drywall finish on the inside, often have deflection which is beyond the limitations of the gypsum wallboard – meaning the joints will end up cracking due to too much lateral movement. Chances are good your roof trusses are not designed to support the weight of a ceiling and will require some engineered upgrades in order to do so. You are about to make a big investment into upgrading your building, please do not take my recommendations lightly – as you stated, you do not want to throw good money after bad.


