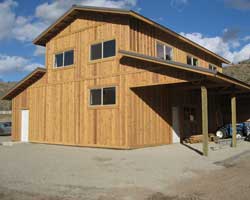
It seems more and more people are looking towards pole buildings for their new homes. We have clients asking us nearly every day, if they can “see” the available floor plans we have for pole building houses.
 Unlike typical residential “plan mills” or most ‘modern’ builders, we do not have a set list of house plans at our fingertips. We much rather prefer each of our clients develop their own floor plan, based upon what fits best with their particular needs – then “wrap” the pole building shell around where the future rooms will be.
If this task sounds daunting, don’t let it be – all it takes is a little thought on your part. Your pole building home is going to be where you live for many years, possibly the balance of your lifetime. Give thought to what your needs are today, as well as into the future, and you can have a design which will keep you satisfied for years to come.
Things to consider include room orientation. If the site has a view, face the most “lived in” spaces towards the view. For most families this would include the master bedroom, kitchen and family rooms.
Think about the future, while most of us are fairly spry when our children are young, do we really want to be making repeated trips up and down stairs to a second floor or basement at retirement age?
Minimization of steps is huge, so give thought as to how to reduce them and keep things convenient. Try to avoid having to walk through one room to reach another, and keep any hallways short. With an attached garage, keep the distance from it to the kitchen as short as possible, and on a direct route. Detached or no garage? Have an entry way nearby between parking areas and kitchen. Carrying groceries long distances becomes tedious quickly.
Eating areas should be incorporated into the kitchen. Large well planned kitchens are a plus, and islands are quite popular. Draw a triangle between sink, range and refrigerator. The three legs of the triangle should be no greater than 22 feet and the dishwasher should be along one of the legs (and next to the sink). Two dishwashers and two microwaves are very handy – seriously, once you have experienced it, there is no going back, you will be hooked. Islands should be 42 to 48 inches from any counter, and there should be at least three feet of counter between a refrigerator and the sink. If at all possible, incorporate a pantry into your plans.
Formal dining rooms are pretty much a thing of the past (along with living rooms and foyers), but if there is to be one, it should be adjacent to the kitchen as well.
Family rooms are exactly what they sound like – where the family gathers. Allocate 200 or more square feet here. Being adjacent or open to the kitchen is becoming increasingly popular.
Laundry rooms should be planned to be convenient to either the bedrooms, or the kitchen. Locating them in an attached garage, or on a different floor makes the task of doing the wash not nearly as enjoyable or practical. Consider if you want the laundry room to double as a mud room as well.
There should be a coat, boot, glove, umbrella, etc., closet located nearby any door to the outside world.
All bedrooms should be either close to, or have a bathroom attached.
Large master bedrooms are wonderful and chances are good most couples will spend a fair amount of time in them (easily over 1/3rd of your life). Consider room for a couch or love seat, to watch TV or read. Space for a desk or your favorite exercise equipment? Walk in closets and spacious bathrooms make for an inviting master suite.
With secondary bedrooms, I usually recommend keeping them as small as possible, if you have children, they grow up quickly and face it – they never want to hang out in their rooms anyhow. Plan on about 100 square feet, plus a good sized closet (should be at least two feet deep by six to eight feet long). Well planned closets also make for good sound barriers to adjacent rooms (think the master bedroom). Secondary/guest bathrooms can be about five by seven feet.
Plumbing costs are reduced by having bathrooms and laundry rooms close or adjacent to each other, or if on multiple levels, stacking them.
From this outline, consider how much space is ideally needed for each room. Which rooms need to be located next to which and draw a box around the rooms. Use grid paper and make cut-outs of every room – move them around on a table until it you feel the flow of the rooms and consider all options. Voila! You now have “YOUR” house plans! The nice thing about a pole building framework – none of the interior walls are “structural”. As kids grow up and leave home, you can move interior walls and combine kids’ rooms into a den or larger family room. You have the greatest potential to get your dream home…with a pole building!


