Welcome to Ask the Pole Barn Guru – where you can ask questions about building topics, with answers posted on Mondays. With many questions to answer, please be patient to watch for yours to come up on a future Monday segment. If you want a quick answer, please be sure to answer with a “reply-able” email address.
Email all questions to: PoleBarnGuru@HansenPoleBuildings.com
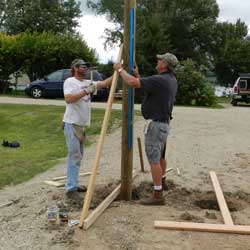
DEAR POLE BARN GURU: Have you ever tried using stands under your posts before you pour. I like the concept brand “X” uses, just seems a little overly complicated. Thanks. SCOTT IN MACOMB
DEAR SCOTT: Without knowing who Brand “X” is, hard for me to comment on their methodology. I have not personally tried the use of stands, however I have written about them: https://www.hansenpolebuildings.com/blog/2014/05/one-pour-reinforcement-cage/.
This does seem like a costly method, when it is actually quite simple to just ‘float’ the posts in the holes: https://www.hansenpolebuildings.com/blog/2015/04/floating-poles/
Mike the Pole Barn Guru
DEAR POLE BARN GURU: Hi, I’m putting in a pole barn, and where it’s located is about two feet low from the driveway. This area gets a bit wet during rains, and I was wondering what would be the best solution to build up the area? I will be pouring a concrete pad eventually. Should I use a crushed gravel or something like a bank run dirt (processed fill with dirt and stone)? Thanks! MATT IN OSWEGO
DEAR MATT: Most certainly an excellent idea to raise up the site of your new pole building – the last thing you want to do is have it sit in a hole!
Rather than rehash a well-covered prior topic, you should read through the series of articles I wrote beginning with this one: https://www.hansenpolebuildings.com/blog/2011/11/site-preparation/
By inputting your “key word” in the search field on the blog page– you can read other articles on related subjects. I think you will find lots of useful information in past blogs.
Good Luck! Mike the Pole Barn Guru
DEAR POLE BARN GURU: Hi. I’m building a 12 by 20 pole barn (gambrel roof). So far I just finished the trusses and I’m going to be setting the poles in few days. I’m following the instructions from a book building a shed from Joseph Truini. And I got extra plans from perfect barns company from same book.
My questions:
- In the book they set the post or pole in one bag of concrete for each post for footing then they set the post and build the walls and after framing the wall they set the post.
Is this crazy to put walls before setting posts?
- After they frame the walls the only add 1/2 bag of concrete to each post, is this enough?
- I live in Edmonton, Canada where the winters are weeks of 20 (C) below so I need to make sure the structure is strong enough to last this extreme weather.
The frost line around here is more than 4 feet, I’m planning in digging as deep as I can get – maybe 8 or 10 feet. Do you think this is enough?
MARITZABEL IN EDMONTON
DEAR MARITZABEL: Based upon the information I have been able to find on the internet it sounds like the eight to 10 foot frost depth is probably correct. I do really question a footing made from only one bag of premix – footings should be six to eight inches thick at a minimum and even on a small building, probably at least 18 inches in diameter. Adding another ½ bag of concrete later, after walls are up, sounds like a waste of a ½ bag of premix.
I’d stand the columns in the holes, float them eight inches off the bottom of the hole and pour at least 18 inches of concrete in the bottom.
Without looking at the plans you are working from, I have no idea of how one could possibly frame walls before setting posts.
Mike the Pole Barn Guru
 Use duplex (double headed) nails, or similar fasteners, to temporarily attach a roof purlin at “column depth below grade” across what will become the interior face of the column when it is placed in the hole. In most instances, with frost depths of 40 inches or less, this will be 32 inches from the end of the pole which is towards the hole.


