Every once in a while I surprise people and actually pass out some worthwhile real life scenario information. Today it is going to be a “how-to”: trimming an overhead door.
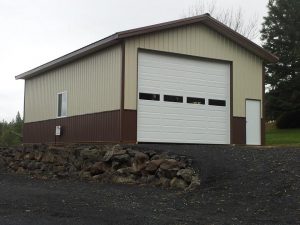
Here is the picture – the client hired a contractor to construct their building and ended up completing the building themselves. The new pole building has a 14 foot wide by eight foot tall raised panel residential overhead door in one endwall. The original intention was to have “dog ears” at the corners of the opening. However the builders framed the opening square (instead of angle cut), and then cut the endwall steel to match the square opening, followed by installing the steel siding to match the opening.
 The overhead door trim provided is a one piece unit, with a wide face to cover the 2×6 jamb boards, and an integrated J. For whatever reason, we have adopted the designation used by McElroy Metals for this piece, “PJFB- 6-1/2”. For this particular client’s building, two pieces of 16’ long trim were provided.
The dimensions of the finished opening for the door (above the concrete slab) are 13’10” in width and 7’11” in height, giving the residential door a one inch overlap on each side and at the top.
While the Hansen Buildings Construction Guide gives step-by-step instructions for the cutting of these trims in situations with dog ears, up until now cutting trim for square cut is not covered. (It will be added very soon however!)
Remove any screws from the siding which are within nine inches of the opening.
First, take one of the 16’ trim pieces and cut it exactly in half. These two pieces will eventually become the verticals. Hold the trim so looking at one end, the “J” is visible. With the “J” on the left, cut down each bend of the “J” (two places) one inch. Bend this tab back and forth until it breaks off.
Bend the wide face of the trim at 90 degrees away from the “J” one inch below the end you are cutting on. This one inch will fit behind the top jamb trim.
Do the opposite to create the other vertical.
For the horizontal, cut it square at 14’3”. Cut along the two bends of the “J” on each end for 2-1/2 inches. Bend the newly created tab down (it will slide into the vertical “J”s). Cut 1-1/2” off the small face of the “J” on each end. From the uppermost edge of the last cut, cut a 45 degree angle back to the cut at 2-1/2 inches (do this on each end). This 45 will overlap the “street face” of the verticals.
Cut the wide face of the trim off at 2-1/2 inches from each end.
Assemble the pieces interlocking on a flat surface – trim (it won’t be much) as necessary to give a snug and attractive fit.
With one person at each “joint” of the three pieces, pick assembly up and slide the wide leg of the “J” under the existing wall steel edge on one side (this will entail lowering the opposite joint). Once in place, gradually slide the top and opposite vertical trims in.
Replace the screw in the siding, and (if not already so located) place another screw in each line up close to the street face of the “J”, so it will go through the wide back face of the “J” and into the wood behind.
And yes, trimming an overhead door will be added to the Hansen Buildings Construction Guide, along with accompanying diagrams and real life photos


