Hart and Home YouTube – Episode IV The Final Chapter
If you missed our previous episodes, please go to bottom of this article, on left, and click on arrow thrice to go to Hart and Home YouTube – Episode I. Moving forward:
While individual results may vary, our clients have generally had good experiences using windows with integral J Channels and following our Construction Manual installation processes. I have several of them on my own post frame shouse (shop/house) and leakage has never been an issue. When I was a full time post frame building contractor, roughly 10% of all of our standard flanged windows had call backs due to leakage. Once we went to integral J Channel windows, our warranty claims disappeared.

Just this past year, we have gone to including Climactic specific requirements for insulation to our engineer sealed building plans, this includes window U values.
Kevin Hart had some excellent points on splash plank installation and for those who will be taking extended times for installation, we will be adding other recommendations to our Construction Manual. For buildings with ceiling loaded trusses and ceiling joists, “Most Common Mistake #2” in Construction Manual Chapter 36, Ceiling Joists, is “Neglecting to install joist hangers prior to lifting trusses”. With hangars in place, it allows for permanent truss bracing to be located appropriately to avoid having conflicting locations. Language has since been added to Construction Manual Chapter 9, Roof Truss Preparation, to encourage installation of ceiling joist hangers, prior to lifting trusses into place.
We have edited our Construction Manual in regards to orientation of truss notch and placement for the first pair of trusses closest to the front endwall in order to aid in ease of lifting the entire bay closest to each endwall.
Having owned or managed prefabricated wood roof trusses for 20 years – truss builders are not carpenters. When allowed to nail trusses together into pairs, more often than not results are less than what most clients would find acceptable. Due to weight, it is also far easier to move trusses around on jobsites as singles.
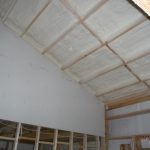
Language has since been added to our Construction Manual for applying temporary bracing to tops of purlins if roof steel will not be applied immediately following purlin installation. We also have discontinued offering reflective radiant barriers as an option, instead we have gone to roof steel with factory applied integral condensation control (more about Integral Condensation Control here: https://hansenpolebuildings.com/2020/09/integral-condensation-control-2/).
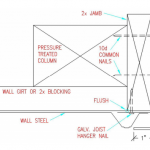
We had already been having discussions internally in regards to adding an externally mounted girt below windows, just like Kevin did. Right now, it is just a matter of programming in our system and getting instructions and drawings into our Construction Manual.
Many builders like to use F and J trims at top of sidewalls with enclosed overhangs – mostly because they then do not attach soffit panels at all on the inboard (wall) side. While it makes for a quick installation, soffit receiving portion of “F” is wider than soffit is thick, allowing soffit panels to vibrate in wind. Builders using F and J are not placing any solid wood backing above it, again saving them money, but not providing anything of substance to attach soffit panels to.
Trims butting or overlapping – we have struggled with non-uniformity of press broken trims and have had better luck with how they lie when butted than trying to make laps look smooth. On fascia trims, we’ve used a plethora of different variations before settling on our current model. With properly placed inside closure strips at the extreme downhill edge of fascia, we have never experienced water getting behind fascia L trim. We did try a shorter height L fascia trim, with an eave trim and found the angle of eave trims caused drip edge of eave trim away from fascia trim. When screws were placed thru eave trim to prevent this – eave trims puckered out away from fascia trim between screws.
On the end of sidewall soffit level trim, with soffit panels installed per Construction Manual, underside of base trim at end. Downside is it does leave a cut edge of the soffit panel. We believe we have found an improved trim option. It would allow soffit panels to slide in at each end and would have a finish painted side down.
Thank you again to Kevin and Whitney for allowing our team at Hansen Pole Buildings to participate in their incredible journey. We look forward to assisting you with yours!


