Part III of three in how to build a Sliding Door(Part I posted July 13 and Part II July 14):
Door Pull
From experience, for opening ease, it is best mounted vertically onto door “end” – on a Vertical Side Rail face. If one-piece sliding doors, skip next section.
Bi-Parting Doors
With a few exceptions (Track to Track Board, Jamb Mount Stop and Side Mounted Jamb latch, mentioned earlier), bi-parting doors install same as single doors.
Door Track
Track for bi-parting doors installs with a 24” trackless space (48” space if doors are wider than 10’) at the center of the track board.
Astragal
Attach to one of the verticals where the two doors meet with one pantek screw for each 2’ of vertical height. See Figure 27-12.
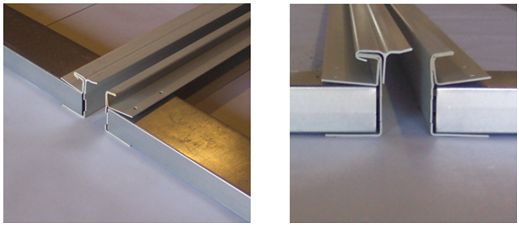
Figure 27-12
Center Mounted Snugger
Select a horizontal door member which is at a convenient height and drill one (1) 17/32” diameter hole as shown. Next drill one (1) 9/32” diameter hole in vertical door member.
Slip larger link on chain end over snugger rod and insert snugger rod into 17/32” hole in horizontal door member.
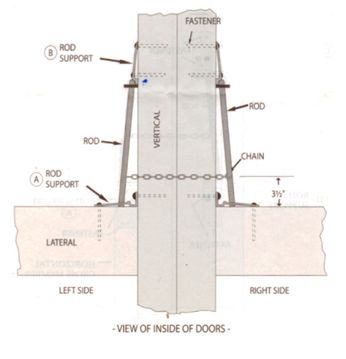
Figure 27-13
Secure opposite snugger rod end to vertical member using one (1) 1/4” fastener and nut. See Figure 27-13
Install snugger rod second half in other door, following same procedure except no chain link is put on rod. Attach “S” hook to chain.
To latch the two doors together, merely hook “S” hook onto snugger rod as shown. The more door rattles, the tighter latch becomes.
After making certain “S” hook is in proper link (latched chain will be about 6” from horizontal member top), close “S” hook slightly so it will stays attached to chain. See Figure 27-13.
Center Door Guide
Center guide may be mounted to a pressure treated post cutoff piece or embedded in concrete. Center guide mounting fasteners are NOT included.
Locate guide at door opening center point. Sliding door bottom laterals will hook into center guide. See Figure 27-14.
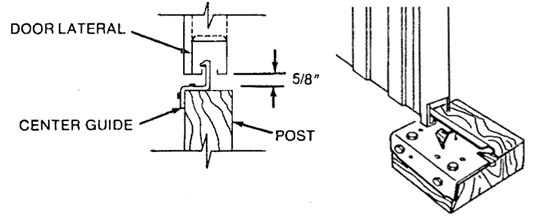
Figure 27-14
For proper closure, each bottom horizontal is to be cut or notched 1/16” short for the center verticals to compensate for center stop thickness.
Place center guide and fasten with 6 nails or 4 3/8” lag bolts.
See Figure 27-15

Figure 27-15
After guide is in place, additional adjustment is possible through vertical adjustment on door trolleys. This adjustment is used after center guide is rigidly in place.
This concludes our three part series on sliding door construction.


