I admit, when I first entered the post frame (pole) building business – I was clueless on a good day. My only “training” was picking the brain of an old time pole barn builder, George Evanovich. George was a nice enough guy, but it didn’t take me long to realize when it came to details – George was winging it!
 When it came to entry doors – George gave me bad information. He didn’t want the pressure preservative treated skirt board (aka splash plank) to be across entry door openings. Not knowing any better, I didn’t consider asking why, or (more appropriately) why not?
It didn’t take long for me to find out things work much better if the skirt board is run across any entry door openings.
Why?
Remember, in the event a nominal four inch thick concrete slab on grade floor is to be poured inside of the building, the bottom of the splash plank is the bottom of the slab. Just in case you have forgotten: https://www.hansenpolebuildings.com/2012/02/where-is-the-top-of-the-concrete-slab/
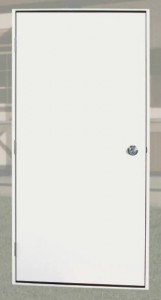
So, doing it George’s way, the entry door would have been placed with the bottom of the door at grade. Let’s hope the doors all opened out and no one had any issues with there being a 3-1/2” lip of concrete directly inside of the door. Watch out for stubbed toes!
To do it right – the splash plank does get placed across the site of the future entry door. In the area between pressure preservative treated columns where the entry door will be placed, draw a horizontal line on the outside of the splash plank, 3-1/2 inches above the bottom (or grade). On the door side of each post, saw cut vertically down to this line, then cut across the line between the posts.
DO NOT THROW THIS PIECE AWAY!!
Instead, rotate the top of the cutoff 90 degrees into the building, so it lays flat between the posts and behind the splash plank. Nail this cutoff securely through the splash plank, and toenail into the columns at each side of the entry door.
Now, when the entry door is installed, if the concrete floor is not immediately placed, this cutoff will act as a stiffener to keep the bottom threshold of the entry door from being bent, or worse, broken!


This cutout for the entry door, should it span the full length between the posts, or just wide enough for the door? And if it’s the full length, wouldn’t that leave a gap between the bottom of the metal siding and splash plank? What do I screw the metal to?
The “cutout” for the entry door is only between the columns at each side of the entry door – not the entire bay.
After installing the door, I realized due to the thickness of the posts and the the door frame being mounted flush with the outside of the building, the door only opens inward a bit more than 90 degrees (residential inward swinging door) before it hits the post on the inside. Is there any trick or any special hinges that will let the door swing inward around the post for a full 180 degrees? I have seen Swing Clear/Offset Door Hinges, but they don’t seem to be made for this purpose.
The only way to accomplish this would be to relocate the door so it is flush with the inside of the columns, then order steel L trims to side the short L behind the J Channels on the outside and cover the columns on each side of door opening (install L trim prior to reinstalling door).