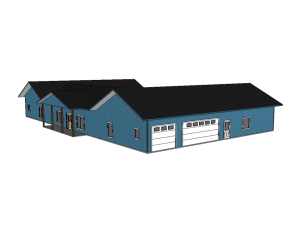
As important as carefully investigating the style, quality and features of the building you are going to buy, is taking the time to look over a sample set of plans and directions of how it all goes together…before you buy the building. I’ve purchased what looked to be the simplest projects in the past (how hard can a child’s toy box be?) only to come home and wonder if the people writing the directions had ever put one together themselves!
 As I mentioned yesterday, our plans are a minimum of 6 pages:
- Pole layout
- Roof Framing Section
- Interior Section
- Endwall framing elevations (both front and rear)
- Sidewall framing elevations (both left and right)
- Steel or Wood Siding Cutting and Layout Sheet
Depending upon your building size and features, there could be more pages for lofts, stairs or those pretty drawings certain building departments like to see, called “elevation drawings”.
Plans are drawn in a commonly used scale, which is required by most building departments. A word of caution here -do not ever and I say ever, try to use a ruler and “scale” off the drawing! Why? In printing, sometimes depending upon the computer and printer, the scale can get slightly altered. We also have detail drawings which are scaled at different scales, for you to get a closer look as if you zoomed in on them with field glasses. Getting the scales mixed up for the inexperienced could result in disastrous building errors. All dimensions are marked in “real foot” measurements, so read, use your tape measure and you will be just fine.
A word here about some of the common abbreviations used on your plans, before we get into discussing a pole layout. We try very hard to not use any abbreviations which are out of the ordinary, or difficult to figure out. Most folks can read BL and CL and understand they mean Building Line and Center Line. But not everyone reads: U.O.N. as Unless Otherwise Noted. And what does this mean anyway?! So we stick to the common ones, but when in doubt, ask! If you are looking over a sample set of plans and don’t understand half of what it is telling you, maybe this is not the building kit you want to purchase.
A pole layout is the first page of our plans. It shows outside of post to outside of post Building Line dimensions for the corners. This means if you have a building 24’ x 36’, and drew a line on the ground for those exact dimensions, all the posts including the corners would fit tight against the line on the inside of the rectangle.
The sidewall and endwall posts which are not corners, are measured to the centerline of each post. Why do we use centerlines for the inside posts? Not all posts are exactly the same size. They can vary as much as an inch or more, so a 6×4 which is normally 5-1/2” x 3-1/2” could be 5-1/4” x 3-3/8”! Small measurements for one post won’t make a hill of beans difference overall, but think how far off you’d be if you had a building 120’ long and every post was off “just a bit”.
The pole layout shows the diameter of the hole you are going to dig and fill with concrete, and then it shows you the orientation of the post. This means if you have a 6×4, on an endwall it could be placed with the 4” side “to the wind” or the 6” side “to the wind”. And the direction is important. Building codes, wind exposure and speed, along with large doors and width of your building will dictate both the size and orientation of the posts. But don’t worry, every dimension is shown on your pole layout.
OK, page one is easy, right?!
Click here to check out a sample Pole Layout:
https://www.hansenpolebuildings.com/sample-plans.htm
Come back tomorrow and we’ll talk about taking another look at your building from the sky: the Roof Framing Section.


