Welcome to Ask the Pole Barn Guru – where you can ask questions about building topics, with answers posted on Mondays. With many questions to answer, please be patient to watch for yours to come up on a future Monday segment. If you want a quick answer, please be sure to answer with a “reply-able” email address.
Email all questions to: PoleBarnGuru@HansenPoleBuildings.com
DEAR POLE BARN GURU: I have fiber glass roof light panels and they are leaking and damaged. I need new skylights. They have to match my old steel panels. Do you know where I can get some? HICCUP IN HINCKLEY
DEAR HICCUP: This is an ongoing issue with people who used fiberglass panels in roofs for skylights. The information you are seeking maybe found by reading: https://www.hansenpolebuildings.com/blog/2014/09/skylights-2/
Mike the Pole Barn Guru
DEAR POLE BARN GURU: Do you sell just the large rolling track style doors? AIRY IN ALASKA
DEAR AIRY: Although our prime business is providing complete post frame (pole) building kit packages, we can supply just the components for sliding doors. We are happy to help you – Please be aware – there will be a considerable amount of freight in shipping a sliding door package to any location, and even more so in your case – Alaska. Please send any sliding door package assembly requests to Eric@HansenPoleBuildings.com
Mike the Pole Barn Guru
DEAR POLE BARN GURU: I’m planning on having a pole barn built to be used as a shop building for my business. I want to insulate the roof and walls. The walls are easy, but I am not sure how to economically insulate the roof. The roof is supported by a pair of trusses bolted to each side of the pole (actually a 6 by 6 pressure treated post). Purlins are 2 by 6’s placed 24 inches on center, running parallel to the ridge. There is a vapor barrier “insulating blanket” (really very thin) on top of the purlins under the steel roofing panels. It is there to prevent condensation and subsequent raining inside the building.
One idea would be to nail 2 inch thick foil faced foam panels to the underside of the purlins, then 1 by 3 strapping nailed 16 inches o.c. perpendicular to the purlins, to create a three-quarter inch air space between the foam panels and the half-inch drywall nailed to the strapping. I’ve specified the roof be built to support the weight of the drywall.
Do you have better and or cheaper ideas? WANTING IN WASHINGTON
DEAR WANTING: Although it has little to do with insulating your building, I’ll start with a structural concern – instead of placing trusses on each side of the columns, I would recommend they be nailed face-to-face without blocking between, then placed into a notch cut into the tops of the columns. The trusses then actually act as a pair, as opposed to two individual trusses spaced apart. This greatly reduces the possibility of a catastrophic failure due to one individual truss failing, as the probability of the two joined trusses having the exact same weak point is infinitesimally small.
Moving forward – typically columns (and trusses) in your part of the country are spaced every 10 or 12 feet. If 2×6 roof purlins are to be used, they will not be able to carry the weight of the drywall without undue deflection.
Let’s go to simple, better and easy. In your proposed version, a large area is being created above the plane of the bottom chord of the trusses and below the drywall – where all of the heat is going to rise to. You will have to heat a large volume of space, which is not able to be utilized.
Instead – specify the trusses to be fabricated with a raised heel (see https://www.hansenpolebuildings.com/blog/2012/07/raised-heel-trusses/). Install 2×6 ceiling joists at 24 inches on center between the roof truss bottom chords, using a Simpson LU24 or similar hanger at each end. Install 5/8” gypsum wallboard across the underside of the ceiling joists. Blow in cellulose or fiberglass insulation, or use unfaced batt insulation above the drywall.
Be sure to include specifications to ventilate the dead attic space: https://www.hansenpolebuildings.com/blog/2014/02/pole-building-ventilation/
These steps will allow you to climate control the least amount of space, with the least cost to achieve the insulating system.
Mike the Pole Barn Guru
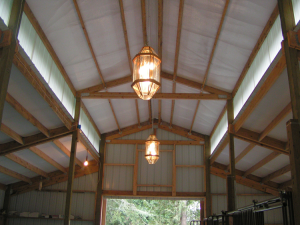 Eave lights are typically short portions of translucent material installed usually in the upper portion of one or both eave sidewalls.


