Tag Archives: structural engineer

Rethinking Ways to Encourage Permanent Truss Bracing

Today’s blog comes from Hansen Pole Building’s guest, Frank Woeste, P.E.

Rethinking Ways to Encourage Permanent Truss Bracing Part II

  1. Truss Bracing Background

    The purpose of permanent truss bracing is to satisfy the design assumptions of the truss designer such that the truss system will safely support design loads through the design life of the structure. Early truss industry temporary bracing recommendations (DSB-89)[3] were based on an assumed dead loading of about 5–10 psf based on the truss span, whereas the truss design total load (gravity) commonly varies from 40–60 psf.

    The dramatic difference in assumed load levels acting during truss installation verses in-service loading is helpful in understanding that the bracing needed for a “safe installation” is only the first part of a complete truss system that will satisfy the design assumptions of the truss designer/engineer.

    2015 BCSI, pp. 1–36, provides background, data, and recommendations for the “safe installation” of trusses spaced up to 2-ft. on-center and up to 80-ft in length. After a quick review of these 36 pages, some GCs may be surprised by the extent of the information and then entertain the book as a “check-it-out item” for their truss installation sub-contractors.
     
  1. BCSIB3 Discussion Topics—Permanent Bracing for Chords and Webs

    In the interest of time, only the “high points” can be covered to generate interest in the scope of the book. It may be instructive to review the bottom paragraph of the 2nd column on page 37:
    It can be quickly noted that, for most commercial projects involving an Architect or Structural Engineer (RDP), the roof truss bracing system design/specifications is not the responsibility of the Contractor per ANSI/TPI 12015, Section 2.3.4.10.

    As you page through the book with your customer, I believe some will be fascinated by the extent of information and bracing details available for consideration and possible use by the RDP for a project.

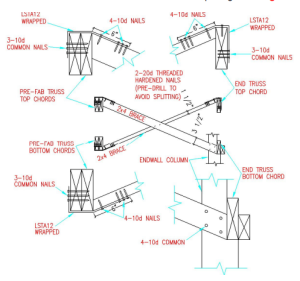
    Turning to page 41 on Web Member Permanent Bracing, you will find a discussion about the importance of Diagonal Braces (DBs) and Continuous Lateral Restraints (CLRs). Figure B3–11 then depicts CLRs in green, DBs in red. A note in two locations on page 41 states:
    “Repeat Diagonal Bracing every 20’ or as specified. Closer spacing may be required by the Building Designer.”

    A similar note is given in other locations of BCSIB3 and it points to the fact that industry and engineering experts can only publish an upper limit on the DB spacing—not the actual spacing that might be required due to the design level of axial compression in a web or chord (typically produced by a design snow load combination).

    Returning to the case where the RDP does not provide a permanent bracing design for a truss package after it has been reviewed and returned to the CM, the GC must understand the RDP has not provided a definitive specification on the required DB spacing for the roof truss installation as required by the building code and TPI 1 (because BCSIB3 defers the issue of DB spacing to the RDP).

    This discussion leads me to an “a-ha moment”—if the RDP for the project was advised about the availability of the BCSI Book and introduced to the permanent bracing content, would it be unreasonably burdensome to ask the RDP to:
  • Consider the BCSI Book as an industry standard for permanent bracing and possibly adopt it for a specific project,
  • Make notes in the book as to what is needed in terms of DB spacing(s),
  • Note any other additional permanent bracing requirements for the project,
  • Sign, seal, and add their professional work to the Construction Documents?

A Call to Action

This article suggests the idea that CMs should become more proactive in the education of their customers with respect to permanent bracing resources and the same information can be shared with the RDP for their specific project. The issue of permanent bracing design and installation is present for every truss installation based on the assumptions, bracing requirements, and information given on the truss design drawings. The natural link between the CM, GC, and RDP is the only link that I can identify whereby permanent bracing education by one party could be reliably shared with the other parties. Additionally, the CM could meet with local code departments and design professionals and provide a copy of the BCSI Book.

By this article, I challenge CMs and truss industry leaders to consider the current permanent bracing practices in the field and suggest other proactive ideas to establish a reliable path for sharing permanent bracing design resources with the GC and ultimately the RDP.

The author welcomes comments and can be contacted by e-mail: fwoeste@vt.edu.

[1] Building Component Safety Information 2013 Edition Updated March 2105 published by the Truss Plate Institute (TPI) and Structural Building Components Association (SBCA).

[2] http://www.tpinst.org/technical-downloads

[3] DSB-89: Recommended Design Specification for Temporary Bracing of Metal Plate Connected Wood Trusses published by the Truss Plate Institute (TPI).

Can I Turn an Existing Pole Barn into a Barndominium

Can I Turn an Existing Pole Barn into a Barndominium?

Reader MICHELLE in GALLATIN writes:

“Hi Mike, my name is Michelle and I live in Nashville Tennessee. I am under contract on an existing pole barn (30′ x 60′) that I am going to turn into a Barndominium. (Picture attached) Today we had the structural engineer come out because the city tells me I will need a letter from him saying the building is up to codes before they will issue a building permit. The structural engineer is not familiar with Barndominiums and has some questions about the roof sleepers. Everything else checks out OK. Is there any possibility he could call you to pick your brain on this? I am willing to pay you for your time on the phone call. Just so you know I am looking to do the spray foam on the ceiling and walls as per all the discussions I read on the barndominium Facebook page. Please feel free to call me if you’d rather talk this through more on the phone with me before the structural engineer calls you. If you decide you have the time to take his call.”

Mike the Pole Barn Guru says: Because Michelle is so nice, here are my insights, addressed by photo:

Wood entry door in wood jambs should be replaced with an insulated, factory painted, steel door with factory painted steel jambs


Reflective Radiant Barriers (RRB) are only effective at controlling condensation when seams are thoroughly taped together.


Roof trusses are unlikely to have been designed to support a ceiling load – requiring further analysis. Provided they are either adequate, or can be repaired to carry a ceiling load, heels are not deep enough to provide full depth of insulation from wall-to-wall. Design solutions could include (a) remove reflective radiant barrier from roof and use closed cell spray foam insulation to underside of roof deck, or (b) use closed cell spray foam closest to eaves on top of ceiling with blown fiberglass to R-60 in balance of attic area. Spray foam needs to be installed to allow for at least one inch of clear airflow above. Diagonal braces at corners are inadequate to properly transfer shear loads. It is possible to replace screws at top and bottom of each roof and wall panel with 1-1/2″ #12 diaphragm screws, with one each side of every high rib. This should get you to 80-90 pounds per lineal foot of shear resistance.


Eave lights should be removed as they will not transfer shear loads and will be covered with insulation and interior finish materials. Truss carriers (and their connections) should be checked for adequacy to carry concentrated loads from intermediate trusses. As a carrier is on the inside face of columns, an interior set of wall girts will need to be added to support finishes.


Sliding doors will need to be replaced either with solid walls, or an appropriate door or window(s). I would want to see an X brace between the end truss and the next truss at centerline connected to each chord with a Simpson LSTA12 or similar.


Connections between roof purlins and trusses are probably inadequate, particularly at endwalls.


Truss bottom chords should be braced laterally no less than 10′ on center (and probably more like every 6-7′). Ceiling joists would fulfill this requirement.


Remove any current concrete slabs – re-pour four inches thick over no less than four inches of compacted gravel, a 6mil minimum well-sealed vapor barrier and ideally R-10 EPS insulation boards.


If a dead attic space will be created, provide venting at eaves and ridge


Roof steel is showing signs of aging, I would recommend replacing – remove RRB and order roof steel with an Integral Condensation Control factory applied, unless roof assembly is to be insulated only with spray foam insulation.


Perimeter of slab should be insulated with R-10 EPS boards down two feet, then outwards two feet

My recommendation – I would continue to use this building strictly as a barn and erect a new, fully engineered and Code conforming post frame home elsewhere on this property. Bringing this building up to meet Code requirements as a dwelling will cost more in time and labor than building is worth. https://hansenpolebuildings.com/2022/01/why-your-new-barndominium-should-be-post-frame/

Frustrating Builder, Post Size, and Sliding Barn Doors?

This week the Pole Barn Guru tackles reader questions about recourse against a builder that “never does what what he says,” a question about the necessary post size for an RV shelter, and the need for a structural engineer to answer the question, and advice for a reader whose doors blow out wondering if sliding doors are the solution— probably not.

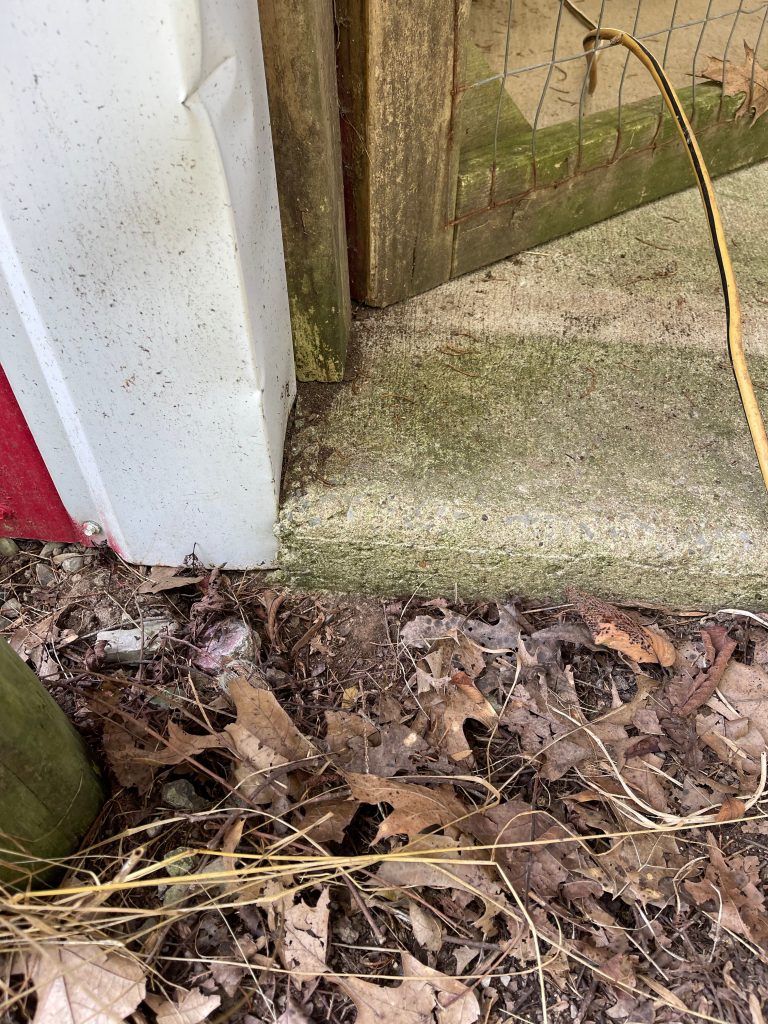
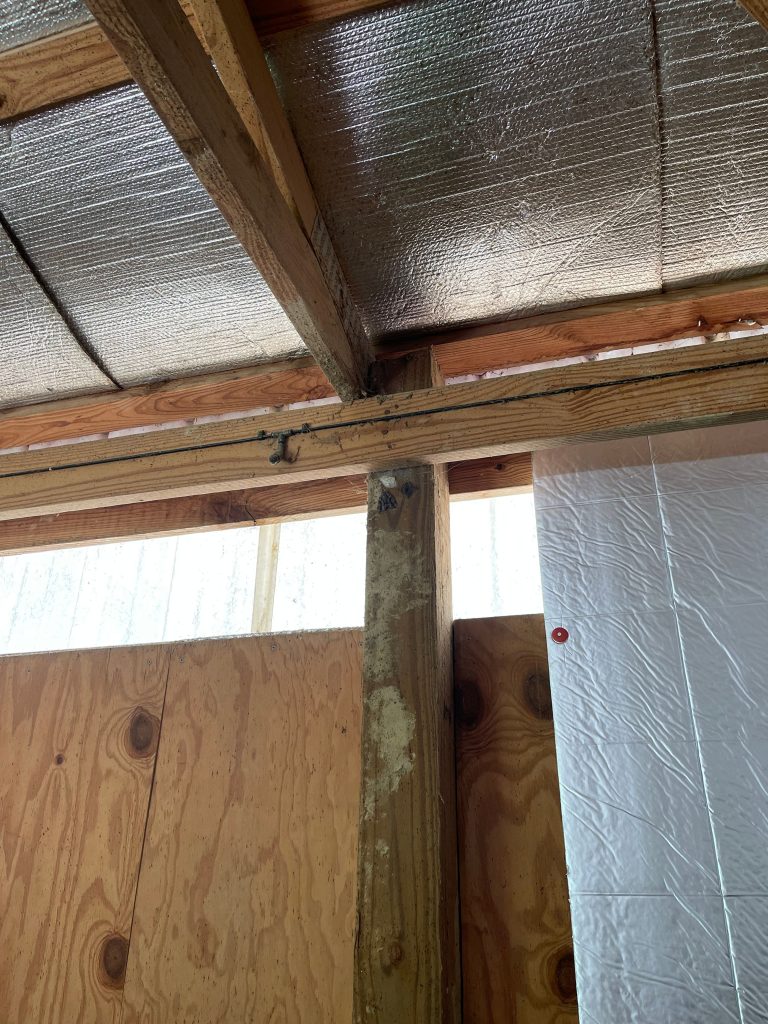
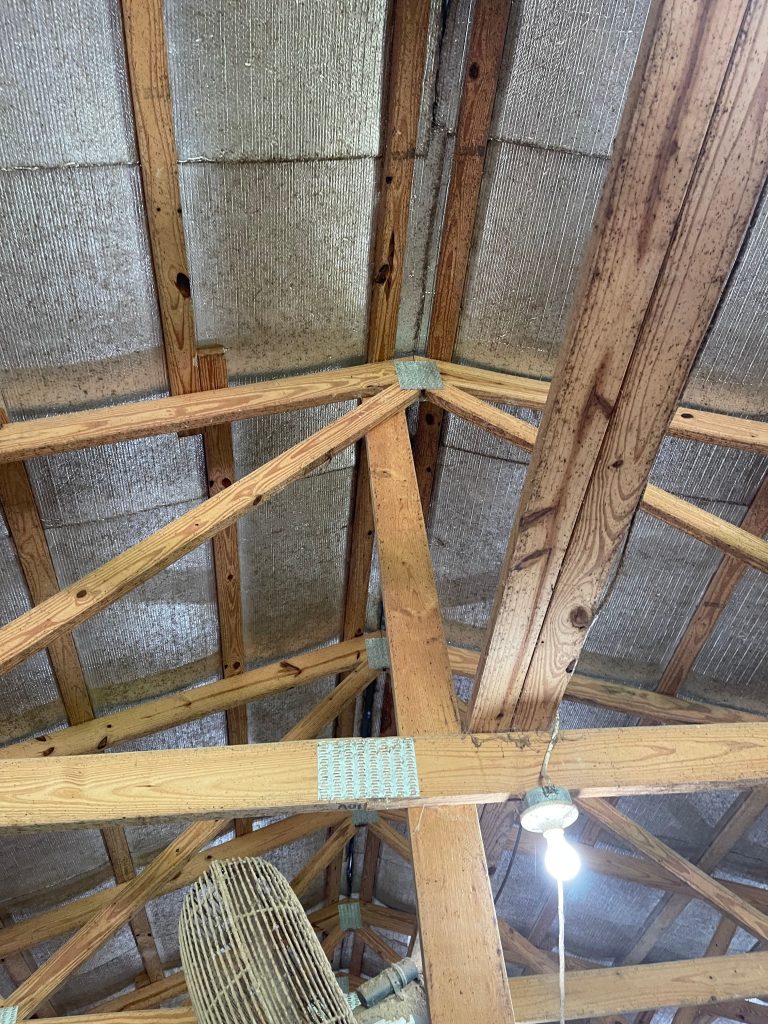
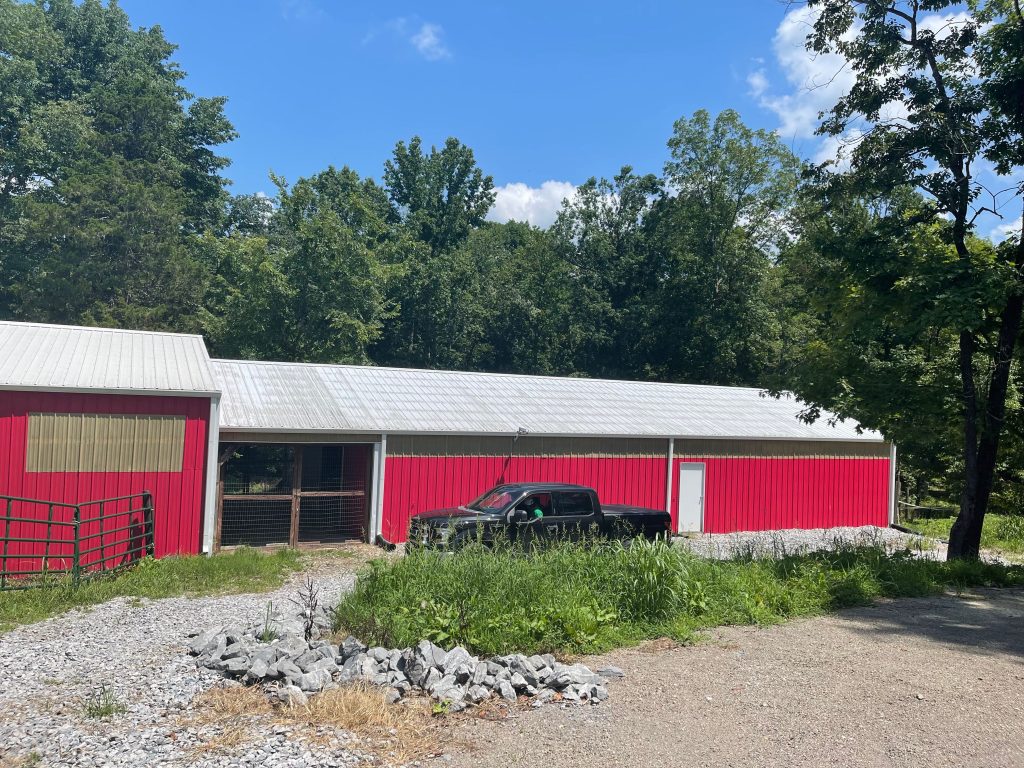
DEAR POLE BARN GURU: Thanks, I have a builder who has not done one thing right. The details are long and frustrating. What recourse do I have? It seems there is no codes in Heavner, Oklahoma I would like to send some pictures. I am disabled and to not have stress. This guy lies and never does what he says. Never got a contract, asked several times. KENETH in HEAVNER

DEAR KENNETH: Hire a Construction Attorney Now.

Do not give this builder any more money.

You have probably now realized you have committed a cardinal sin of building construction – hiring a builder, without a contract.
For those of you following along at home: ALWAYS THOROUGHLY VET ANY CONTRACTOR https://www.hansenpolebuildings.com/2018/04/vetting-building-contractor/
And contracts are boring, until you go to court: https://www.hansenpolebuildings.com/2021/06/contracts-are-boring-until-you-go-to-court/


DEAR POLE BARN GURU: What size post needed for 26 by 26 with 12 foot high wall and 4/12 beam roof RV port. DON in OMAHA

DEAR DON: This is a question best answered by an engineer who is going to seal your building plans (whomever you are purchasing your building kit should be including them). While I cannot give you actual engineering advice, I can tell you what will not work.

In a roof only post frame building, columns act as cantilevers (think diving board). There is a minimum column dimension calculation, based upon a column’s unsupported length. In most cases, this unsupported length is from top of full concrete backfilled hole, to bottom of roof trusses.

Let’s take a look at a 6×6 (actual dimensions of 5-1/2″ x 5-1/2″). The L/d (Unsupported length divided by least dimension of column) ratio must be less than 50. 12 feet equals 144 inches, so 144 divided by 5.5 equals 26.18 – but, NOT SO FAST, columns are also impacted by a ‘magical’ factor known as Ke. For a purely cantilevered column Ke is equal to 2.1. Therefore 26.8 times 2.1 equals 54.98, as this is greater than 50 and a 6×6 would fail.

Greatest unsupported length of a cantilevered 6×6 column would be 130.95 inches. This does NOT take into account loads having to be carried by this column (snow, wind and seismic), hence your need for an engineer to verify structural adequacy.


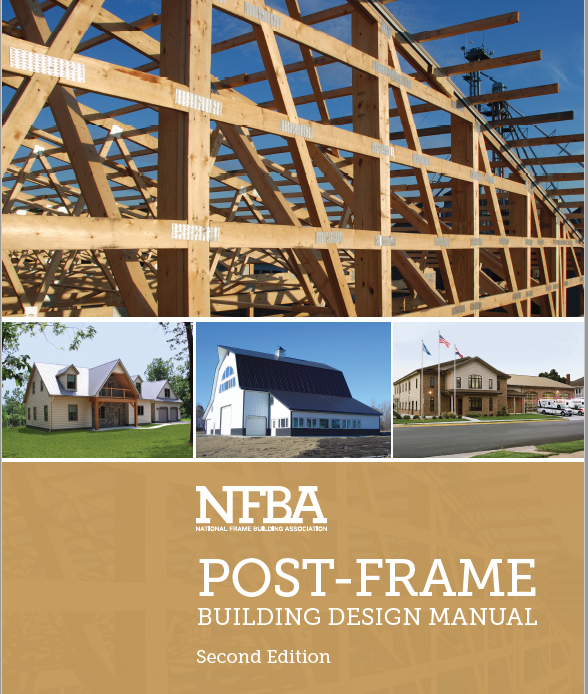
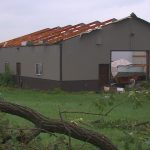
DEAR POLE BARN GURU: I’ve had my 2, 12 x 12 panel doors blow out and my roof dropped 1/4 mile away twice in 2 years. I’m thinking barn doors to maybe be a good idea for my door replacement this time as they mount outside, which will make it much harder for the wind to bend them. Do you make or can you suggest a door to replace these doors this time that will not get blown out by the wind? Thanks for your time and trouble. JOHN in SOLANO

DEAR JOHN: Sliding ‘barn’ doors are probably not your best design solution as very few of them will withstand high winds. What you actually need (at least my recommendation) are wind rated overhead doors. Whomever provided your doors originally (and replaced them) did you a true injustice. https://www.hansenpolebuildings.com/2014/12/wind-load-rated-garage-doors/

Subcontractors for Your Barndominium

Welcome – you are maybe here because you have followed my biggest money saving tip in building a new barndominium, you are acting as your own General Contractor. If you are not yet convinced, please take a brief pause to jump back to: https://www.hansenpolebuildings.com/2020/02/does-my-barndominium-need-a-turn-key-general-contractor/.

There are those who have time and patience (or skills) to learn how to DIY everything. Most do not fit into this category and are going to need some skilled subcontractors to do more (or all) challenging tasks.

A subcontractor is an individual contractor or a contracting firm who contracts with a General Contractor (now you as an owner builder), to perform part or all of a specific barndominium building job. In construction industry jargon, subcontractors are also called subs.

With you in control as general contractor,  you will build your new home by subcontracting with others for specific jobs.

You will pay for your project by setting a predetermined contract amount with each subcontractor.

You will have no hourly wage employees working for you, meaning you will avoid mountains of governmental red tape and taxes concerning employees.

Your contractors and subcontractors are not considered to be employees.

Some subcontractors, or contractors, need to be licensed for their trade. Check with your local Building Department to confirm these requirements. For those needing to be licensed, be sure to ask to see a copy of their contractor’s registration and verify it!

Below is a list of barndominium contractors, subcontractors and professional people you probably will be contracting with, listed generally in order of need (along with links to relevant articles, where appropriate).

Real estate agent (for land search) https://www.hansenpolebuildings.com/2019/08/a-place-for-a-post-frame-barndominium/

Real estate attorney (many states require them for property closing)

Loan officer at banks, credit unions, or mortgage lenders https://www.hansenpolebuildings.com/2020/06/things-to-complete-before-going-to-a-barndominium-lender/

Barndominium designer http://www.hansenpolebuildings.com/post-frame-floor-plans/?fbclid=IwAR2ta5IFSxrltv5eAyBVmg-JUsoPfy9hbWtP86svOTPfG1q5pGmfhA7yd5Q

Structural engineer (every Hansen Pole Building comes complete with fully engineered structural plans, so this aspect is covered for you)

Surveyor https://www.hansenpolebuildings.com/2014/02/pole-building-20/

Well driller (if no public water)

Grading and Excavation Contractor

Septic system installer

Soil Treatment Firm if in termite country https://www.hansenpolebuildings.com/2019/09/pre-construction-termite-treatment/

Your Hansen Pole Building kit (www.HansenPoleBuildings.com 1.866.200.9657)

Hansen Buildings Construction Manual
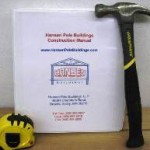
Building Erector (Hansen Pole Buildings are designed for average physically capable persons who can and will read instructions to successfully construct their own beautiful buildings and many of our clients do DIY). Our buildings come with full 24” x 36” blueprints detailing location and attachment of every piece, a 500 page fully illustrated step-by-step installation manual, as well as unlimited technical support from people who have actually built buildings. For those without time or inclination, we have an extensive independent Builder Network covering the contiguous 48 states. We can assist you in getting erection labor pricing as well as introducing you to potential builders

Concrete contractor to pour concrete slab or concrete floors, as well as drives, walks and approaches.

Electrician

Plumber

HVAC (heating, ventilation and air-conditioning)

Insulation installer

Drywall contractor

Painter

Finish carpenter (Installs kitchen and other built-in cabinets and trim around doors and windows)

Flooring, carpet, and countertop contractor

Tile contractor

Cleaning crew contractor

Landscape contractor

Cross off from this list all tasks and trades you are willing and able to do yourself. You are now journeying a step closer to your barndominium General Contracting success!

Cutting Barn Trusses

Just a Little Nip Here, Tuck There

As so many of us have entered an age of Covid-19 binge television watching, I can imagine there are more than a few who have consumed calories while watching 100 episodes of Nip/Tuck (originally aired on FX from 2003-2010).

While nipping and tucking can solve many human cosmetic issues, it is done by highly skilled professional surgeons. Want to nip and tuck on a building’s structure? You wouldn’t hire a bus driver to perform plastic surgery, so don’t try to be your own structural engineer.

Reader BRIAN in ANDERSON writes:

“I have a barn, 40 foot wide, 36 feet long.  I need to increase the height of the front garage door to fit an RV, and need to modify a single truss in the front of the building to make room for a roll-up garage door (barrel door).  The trusses are engineered attic trusses, and span the 40′ without any support.  The distance between the web members that would make up the “wall” of the attic room, is just over 16′.  The door is 16′ wide.  So I need to get some more room between the web supports, and remove a section of the bottom chord.  I will be raising the middle section of the bottom chord by 26″. My plan is to modify the truss in two ways:  First create a new bottom truss to effectively turn this single truss into a coffer truss, and widen the web members.  The new bottom chord will sandwich the existing truss elements with a new 2×10 on each side, and gaps of the new chord path filled in effectively making a solid beam 3 boards wide (considering construction adhesive between the layers as overkill).  Including some drawing showing the steps I plan to take.  Probably overkill, maybe not enough, just want a reality check on the plan.  Also, trusses are 24″ on center.”

Mike the Pole Barn Guru responds:

Stop.

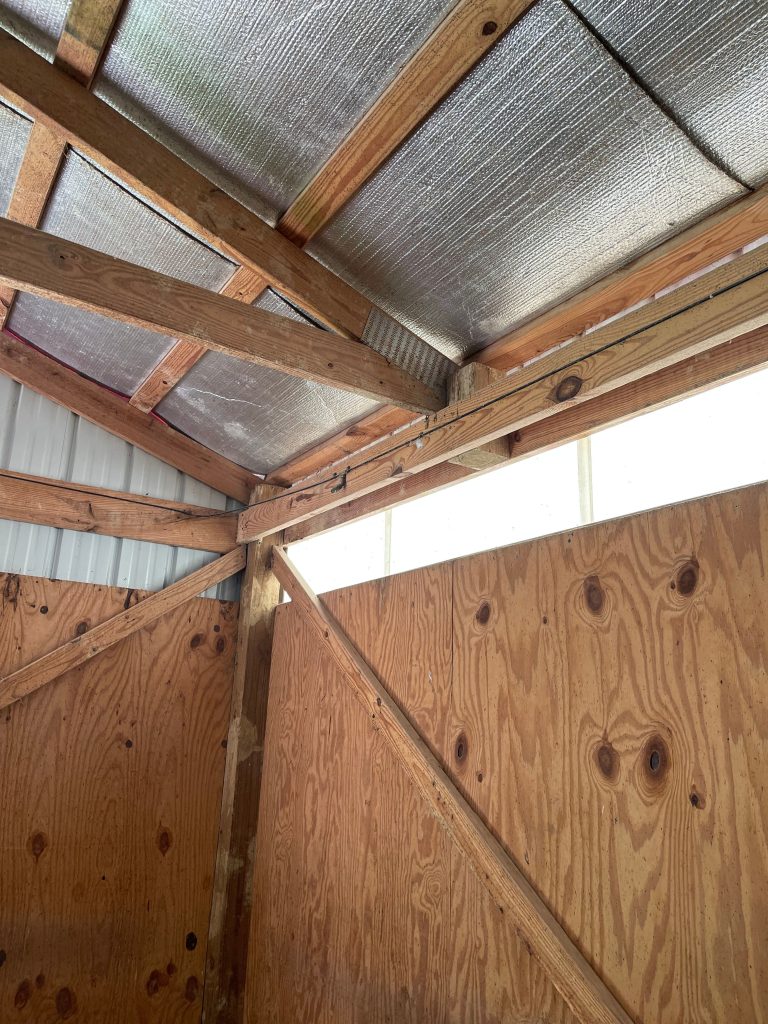
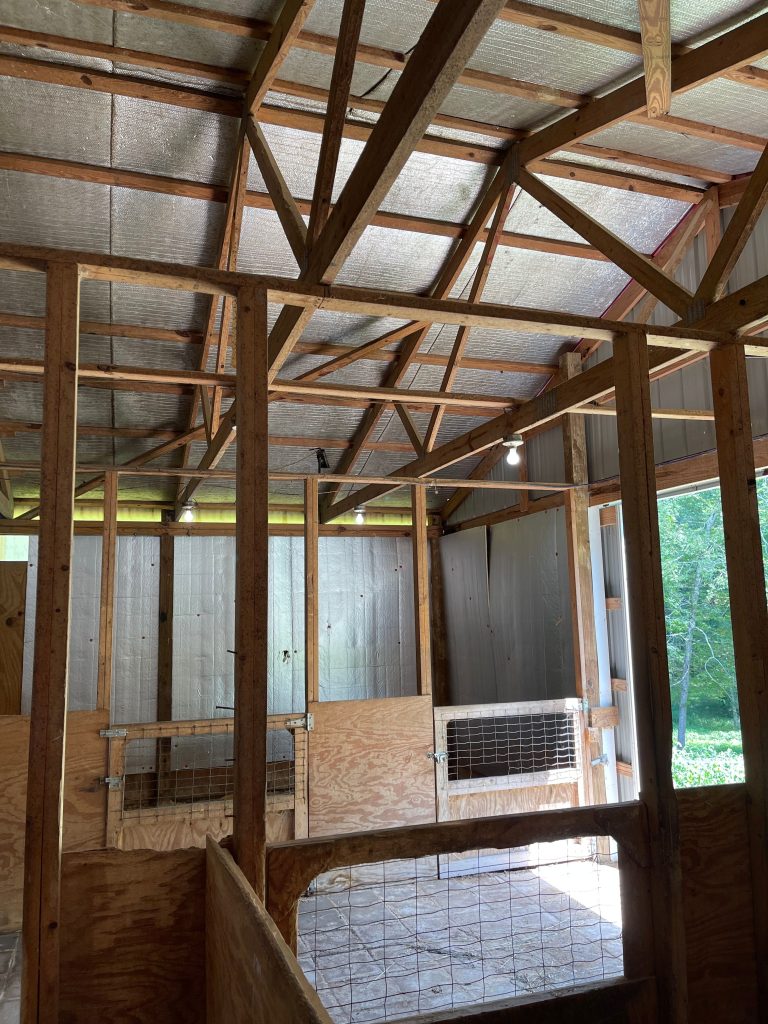
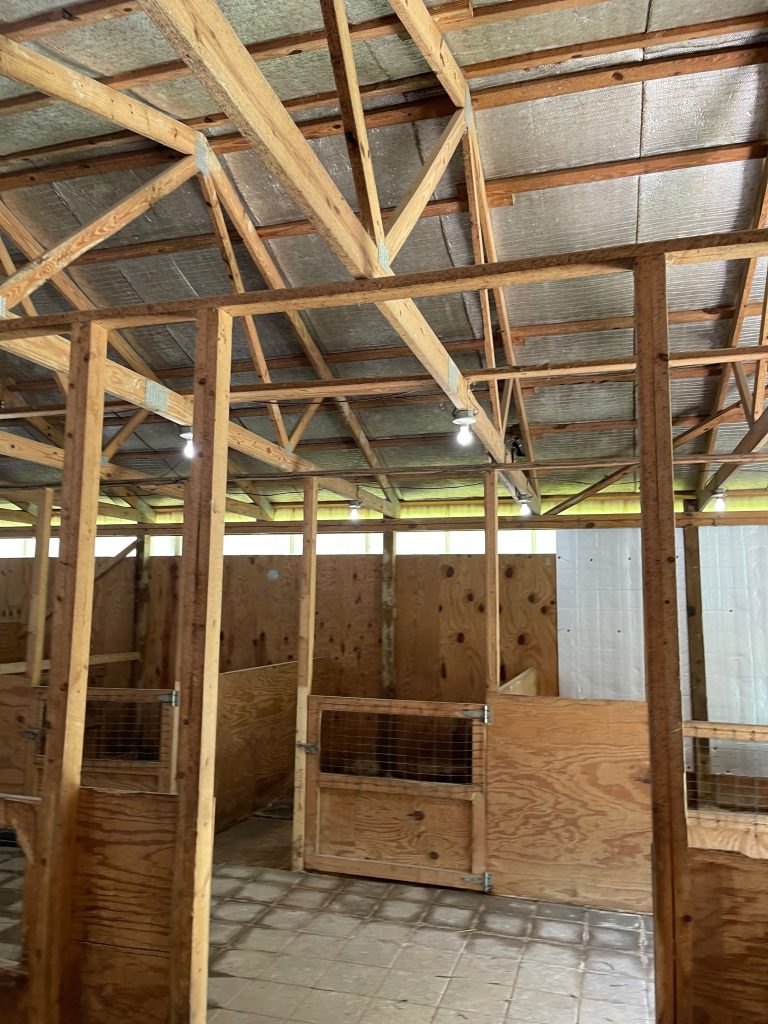
Never, ever cut a truss without having an engineered repair. Ideally this could be obtained from whomever manufactured your building’s trusses originally. If you are unsure, there should be a manufacturer’s permanent ink stamp on each truss bottom chord. Should you not know who fabricated them, stamps are not able to be found or manufacturer is no longer in business, hire a local Registered Professional Engineer to come examine your trusses and provide a repair drawing (if it is even possible to be done).

For extended reading on not cutting trusses: https://www.hansenpolebuildings.com/2016/07/cutting-trusses/

Proposed Building Code Change to Add to Construction Costs

During each 3-year-cycle of the International Building Code (IBC) and International Residential Code (IRC), there exists an opportunity to propose modifications and improve the codes to recognize new and innovative construction.  During the final two weeks in April, the code proposal hearings were held in Louisville, Kentucky where several hundred proposals were discussed and considered for inclusion in the code.

large-span-trusses-150x150While post-frame construction is typically used in agricultural applications which are often (and in my humble opinion sadly) considered exempt from code compliance, more and more post-frame construction is either residential housing (IRC) or commercial (IBC) in nature.  In these cases, changes which impact the code may have an effect on how post-frame buildings are constructed.

Eight proposals were identified by NFBA (National Frame Building Association) staff as having a potential impact on post-frame construction.  While the majority of these proposals were defeated, the following action should be noted:

S138-16: Submitted by the Structural Engineers Association, this proposal was approved and will require special inspection for wood trusses with a clear span of 60 feet or greater or an overall height of 60 inches or greater.  While the clear span is not a major issue, the 60 inch height may impact a number of projects creating new cost/scheduling issues.  This change is scheduled to be included in the 2018 IBC.

Having spent my entire adult life installing, designing, selling, building, delivering and purchasing wood trusses, it would seem ludicrous to require a special inspection for wood trusses with an overall height of 60 inches or greater. This would add an extra layer of inspection to nearly every building (not only post frame) project, with seemingly no apparent rationale other than the employment of a large number of people to perform these inspections (most likely the same structural engineers who made this proposal).

Trusses spanning 60 feet or more, are already required to have special inspections, under the IBC: https://www.hansenpolebuildings.com/2013/12/wide-span-trusses/.

What can you do? Contact your local Building Official today and ask them to vote to repeal this costly measure which does little or nothing to improve the safety of buildings.

My Early Urban Garage Experiences

In the 1980’s one man stood alone when it came to whether City of Portland (basically the same thing as Multnomah County), Oregon homeowners could acquire a Building Permit for a residential accessory building or not.

Charles “Chuck” Frazier

Now Chuck was a registered Structural Engineer, who took his position very seriously. His expectation was, if a structural permit was going to be approved by him – then the permit applicant, better have his (or her) structural ducks lined up in a perfect row!

urban pole barn

So fearsome was his reputation, many builders (especially those who constructed pole buildings), would put right on their newspaper ads, “We do not build in Multnomah County”.

While I never had the opportunity to meet Chuck personally, when I had my first pole building kit package business in Oregon, I had the opportunity to deal with him by phone on many what I will call “urban garages”. I was young, and pretty naïve, so early on I just asked him specifically what it was he wanted, in order to issue a permit for a pole building garage.

In a nutshell, he wanted the calculations to verify the embedment of the columns (how deep and what diameter) and for the size, grade, spacing of columns, sidewall girts and roof purlins. Not being an engineer – I asked him for an example, which he provided.

Using his example, we provided hundreds upon hundreds of pole building urban garages across Metro Portland. Portland was laid out with numerous postage stamp sized lots, many only 25 to 35 feet in width. These are especially prevalent in the Northeast area, where many single family homes were built on them after World War One and before the Great Depression. By the 80’s people found they could purchase these 60-70 year old homes for next to nothing and many neighborhoods began to revitalize themselves. One fairly consistent lacking feature of these homes – most of them did not have garages!

Pole buildings were a perfect fit for these homeowners. Many of them were relatively young, and willing to put sweat equity into the fixing up of their (new to them) older homes. Pole buildings are able to be of any dimension, and therefore allowed for the maximization of building footprint to available space. With the only foundation being holes augured into the ground, it was pretty “low tech” compared to the invasiveness of having to excavate for footings and foundations, as would have happened with what many would consider to be more traditional “stick framed”.

And, because construction goes so quick, many urban garages started Friday after work, and were completed over a single weekend!


Engineer – It Ain’t Amtrack

I once heard an anecdotal story about a man who had a choice to stand in one of two lines – for brains, or trains. He had always wanted to be an engineer, so he picked the line for trains….

OK, so it wasn’t necessarily funny.

If you’ve ever been involved with a commercial building, it was probably designed by a Registered Design Professional (an RDP – an architect or engineer). Ordered prefabricated wood roof trusses? Again, they were probably manufactured from designs created by a registered professional engineer (P.E.) or a structural engineer (S.E.).

In reality, virtually any structure was either designed by an RDP, or should have been.

Most architects subcontract the structural portion of their designs to an engineer. Engineers specialize in their ability to “run the numbers” to prove on paper why things will or will not perform in the real world.

An engineer is responsible for the analysis and design of the structure or framing system of a building or building component. While doing the building’s structural design, the engineer will take safety and performance into consideration.  For performance or serviceability this is the design for vibrations from machinery, floor vibration or deflection which could cause discomfort, or even building deflection or sway.  The occupants of a building might feel uncomfortable if the building sways or moves too much, especially on the upper stories.

An engineer’s qualifications can be verified.  The easiest thing to do is to check if the engineer has either a Professional Engineer (PE) license in civil engineering or their Structural Engineer (SE) license in the state which the project is being built.  Some states don’t offer a SE license so this is why there is a difference in the title.  While there is a nationally recognized test for engineers, there is no general licensing, it is state specific and each state has their own requirements to obtain and maintain registration.

Okay, so this is a general definition of the responsibilities of an engineer, how does it pertain to post frame buildings?  Pole buildings, for engineers, involve the same responsibilities and analysis as any other structure, but it all pertains to one specific material.  Very few RDPs are familiar with post frame construction and design pole buildings on a regular basis. If hiring an engineer to design a pole barn, look for one with extensive experience – hundreds of post frame buildings designed, not just five or ten.

Be wary of anyone (builder or company) who says “I’ve done pole buildings for 10 years,” but has no engineering background nor degree.  Does this mean he can verify the design he uses will be safe? Is it economical in design or did he just put a lot of lumber into it, many dollars of it which does nothing for the building and a lot for depleting your funds?  Does it have verifiable calculations to prove it will stand the test of time and nature?  Or does it mean buildings have been built over ten years and fortunately none of them have fallen down – yet?  Companies which supply complete pole building kit packages have ongoing relationships or employ engineers who have the expertise it takes to design safe and economical structures, which will perform admirably for generations.  Don’t be caught “un-insured”.  Make sure your building has an engineer’s stamp of approval on your building plans.