Welcome to Ask the Pole Barn Guru – where you can ask questions about building topics, with answers posted on Mondays. With many questions to answer, please be patient to watch for yours to come up on a future Monday segment. If you want a quick answer, please be sure to answer with a “reply-able” email address.
Email all questions to: PoleBarnGuru@HansenPoleBuildings.com
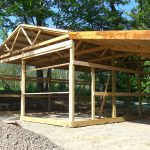
DEAR POLE BARN GURU: Should I go with wood, or 12 or 14 gauge steel trusses? DELIBERATING DEE
DEAR DELIBERATING: I came from the prefabricated wood roof truss industry, having spent nearly two decades either having built them myself, been a designer, managing or owning roof truss manufacturing plants.
In my experience I learned prefabricated wood trusses are amazing products. Not only can they be utilized for a myriad of different application, they also are a highly engineered product. Every component of a wood roof truss is put through a rigorous computer analysis, which verifies all members are capable (when properly installed and braced) to be able to withstand not only the snow loads to which they will be subjected, but also wind loads. The entire process is remarkably complex, involving the most up-to-date research available. Because of this, wood roof trusses just do not experience failures, within the parameters of the design loads.
Besides all of this, pre-fabricated roof truss manufacturers are required, by the Building Codes, to be inspected quarterly by an independent firm for quality control. These inspections are done without any advance notice – the inspector just shows up unannounced. The truss company must supply the engineer sealed drawings for every truss the inspector wants to review. No engineering and the trusses must be destroyed. The inspectors are so thorough, they even take a micrometer to the steel roof truss plates, to confirm they are the correct thickness! The size and grade of every piece of wood in the truss is verified to meet or exceed what is specified on the drawings, and all of the joints between the wood members are checked to make sure they are tight. Even the placement of the steel plates must match what is shown on the drawings.
The inspector also looks to make sure completed trusses are adequately stored to prevent deterioration of the wood members and to prevent damage to the truss plates.
In other words, the inspections are rigorous.
When I owned my first business, in Oregon, we hired a very nice gentleman to be a pole building sales person for us. Originally from Arkansas, Stan’s father built light gauge steel truss frames for “pole” buildings (in their case, the entire structural framework was made of steel, so they actually were not pole buildings – but rather light gauge steel frame buildings).
Stan discussed with me his interest in building the same type of frames and distributing them in the Pacific Northwest. While I didn’t see this as a fit for our particular niche (we were pole buildings only), I did give Stan my blessings to head out on his own and start his own business.
Apparently things were a little different where Stan was from – the steel truss frames there were made of steel angle iron for the top and bottom chords, and rebar was welded in between for the internal webbing. Engineering was never a requirement, Stan’s daddy just built them using seat-of-the pants – with the assumption if they worked in the past, then they would work in the future.
The Pacific Northwest was not quite the same as Arkansas, as Stan quickly found out. In order to acquire building permits (required on most uildings in the West), Building Departments required engineer sealed drawings for the steel truss frames. Having to engineer the trusses resulted in upgrades to the designs – no more rebar for truss webs, they had to use angle iron there as well. Plus, it required certified welders having to do the fabrication. These requirements added exponentially to the cost of the frames, and made them have to play by rules similar to the prefabricated wood roof truss industry.
Stan long ago sold his interest in the company he founded, but it continues to fill a place in the market. The buildings are generally 15-20% more than post frame construction.
As to the choice of trusses, most people are very comfortable working with wood as wood tends to be very forgiving. Attaching wood roof purlins to a steel framework is not as easy or straightforward as wood to wood.
Part of the answer to your question is – what is it going to cost? In order to get a direct comparison, make sure the proposed light gauge steel trusses being quoted come with wet sealed (not photo copied) structural drawings. The drawings should also include the requirements for bracing. Steel trusses normally take diagonal steel struts from the bottom chord of the truss, up to the roof purlins, to prevent buckling of the trusses in the weak direction. The bracing, as well as any connectors should be included in the price. Detailed instructions should be provided so the trusses are adequately attached to the columns, and for installation of the bracing.
DEAR POLE BARN GURU: Do you have someone to install your buildings? TEXAS JEFF
DEAR TEXAS: Hansen Pole Buildings is a supplier of pole building kit packages only.
You do not need to hire a contractor to build your pole building. Our buildings are designed for the do-it-yourself person. Most of our clients do their own construction. We believe our drawings and industry-leading Construction Guide are clear enough to make the task relatively simple, even for the first-time builder. Keep in mind this is a material kit, not a completely pre-fabricated structure. Assembly, including measuring and cutting, will be required. You will be required to have (or borrow or rent) various hand tools. If you are not comfortable with putting up your own building, a contractor should be available at a reasonable price. We have found the average person who can read and understand English can, and will, build a better building for him or herself than most contractors. Why? Because it’s YOUR building and you will take the time and care to do it “right”.
We are clearly not contractors in any sense of the word. We do not construct, build or repair buildings (or portions of buildings) anywhere for anyone. Should you need a builder, we DO have a list of builders for nearly anywhere in the country. Please call our office to receive a builder referral.
Keep in mind, a referral is not an endorsement on Hansen Pole Buildings part of the particular builder’s skills or lack thereof, As none of them work directly for us, we can’t guarantee the quality of their work, We DO have a “one strike and you’re out” rule for our referral list. Simply, if we receive even one verifiable and legitimate negative complaint about any particular builder, we will no longer give out their name to our clients. While this is not a fail-safe method, it does afford some degree of protection, it is always a good idea to speak with other customers the builder has done work for in the past, to get an idea of the builder’s professionalism.
 DEAR POLE BARN GURU: If purchasing a kit from Hansen with installation instructions. Assuming it’s a custom kit that is intended to be an addition like a new garage, would you provide guidance as to how to complete the marrying of the new structure with the existing? EVAN in HORICON
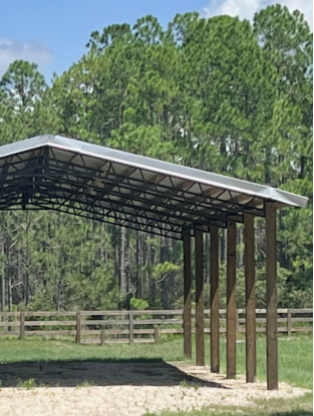
 DEAR JOHN: Your new Hansen post-frame building kit includes full multi-page 24” x 36” engineer sealed structural blueprints detailing location and attachment of every piece (as well as suitable for obtaining Building Permits), all lumber, trusses, roofing, siding, doors, windows, etc., to provide a complete ‘dried-in’ shell. Any raised wood floors (lofts, mezzanines, second or third floors) and applicable stairs. Our industry’s best, fully illustrated, step-by-step installation manual, and unlimited technical support from people who have actually built post frame buildings. Even better – it includes our industry leading Limited Lifetime Structural warranty!
 DEAR POLE BARN GURU: I am planning to build a pole barn 36×40 on 10’ centers with heavy duty steel roof trusses on 6×6 posts. The wall height will be 10’ and I would like to have 3’ faux stone for siding at the bottom with the rest of the siding hardi plank cement board. Would the weight be too much for a traditional pole barn style framing? NICK in CROSBY
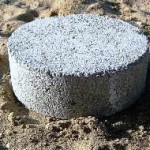 DEAR FRAN: Our engineers typically detail bottom of roof supporting column holes with an eight inch thick concrete footing mono poured with 10 inches of concrete up each side of columns, resulting in a total depth of pour of 18 inches.
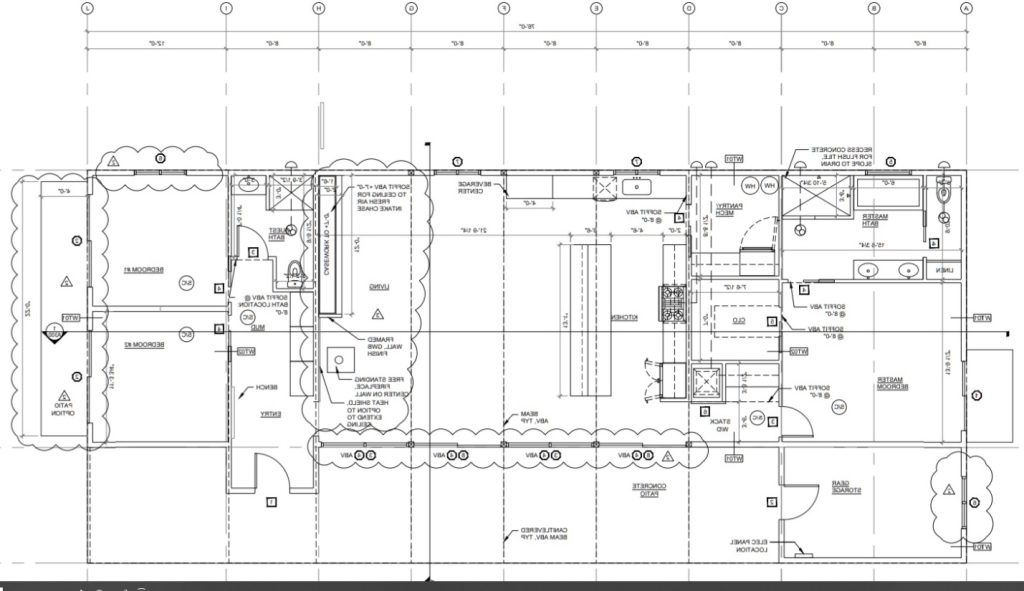
 “My name is George xxxxxx, I am currently a thesis student at Auburn University’s Rural Studio, located in Hale County, Alabama. I am looking into pole barn // post frame construction as a method for quickly building strong homes. Hansen seems like it has more experience in this methodology than most in the nation, where most contractors are afraid of diverging from traditional stick-frame construction. I am particularly interested in the structuring of your residential homes (the retirement home in Decatur is beautiful), and your opinion on steel vs. wood roof framing. If there is an expert who would be willing to spend some minutes this week answering a few of my questions it would be greatly appreciated! Also, if you have more questions about the Rural Studio I would be happy to answer them to the best of my ability.”