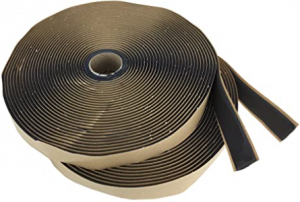
Tag Archives: steel panels

Edge Dimples, Metal Truss Spacing, and Monitor Buildings

This Wednesday the Pole Barn Guru discusses reader questions regarding panels with “edge wave/dimples,” metal truss spacing for an ag building, and monitor building widths.

DEAR POLE BARN GURU: Good afternoon, on a few jobs we’ve had installed the lap leg on it has had edge wave/dimples along the panel, with no rhyme or reason as to where the dimples are. This is causing the panel to not lay 100% perfect and have small gaps along it as well if you look from the side. When looking at the panel on the ground it appears you do not see the wave/dimples. It is 29ga az50 galvalume painted, 3/4″ high rib exposed fastener ag panel. Do you know what could possibly be causing this? I attached a picture as well. Thank you! Tyler

DEAR TYLER: Most often this is caused by handling issues before steel is on ground at your jobsite – after first time I had to deal with it I made it a point to double check overlapping edges of all skids for damage before driver sped away to his or her next delivery. Any appearance of a wave on this edge and back on truck it went.

Your randomness issues appear to be from jobsite handling however they oftentimes can be bent back carefully by covering wave with a soft cloth and using a pair of pliers. Even if slightly over bent back, it will lay flat once screws are installed on side away from overlap.


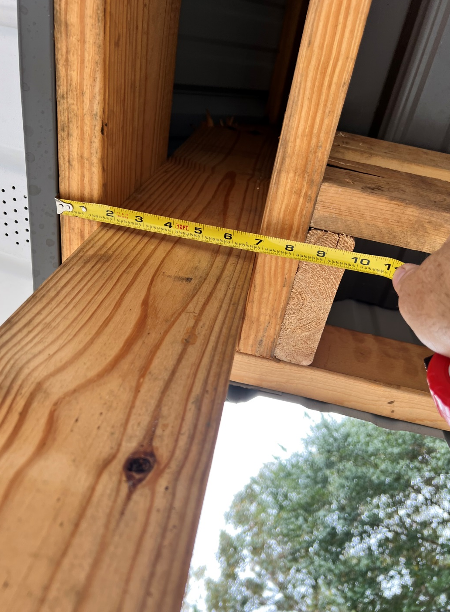
DEAR POLE BARN GURU: Putting up a metal truss pole barn that calls for 12′ post centers and want to use 16′ centers for the truss using 16′ 2×6 for the purlins 30 cups per bay. Looking to get more length to barn this way. Minimum wind and snow load central Mississippi agriculture barn building housing mostly hay. Will this work or is 12′ max on metal truss bay width? 3 bays 16′ would garner me 50′ length with overhang or two 12′ bays on the end and 16 bay in middle would get me 42′ of length with foot overhang. Would either be sturdy enough for this application. TOMMY in ACKERMAN

DEAR TOMMY: Those welded up steel trusses are designed to support bare minimal loads at 12 foot on center. Spacing them any farther apart is nothing short of a recipe for failure. Also, unless you have access to some very high strength 2×6 for purlins, they would be over stressed in bending and deflect noticeably. If you want or need a longer building, invest in more trusses.


second floorDEAR POLE BARN GURU: Monitor barns -is it crazy to think/have 14 foot “wings” and 24 wide center? Thinking 52 wide with 14-24-14 sizing. Seems most have narrower center. Is there a reason? STEVE in WEISER


DEAR STEVE: Not crazy at all, we have had clients with raised center of monitor as wide as 80′. Ultimately it comes down to what dimensions work best for your wants and needs.

Often monitor buildings are used for horse stall barns, where raised center is an aisleway. In this scenario 12-16′ center widths work very well for aisles.

Replacing Panels, Rebar in Column, and Wholesale Purchases(?)

This Wednesday the Pole Barn Guru answers reader questions about replacing old steel panels and adding an overhead garage door, if rebar is needed in the column to collar connection of the footing, and the ability to buy rock wool insulation wholesale.

DEAR POLE BARN GURU: I’m purchasing a small farm in rural Missouri. It has a 24′ x 60′ pole barn. the framing / structure is in good shape. It has corrugated metal panels. these are sound, but the looks are poor. It also has the sliding barn type door. My hope is to re-face the building with better looking panels and put in an overhead-style door ( garage type door). JOHN in NEWINGTON

DEAR JOHN: New steel cladding would certainly “freshen up” looks of this building. It would also allow for steel siding to be held up from grade (by adding a pressure preservative treated splash plank at base), rather than being run into ground.


DEAR POLE BARN GURU: Does rebar need to be installed in the concrete that surrounds the column in a pole barn? I will have holes of 12″, 18″ and 24″. Thanks. LOUIS in STEPHENS CITY

DEAR LOUIS: Unless it is called out for on your engineer sealed plans, there would usually be no requirement for rebar in concrete column encasement.

A 12″ diameter hole would be very unusual as Codes require a 4″ minimum space between corners of columns and edge of holes (a 4×4 perfectly placed in the center of a 13″ hole would meet Code requirements).


DEAR POLE BARN GURU: Hi, I was watching a video on Youtube recently and saw a guy hanging 6″ rock wool batt insulation. I was wondering if you might know where I can buy this product wholesale? I built a 30×64 and am at that stage where I’ll be looking to insulate myself soon. MARK in ARAPAHOE

DEAR MARK: Unless you are willing to buy an entire 53′ van box of rock wool, you are not going to be able to purchase it wholesale and even then you would need to provide proof you would be distributing on a regular basis from an established business in construction supply trades.


How to Best Use Roof Steel Already Owned

How it is people end up owning steel roofing (or siding) when they do not have a structure to put it on has always been somewhat of a mystery to me.

Reader TIM in IRON RIVER writes:

“Hoping to build 40’x56′ post frame structure with 2′ overhang and 4/12 pitch using steel roofing I have on hand. That said it looks like I need roof lengths of 23′-1 1/4″ long to get that 2′ overhang. I have plenty of 20′-8″ and 2′ steel roofing and when combined with overlap I’ll be short (20′-8″ + 2′ minus 4″ overlap = 22′-4″) approximately a 9″ overhang. We do get plenty of rain here so the more overhang the better. For a 4/12 pitch how much overlap should I have for two adjoining roof pieces? Is there a vent gap at peak and if so how big of gap? Would 9″ overhang be sufficient for a rainy area to maintain building longevity? I guess I could go shorter on the 40′ width in order to use one single roof piece and to attain 2′ overhang. Your thoughts please.”

Mike the Pole Barn Guru responds:

If at all possible I try to avoid steel panels overlapping steel panels along their run.

Why?

Because all panels have been run through an identical set of dies, they are not designed with ‘outer’ panels having slightly larger ribs in order to accommodate a smooth lap transition. From experience, this overlap will attempt to “grow” on you as you go along your roof.

Most steel manufacturers recommend a minimum end lap of 12 inches. All overlaps should be made so as to center on a roof purlin.  A 3/32″ x 1/2″ butyl endlap sealant should be applied on the bottom panel just below the centerline of the purlin where lap will occur. Due to the probability of panels not lying smoothly, sidelap sealants may also be needed.

Roof panels from each side should be held down from the peak of the roof by several inches (generally no greater than four with standard ridge caps) to allow for ventilation.

With all of this said, if it fits on your property, you should consider going to say 36′ x 60′ (or 72′), with 18″ overhangs to best utilize material you have and eliminate any overlapping splices. With 18″ overhangs on ends also, three foot width panels will lay out nicely without having to rip a panel when getting to building ends. Either of these building lengths will work out well for framing material usage with double trusses aligned with columns every 12 feet.

3M VHB Tape

3M™ VHB™ Tape

Reader WILLIAM in DYER writes:

“I’ve been researching pole buildings, and the weak point for putting one up seems to be the screws and washers.  Have you looked into using 3M™ VHB™ tape instead of screws and fasteners for attaching the metal exterior sheeting? What are the pros/cons of tape only? Thanks.”

Personally the only way the screws holding the steel roofing and siding on would be the weak point would be if the wrong product is being used, or the right product is being improperly installed.

Here is the scoop on VHB™ tape straight from 3M™:

Details

  • Fast and easy-to-use permanent bonding method provides high strength and long-term durability
  • Virtually invisible fastening keeps surfaces smooth
  • Can replace mechanical fasteners (rivets, welding, screws) or liquid adhesives
  • Black, 0.045 in (1.1 mm), modified acrylic adhesive and very conformable acrylic foam core bonds to a wide variety of substrates including powder coated paints and irregular surfaces
  • Eliminate drilling, grinding, refinishing, screwing, welding and clean-up
  • Creates a permanent seal against water, moisture and more by offering better gap filling capabilities
  • Pressure sensitive adhesive bonds on contact to provide immediate handling strength
  • Allows the use of thinner, lighter weight and dissimilar materials


Dream, Design, Deliver with our 3M™ VHB™ Tape 5952. It is a black, 0.045 in (1.1 mm) modified acrylic adhesive with a very conformable, foam core. It can replace rivets, welds and screws. The fast and easy to use permanent bonding method provides high strength and long-term durability. It offers design flexibility with its viscoelasticity and powerful ability to bond to a variety of surfaces.

Convenience Meets Extreme Bonding Power 
Our 3M™ VHB™ Tape consists of a durable acrylic adhesive with viscoelastic properties. This provides an extraordinarily strong double sided foam tape that adheres to a broad range of substrates, including aluminum, stainless steel, galvanized steel, composites, plastics, acrylic, polycarbonate, ABS and painted or sealed wood and concrete. Our bonding tapes provide excellent shear strength, conformability, surface adhesion and temperature resistance. They are commonly used in applications across a variety of markets including transportation, appliance, electronics, construction, sign and display and general industrial. Reliably bonds a variety of materials with strength and speed for permanent applications. 

Dream, Design, Deliver with the 5952 Family of 3M™ VHB™ Tapes 
The 5952 family of 3M™ VHB™ Tapes utilizes modified acrylic adhesive on both sides of a very conformable, adhesive foam core. The combination of strength, conformability and adhesion makes this family one of the most capable and well-rounded 3M™ VHB™ Tapes. It is specifically designed for good adhesion to high, medium and lower surface energy plastics and paints, metals and glass. Applications for this tape include bonding and sealing polycarbonate lens over LCD, signage and windows to post-painted control panels. 

An Unconventional Foam Tape 
We invented 3M™ VHB™ Tapes in 1980 as the first of their kind. These unique tapes combine conformability with a strong, permanent bond. The result is a family of extraordinarily strong tapes that adhere to a broad range of substrates. 3M™ VHB™ Tape is a proven alternative to screws, rivets, welds and other forms of mechanical fasteners. Skyscrapers, cell phones, electronic highway signs, refrigerators, architectural windows and more all rely on this specialty bonding tape for one or more steps in the assembly, mounting, fastening and sealing process. This trusted and reliable tape offers a consistent bond, outstanding durability and excellent solvent and moisture resistance. 3M stands by all of its products and is there to provide you with design guidance and technical support when you need it. 

Proven Reliability from 3M™ VHB™ Tapes 
3M™ VHB™ Tape offers a durable bond in a way that mechanical fasteners can’t. This tape enhances the appearance of finished goods by eliminating rivets and screws while providing immediate handling strength. In most cases, fastening with 3M™ VHB™ Tape is a quicker process than drilling, fastening, or using liquid adhesive. Our versatile line of tapes can be used indoors or outdoors in a variety of applications, including window, door and sign assembly, electronics, construction and countless other industrial applications. Chemically resistant as well as UV and temperature stable, 3M™ VHB™ Tape can withstand the heat of Dubai to the cold of Canada. The unique acrylic chemistry is extremely durable and resistant to change over time, making this a long-lasting and powerful tape you can trust. 

Bringing Better Ideas to the Surface through Science and Innovation 
In our 3M Industrial Adhesives and Tapes Division, we apply the science of adhesion to deliver innovative solutions that improve the design and manufacturing processes of companies around the world. In the end, our technologies help customers like you deliver competitive products to the market faster and more efficiently. 

Mike the Pole Barn Guru comments:

Why it might not be the best choice….

OLYMPUS DIGITAL CAMERA

In order to utilize it with the steel panels, it would need to be tested for shear strength by an independent engineer. It would preclude the use of Building Wrap (like Tyvek) in walls, as well as radiant reflective barriers or Dripstop/Condenstop in roofs.

While it sounds like an excellent product, the cost along may prove prohibitive, as the lowest price I am seeing is somewhere around 70 cents per lineal foot, making it around 10 times as expensive as the diaphragm screws we provide and even more expensive than the smaller diameter lesser quality fasteners used by most post frame suppliers and builders.


Steel Roofing: Screw in the Flats or the High Ribs

It was a pleasant October evening back in 1985 in Blacksburg, Virginia. My friend Dr. Frank Woeste was then a professor in the College of Agricultural and Life Sciences at Virginia Tech (officially Virginia Polytechnic Institute and State University) and he had invited me to teach one of his classes for a day, in exchange for him providing some basic engineering software which would design post frame building columns, roof purlins and wall girts.

Now back in 1985, Virginia Tech had not yet become the NCAA football powerhouse it grew into under the direction of Hokies’ head coach Frank Beamer – having now participated in post season bowl games for each of the last 23 seasons. This also long predated the April 16, 2007 tragedy in which Virginia Tech student Seung-Hui Cho fatally shot 32 faculty members and students, wounding 17 others before killing himself on campus. This shooting remains the deadliest mass shooting committed by a lone gunman in United States history.

Mid-way through the evening with Frank, after digesting a hearty meal and debating whether the hops in the liquid consumed were a fruit or a vegetable (they actually are neither – they are flower cones), we digressed into the true essence of Dr. Woeste’s research at Virginia Tech – which was post frame buildings and prefabricated metal connector plated wood trusses.

Narrowing things down, a lively discussion occurred (including some of his grad students) on whether steel roofing and siding for post frame buildings should be attached with screws through the ‘flats’ or on the tops of the high ribs.

For years steel roofing and siding had been attached with ring shanked nails (read more about this and Dr. Woeste here: https://www.hansenpolebuildings.com/2011/12/ring-shank-nails/). The traditional location of the nails was at the crown of the high ribs – knowing not all of the nails would be identically driven through the steel into the underlying wood. The concept was rain running off the roof would never get high enough to leak around the improperly seated nails on the tops of the high ribs!

So, what would happen if screws were improperly placed in the crowns of the steel high ribs?

Properly designed post frame buildings are dependent upon the diaphragm action contributed by the skin (roofing and siding) and numerous tests have been done to confirm the shear strength of the panels as properly fastened. When screws are placed through the high ribs, there is a 5/8 to ¾ inch gap between the underside of the high rib and the framing below. The screw can flex within this space, reducing the shear load carrying capacity of the sheathing system.

Furthermore, the flexation of the screws in this gap, allows the steel panels to move slightly under wind or seismic loads, eventually contributing to slots being formed in the steel around the screw shanks, and over time, causing leaks.

The answer Frank and I came up with is the same one espoused by every steel roofing and siding roll former – screw in the flats, not on the ribs!

Steel Stretcher Needed

Along with this photo came the message: “The Contractor I hired to put up the building will be sending you video from his cell phone sometime today.

In the meantime I have taken two photos: one of the gable end and the other of the side wall. The side wall panels are perfect and the end gable ends are 6 inches too short on the high side.”

Just at a cursory glance, the workmanship on the building looks pretty clean. Now I am going to take you just a little closer into it.

Well, maybe this photo needs to be revisited…..

steel stretcher
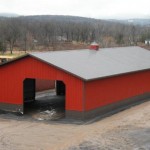
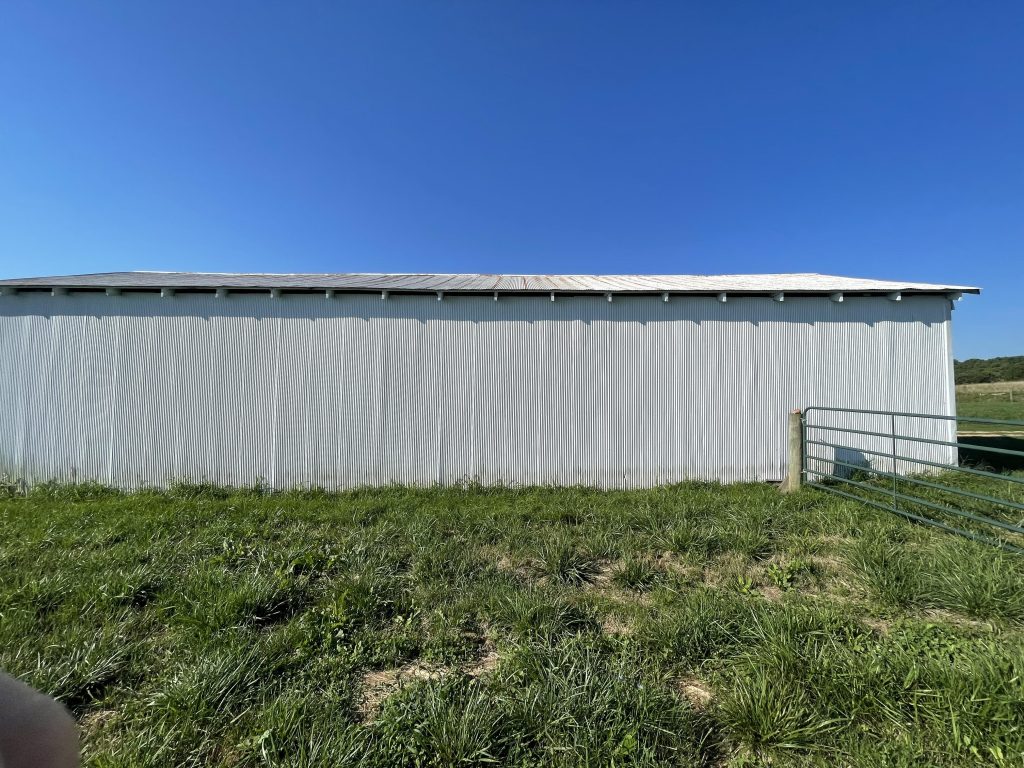
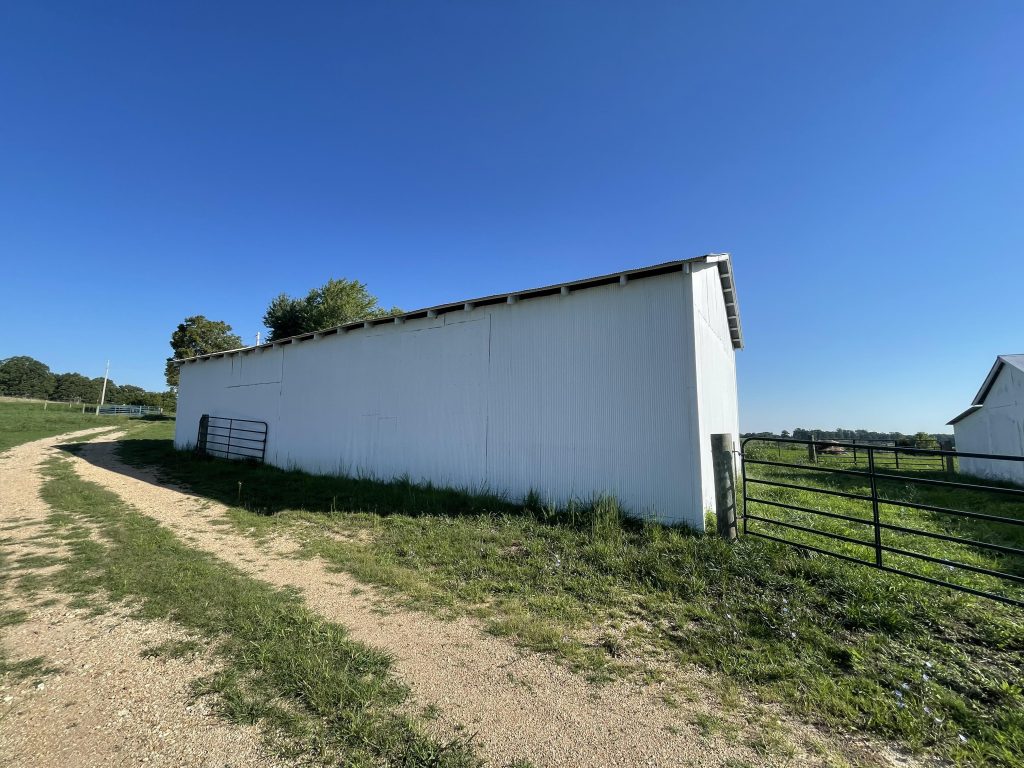
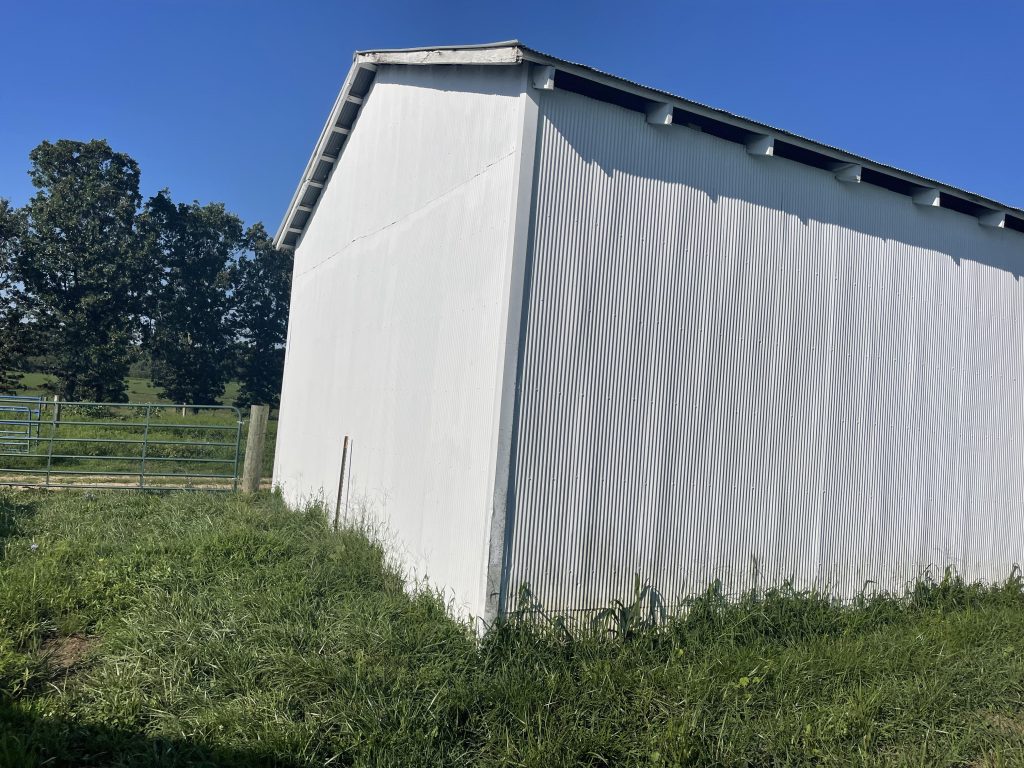
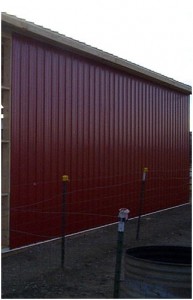
Look up at the top of the red wall steel. What do you see?

If you said, “wood”, you are correct about what you are seeing.

Unfortunately for the builder, there is not supposed to be wood showing at this part of the building! The wall steel is supposed to run up into an inverted piece of J Channel trim which is placed tight against the underside of the roof steel.

What does all of this mean?

It means the building is built six inches too tall!

My loyal readers have read over and over with me harping on this subject so many times they probably have blood shooting out of their eyes at the very thought of another builder who didn’t pay attention to the measure of eave height being shown on the plans five times on three different pages. Not to mention the Construction Manual which is almost annoying outlining how to measure eave height over and over again throughout the chapters.

One might notice the symbolism between the number of times eave height is mentioned in the Hansen Pole Buildings Construction Manual (51) and the infamous Area 51 of UFO and conspiracy theory claims. When it comes to some building contractors, I’m wondering if the extraterrestrials experimented on them!

This is a builder who could have used my patent pending eave height tape measure (https://www.hansenpolebuildings.com/blog/2015/02/eave-height-2/).

Rustic Trail Steel Panels

When my first born daughter Annie was alive, her favorite ride at Disneyland® was the Big Thunder Mountain Railroad. She and I spent an entire rainy evening riding it over-and-over as there were no lines and it was just a matter of getting from the exit back to the entrance to start all over again.

Although we spent no time stopping to admire the scenes along the line queue, the last half of it is a series of Wild West themed features including buildings alongside the track representing what was originally the “town” of Rainbow Ridge and a water cranking machine. The town is now known as Big Thunder, but originally it was one of several elements from the Rainbow Caverns Mine Train (later known as the Mine Train through Nature’s Wonderland) which transported Disneyland® guests around Frontierland from 1956 until 1977. All of the “old timey” buildings of Big Thunder feature rusted steel roofs.

You can read more about the Big Thunder Mountain Railroad here: https://disneyland.disney.go.com/attractions/disneyland/big-thunder-mountain-railroad/

Back in 1983 Annie and I were too busy having fun and laughing to ever envision I would someday be writing about our experience. I’ve written about those rusted steel roofs previously: https://www.hansenpolebuildings.com/blog/2011/09/537-cold-rolled-steel/

Hansen Pole Buildings is one of the largest customers of American Building Components (ABC® https://www.abcmetalroofing.com) who manufactures a steel roofing and siding product known as “Rustic Trail”.

rustic trail steel
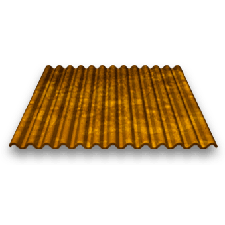
If you are going for the weathered or aged look of Disneyland’s Big Thunder Mountain Railroad on your building, then ABC’s Rustic Trail product is the perfect solution for your project. The Rustic Trail panel is recommended for installation in low humidity, arid and semi-arid climates.

Rustic Trail is roll formed from a thick 22 gauge steel and provides 32” coverage on walls and 29.33” coverage on roofs. The panels are uncoated and unpainted to allow for accelerated oxidation to provide a natural iron oxide (aka rusted) finish on the surface of the panel. The panels are manufactured to order in ¼” increments. Un-formed flat sheets and custom trim components are offered in matching material and a full line of accessories are available.

The cold rolled bare steel from which the Rustic Trail panels and/or trims are manufactured are intended to naturally oxidize and rust. For this reason, it is recommended the products are used only in arid to semi-arid climates and not installed in a manner which allows for ponding water. The recommended minimum roof pitch is 3:12. Water runoff from Rustic Trail products can and will stain surrounding surfaces, which could include walls, driveways and sidewalks.

Carry home your own remembrance of Disneyland’s Big Thunder Mountain, with Rustic Steel panels on your new pole building!

Screw Placement on Steel Panels

Welcome to Ask the Pole Barn Guru – where you can ask questions about building topics, with answers posted on Mondays.  With many questions to answer, please be patient to watch for yours to come up on a future Monday segment.  If you want a quick answer, please be sure to answer with a “reply-able” email address.

Email all questions to: PoleBarnGuru@HansenPoleBuildings.com

DEAR POLE BARN GURU: Hi, I wanted to know the best location for screw placement on my pole barn roof. Should I place them on the raised rib or in the lower flat area? Thank you! WILLING IN WAVERLY DEAR WILLING: Screws should always be placed in the “flat” areas of the steel panels. The first panel will have an overlap on the leading edge (closest to the end of the building). Place a #10 x 1-1/2” screw next to this rib, into a roof purlin, and continue screw placement every nine inches across the roof.  The exception will be at the eave and the ridge, as this is where the greatest shear forces are. At these locations use either a diaphragm screw or a #14 x 1-1/2” screw on both sides of every high rib. Diaphragm screws will have some advantages over the #14 part (and can be used everywhere on the building). They have a narrower #12 shank, other than just below the head, so they are easier to drive and less likely to split the purlins. They also have a ¼” hex head, so driver bits do not have to be switched back and forth. You can read more about the development of these screws at: https://www.hansenpolebuildings.com/blog/2012/08/this-is-a-test-steel-strength/

Mike the Pole Barn Guru

DEAR POLE BARN GURU: I am currently building a pole barn and looking at pricing on an overhead door. Opening is for a 12 x 10. What option do you offer for an overhead door with latch for security? Thank you. OPENING UPWARDS

DEAR OPENING: The options are innumerable. We offer about every “look” on the market –we’d just need to know what features you want such as glass inserts, designs, etc. Most of our clients use sectional steel doors with inside slide locks. These are available in a commercial pattern (with heavier hardware) as well as numerous profiles of raised panel doors. If you are trying to create a unique or upscale look, carriage house style doors are also available.

In the event you think the building might ever be climate controlled, it is advisable to go with insulated door panels initially, as the cost and effort of retrofitting may prove prohibitive. https://www.hansenpolebuildings.com/blog/2012/12/insulated-overhead-doors/

One thing many people do not consider is wind rated doors. For more information please read: https://www.hansenpolebuildings.com/blog/2011/10/wind-rated-garage-doors/

Mike the Pole Barn Guru

DEAR POLE BARN GURU: I was looking at the video you have on your site! I was interested in the 2nd building you showed ……..the Arena. Was thinking of turning this into a home. Possibly one half its size.

and another barn for 3/4 horses 5/6 cows 2/3 goats rabbit hutch and a milking stall…the other end of this huge pole barn would be for equipment vehicles farm equip snow mobiles ATV’s other stuff and attached to this a Butchers House with Freezer Controls to make it nice and cold like an operating room to kill bacteria and germs with several sinks and tables for meat processing and a small walk in freezer with meat hooks to hang game i.e., deer elk bear etc…….

below the home a basement the same size as home only access to half…the other half hidden with secret access via bookshelf or storage rack…..and a basement under the other barn as well with a tunnel leading from the barn to the hidden basement under the home!  The home will be very open with huge living areas. We want the Shell Built totally insulated wiring and plumbing. We want 2 huge stone fireplaces with swing hooks to cook over the fires if we desire and 3/4 wood burning stoves throughout.

Notice your design on the video of the Arena….see where the lower roof meets the upper room…… I want it to be much higher than this and I want a stair case leading to this loft where there will be one of the two big bathrooms (the other downstairs) and the rest of the huge space all bedrooms with an open entertainment area for pit group and big screen TV…….. possibly a sunken area downstairs for huge pit group and TV as well… We want a huge kitchen area.

We also want to put in 5/6 long greenhouses but ours will be built 5/6 feet into the ground to take advantage of geothermal energies/forces to grow all year round…… the roofs will be above ground level with every other roof panel being a SOLAR PANNEL… We want this built so we have access to it from the house possibly heavy duty heavy security glass sliding doors????? And we want a power distribution center building built for battery backup system and the ability to tie in Solar, Wind and Hydro power sources into the grid………  We want to be hooked to the grip but have the option to shut power down from main grid and just go solar wind mill and hydro power or a combination of all.

We are looking for a rough estimate for a barn as described above with Butcher House and Arena Home with basements a tunnel way between them both design the bathrooms one up one down, sunk in entertainment area down stairs 2 huge stone fireplaces and about 3 wood burning stoves. The Arena Home is to be totally insulated heavy beams and wooden floors…kitchen area to use imitation marble tiles…….

just a rough estimate   off the wall TICKLED IN TEXAS

DEAR TICKLED: Thank you very much for your interest. The scope of your project is far beyond what our normal scope of work is. We would recommend you contract with an architect to create the overall design and budgetary figures. We would be happy to work with them on our portion – which would be the building shells only.

Steel Siding Failure?

In my fledgling days in the pole building industry, we jumped on board when ASC Pacific began offering “Twice the Life” Zincalume® coated steel roofing panels as an alternative to bare galvanized. Keep in mind, back in the early 1980’s almost every roof was unpainted – so this was huge!

One side benefit of Zincalume® is the aluminum content of the protective coating causes the bare panels to oxidize to a milky white over time, unlike the red rust of galvanization. One prolific Pacific Northwest builder even sold Zincalume® to customers telling them they would eventually have a white roof!

My business had provided a three sided “machine shed” 40 foot deep by 60 feet long and 10 foot eave to a farmer in the state of Washington. Within a year after he had the building up, he called because he had fist sized holes in the roof of his barn!

Well, there was a “Paul Harvey” to his story….he had enclosed the open side of the building, and then used it for raising hogs! The building had absolutely no ventilation provisions, nor was there a vapor barrier installed under the roof steel.

The wastes produced by the hogs contained a very high amount of ammonia, which reacted with the aluminum in the Zincalume®, and literally ate holes in it!

rusted steel siding
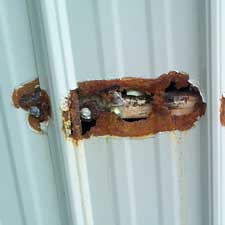
We recently had a client send us the photos seen with this article. Their four year old building had developed a series of rust through holes and the client wanted to know if the steel panels were still under warranty.

Strangely, the holes are all in a straight line, across one panel of steel and just onto the next panel. The line of holes just happens to coincide with the location of a “bookshelf” style wall girt on the inside of the building. Nowhere else on the building is there any sign of rust.

While the ultimate authority will be the steel roll forming company, my suspicion is some corrosive material was placed on the bookshelf girt (which was being used as a shelf), and it leaked or spilled along the girt line.

What came to mind first was an old battery. A frequent poster to internet discussion boards, from Tennessee, had this to say about battery acid and steel:

“I fought the battery acid contamination for years on mine equipment on metal a heck of a lot thicker…” “What I found is no amount of rinsing, or pressure washing will stop the damage from continuing and once the metal is contaminated replacement is about the best solution. The problem with acid is not just having the corrosive substance lying on the surface dissolving the metal, but the fact that once contaminated a chemical reaction is started that is very hard to stop! The acid will “eat” into the metal and cannot be simply rinsed off nor is it easy to neutralize for the same reason.”

Steel roofing and sidings are strong and affordable, however care must be taken to protect them from caustic situation, which may lead to premature failure of the product.