Over 50% of all Hansen Pole Buildings kit packages are constructed by the building owners themselves. If you are amongst these stalwart folks, kudos! Odds are your new post frame building will have a far superior end resultant than what you could or would have paid your hard earned dollars to have a builder do it for you.
The #1 reason – you care!
If you are among these folks, I praise you for your willingness to actually do things like reading the plans and following the instructions.
The contractor of the building in the photo did have a few challenging moments, which might have been less of a challenge had he followed along as we anticipated he would. Those will be glossed over and we will take a quick look at one of the photos provided by the proud new building owner.
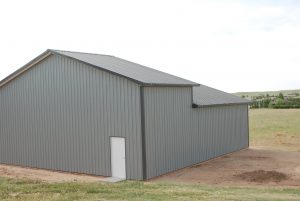
Please try to ignore the installation on the fascia trims.
Getting on to business….
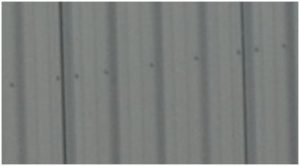
Looking at the sidewall steel panels, see how nearly every lap is sticking up? This is a common, yet easily solved challenge which I recently wrote about: https://www.hansenpolebuildings.com/2016/05/cool-solar-stuff/.
The builder even went to great lengths to make the problem worse, by placing a screw through the tops of some of the overlapping steel ribs. This is not a solution espoused in our installation instructions and frankly, I don’t know where he got the screws from, as we did not furnish any for this purpose.
Why is this worse? If someone now tries to resolve this, they may end up with some holes in the underlaps which can be seen past the edge of the overlapping panels.
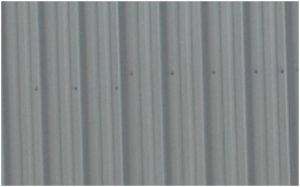
 Run your eyes up to the top of the eave walls – where screws have been placed on both sides of each high rib. Again, this is not a screw pattern which is shown on our plans or in the instructions. Although there ARE some places for screws to be placed like this – this happens to be none of them.
Now kindly turn the corner and look at the peaked endwall.
See the line of screws which are even with the sidewall eave line? I will give you a moment.
See how they stop about six feet in from the corner?
Not how things were anticipated, this line coincides with the end truss bottom chord and should have run all of the way to the corner.
 Now, move your eyes down a row of screws. At nine feet in from the corner, the screw line has a jog in it of about two inches. I won’t even ask how.
The building is completed and will serve its intended function admirably (at least providing the builder DID put screws on each side of the high ribs where they were supposed to go). The client appears pleased with the end result, so we smile and move forward.
I can honestly say in the thousands of building kits sold by Hansen Buildings and constructed by the building owners, I just have never seen screws placed quite like this.
Now for the #2 reason: Because they cared!
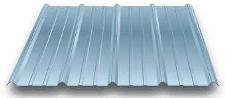 With any steel panel fastening case, screw guns with an adjustable clutch and/or a depth sensing nosepiece, and a minimum of six amps of power are the proper tools of choice. This assures the fasteners are optimally installed. Often (which we recommend) steel panels can be predrilled to prevent walking of the screw point across the surface of the steel …and creating scratches you really didn’t want to have. Selecting a tool with the correct RPM (Revolutions Per Minute) is essential for ideal performance of the pole building system.


