Tag Archives: soil compaction

Building Codes, Site Prep, and Heating & Cooling Efficiency

This Wednesday the Pole Barn Guru answers reader questions about whether or not a Hansen Building meets Florida/Dade building codes + a few others, optimal materials for site prep on a grade, and heating & cooling efficiency in a long, narrow structure.

DEAR POLE BARN GURU: A few questions:- Do your products meet Miami/Dade building codes? If no you can ignore the remaining questions.- Do you build telephone style structures?- Have you built projects for zoos?- Have you built animal habitats, climbing structures for monkeys? You can call me for more information. Thank you. CHARLES in KISSIMMEE

DEAR CHARLES: Yes, our fully engineered buildings can meet or exceed Miami/Dade building codes.

We are not contractors, so we do not build anything. We provide fully engineered custom kits – designed to be erected D-I-Y or (for those without time or inclination) by a building erector of our client’s choice.

We do not use telephone (utility) poles for any of our buildings, whether new or recycled. We have provided buildings at zoos, amongst them would be Cheyenne Mountain (Colorado Springs, Colorado) Zoo’s Nature Center and Las Vegas, Nevada zoo’s giraffe barn. Our buildings incorporate structural aspects needed to adequate enclose spaces – roof, walls, doors, windows, any elevated wood floors and stairs. Non-structural aspects of our buildings are left to our clients.


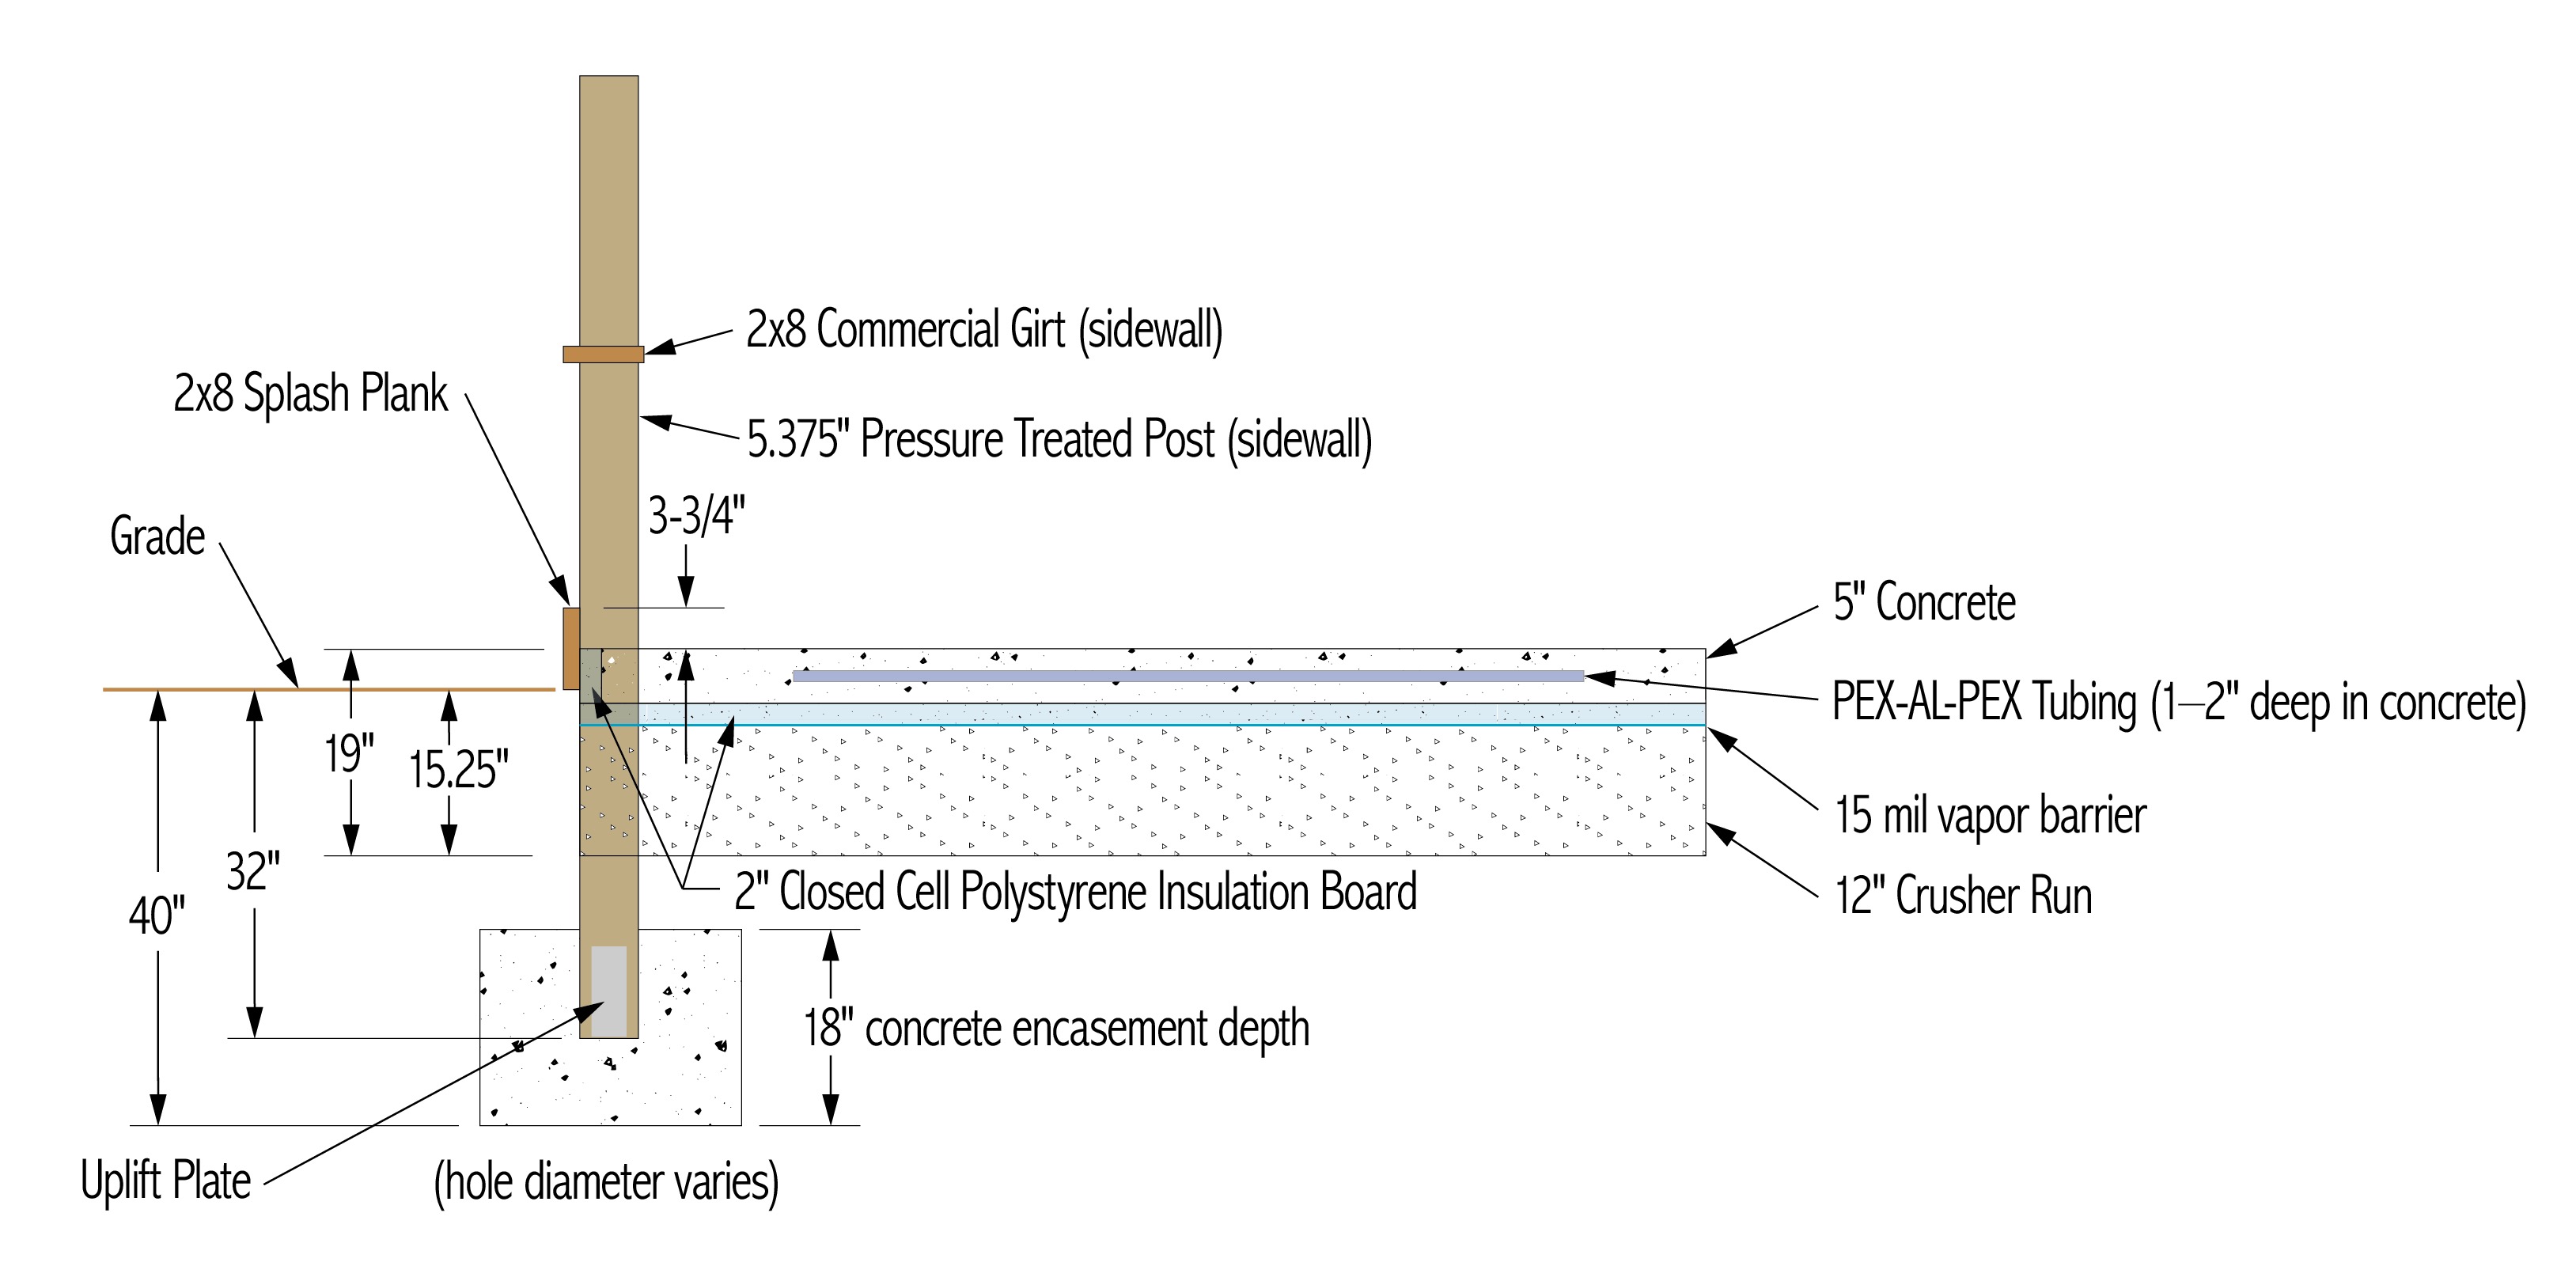
DEAR POLE BARN GURU: I’m building a pole barn on an uneven build site and am trying to figure out the best material to level the site with. I need as much as 3ft of material in some areas. I can get sand for cheap nearby but I didn’t know if it was the appropriate material for setting poles.

As an added complication, I’ve already acquired my poles, which won’t reach the soil beneath the fill material. However, I will be compacting the material in lifts. REID

DEAR REID: While sand compacts well, it also is prone to washouts. Please read: https://www.hansenpolebuildings.com/2011/11/site-preparation/
and subsequent four articles to follow (use right arrow at bottom of article to move to next).


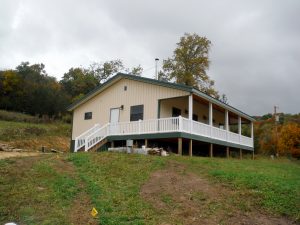
DEAR POLE BARN GURU: I’ve enjoyed perusing your website 😉 We will be building at some point in the next few years, land is already purchased. I designed our current home, but plan to have help on our future home.
The prettier view will be to the North, but I always want Southern exposure in every room possible. Do you think it is a bad idea to design a home that is only one room (24’) deep? It would be long and narrow. I guess my primary concern is heating & cooling efficiency.
Any thoughts you can share would be greatly appreciated! I will likely get back to you for a quote on designing our home, when I get my ideas pulled together. JOYCE in QUINCY

DEAR JOYCE: Provided you are able to locate your HVAC so it is centralized heating and cooling should not be an issue with a long and narrow floor plan. You see this regularly done with manufactured housing.

Your biggest challenge will be laying out rooms so they can have both a North view and a Southern exposure. Unless your plan is to have basically only three major room zones, say a great room in center with a bedroom suite to each side of it, you are going to either be forced to have a hallway, or rooms with only either a view or exposure.

Our staff floor plan experts can help to create your ideal dream floor plan with this look. Every barndominium Hansen Pole Buildings provides is 100% custom designed to best meet the wants and needs of our clients and their loved ones, please see #3 here to assist in determining needed spaces and approximate sizes, and to have professional floor plans and elevation drawings produced affordably. https://www.hansenpolebuildings.com/2021/02/a-shortlist-for-smooth-barndominium-sailing/

Suitable Base, Insulation, and Building in Flood Zone

This week the Pole Barn Guru addresses questions about whether or not a base will be suitable for a slab, if a person HAS to insulate if they intend to heat the structure, and building 13′ above grade foundation in a flood zone.

DEAR POLE BARN GURU: Good morning, I’m getting ready to have a slab poured in my 30’x30′ pole barn, the slab will be 7 inches thick (was meant to be 6 but I failed to bring the base material up high enough) of 4000psi, with fiber mesh along with wire mesh. The pad site is level and compacted asphalt millings (compacted by a 14 ton vibrating roller). The base material I was advised to use is a “clean fill”, that is mined from below ground from a local quarry, its best described as similar to a baseball infield dirt. The base is approximately five inches thick. I personally put the base down, spraying it with water and compacting with a vibrating plate compacter as I went. My main question is based upon your knowledge, is it your opinion that this will provide a suitable base for the slab? I appreciate any input you may have. Thank you and thanks for a great site! ADAM in CLARKSBURG

DEAR ADAM: Thank you for your kind words. Concrete makes for very expensive fill and unless you are planning on some very heavy equipment being placed on your slab, more than four inches is probably unnecessary. As to your base, without having had a Geotechnical Engineer do a site analysis, it is impossible for me to confirm adequacy of your fill as described. Your “clean fill”, as described, has me somewhat concerned as baseball infield dirt is fairly fine and could prove a challenge in obtaining adequate compaction. Normally I would expect to see 3/4″ minus or similar crushed stone.


DEAR POLE BARN GURU: If an individual builds a pole barn that he intends to fully heat does he HAVE to insulate it? Can’t find a definitive answer in the IBC or IECC. BOB in CROWN POINT

DEAR BOB: If your heating source requires a permit, your Building Department is going to expect appropriate insulation. From a practicality standpoint, it would be prudent to insulate.


DEAR POLE BARN GURU: Hello, Our property is in a flood zone. We would need to build on a 13 foot above grade elevated foundation. Any ideas if this is feasible with a pole barn kit? Thank you ED in BOLIVIA

DEAR ED: Fully engineered post frame buildings are very adaptable to flood zones, they make excellent for excellent stilt houses. Our engineers will need some specifics on your property’s flood specifics. https://www.hansenpolebuildings.com/2017/09/stilt-houses/

Barndominium Building on Solid Ground

For many, a new barndominium is looked upon as being a ‘forever’ home. This is an opportunity to have a floor plan custom crafted to meet all sorts of family wants and needs – whether it is a huge country kitchen or shop space big enough to house a fleet of classic vehicles.

It is yours.

It is YOUR hard earned dollars going to pay for this lovely new home.

While I encourage everyone who can to at least act as their own General Contractor (https://www.hansenpolebuildings.com/2020/02/does-my-barndominium-need-a-turn-key-general-contractor/), not everyone feels confident in doing this. In some instances lenders require a General Contractor’s involvement. For others, their new barndominium and their current home and careers are geographically not close enough to allow for this to occur.

Scary things can happen when turnkey General Contractors are left to their own devices. I have penned previously (okay hunt-and-pecked) on how to avoid General Contractor challenges (https://www.hansenpolebuildings.com/2019/11/a-contractor-for-your-new-barndominium/).
Crucial to long term success with your new barndominium is having a solid base to build upon. Those doing work DIY have an advantage – you get to supervise (or do) site preparation and any needed compaction.

drywall crackHaving a barndominium built? You may anticipate a few things going wrong, but you’d expect your builder to erect your house on solid ground, right? Don’t be so sure.
Population growth and urban sprawl mean there’s not much residential land left in many areas. “What’s left is not very good,” says Daniel G. Knowler, a senior engagement manager at Navigant Consulting, specializing in construction disputes. A lot of homes are being built on expansive soil — it swells when it rains — without adequate safeguards.

One family moved into their new home in Highlands Ranch, Colorado, and long cracks started showing up in walls, then their porch started pulling away from their house. After badgering his builder for a soils report, this homeowner learned their lot was a hot spot for potential swell! Eventually a court found for these homeowners and ordered restitution from said builder.

(for extended reading on barndominiums on expansive soils please see: https://www.hansenpolebuildings.com/2020/07/barndominium-on-expansive-soils/)
Problems besides swelling soil can occur. In Laguna Niguel, California four hillside homes built on an ancient landslide site toppled after unstable soil gave way. Besides these four homes collapsing, they landed on top of other dwellings below – destroying them!

Do not assume a turnkey General Contractor will make all potential problems go away, sadly they can cause more than they solve.

Seal Walls, Fill for Compaction, and Condensation Control

Let’s close out the week with another installment of Ask the Pole Barn Guru! First up is a resolution to seal up a building, followed by assistance with compacted fill, and finally an alternative to spray foam to control condensation.

DEAR POLE BARN GURU: I purchased a pole building from you last year and there was an error that I wanted an insulated building. So I will be insulating this myself. What keeps all the drafts and bugs out at the roof eve and lower edge of side panels? I am doing house wrap on the exterior walls. MARK in MOUNT VERNON

DEAR MARK: Communication – we as humans do so much of it and all too often do not fully convey our intentions. I am just as guilty as any other person, so do not feel like you are alone in this. This is one reason we strive to do everything in writing, so both parties are clear on each other’s expectations.


Also, successful construction is not measured by how perfect things went initially, but rather by how challenges are solved to arrive at a great end result.

Your roof eaves should be sealed with inside closures, provided with your building package, to install between fascia board and roof steel, so should not be an issue there. If you have not yet installed siding, same inside closures can be placed at bottom of walls, on top of your Weather Resistant Barrier to keep any little critters from entering steel high ribs in your 1/4 inch space between base trim flat and bottom edge of wall panels.


DEAR POLE BARN GURU: I’ve worked with a Hansen Building Designer, ordered my building, and materials will start arriving in two weeks. Looking forward to it, but also a little bit ‘trepidated,’ as it’s my first post-frame build (I completely remuddled a 100 year old farm house at our last place, so that’s what I have for previous experience).

My question has to do with the compacted fill that goes onto my cleared site after the poles are concreted in. Is crusher run gravel appropriate, or is a different type of gravel recommended for better drainage (I’m not familiar with the options, so please be specific if so)?

Also, please see the attached photo of the cleared site along with a drawing I created based on what I *think* are the correct dimensions based on reading the Construction Manual and a number of your blog posts. Note that I’m planning on a 5″ thick concrete floor, and have indicated same in the drawing at exactly 5″. ED in SUMMERTOWN

DEAR ED: Awesome drawing! You should have no difficulties in assembling your own beautiful building, as I can tell you are already reading directions!

Crusher run should be adequate for your sub-base. Most important is to get any clay removed from within upper levels of your grade and to have good compaction. Top two to six inches of your fill should be clean and drained sand or sandy gravel, again well compacted.

Photos: https://hansenpolebuildings.com/uploads/polebarnquestions/7bea6f6c3d75e192515b8bd12303c72c.jpg
https://hansenpolebuildings.com/uploads/polebarnquestions/5ccc84929f35cf3f29da7f8849defaa1.jpeg


DEAR POLE BARN GURU: If not spray foam on the underside of metal roof then I saw you recommend reflective siding insulation. Would that suffice in lieu of spray foam?

DYLAN in BEDFORD

DEAR DYLAN: My first alternate choice would be to use an I.C.C. (Integral Condensation Control) https://www.hansenpolebuildings.com/2020/09/integral-condensation-control-2/ easy to install and no seams to worry about. Next choice would be a Reflective Radiant Barrier – we have it in six foot wide rolls with an adhesive pull strip to seal joints. Contact Materials@HansenPoleBuildings.com for delivered pricing (rolls are 128′ long).


The Idea of Heating, Post Heave, and Interior Housewrap

Mike the Pole Barn Guru discusses The Idea of Heating the building in the future, Post Heave, and Interior Housewrap.

DEAR POLE BARN GURU: Hi Pole Barn Guru, I am getting ready to order a kit for a new 38×40 pole barn in Southern Ohio. Initially it will be cold storage, but the idea of heating it someday lingers.

I read your opinion on condensation blankets, and I was in agreement, that installing between purlins and the metal seemed like a mistake. 

What is your opinion on bubble wrap? Then I assume I could put fiberglass batting directly against the bubble wrap at a later date? But the bubble wrap would keep the condensation down? 

Any advice is greatly appreciated. Thank you. BOB in OHIO

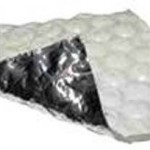
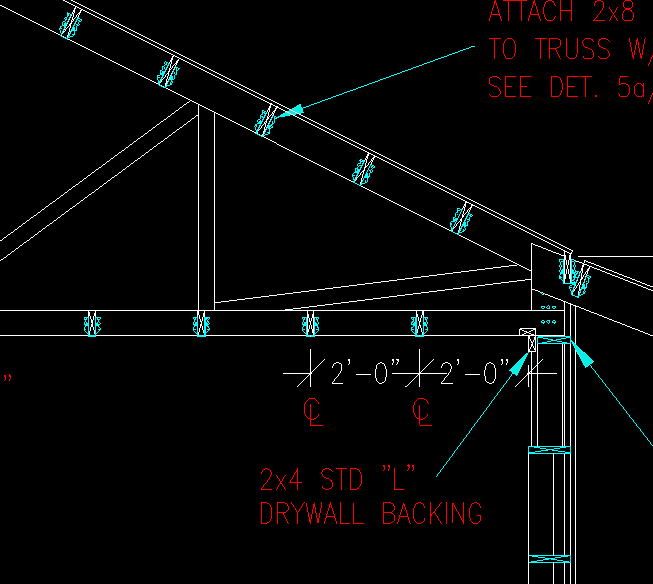
DEAR BOB: We sell millions of square feet of reflective radiant barrier (bubble wrap) every year. Installed properly, it is a great condensation control, however it has next to no insulating value.

If you think you ever might heat the building this is my recommendation – order the building kit package with raised heel trusses (at least two inches greater in heel height than the depth of blown in insulation – so for R-45 you would need 17 inches of heel height) and designed to support a ceiling (10 psf). Use enclosed vented soffits and vented ridge along with a reflective radiant barrier.


DEAR POLE BARN GURU: I have a barn where a water pipe under the ground cracked and was leaking water under the front of my barn causing my two front pole of my barn to heave up about a foot due to freezing and thawing(This was before I bought the property).  I have fixed the pipe, now how do I get my barn level again?

I look forward to hearing from you. GEORGE in KLEEFELD

DEAR GEORGE: The only way I can see to get things back to level involves having to excavate the area which has heaved so as to be able to get the building back to where it began. The biggest challenges will be not over excavating, and getting the soil placed back into the excavation properly compacted. There may be other issues with water in the soil and inadequate drainage beneath the building which could cause future problems. It would behoove you to involve a registered engineer with extensive experience in soils to take a look at your site and give an expert opinion.


DEAR POLE BARN GURU: Once again, thanks so much for the info, lot of information out there to sort through. After thought, Cleary nailed all the sides and roof, removing the nails would result in a lot of damage. Can we use Tyvek on interior of 2×6 cross members or put it between the 2×6’s against the tin. Then put up unfaced 6″ fiberglass, poly, then plywood with a three foot tin boarder around bottom? If only we had the money and knowledge 20 years ago. Thanks again. MIKE in PALMYRA

housewrap
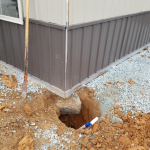
DEAR MIKE: Sorry to hear all of the steel was nailed on your building – chances are more than fair they will start to pose more challenges, between leaking and premature deterioration, if they have not begun to do so already. The difference in cost between nails and screws for attaching steel is so minuscule in relationship to what was invested in the building itself. Of your two ideas proposed, probably the most likely to be successful is to completely wrap the inside of the framing with the Tyvek – this would include the columns, as it will be impossible to adequately seal all of the seams up against the posts. Keep in mind, the better you can seal it, the better the end resultant will be.


Shifting Piers: Building Blooper or Blunder?

This is a true story, about the construction of an all-steel building; however the events could spell the doom of any building project – regardless of the structural framework.

Shifting Piers

Geo-technical engineers were called out to a jobsite to investigate why it was the concrete piers supporting an under construction all-steel building were unstable.

In August, eight months after the site work was completed, the steel erectors walked off the job, as they were unable to put the steel in place! Now what could have caused such an issue?

Snow does not make for a good building base

Snow covered steel columns
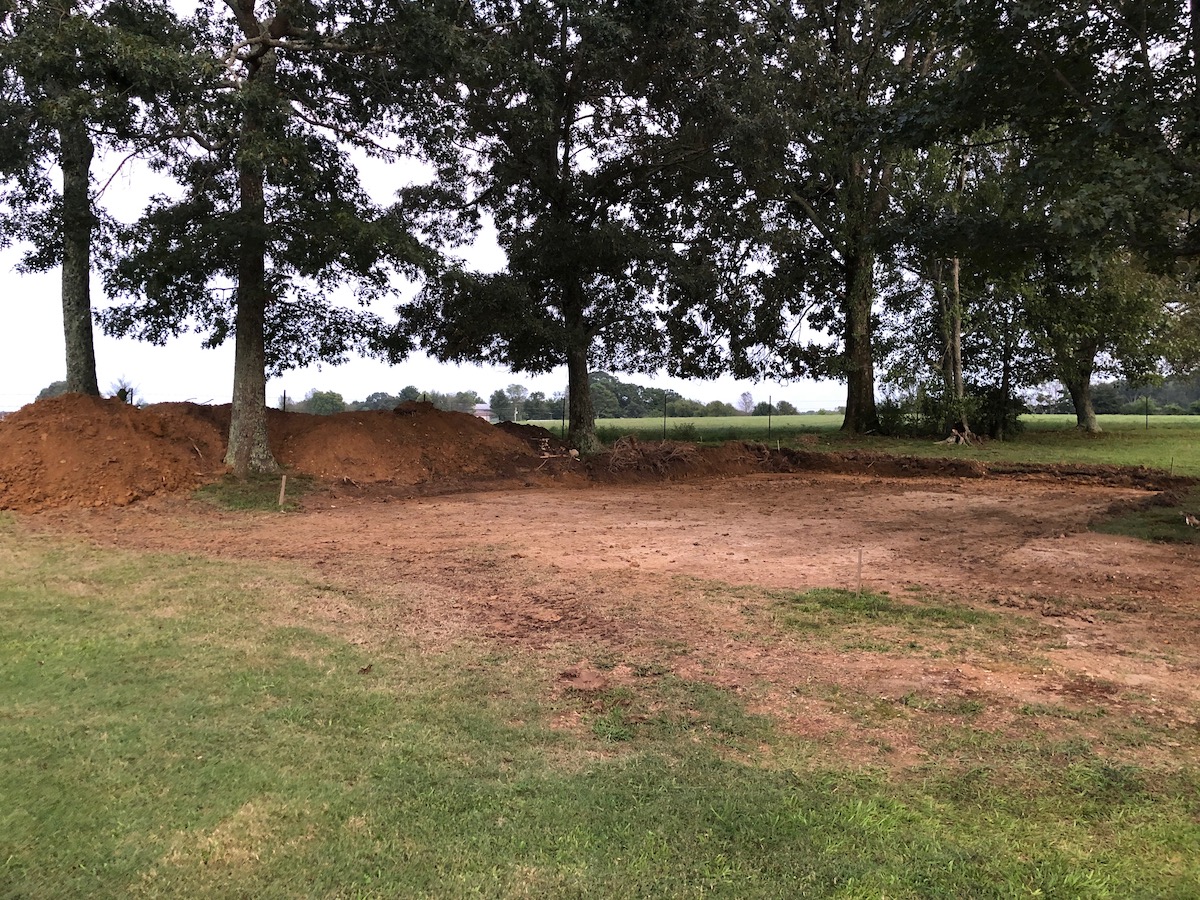
Well, the site work was completed the previous December. As part of the site work, bulldozers compacted earth over six inches of…..snow!

Anyone seeing a potential problem cropping up?

When the geo-tech engineers dug test pits, to determine what the soil issues were, they found the snow was still buried deep underground! The dozer compacted soil which was acting as a blanket.  This kept the covered snow in a mostly frozen state. As the snow began to melt, the concrete piers above the snow began to shift.

Steel Building on Wheels?

In order to complete the project, the steel erectors had to put the steel building on wheels and roll it out of the way. This allowed for a new set of footings and a foundation to be placed (once, of course, the snow was removed).

Here was one project which was going to go way over budget.  And probably resulted in a slew of legal actions back and forth as all involved pointed their fingers at each other, trying to escape liability.

Read the Reports!

It is recommended for contractors to read geo-technical reports, whether they appear to apply to them or not. Building owners should also make certain any engineering tests specified in the construction documents, or required by Building Officials, are actually carried out.

Hurl Your…Concrete Cookies

I know none of us has ever experienced this condition, but we all know of someone who has had the hurling issue, often after a period of personal discussion with some of the friends of George Thorogood.

In this instance, I’m not thinking either of the example above, or the tasty oatmeal raisin cookies my grandma made for us when we were kids. I am making specific reference to the pre-cast chunks of concrete usually four to six inches in thickness and 12 to 18 inches in diameter which are sold or provided for footings in pole buildings.

The basic concept is to throw concrete cookies in the bottom of the augered holes and place the building columns directly upon them. The general idea is for the cookies to support the weight of the building, to prevent settling.

My recommendation – RUN, DO NOT WALK, away from this as a design solution.

Why?

They are a failure looking for a place to happen.

Let’s look at what a footing is supposed to do. The dead weight of the building PLUS all imposed live loads must be distributed to the soils beneath the building. Sounds pretty simple, eh?

Concrete Cookie

Concrete Cookie

To begin with, the International Building Codes require concrete footings to be a minimum of six inches in thickness. This eliminates immediately any concrete cookies which are less than this thickness (most of them).

Examine a fairly small example – a 30’ wide building with columns spaced every eight feet. The actual weight of the building (dead load) will vary greatly depending upon the materials used. Steel roofing and siding will be lighter than shingles and wood sidings. For the sake of this example, we will use a fairly light 10 psf (pounds per square foot) building weight. The Code specifies a minimum roof live load of 20 psf. This means each footing must carry the weight of one-half of the width (15 feet) times the column spacing (8 feet) times 30 psf. Doing the math, 3600 pounds.

In many parts of the country soil bearing pressures are as little as 1500 or even 1000 psf. Basically – the easier it is to dig, the lower the capacity of the soil to support a vertical load.

For every foot of depth below grade, the soil capacity is increased by 20%. Other than with 1000 psf soils, for every foot of width over one foot, the capacity also gets a 20% increase.

With 1500 psf soil, and the bottom of the footing four feet below grade, a 12 inch footing will support 2700 pounds per square foot.

A 12 inch diameter footing covers 0.785 square feet, a 16 inch 1.4, 18 inch 1.77, 24 inch 3.14.

The 16 inch footing would support exactly the 3600 pounds from the example above. However – lots of places in the country have snow loads (which the footings must support) and many buildings are wider than 30 feet, or have columns placed over eight feet apart.

Trying a 40 foot span, with a 40 psf roof snow load, same eight foot column spacing, would mean resisting an 8000 pound load! With 1500 psf soils, even a two foot diameter footing would be inadequate.

In most cases, the use of concrete cookies as footing pads proves to be both inadequate and a waste of good money. To insure a building won’t settle, (from inadequate footings), look for a plan produced by a registered design professional who is proficient in post frame building design. He/She will have the history and training to design your building to withstand the loads…which begins with the foundation.

Building Site Prep: Soil Compaction How-To

The desired level of soil compaction is best achieved by matching the soil type with its proper compaction method.  Other factors must be considered as well, such as soil compaction specs and job site conditions.  Since granular soils are not cohesive and the particles require a shaking or vibratory action to move them, vibratory plates (forward travel) are the best choice.

Reversible plates and smooth drum vibratory rollers are appropriate for production work.  Granular soil particles respond to different frequencies (vibrations) depending on particle size.  The smaller the particle, the higher the frequencies and higher compaction forces are required. Two factors are important in determining the type of force a compaction machine produces: frequency and amplitude.  Frequency is the speed at which an eccentric shaft rotates or the machine jumps.  Each compaction frequency machine is designed to operate at an optimum frequency to supply the maximum force.  Frequency is usually given in terms of vibration per minute (vpm). Amplitude (or normal amplitude) is the maximum movement of a vibrating body from its axis in one direction.  Double amplitude is the maximum distance a vibrating body moves in both directions from its axis.  The apparent amplitude varies for each machine under different job site conditions.  The apparent amplitude increases as the material becomes more dense and compacted.

Lift height (depth of the soil layer) is an important factor that effects machine performance and soil compaction cost.  Vibratory equipment compact soil in the same direction: from top to bottom and bottom to top.  As the machine hits the soil, the impact travels to the hard surface below and then returns upward.  This sets all particles in motion and compaction takes place. As the soil becomes compacted, the impact has a shorter distance to travel.  More force returns to the machine, making it lift off the ground higher in its stroke cycle.  If the lift is too deep, the machine will take longer to compact the soil and a layer within the lift will not be compacted.

Soil can also be over-compacted if the compactor makes too many passes (a pass is the machine going across a lift in one direction).  Over-compaction is like constantly hitting concrete with a sledgehammer.  Cracks will eventually appear, reducing density.  This is a waste of man-hours and adds unnecessary wear to the machine.

For granular soils, the best compaction is done with vibratory plates. Vibratory plates are low amplitude and high frequency, designed to compact granular soils.  Gasoline or diesel engines drive one or two eccentric weights at a high speed to develop soil compaction force.  The resulting vibrations cause forward motion.  The engine and handle are vibration-isolated from the vibrating plate.  The heavier the plate, the more compaction force it generates.  Frequency range is usually 2500 vpm to 6000 vpm.  Vibration is the one principal compaction effect.

The bottom line (pun intended) is to start the project off correctly with a site which has been adequately prepared to withstand not only the weight of your new building, but the forces of nature which will be applied to it during your lifetime, and the lifetimes of the owners after you. As important, if you’ve read my previous blogs, is not to alter the soil once you have carefully prepared your site, and then meticulously constructed your dream building.  Altering anything under or around your new building may affect the soil density or water consistency of your “dirt”, and is plain and simple looking for cracks, heaves and other “nasties” which could be costly, if not unsightly.  Don’t end up with a reminder of the Leaning Tower of Pisa….or worse.

And now you know why dirt is so important.

Site Preparation Part III: Soil Moisture Content

When I think of water and soil, I can’t help but think of the Tower of Suurhusen in Germany.  This one leans even more than the Leaning Tower of Pisa in Italy.  But it’s why it leans which interests me.  Built in 1450, it probably would have never leaned, if not for changing the moisture content of the soil.  It didn’t even start to lean until the nineteenth century, when water was drained from the marshy land around it.  You can read more about it here:

https://architecture.about.com/od/structural/ig/Leaning-Buildings/Tower-of-Suurhusen.htm

The response of soil to moisture is very important, as the soil must carry the load year-round.  Rain, for example, may transform soil into a plastic state or even into a liquid.  In this state, soil has very little or no load-bearing ability.

Soil moisture content is vital to proper compaction.  Moisture acts as a lubricant within soil, sliding the particles together.  Too little moisture means inadequate compaction – the particles cannot move past each other to achieve density.  Too much moisture leaves water-filled voids and subsequently weakens the load-bearing ability.  The highest density for most soils is at a certain water content for a given compaction effort.  The drier the soil, the more resistant it is to compaction.  In a water-saturated state the voids between particles are partially filled with water, creating an apparent cohesion which binds them together.  This cohesion increases as the particle size decreases (as in clay-type soils).

To determine if proper soil compaction is achieved for any specific construction application, several methods were developed.  The most prominent by far is soil density.

Soil testing accomplishes the following: measures density of soil for comparing the degree of compaction vs. specifications for the structure to be built; measures the effect of moisture on soil density vs. specifications; and provides a moisture density curve identifying optimum moisture content.

Tests to determine optimum soil moisture content are done in the laboratory.  The most common is the Proctor Test, or Modified Proctor Test.  A particular soil needs to have an ideal (or optimum) amount of moisture to achieve maximum density.  This is important not only for durability, but will save money because less compaction effort is needed to achieve the desired results.

A quick method of determining moisture is known as the “Hand Test”.  I love these kind of tests – they are quick, simple, and I don’t have to get out my checkbook or credit card to pay for them.

Pick up a handful of soil.  Squeeze it in your hand.  Open your hand. If the soil is powdery and will not retain the shape made by your hand, it is too dry.  If it shatters when dropped, it is too dry. If the soil is moldable and breaks into only a couple of pieces when dropped, it has the right amount of moisture for proper compaction. If the soil is plastic in your hand, leaves traces of moisture on your fingers and stays in one piece when dropped, it has too much moisture for compaction.

Bottom line folks is this: make sure you have the proper soil moisture content prior to compacting it.  And once you have your new building up, don’t go messing around with changing the density or the moisture content of the ground underneath and around it.  If you’ve done your homework and gotten the soil compacted properly, you should be sitting “level” for the next several hundred years…in your new pole building.

Building Site Preparation Part II: Soil Compaction

This is day two in several where I am discussing all kinds of issues with site preparation, mostly what to do with the…dirt.

So what actually is soil? Soil is formed in place or deposited by various forces of nature – such as glaciers, wind, lakes and rivers – residually or organically.  The important elements in soil compaction are soil type, soil moisture content and compaction effort required.

There are five principle reasons to compact soil: to increase load-bearing capacity, prevent soil settlement and frost damage, provide stability, reduce water seepage, swelling and contraction and reduce settling of soil.

The Leaning Tower of Pisa would have benefited from a soils engineer and a soil compaction test. The tower was in trouble before it was even finished. According to www.buzzle.com after the tower reached its third floor construction in 1178, they had to stop the work as the structure started to sink in the ground. This was due to weak and unstable soil where the foundation was being constructed. The work was halted for almost 90 years after that. The halt in the construction gave time for the soil to settle; otherwise the tower would’ve definitely collapsed. As there was a tilt in the building, the engineers had to build the next 4 floors, with one side taller than the other. Thus it manipulated the tower to lean in the opposite direction.

Soil can be compacted by vibration, impact, kneading or pressure. These different compaction efforts can be accomplished by the main types of compaction force, static or vibratory.

Static force is simply the deadweight of the machine, applying downward force on the soil surface, compressing the soil particles.  The only way to change the effective compaction force is by adding or subtracting the weight of the machine.  Static compaction is confined to upper soil layers and is limited to any appreciable depth.  Kneading and pressure are two examples of static compaction.

Vibratory force uses a mechanism, usually engine-driven, to create a downward force in addition to the machine’s static weight.  The vibrating mechanism is usually a rotating eccentric weight or piston/spring combination (in rammers).  The compactors deliver a rapid sequence of blows (impacts) to the surface, thereby affecting the top layers as well as deeper layers.  Vibration moves through the material, setting particles in motion and moving them closer together for the highest density possible.  Based on the materials being compacted, a certain amount of force must be used to overcome the cohesive nature of particular particles.

Poor, improper or no compaction can result in concrete slab cracks or frost heaves, foundation erosion and/or building settling. Proper compaction can ensure a longer structural life.

Every soil type behaves differently with respect to maximum density and optimum moisture.  Therefore, each soil type has its own unique requirements and controls both in the field and for testing purposes.  Soil types are commonly classified by grain size, determined by passing the soil through a series of sieves to screen or separate the different grain sizes. Soils found in nature are almost always a combination of soil types.  A well-graded soil consists of a wide range of particle sizes with the smaller particles filling voids between larger particles.  The result is a dense structure which lends itself well to compaction.  A soil’s makeup determines the best compaction method to use. There are three basic soil groups: cohesive, granular and organic. Organic soils are not suitable for compaction.

Cohesive soils, such as clays or silts have the smallest particles. Cohesive soils are dense and tightly bound together by molecular attraction.  They are plastic when wet and can be molded, but become very hard when dry.  Cohesive soils feel smooth and greasy when rubbed between fingers. Clay soils are less than ideal to construct your new pole building upon and should be removed and replaced.

Granular soils range in particle size from .003″ to .08″ (sand) and .08″ to 1.0″ (fine to medium gravel).  Granular soils are known for their water-draining properties. Sand and gravel obtain maximum density in either a fully dry or saturated state.  Granular soils feel gritty when rubbed between fingers. When water and granular soils are shaken in the palm of your hand, they will mix, when shaking stops, they will separate. When dry, a soil sample will crumble.

Gravel and sand can be compacted either by vibration (using a vibrating plate compactor, vibrating roller or vibrating sheepsfoot) or kneading with pressure (using a scraper, rubber tired roller, loader or grid roller). Both are good to excellent in terms of foundation support and as a subgrade. They are easy to compact and are not expansive (expansive soils tend to be prone to frost heave issues).

Whew!  That’s a mouthful and then some in talking about compaction.  Too bad the contractors working on the Leaning Tower of Pisa didn’t know all of this!  The good news is, in 1990 efforts were made to correct the angle from 5.5 degrees to 3.99 degrees, and engineers have determined it stopped sinking since about 2008 and will continue to be stable for another 200 plus years.  If I ever get the chance to see it (my bride is determined we will!), I’ll be sure to have my picture taken outside…with my feet planted firmly on the ground

Building Site Preparation: Talking Dirty Part I

Caught your attention, didn’t I?

Every building project starts from the same place – the dirt. In order to achieve a quality outcome, it takes a quality beginning.  It’s hard to believe, but there is a lot of “stuff” to cover about dirt.  Stick with me here for the next several blogs and we’ll take it one step at a time.

Building site preparations begins with allowing proper drainage.  Plan to keep building grade higher than the surrounding site. On an ideal site, water drains naturally away from building. Since few sites are ideal, in most cases, grade work will be required to keep surface water away from building. Keeping finished building floor higher than the surrounding site reduces flooding chances during heavy rainfall or rapid snowmelt.

In flood plains, consult first with your building department to determine their requirements. Typical recommendation is to establish grade level at finished floor top higher than flood level. This may require importing fill to raise grade. A surveyor can be hired to expertly determine these heights.  In some cases, vents may be installed, below flood level, to equalize interior and exterior pressures,

Many sites can be graded with a skid steer (a.k.a. Bobcat) or backhoe.  Some cases will require heavy equipment to properly grade site to allow water to drain away from building.  If a professional is engaged for site grading, make certain finished grade prepared is adequate before making final payment. In far too many cases “flat” sites which are out of level have been experienced by disappointed owners.

At a minimum, site preparation includes:


  • Remove all sod and vegetation.


  • For ideal site preparation, remove topsoil and stockpile for later use in finish grading. In frost prone areas, remove any clays or silty soil from within the future building “footprint”.


  • Replace subsoil removed from around building with granulated fill to help drain subsurface water from building.


  • Distribute all fill, large debris free (no pit run), uniformly around site in layers no deeper than six inches.


  • Compact each layer to a minimum 90% of a Modified Proctor Density before next layer is added. (You will need to hire a soils engineer to do this test and tell you if you have the compaction right).  Usually, adequate compaction takes more than driving over fill with a dump truck, or earth moving equipment.


  • When any building portion sits on fill, rest columns, as well as any concrete encasement, on or in undisturbed soil. In many cases, building inspectors will require a soils engineer to confirm compaction adequacy on filled sites. Soils engineers can be expensive, but are even more costly when called in to do analysis “after the fact”.

Soil compaction is defined as the method of mechanically increasing the density of soil.  In construction, this is a significant part of the building process.  If performed improperly, settlement of the soil could occur and result in unnecessary maintenance costs or structure failure.  Almost all types of building sites and construction projects utilize mechanical compaction techniques.

This is enough to absorb for one day.  Come back Friday, with a belly full of turkey, mashed potatoes and gravy, and my all time favorite, pumpkin pie, and I will discuss why compaction is so important!

 Happy Thanksgiving Everyone!

Mike