Moisture Barrier for a North Idaho Hangar
Reader BILL in SANDPOINT writes:
“Hey guru! Question about insulation – moisture barrier. We are under construction on a 64×70 post frame aircraft hangar in North Idaho. The eave height is 19 feet, plus a two foot heel. There are no overhangs. Roof pitch is 3:12 and the ceiling is vaulted 1:12 there will be a 58 foot wide by 18 foot tall hanger door. Attic venting will be from gable end vents. The roof will be sheathed with 7/16 OSB and receive 30# felt under the 26 gauge PBR. The walls will be sheathed 7/16 OSB and house wrapped under the 29 gauge steel panels. The plan is to install metal liner panel on the ceiling and 5/8″ drywall on the walls. Insulation will be r49 blow in the attic, and r25 unfaced batts in the walls. The hanger door is yet to be determined, but it might also be unfaced batts under a metal liner. Two 125,000 BTU radiant tube heaters will be installed in the ceiling. They will be vented outside and will draw combustion air from outside. I am thinking that it makes sense to install a full vapor barrier for the walls and the ceiling, but would appreciate your thoughts on the matter.”
Mike the Pole Barn Guru writes:
Before we get to your question, I have some concerns….
 First – you are putting a 58 foot wide door in a 64 foot endwall. This leaves only three feet of solid wall on each side of your door opening. These areas need to be shearwalls and maximum aspect ratio for a shearwall is 4:1 (four feet of height for every foot of width). With a three foot wide shearwall your maximum opening height would be 12 feet. You are likely to experience some tremendous racking problems (if not a failure) on your door endwall.
Second – trying to ventilate a 4480 square foot dead attic space with gable vents will require 1075.2 square inches of NFVA (Net Free Ventilating Area) in each endwall and this is providing half of NFVA is located in each upper and lower half of each endwall. You could accomplish this with say four 24″ x 36″ galvanized gable vents each end, however this might not be your most aesthetically pleasing design solution. Downside of gable vents is once you get past your first pair of trusses, airflow becomes negligible. I would be much happier with vents in your sidewalls (in area of truss heels) as an intake, combined with continuous ridge venting.
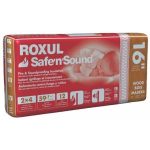 If it were me – I would use unfaced R-30 rockwool batts in sidewalls (they are not affected by moisture and R value does not degrade over time like fiberglass does) with a well-sealed interior vapor barrier before hanging drywall. This would allow your walls to dry to outside. Ceiling should not have a vapor barrier, as you want moist air to be able to escape into your well ventilated attic. I would blow in R-60 of rockwool.
Best of success with your build.
 Polycarbonate wall light panels are a very affordable way to get natural lighting into pole buildings which will not have finished interior walls. Most often (and most cost effective) is to install them at the tops of the eave sidewalls.


