Tag Archives: post frame insulation

How to Best Insulate an All-Steel Building

How to Best Insulate an All-Steel Building

I know lots and lots about post frame buildings, however when it comes to all steel buildings (PEMBs – Pre-Engineered Metal Buildings aka Red Iron) I go to an expert.

Today’s expert is John Lyle McInroe aka Mr Bee Happy, he has been in the building industry since 1988. From 1988 to 1996 he built pole Barn structures. In 1996 he built his first steel building and for eight years built both pole Barn and red iron structures. In 2004 he went into red iron full time and has been building red iron structures of all shapes and sizes ever since. If I was looking for a red iron building in John’s service area, with out question he would be my man.

The most effective way to seal your steel building would be to use spray foam. Since the steel sheeting is already screwed down, I would start with getting closure strips for your panels. You take the closure strips and cut the high rib part off the strips and stuff it in all the high ribs of your panels. This would need to be done at the bottom and top of your sidewall panels and on the bottom and top of your roof panels as well. You want to make sure that anywhere you see daylight is sealed up. I would also use silicone to seal these closure strips into place. Also, just for a little extra, I would also use a flashing tape on any spots that you see daylight that isn’t necessarily where high ribs are. Places like gable end walls where roof and wall come together and corners. Simply, just want to make sure its sealed as well as possible. Once everything is sealed, I would have a reputable spray foam company spray two inches of closed cell foam on all walls and roof and make sure all steel is covered with the closed cell foam. This would include all purlins girt and beams. At this point you have sealed the envelope of the building but have a low R value, roughly 14. So what we do is use an open cell foam on top of the closed cell. We do 5.5” in the roof with 3.5” in the walls. At this point you have an R value of over 33 in the roof and 26 in walls and you have sealed the envelope. Now when we use this method on our projects, we make sure our HVAC company knows how to put in proper HVAC system. Main thing is making sure the system has a fresh air intake system. These are the processes and procedures that we use on all of our projects.


My New Barndominium

Reader RENE in MICHIGAN is one of a growing tide of Americans looking to build a barndominium. She writes:

“I would like to build a barn with living quarters but I do have unanswered questions!

My property is in Riverside WA 98849 and therefore the first question is whether you service this area?

I have done a lay-out of what I have in mind but with no prior experience, help would be appreciated to point out possible problems or suggestions for improvements.

Would a wood construction be preferred to metal?

Would a wood construction be more affordable than metal?

Would a wood construction be better insulated than metal?

Would my 70′ x 70′ building be more expensive than a smaller downstairs and upstairs building

I am in my senior years and still in very good health but there will be a day when using stairs may become a problem and that is why the square footage is so much. The living quarters are two bedrooms (guest bed 15’x20′, bath 15×10′, laundry 15’x10′)(main 20’x20′, bath 20’x10′,dressing room 20’x10′) 2 bathrooms and open plan Livingroom and kitchen (35’x40′) and would be 70′ x 40′ and the garage/storage/RV space 70′ x 30′

May have more questions later but would like to start off with the most obvious, for me. I have to sell property in MI before I can get going on this side. If you could correspond with me by email, for starters, I would appreciate it. 

Thanks, take care and stay safe!

“GodBless”


Mike the Pole Barn Guru responds:

About Hansen BuildingsThank you for reaching out to us. I also qualify for those senior discounts and fully understand stair issues. When we built our own shouse (shop/house) in Northeast South Dakota 15 years ago we went with two stories and my lovely bride insisted upon having an elevator (we actually now have two of them).

I know Riverside well. Back in my younger days I was a prolific post frame builder based in Spokane. There was one year where we erected over 200 post frame buildings just in Spokane County! Hansen Pole Buildings happens to not only service Riverside, we provide more post frame buildings in Washington than any other state!

In my humble opinion wood post frame is going to have numerous advantages to a PEMB (pre-engineered metal building). While building shell costs are probably similar, it ends there. It is going to be easier to construct without a need for heavy equipment. Our post frame buildings come fully engineered including engineered foundation plans (PEMBs require you to hire another engineer to design foundations). Concrete slabs for PEMBs require significant amounts of rebar, resulting in much greater foundation investments. To have a home inside a PEMB, most usually one has to build a framed home inside of a building shell – unlike post frame where you only have to do it once. Post frame buildings are easily super insulated, whereas PEMB steel frames are a great thermal transfer. My ultimate guide to post frame insulation is here: https://www.hansenpolebuildings.com/2019/11/post-frame-building-insulation/.

I have also written about one story or two: https://www.hansenpolebuildings.com/2020/02/barndominium-one-story-or-two/

Here are a few plan tips to consider:

Direction of access (you do not want to have to drive around your house to access garage doors.)
Curb appeal – what will people see as they drive up?
Any views? You’ll want to access all windows with great views to look at.

North-south alignment. Place few or no windows on the north wall, lots on the south wall.
Have overhangs on the south wall great enough to shade windows from midday summer sun.

Please utilize links in this article to assist with determining needed spaces, sizes and how to get expertly crafted floor plans and elevation drawings: https://www.hansenpolebuildings.com/2019/10/show-me-your-barndominium-plans-please/

Horizontal Sheeting, Framing for Insulation, and Alternative Siding

Today the Pole Barn Guru answers questions about overlapping horizontal sheets of steel, the best plan for framing to insulate, and best way to install vinyl lap siding on a post frame building.

Horizontal Steel Siding
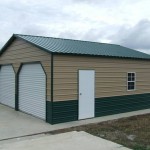
DEAR POLE BARN GURU: When installing horizontal sheeting, does the top sheet always cover the bottom sheet when joined? GARY in EUFAULA

DEAR GARY: In order to prevent water infiltration, yes. Provided overlaps have sufficient overlap, gravity will pull water downward across this overlap.


DEAR POLE BARN GURU: I am looking to have a pole barn put up and wanted your opinion on how to best construct the shell if I want to insulate it down the road. From some of the things I have read I should include some type of foam board under the roof sections and maybe tyvek under the metal walls? Please let me know your thoughts. ROBERT in TIPP CITY

DEAR ROBERT: You do not want to place foam board between roof steel and roof framing as this will create a potential ‘slip’ between steel and framing, reducing or eliminating your roof’s diaphragm strength and resistance to wind loads.


DEAR POLE BARN GURU: I want to put vinyl siding on my pole shed. Do I need to frame 16″ on center walls between poles? What do you recommend? Thanks. TRAVIS in ANDOVER

DEAR TRAVIS: I would recommend using roll formed steel siding.

If your building is not yet erected, contact your engineer who designed your plans to have him or her confirm this is adequate. Place 2×6 wall girts bookshelf style between columns, with outside of girt and outside of columns flush. Install 2×4 Standard & better with wide face to wind at 24 inches on center vertically between pressure preservative treated splash plank and eave strut – nailing 2×4 to each girt with two 10d common nails. Toe nail at top and bottom.

Install 7/16 inch OSB or ½ inch CDX plywood to 2×4 per engineer’s recommendations. Wrap with a Weather Resistant Barrier and install vinyl siding.


Post Frame Homes Proliferate

Post Frame Homes Proliferate

Post frame homes have been a well-kept secret for decades. Well, not only is the bag the cat was in open, but the cat has also leaped out and is running rampantly!

Here at Hansen Pole Buildings, we have noticed a significant surge in requests for quotes, as well as general interest, in residential post frame construction. And, it isn’t just us who are noticing the trend.

Cindy Orschell is the executive director of the Franklin County (Indiana) Area Plan Commission and Building Department. When questioned about what is hot in building she reported, “The trend we are seeing a lot of are pole construction homes”.

There are many possible reasons for the increased interest, one of which is cost.  My brother wrote his thesis on the savings of post frame construction for Habitat for Humanity homes probably 30 years ago, so this is nothing new. It was seven years ago when I penned an article outlining the savings in foundation costs (which have only increased since): https://www.hansenpolebuildings.com/2011/10/buildings-why-not-stick-frame-construction/.

Virtually any stick frame building floor plan or elevation can be converted to a post frame building. For this reason, Hansen Pole Buildings does not offer choices for post frame homes on our website. See something you like? It can be done.

How much is it going to cost?

Hansen Pole Buildings GuesthouseThe structural system of a post-post frame home, its engineered plans and foundation are all going to prove to be less expensive than stick frame. Everything else is going to be pretty much the same – cabinets, fixtures and floor coverings do not suddenly become less expensive just because they were in a post frame building.

There is one place where you may end up spend a bit more up front than you might have with a stick built home – insulation and energy savings! Post frame buildings have fewer structural members which touch both interior and exterior surfaces, reducing the direct transfer of heat and cold. With deep wall cavities, more insulation can be added to the walls. Trusses with raised heels allow deeper insulation from wall-to-wall: https://www.hansenpolebuildings.com/2012/07/raised-heel-trusses/.

Where is the extra upfront investment? Paying for more insulation – which results in savings over the life of your home!

You can do it yourself!

Provided you can and will read the assembly instructions, tens of thousands of dollars can be saved by doing the work yourself. Post frame construction is extremely friendly to those who have the desire and inclination to self build.

Ready to build? We’re here to assist: sales@hansenpolebuildings.com

When the Pole Building Insulation Problem is Larger Than Imagined

When the Pole Building Insulation Problem is Larger Than Imagined

From questions I have received from loyal readers over the past year, post frame (pole) building insulation is right there at the top of the list for priorities. Sadly, it seems the same concern is not often put forward by those who are designing, providing and constructing post frame buildings – leaving far too many new building owners in a world of hurt.

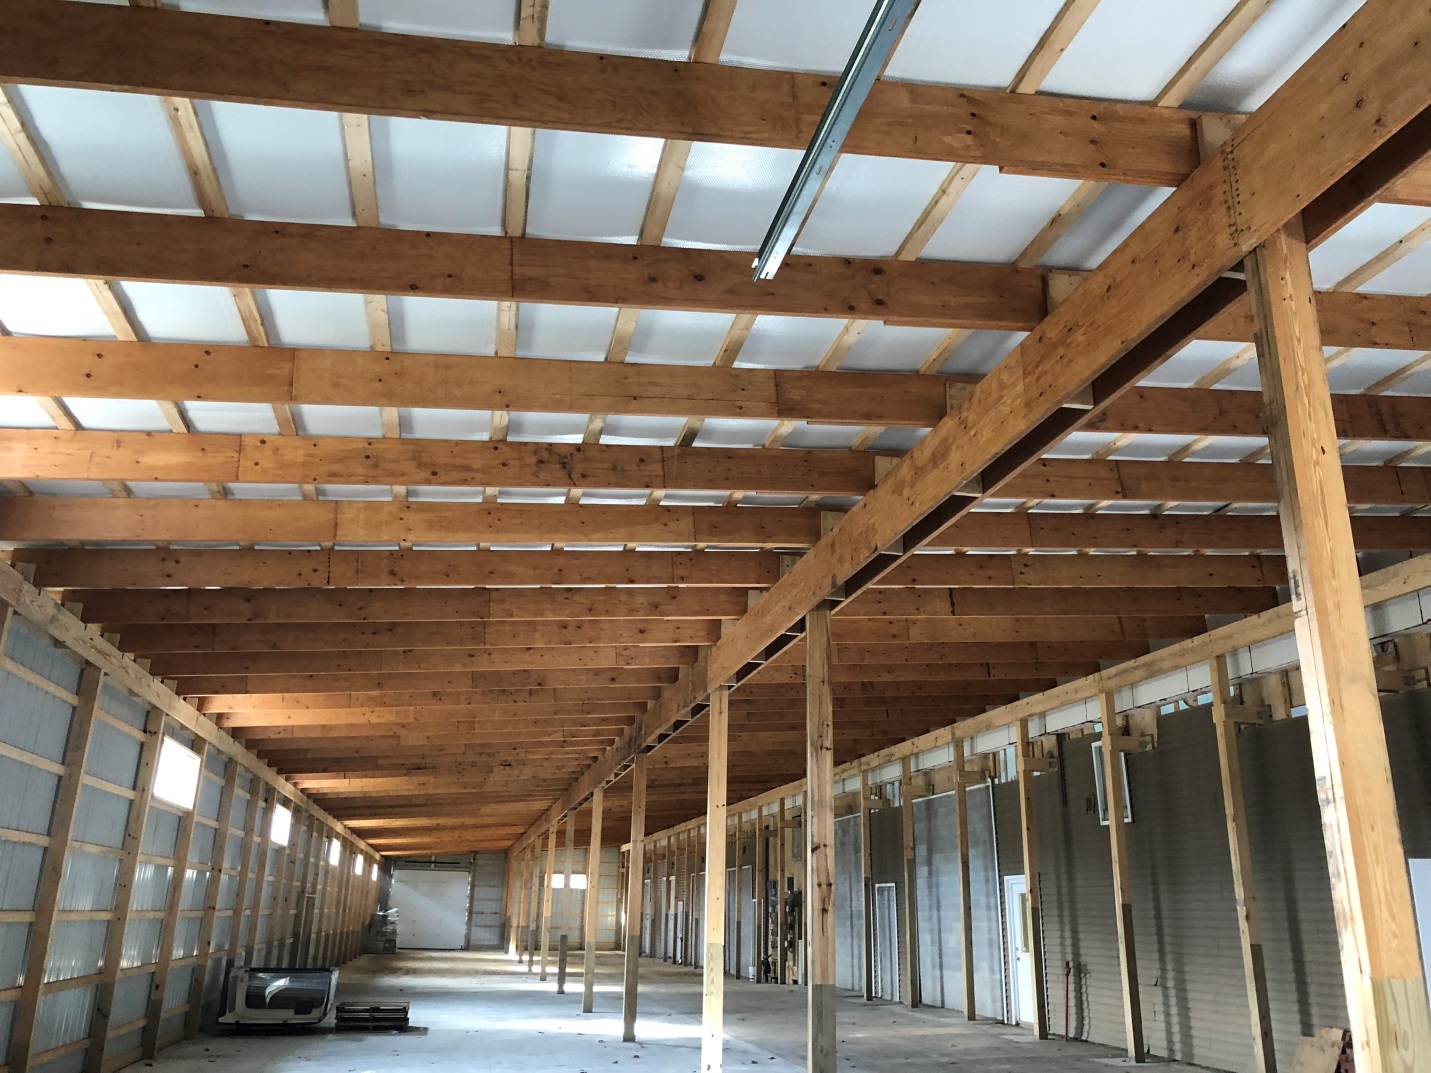
DISCLAIMER: This is NOT a Hansen Pole Building

Reader KEVIN in WEST CHESTER writes: “When installing my insulation do I stop just short of the vented soffit inside at the top of the wall?”

Well, this is an easy question to answer – the wall insulation needs to not cover the air intake provided from the eave vents, if the thought is for them to be used as a functional vent.

Simple, wasn’t it?

Now we can get into the challenges presented in the photo.

Unless the walls are going to be insulated with closed cell spray foam, there should be a well-sealed building wrap between the wall framing and the wall steel. This allows any moisture which would be trapped in the wall to be able to pass through to the outside world.

Now, onto the big challenge – insulating the roof.

If the idea is to have the vents in the low eave soffit be an air intake, then there needs to be a corresponding air exhaust at the high end of the shed. Along with this there needs to be the ability of unobstructed airflow from the low eave to the high side above the roof insulation. This happens to be a Building Code requirement, not to mention it is designed to prevent mold, mildew and other associated decay issues. As the roof purlins appear to be an impediment to airflow if the cavity is filled – the solution may end up being to have to use closed cell spray insulation under the roof sheathing and do away with the eave ventilation.

Moral of the story – consider insulation and ventilation needs early on in the project, in the planning stages, not after the building shell is already constructed.

Attic Insulation Guide

Pole Barn Guru BlogWelcome to Ask the Pole Barn Guru – where you can ask questions about building topics, with answers posted on Mondays.  With many questions to answer, please be patient to watch for yours to come up on a future Monday segment.  If you want a quick answer, please be sure to answer with a “reply-able” email address.

Email all questions to: PoleBarnGuru@HansenPoleBuildings.com

DEAR POLE BARN GURU: I am building a 24’x32′ pole barn type shop using 5 clerestory trusses in which I will install windows in the verticals for natural light. I want the roof shingled and insulated. Is there a way to frame in roof rafters between the trusses to carry the weight of the roof sheathing and to use batt insulation underneath? SCOTT IN ELLERSLIE

DEAR SCOTT: For sake of discussion, we will assume the trusses have been engineered to carry the weight of all of the materials you will be adding.

In order to use batt insulation as you propose, Code requires there to be at least a one inch air space between the top of the insulation (which must be unfaced) and the underside of the roof sheathing. This space must be vented at eaves and peak, and airflow must not be impeded.

Just off the top of my head (and knowing nothing about how your trusses are constructed), I’d probably look at placing a header at the eave and peak, which would carry 2×12 rafters placed every 24 inches and running the same direction as the trusses. Insulation batts up to 10-1/4 inches thick could then be placed between the rafters.

You should consult with the RDP (Registered Design Professional – architect or engineer) who designed your building, to confirm sizes and connections of members, as well as their adequacy to carry the imposed loads.

Mike the Pole Barn Guru

DEAR POLE BARN GURU: My name is Ben, and my husband and I plan to build a timber pole house in the mountains around Luray, VA. We are still in the planning stages, but are already working on the design stage of the house. I wanted to reach out and see if you offer the type of services we need, even though your website seems like you would be just perfect.

As a quick summary of our needs:

I am a 3d artist and am laying out the space in 3ds max to get an idea for room size, arrangement, and other proportions. However since I am not an architect, I need someone to go over the design, make it useable, point out any problem areas I am unaware of as a non-architect. Also being able to get all the materials cut and shipped to our building site is a huge plus.

Additionally, as we are still researching land, I would like input on what to look for based on our design, and then after land is procured, any adaptations needed for our plan to fit the space (the biggest thing I am worried about, is pile depth for the timber piles to pass code and be structurally sound). We plan on a 2 story building, so it’s likely the max timber height above ground would be around 35 feet for some of the timbers. We also plan to build on a mountain side, so the timber length would vary.

Is this the kind of service you can offer?

Thanks so much for your time,  BEN AND AGUST IN LURAY

DEAR BEN: We can supply columns up to 60′ in length, so you should not have any difficulties with what you have in mind – nor will needing various lengths be a challenge.

Our designs do not incorporate interior non-load bearing walls, as we have found room sizes tend to change greatly once the exterior shell is up and clients get a much better feel for what each room will do, as well as for orientation. Always try to work from the inside out – determine (at least close to) the area of the spaces you will need and then orient these spaces to be most functional for your lifestyle. Then create an envelope which fits around your spaces.

The ultimate location may (and should) play a great deal into the final design. Orientations should be such to take advantage of the most practical approaches to the site, as well as views and exterior living spaces (decks and patios).

Keep in mind – any pricing done now, is based upon where markets are at today. Lumber and steel are commodity items and prone to a great deal of variability which is beyond anyone’s control. Allow plenty of safety cushion in your budget, it is always a pleasant feeling to have more money left over, than having to scramble because things were planned too tight.

Mike the Pole Barn Guru

DEAR POLE BARN GURU: I am interested in pricing for a pole barn/apartment.  I am selling my house and will be purchasing roughly 15 acres of land.  I would like a pole barn constructed on the land.  I intend on building my own home which will take some time.  I would like a two story pole barn, with the upstairs being the finished apartment with somewhere around 900 square feet so I can live on my property while my house is being built.  Is this something that you would be able to do?  Thanks for your time. JEFF IN CINCINNATI

DEAR JEFF: Thank you very much for your interest in a new Hansen Pole Building. We provide post frame (pole barn) building kit packages similar to what you have in mind on a regular basis. You will be contacted shortly by one of our Building Designers to get more detailed information as to your exact needs.

Mike the Pole Barn Guru

TextraFINE® Post Frame Insulation

TextraFINE® Post Frame Insulation

It is nice to hear from those who have read and learned from the articles I have posted over the past nearly three years. Even more rewarding, is when Hansen Pole Buildings’ team members come up with products for me to investigate.

Just today Justine (the Hansen Pole Buildings ordering and delivery wizard) asked me if I was familiar with “Textra fine” insulation. She had stumbled upon it during a web search and was unfamiliar with it, having always used either fiberglass or cellulose products previously.

Putting on my aluminum pyramid-shaped research hat, I jumped upon my trusty stead Internet and went on a search.

Anco TextraFINE® Post Frame insulation has excellent mechanical, thermal and acoustical properties making it ideal for insulating post frame structures where wide rolls of un-faced insulation are required.

Textrafine InsulationTextraFINE® Post Frame insulation is made from inorganic silica sand which is formed into long textile-type glass fibers which are bonded together in random orientation by a stable thermosetting binder. This process produces unusually strong, resilient insulation which will return to full thickness following compression.

Manufactured with 85% post-industrial recycled content, TextraFINE® Post Frame Insulation can be a contributor to LEED® credits.

Standard sizes are six inches thick by 48” or 93” in width.

Basically the product (in its 93” width) is designed to friction fit between columns spaced every 8’. The idea being with 6×6 or 3 ply 2×6 laminated columns, and wall girts placed flat on the exterior of the posts, the six inch thick insulation will not extend inside the columns.

Before the International Building Codes were adopted, this would not have been a challenge, however to be Code conforming under the now enacted deflection criteria for wall girts – it IS a problem.

To find out more about deflection in wall girts: https://www.hansenpolebuildings.com/blog/2012/03/girts/

The structural framing solution, most often places framing in conflict with the installation of these wide insulation rolls.

TextraFINE® is also available as a Condensation Control Blanket (CCB) in standard one and two inch thick rolls. The average (or above average) installer or DIYer might want to think twice about this method of trying to control condensation by reading: https://www.hansenpolebuildings.com/blog/2011/11/metal-building-insulation-in-pole-buildings-part-i/

My take on TextraFINE® insulation? It is very probably a great insulation product, however the product as designed to be applied, may not always provide the best or most practical design solution.  As more jurisdictions become savvy to the new code, it would behoove companies such as TextraFINE® to produce insulation in a size conducive to fitting between girts. Also having a vapor barrier would afford it more advantages.

Rigid Insulation Boards Part II: Foam Board

 Yesterday’s blog featured a discussion of the various foam board products with application for your new pole building.  Used correctly, they provide good thermal resistance. Applied incorrectly can create a huge structural problem with pole buildings, along with safety issues.

Protect all types of foam  insulation from direct sunlight. Over time, the sun’s ultraviolet rays can damage the insulation. For roofs, this is generally done by applying a coating such as tar, acrylic, silicone, or rubberized paint. You can also cover the foam with a rubber or plastic membrane, or a layer of asphalt and roofing felt. Make certain you are using compatible products. The solvents in some coatings dissolve certain plastics.

In cold weather, warm inside air containing water vapor can get past the wall finish and insulation, condensing inside the colder wall cavity. In hot, humid climates the same thing can happen, just in the reverse direction. Humid outdoor air in the summer can condense inside cool, air conditioned wall cavities. If enough of this happens and the water cannot escape, wood rot, mold, and other moisture-related problems can occur. For this reason, building codes often require installing a vapor diffuser retarder on the warmest side of the wall cavity.

Foam board insulation is commonly placed against the steel building siding, between the girts of exterior walls. To prevent air infiltration, place rigid insulation boards tightly together and seal the seams with tape or caulk. This practice may worry some in cold climates since the foam board may act as a second vapor diffusion retarder. Studies have shown, condensation rarely occurs in these areas unless something else is seriously wrong with the wall assembly (like massive uncontrolled air leakage into the walls from the building). If the assembly is constructed correctly, the inside surface of the foam board stays warm enough to keep water vapor in its gaseous state long enough for it to escape.

When insulating a foundation you need to consider, although insects don’t eat foam board, they can easily tunnel through it. Insect burrows reduce the R-value and structural integrity of the insulation. For these reasons, some manufacturers treat their foam products with an insecticide, usually a borate compound. Many building jurisdictions also mandate treating the earth around the building with insecticides. These jurisdictions may also want an inspection area several inches wide and all around the foundation of a house kept bare of insulation board.

A better solution for below-grade walls in need of insulation is to install the foam board over the interior of the basement walls rather than on the exterior, which is more common. Interior applications prevent ground-dwelling insects from finding the foam board at all, and they eliminate the need for the bare inspection area. Insulating interior walls, however, requires careful attention to moisture control.

Most jurisdictions also require installing a fire barrier over the interior foam board. While this adds extra cost, the thermal performance of this method is superior in most cases to the more common exterior foam board application. This equates with a dollar savings in energy which can repay many times over for the additional cost of an interior application. If converting a basement into a living space, there is almost no additional cost.

Foam insulation is relatively hard to ignite, but when it is ignited, it burns readily and emits a dense smoke containing many toxic gases. The combustion characteristics of foam insulation products vary with the combustion temperatures, chemical formulation, and available air.

Because of these characteristics, foams used for construction require a covering as a fire barrier. One half-inch thick gypsum wallboard is one of the most common fire barriers. Some building codes, however, do not require an additional fire barrier for certain metal-faced, laminated foam products. Always check with local building code/fire officials and insurers for specific information on what is permitted.

While rigid insulation boards may afford a relatively high R-value, if installed improperly they can provide less than desired insulating results, structural issues or pose a fire hazard. In many instances, other methods of climate control may be more cost effective.