Tag Archives: monitor lofts

Following Pole Building Plans

Build to Match the Pole Building Plans

Picture this, if you will…..

A monitor style post frame (pole) building. The center portion is 24 feet wide by 48 feet long with a 24 foot eave height. On each side of the center is a 12 foot wide “wing”.

The right wing is a roof snowy-monitor-building
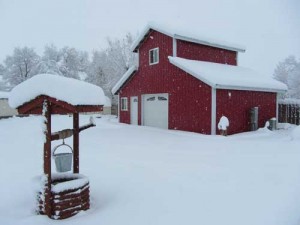
only – with a steel covered wall between it and the center portion. The left wing has its exterior walls enclosed, and is open to the center.

For those of you, fair readers, in the majority of the country, a structural permit to build could be obtained without the need for engineer sealed pole building plans (although I am not advocating going without one). Not so much where this building is to be – this particular client’s building is going to require engineering.

Here is where the fun kicks in, as the building is now constructed and the final inspection has been called for. This is what the field inspector found:

On the Left Wing the client’s builder put 2×10’s 16” on center going across to the posts on the main building in order to create a flat ceiling.  The Building Inspector asked if they would put anything up in the top of the triangle which they said “yes, Christmas boxes”.  The inspector will not pass final inspection as he said it is not designed to carry the weight. 

The client asked his Hansen Pole Buildings’ Designer if the engineer could send a letter or something stating it would not affect the structural integrity of the building.

And…..they finished the wall between the left shed and the main building.  The stick (stud) framed wall is supported only by the four inch thick concrete slab.  The Building Inspector told them they needed 6” of concrete as 4” was not strong enough to carry the weight of the wall.

None of these things, by the way, was communicated to our design & drafting team, so was not incorporated into the engineer sealed pole building plans.

My rule of constructing an engineered building is follow the plans exactly and you won’t have issues with inspections!!

As for the 2×10’s, they would act as floor joists with a 40 psf (pounds per square foot) live load and a 10 psf dead load (at least for their part of the action). The unknown is, how are those joists being supported at each end? It appears a 2 ply 2×12 #2 DFir (Douglas Fir) beam might be able to adequately carry the loads, provided they were attached with proper connections.

Of course no consideration has been given for the amount of extra load being transferred to the columns and down to the footings. This is no small issue – as we are talking about 4000 pounds per column of added load!

Leading to the framed wall, which I am guessing is now carrying one end of aforementioned floor joists. Which makes it a load bearing wall. Which means it requires a six inch thick concrete footing.

In the end, my recommendation was to remove all of the non-engineered changes from the building, and call for inspection again. We can’t even make “suggestions” as to a fix or any other solution – those answers need to come from the Engineer of Record, and they do not come for free.

Dear Pole Barn Guru: How Do I Fix the Insulation Leaks?

Welcome to Ask the Pole Barn Guru – where you can ask questions about building topics, with answers posted on Mondays.  With many questions to answer, please be patient to watch for yours to come up on a future Monday segment.  If you want a quick answer, please be sure to answer with a “reply-able” email address.

Email all questions to: PoleBarnGuru@HansenPoleBuildings.com

 DEAR POLE BARN GURU: Five years ago I bought a house and property that included one of your 48’ x 36’ buildings.  For some reason, the brain-dead owner didn’t have it insulated.  The fool even measured the building dimension to the inside of the corner posts rather than the outside.

Anyway, not knowing any better, I hired a contractor that removed all of the metal siding and roof and sandwiched 2” vinyl faced insulation between the sheet metal and the framing.  Unfortunately, I now think this was an expensive mistake.

Since then I’ve experienced some leakage due to loose screws but the biggest problem after quite cold weather has been leakage that is dripping from the purlins at intervals that seem to be spaced where the screws would be.  Needless to say, this makes the shop uncomfortable and nearly useless.

After reading articles on your web-site, it would seem that the problem is condensation between the insulation and the sheet metal and that I should have had your bubble wrap foil insulation installed between the sheet metal and the insulation I had installed.

I’m wondering if adding the foil insulation between the roof and the insulation I had sandwiched between the sheet metal and purlins will cure the problem or am I just totally screwed and have to start over?

Thank you so much for your help. EXASPERATED IN ELMA

DEAR EXASPERATED: It sounds like whoever put the building up was challenged….mostly by not reading the detailed plans and instructions which came with the building.

The “fix” will involve a lot of labor, but not a huge amount of materials.

Remove the roof and the vinyl faced insulation. Throw away the vinyl faced insulation.

Order enough A1V insulation to do the roof (www.buyreflectiveinsulation.com), 1-1/2” powder coated diaphragm screws to replace all the ones on the roof now, new ridge caps and vented ridge closure strips.

When you go to reroof – cut the first panel in ½ with the cut edge towards the endwall. The other ½ of the first panel will finish the roof at the other end. This will shift all of the screw holes by 4-1/2” so holes which have been elongated by being taken out and put back in will not be reused.

Make sure to use the adhesive tab to fully seal each strip of insulation to the next, as it is installed.

The vented ridge caps will allow warm moist air from inside your building to have a place to escape. If you have a concrete floor in the building, use a good sealant on top of it as well.

DEAR POLE BARN GURU: How can I get the most room and best use of the loft of a monitor barn…Need standing room and a 16 wide aisle down the center of the building. CAROL IN MANDAN

DEAR CAROL: You must have been thinking about this very hard, as I just this morning wrote an article on lofts and headroom.

For a monitor barn, plan the eave height in the raised center around this – add the height of the tallest door in the lowest level. Add one foot if the door is sliding, two feet for an overhead (this will give room for the door tracks, as well as the floor thickness). Add eight feet for loft headroom (code requires a minimum of 7’6”) and a foot for the roof system and any concrete slab on the lower level.

Example – 12 foot tall sliding door + one foot + eight feet + one foot equals 22 foot for eave height.

Be mindful to allow space for stairs. A hole the width of the stairs and at least 10 feet long is going to needed.