Welcome to Ask the Pole Barn Guru – where you can ask questions about building topics, with answers posted on Mondays. With many questions to answer, please be patient to watch for yours to come up on a future Monday segment. If you want a quick answer, please be sure to answer with a “reply-able” email address.
Email all questions to: PoleBarnGuru@HansenPoleBuildings.com
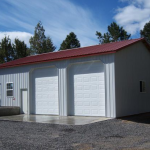
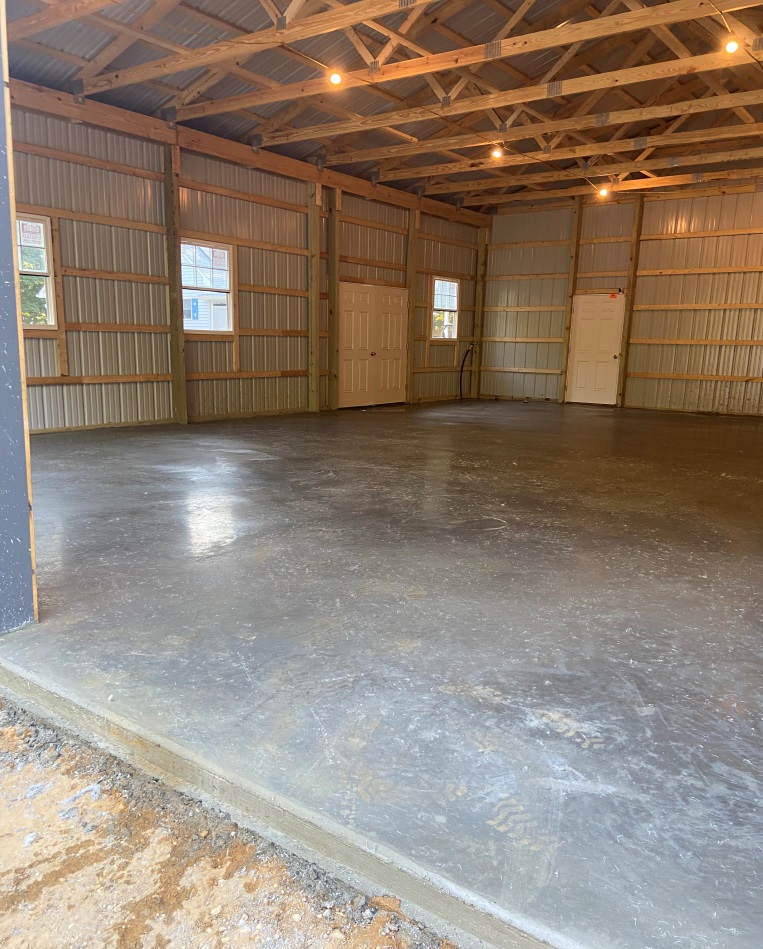
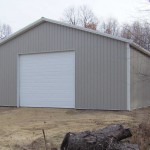
DEAR POLE BARN GURU: Mr. Guru I was wondering if I could ask you a question about pole barns, because I have an issue with mine that is stressing me out. I live in Virginia and My pole barn/ 3 car garage was built in 2004 it is 28′ wide x 44′ long x 10′ tall, foil insulation roof and sides, 4″ concrete floor, gutters and downspouts, 3 insulated garage doors with 5 windows in each and an entry door. I have never noticed any moisture on my garage floor or anywhere inside in all these years, I have 2 classic cars and a 2005 truck that has never seen rain and only has 2,000 miles on it. When I went to change the oil I noticed pulleys under the hood are starting to rust along with bolts and suspension parts underneath. Could humidity be making it rust? I have a gauge in the garage that said 65 % humidity when the temperature was 85 inside. What would be my best bet to reduce the humidity?. Parking on plastic sheeting and a dehumidifier?. I also saw online where ridge vents and vented soffits help circulate air. Thanks for any reply. VAPORIZED IN VIRGINIA
DEAR VAPORIZED: While humidity does not cause rust directly, it does promote it. Rust formation will depend upon the carbon content of the steel, as well as the amount of oxygen in contact with the steel.
From my research, it appears 40% or lower humidity is optimal. In order to reduce humidity, the building needs to be sealed up fairly tight. If there is not a vapor barrier under the concrete floor, a high quality sealant should be put on it. A Tyvek or similar building wrap should be installed between the wall girts and siding. On the inside of wall insulation, a vapor barrier should be installed, taking care to highly seal all joints and corners.
Do not place a vapor barrier at ceiling level, as warm moist air will naturally rise through the ceiling drywall and into the attic space, which must be adequately ventilated (best method is enclosed vented soffits and a ridge vent).
Once these things are done, you may have to use a dehumidifier, but at least you have a space created which can be dehumidified.
A couple of products you may want to investigate to help remove or inhibit rust are Break Free CLP and Eezox.
Mike the Pole Barn Guru
DEAR POLE BARN GURU: Sort of a pole barn question, but actually a metal roof slope design question. I think your pole barn experience is more than enough to help me with this one.
I want to add a simple metal roof over my back deck.
The deck is 40′ long and projects 10′ out from the house.
Unfortunately, the slope has to be 1.5/12 for me to have 72″ height (bottom of joists) over the deck at the lowest end of the roof.
Can I meet adequate design using 2X6x10′ joists on 4′ centers with 2X4 purlins 24” OC using 28 gauge corrugated metal?
If not, should I use 3′ centers for joists or would you recommend 2′ centers?
Or is a 1.5/12 pitch not feasible in this application? I could go 2/12 pitch but the height at the lowest end of the roof trusses would only be 68″ above the deck level (a little too low for my taste).
Thanks Pole Barn Guru for any help you can give me. KAN I IN KENTUCKY
DEAR KAN I: Lots of issues going on here.
While light gauge steel roofing is a great product, it does have some limitations. If you are considering pre-painted (colored) steel, you should be aware of the warranty being void on slopes of less than 3/12.
You also should have a height of no less than 6’8” from top of decking to bottom of any framing which people could walk under (and 7’ would be better yet).
As to sizing of rafters (joists as you have called them), you can use Table R-13 at: https://www.awc.org/pdf/STJR_2012.pdf to determine adequate size and spacing based upon the live (snow) load at your particular site. You will need to know the Fb value of the material you propose to use for rafters. With Southern Yellow Pine (most common in your area) 2×6 #2 has a value of 1000 psi, 2×8 is 925 psi.
In either case, the 2×4 purlins at 24 inches on center will prove to be adequate.
You can read more about the Code requirements for patio covers here: https://publicecodes.cyberregs.com/icod/irc/2012/icod_irc_2012_apph_sec001.htm
Mike the Pole Barn Guru
DEAR POLE BARN GURU: I noticed that my light colored pole barn siding was getting a black coating (kind of looks like coal dust but it isn’t). I figured just some scrubbing with household detergent would remove it but I was wrong. It appears to have stained the paint.
Worried now that the staining is permanent. Barn is only about 10 years old. Any suggestions would be appreciated.
Thanks. STRAINING WITH STAINS
DEAR STRAINING: It really should not be stained. The following is our typical instruction, as recommended by the steel roll forming companies:
For homeowners accustomed to sanding and painting exterior walls (or paying to have done), the easy-care pre-painted steel roofing and siding convenience can lull one into complacency. But, like any outdoor material, steel siding and roofing does get dirty – dirty enough, in fact, to be cleaned at least once a year.
Dirt pickup may cause apparent paint discoloration when exposed, in some dirt-laden atmospheres, for long time periods. Slight chalking may cause some change in appearance in strong sunlight areas. A good cleaning will generally restore the building appearance and render repainting unnecessary. An occasional light cleaning will help maintain good appearance.
To maintain original building panel finish, the only regular maintenance necessary is an annual washing. Remove airborne dirt and weather-related streaks with a garden hose or pressure washer and a bucket of sudsy water. If rinsed frequently, a garden hose may be all which will be needed to use.
Light panels may be washed with either mild detergent-type cleaners or by steam and high pressure spray systems. Apply cleaners with sponge or soft brush and rinse thoroughly in cold water to eliminate cleaning agent film build-up. Follow cleaning agent manufacturer’s instructions. Test small area before applying over entire surface. Hard water deposits may be removed with a 10% acetic acid solution in cold water. Rinse thoroughly.
Mike the Pole Barn Guru
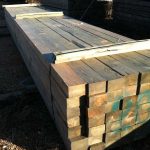 DEAR POLE BARN GURU: Looking for 4pcs 4x6x18 treated ground contact. JERRY in COATESVILLE
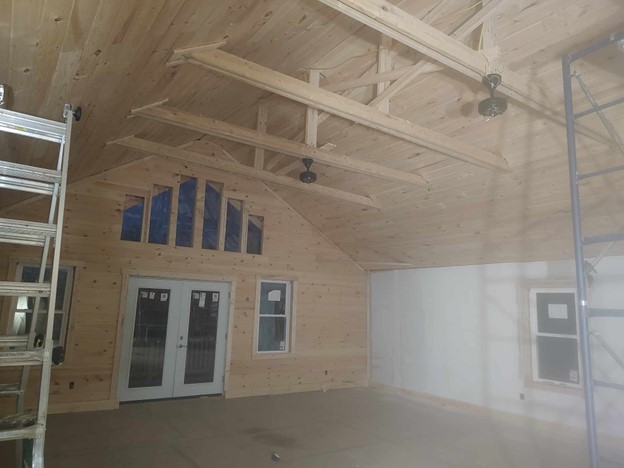
 DEAR POLE BARN GURU: After reading some opinions on some forums I am getting ready to insulate the roof of my metal pole barn. Paper backed fiberglass insulation will not stop condensation without putting plastic sheeting over top of it. How do you feel about this method? Insulation against the underside of the metal roof with plastic over the insulation. DAVE DEAR
 DEAR MICHAEL: Thank you for reaching out to me Michael. Our engineers will only seal plans when we provide the materials, as it is the only way they can guarantee materials they specify will actually arrive onsite. Please send your specifics to Caleb@HansenPoleBuildings.com along with your site address and best contact number. You will find we are very competitive and have provided hundreds of fully engineered post frame buildings to our clients in Oregon.
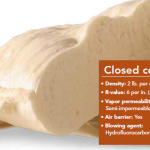 DEAR POLE BARN GURU: Hello, I asked an insulation question on social media and it quickly turned into a debate among other members. In your opinion is there any way to stop the condensation drip on a porch we would like to cover with T/G, box in with soffits? This is a new post frame building with an offset porch. Initially we planned to leave framing exposed but due to birds and wanting a more finished look we would like to put a ceiling in place. Thank you. MEL in ISLAMORADA
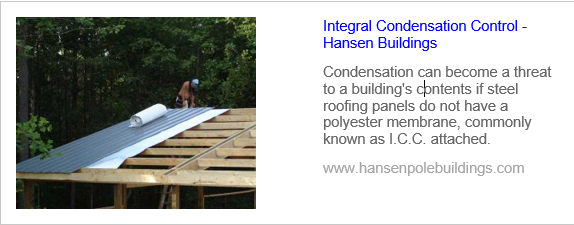

 “
“  DEAR POLE BARN GURU: How wide and tall can a pole building be? TODD in ALLENWOOD
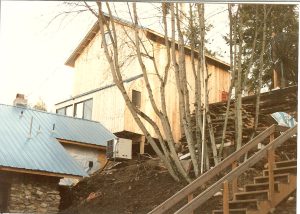 DEAR JENNIFER: Post frame barndominiums lend themselves very well to building on slopes. I solved a personal situation where I had 14 feet of grade change in 24 feet, by building on stilts:
  DEAR TIM and LOUSIE: This is where an ounce of prevention is worth a pound of cure. There are numerous product capable of being applied below rafters, trusses and/or roof purlins, however in order to be truly effective, you must be able to achieve a perfect seal (impossible in real life). If not, warm, moist air from inside your building is still going to rise, get through any gaps, and now be trapped with no way to escape. Even with a tight seal, unless there is a thermal break, chances are fair you will now have move the condensation from underside of roof steel, to underside of new product. There are some solutions – least expensive, highly labor intensive is to remove roof steel, install a well-sealed thermal break, reinstall roof steel or have two inches of closed cell spray foam applied to underside of roof steel.
 DEAR KAITLIN: Most pole barns are built either without being engineered or to Risk Category I. For residential purposes, it would need to meet more stringent structural requirements of Risk Category II. You will probably have to add some perimeter slab insulation in order to meet Energy Code requirements. My best recommendation is to engage a Utah Registered Professional Engineer to do a physical evaluation of your existing building and to design needed structural upgrades.
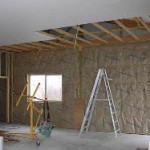 DEAR WESLEY: I have seen many far less well thought out wall systems without exterior sheathing not experience issues with condensation. As far as air sealing, you could get a blower door test done to find out exactly what your situation is. For extended reading, please see
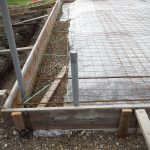
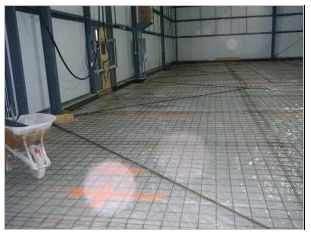
  DEAR TRIPPE: We always suspend our columns eight (8) inches above bottom of holes and mono-pour footing and concrete encasement in a single pour (saves on paying for short haul charges). While concrete typically reaches 75% of compressive strength in seven days, when I was building we would pour one day and start building next day. For slabs on grade, it is recommended to not walk on them for 24-48 hours after a pour. Keep in mind, concrete compressive strength is in psi (pounds per square inch) and soil bearing capacity under footing is in psf (pounds per square foot). Most soil will support a maximum of 2000 psf or 13.88 psi, so your concrete (at 2500-3000 psi) is going to be much stronger, even after a very short time span, than soils beneath. You can increase concrete strength by ordering a higher cement mix and speed curing time by use of hot water (avoid use of chemical additives to speed curing).
 If you have not seen ridiculous claims of double digit R-values from reflective radiant barriers yet (aka ‘bubble wrap insulation”) you will. Read more about these claims here:
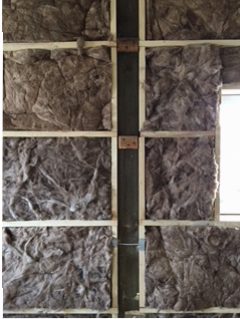
 DEAR POLE BARN GURU: Can you add a 16 ft wide garage door to an existing pole barn? It would be on a gable end of a 30×50 building. ALEC in TOLEDO
 DEAR POLE BARN GURU: Do you know any pole barn movers in central Illinois? Have a 52×100 we would like to move about 15 miles, ambitious I am sure. MELANNE in DAWSON
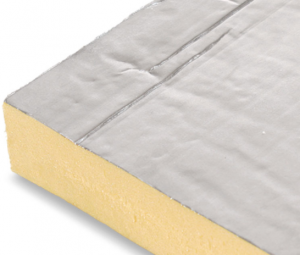 “I’ve moved into a house that also has an existing 30’x40′ (uninsulated) pole barn. I want to insulate and am considering 2″ thick polyiso foam boards attached to the bottom cord of the roof truss. The roof trusses are 4′ spacing. 1) Do you feel that is a good choice? 2) Do I need to add any type of vapor barrier (or anything else) above the polyiso boards?”
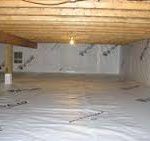 DEAR ROSS: You are correct about where moisture is coming from – and it is made even worse in Winter, when ground outside of your building is frozen and inside your building is where all ground moisture is trying to escape (basically think of your building as being a cork pulled out of a genie’s bottle). While pouring a concrete slab on grade of a vapor barrier would be your best (and permanent) solution, concrete is costly. With this said, my best recommendation would be to remove top two inches of dirt inside of your building, making sure there are no sharp rocks projecting up above surface. Place a 15mil black vapor barrier across entire floor, overlapping seams by 12 inches and taping them tightly shut. Run vapor barrier up onto splash planks on walls (if possible) as well as sealing to each column. Cover vapor barrier with two inches of clean sand. You may need to mechanically dehumidify, in order to fully resolve your challenges.
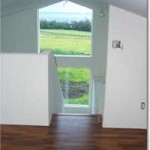 DEAR WESLEY: Post frame buildings “work” due to their skin. Placing openings, without approval from your building’s engineer, could result in catastrophic structural failure.
 DEAR TONY: Most important for avoiding frost heave is having a properly prepared building site:
 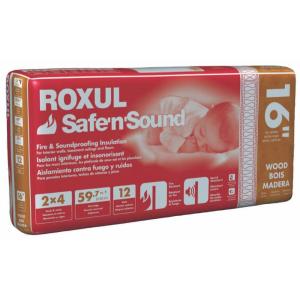 Now – on to your question at hand. For your walls, it appears most folks do exactly as you propose and build a 2×4 wood stud wall inside of their PEMB’s (pre-engineered metal building) steel wall girts. You will want to completely fill your wall cavity with insulation – I would recommend rock wool, as it is not affected by moisture (here is information on one particular product
 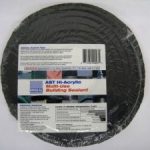 Is there a form fitted closure strip under each side of your ridge cap? If you have light coming through the ridge during daylight, then no. Easiest fix, if none, would be Emseal
  3) Once the above two have been either ruled out or repaired, your problem is condensation. Stains on trusses and purlins are typically a giveaway to this being an issue, especially if they seem relatively consistent from eave to ridge and along length of building. Short of replacing roof steel with a product with an Integral Condensation Control factory applied (read more here:
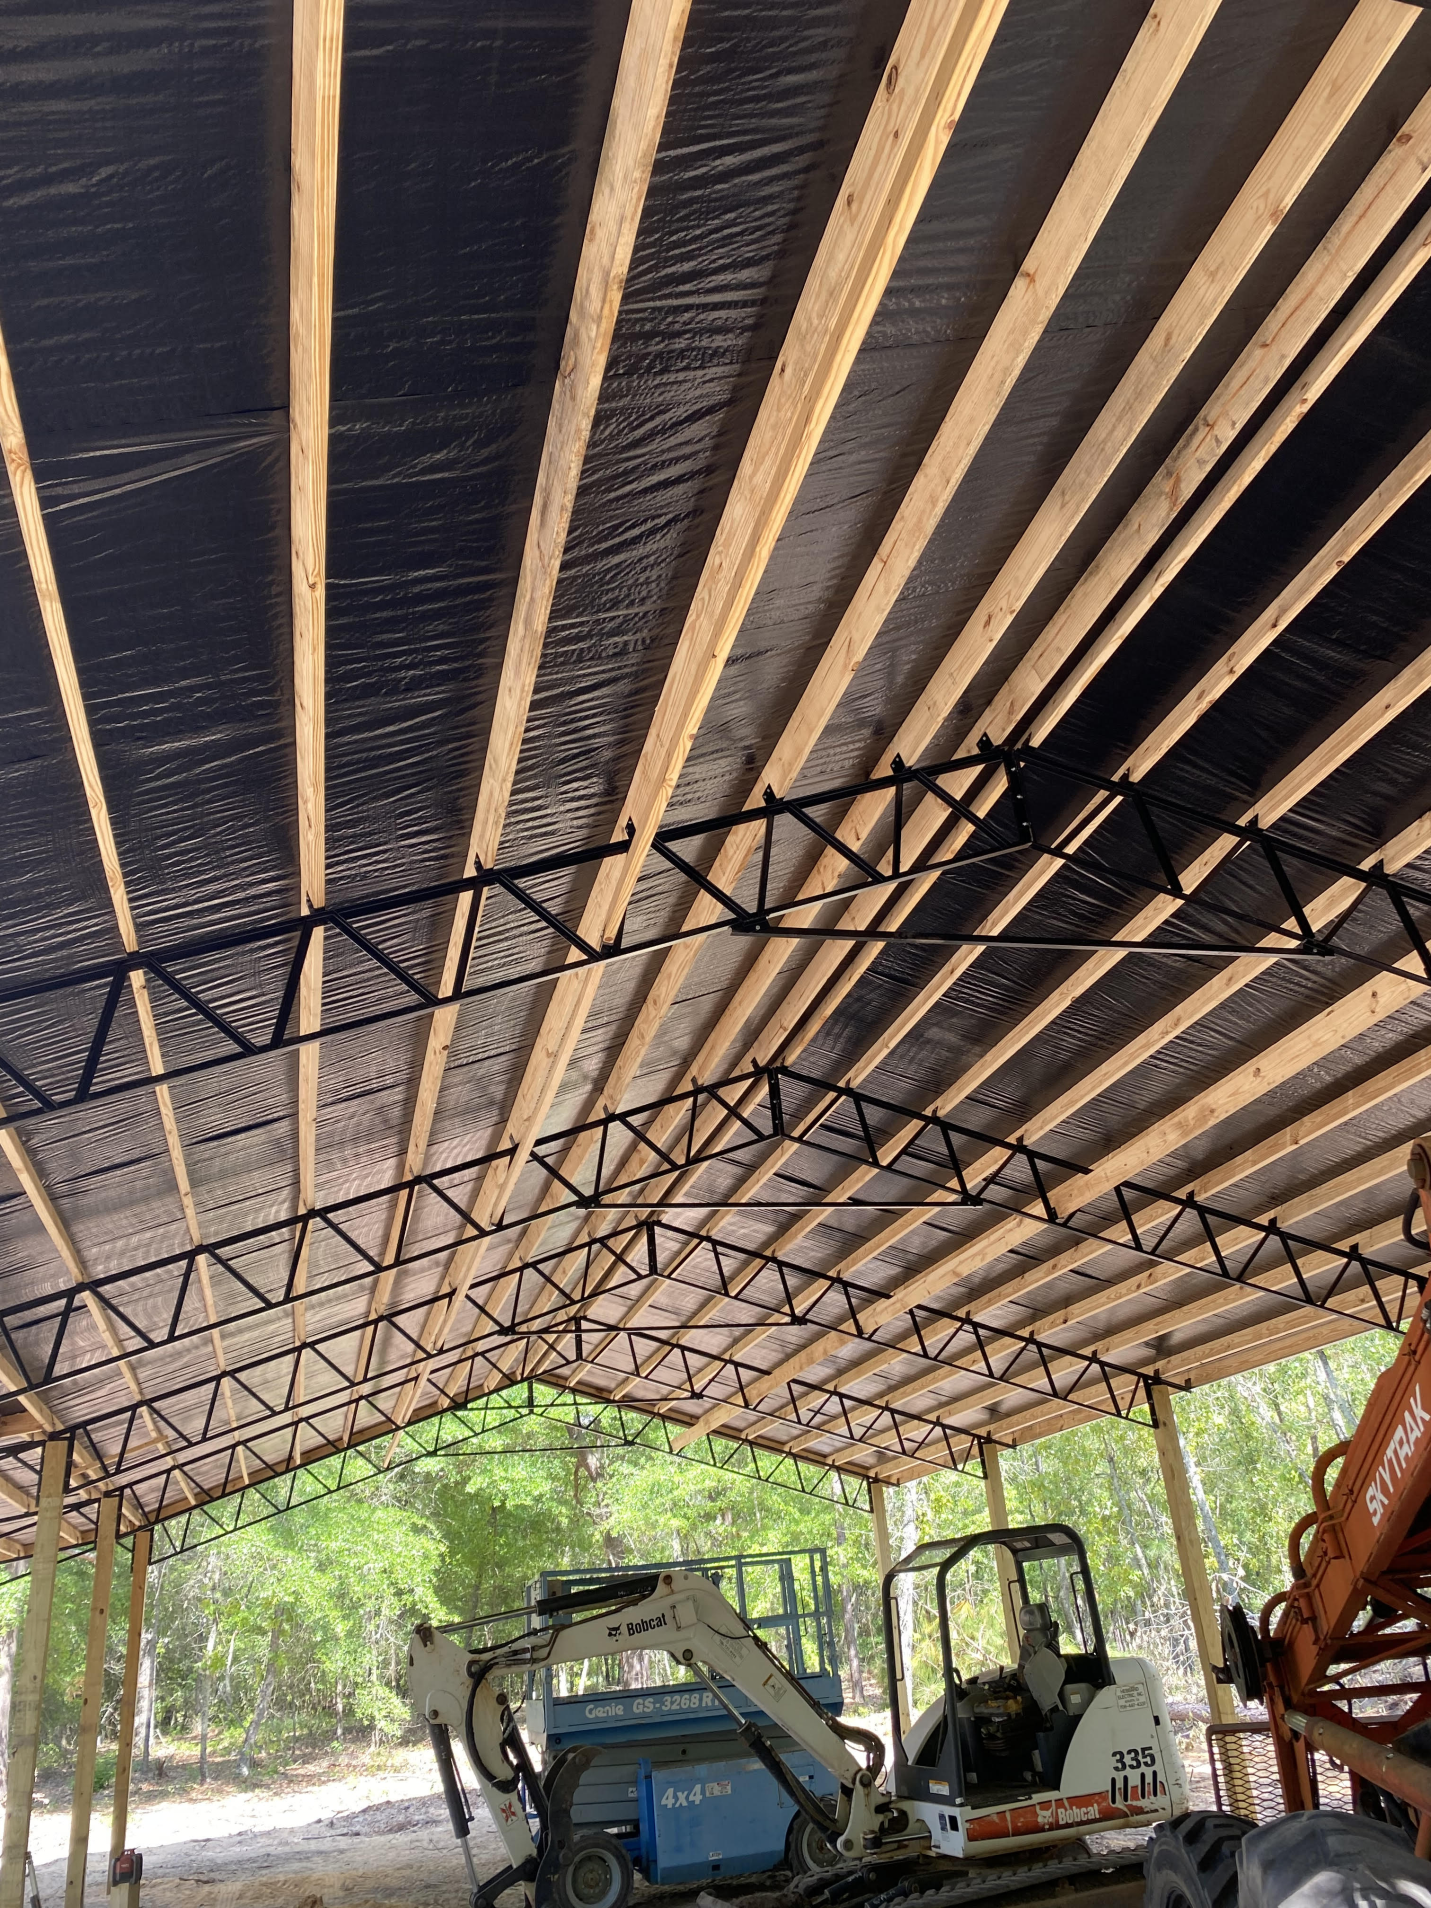
 DEAR JIM: Good news and bad news…. while your proposed solution will likely take care of possible condensation issues, it is structurally unsound. Post frame (pole barn) buildings rely upon shear strength of steel roofing and siding in order to remain stable. When you add in even a half-inch gap of non-rigid material (foam board) between framing and steel skin, you greatly reduce (or eliminate) shear strength of your steel panels. Even if your building were to remain standing, shifting of steel panels with small diameter (#9 or #10) screws will cause slots to form around screw shanks, eventually causing leakage.
 I am pleased my information has proven helpful to you. I would consider one of two options – installing steel in these two areas over solid sheathing (OSB or plywood) with 30# felt or a synthetic underlayment, or using two inches of closed cell spray foam applied directly to underside of roof steel. Either of these should assist in mitigating sound.
 Ultimately this decision should be made by whomever your engineer is who is sealing your building plans. Special care should also be taken to insure adequacy of purlins in drift zones (closest to ridge), where purlins may need to be closer spaced, higher grade and/or larger dimension material.
 I am really considering using a Hansen Pole Barn Kit for the shell, but need to figure out how to ensure 60% humidity inside the building doesn’t rot it from the inside out. I know that HVAC Dehumidification will be very import, but so is how to seal the build walls from both the outside and inside, how to insulate the walls and ceiling (especially since we plan to have a flat ceiling thus an attic area where the Ceiling and Roof may need to both be insulated to avoid condensation, etc.
 DEAR MARK: You can easily check your concrete slab for a vapor barrier – place a wrench on floor overnight, next morning remove wrench and if a dark spot is seen where wrench was placed, you have no vapor barrier. If so, seal slab with a high quality sealant (here is an example
  DEAR POLE BARN GURU: Do you do 6 bedroom Barndo’s? I’m looking for a 6 bed, 4 bath barndominum floor plan. I have an idea of what I like in my head but 6 bedrooms one story are difficult. HEATHER in CLEBURNE
 DEAR POLE BARN GURU: I would like to build a 20 foot wide x 40 foot long pole barn house in Fredericktown, Ohio. Do you know if the local building department would give a permit for a residential pole barn house, & what are the steps to obtaining that permit, who to call, & etc.? I’m at the beginning of that building process & would like to begin this summer. Thanks. RENEE in MOUNT VERNON
 My educated guess is your building’s concrete slab on grade does not have a well sealed vapor barrier underneath. If this is indeed true, you need to start by removal (or minimization) of your moisture source – put a good sealant on your slab’s surface. There are other things to be done once ground thaws, we will get to them in a moment.
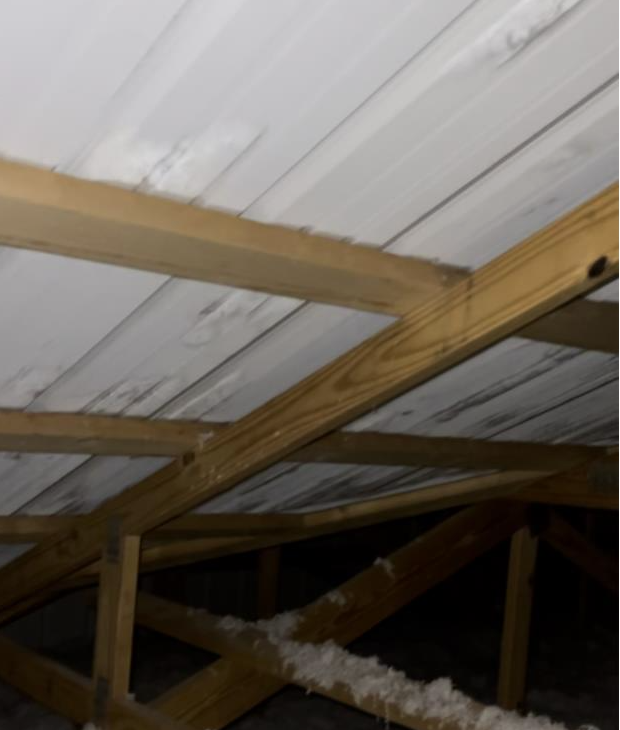
 “Greetings – I’ve got a pole barn style home that’s about 2.5 years old and I’m having moisture issues in the attic. Hoping I can talk with someone to get a consult or second opinion to resolve as quickly as possible. Let me know if it is something you can connect on. Attached is an image from the attic where you can see moisture on the underside of the metal roof. It freezes at night and then during the day when the sun is out, it melts and drips into the attic insulation.
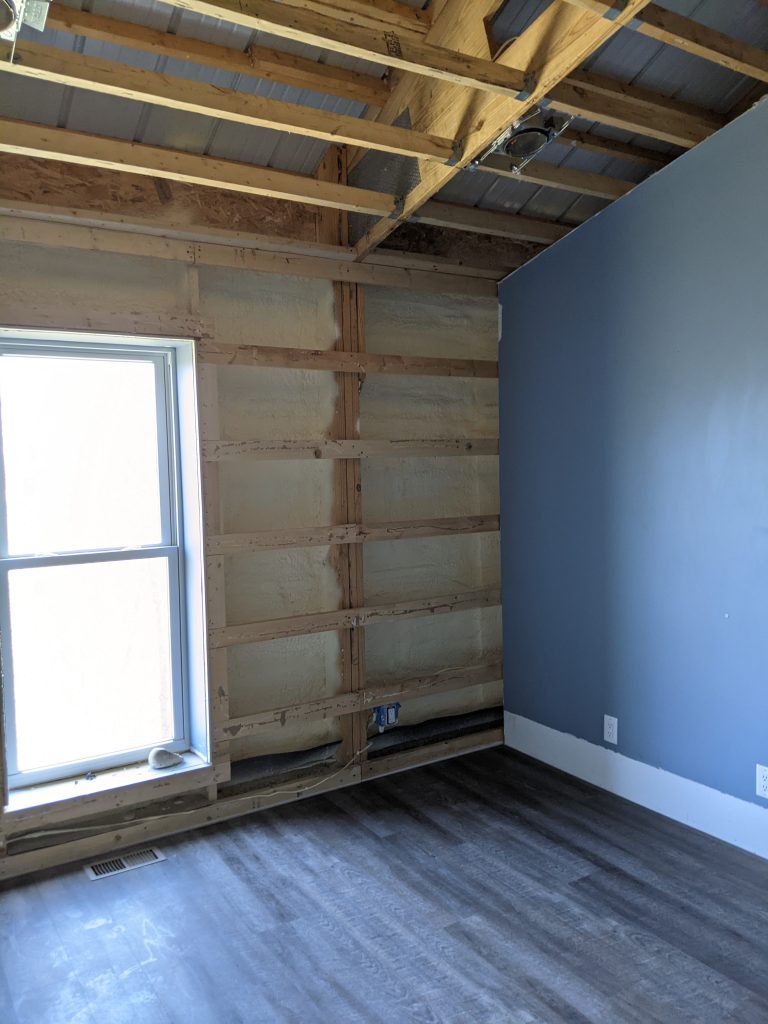
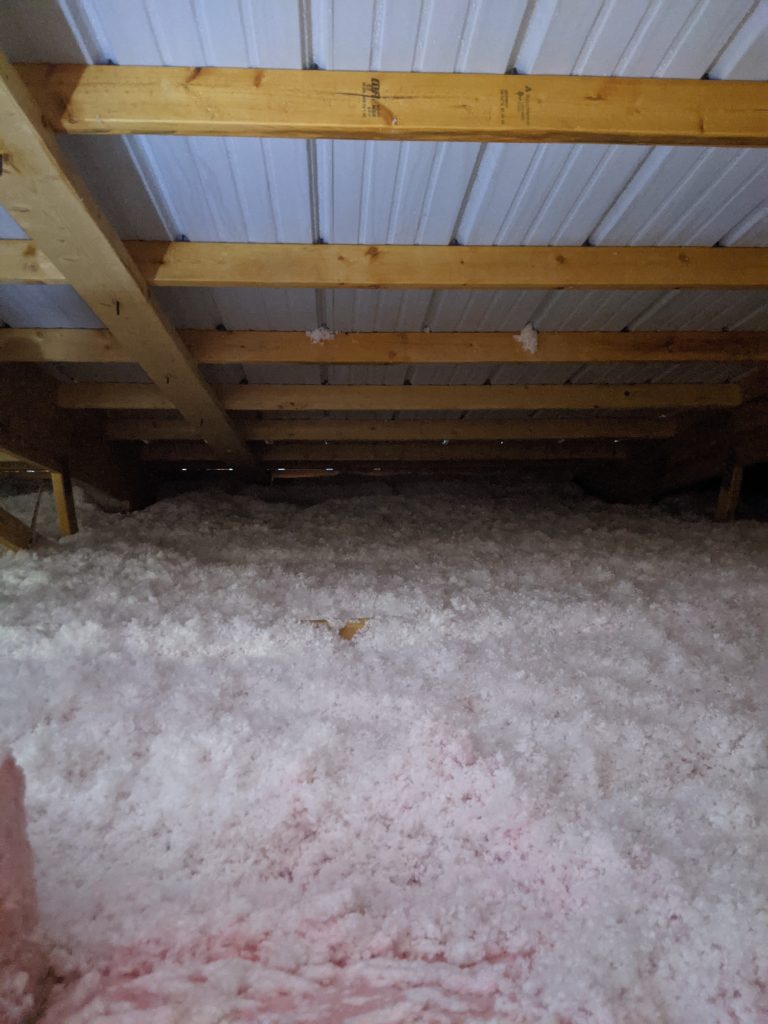
 Easiest solve is to have two inches of closed cell spray foam applied to underside of roof purlins. Any other solutions will take removal of roof steel panels, adding a thermal break, and then reinstalling roofing.
 As time allows, remove roof Prodex, have two inches of closed cell spray foam applied to roof steel underside, and increase thickness of blown in attic insulation to R-60.
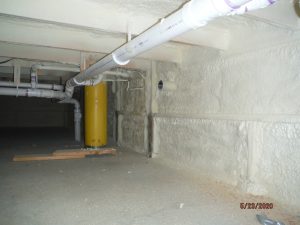 Closed cell spray foam applied directly to steel roofing and siding can be a great product for controlling condensation, achieving an air tight barndominium and at R-7 per inch is a great insulation solution. So good, I strongly encourage its use, especially for those buildings in Climate Zones one and two (deep South).
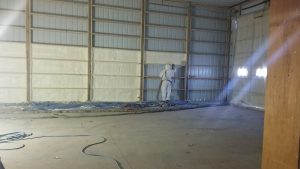
 Last questions. I found a 36×36 square gable vent that has a NFVA of 585. I need 576 on both sides of my building so this vent should be sufficient, correct? Also, with me using the 1/300 ventilation rule the gable vent company who has this vent recommended using a vapor barrier in the attic too. I believe he said that it needs to be no more than 1 perm and to install it on the warm side of the attic. He said this is needed because I’m not using the 1/150 rule. He said if I have 16 sq ft on ventilation instead of 8 I wouldn’t need a vapor barrier. That’s not really an option though. That many gable vents wouldn’t look good. So what do you think? Do I really need a vapor barrier using the 1/300 rule? My roof panels have a felt-like material on the underside of them that I believe is called “drip x”. I was under the impression that this was a vapor barrier and when warm air rises and hits those cold roof panels the “drip x” keeps it from condensing. Do I really need a vapor barrier along the warm side of the attic too? That sounds like overkill to me but I want to do it right too. The plan is to fully finish the inside of my outbuilding eventually with a ceiling that will be white ribbed panels with a r-38 blown in fiberglass. I only plan on heating the building to about 55-60 degrees and that’s only if I’m out there working. The thermostat will be set to 45-50 if I’m not out there. Also, this outbuilding doesn’t currently have air conditioning but I may consider adding it down the road. You’ve been a big help so far. Thank you and I look forward to your response. “
 DEAR POLE BARN GURU: What base size and height is correct for a cupolas for a 32’ wide by 36’ long by 35-40’ high with a 10 over 12 pitch roof? Thank you for your answer. NANCY in SPENCER
 DEAR ERIC: 40 years ago I provided a post frame building kit package for a tire dealer in Pahrump!
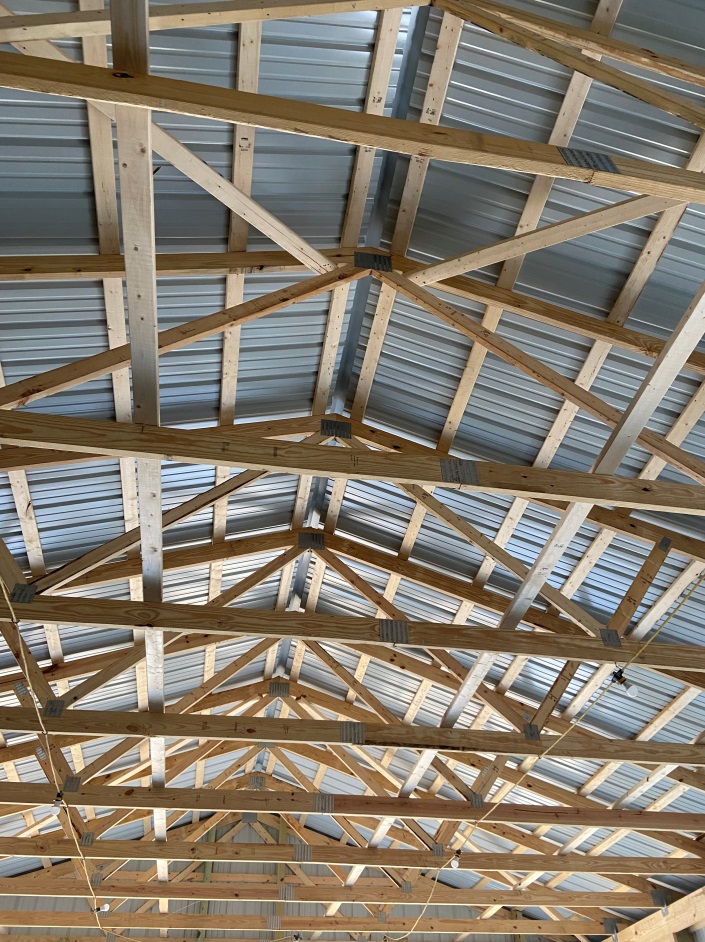
 DEAR POLE BARN GURU: I have a barn that doesn’t have soffit vents but it does have a ridge vent. I installed reflective insulation which seems to have dropped the temperature quite a bit. I also have a gable powered fan that does 2000 CFM. However it is about 8 to 10 feet lower than the ridge vent. Are these two things fighting each other do you think or should I take a pipe and vent it up to my ridge vent and to my fan to take the hot air out from the top or should I turn my gable fan off completely.
 DEAR DENNIS: Properly pressure preservative treated columns, embedded in ground are unlikely to decay within lifetimes of anyone alive on our planet today
 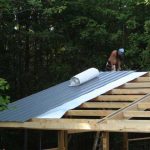 DEAR THOMAS: In most instances eave and ridge vents are inadequate alone to prevent condensation. Contractors who fail to include some sort of thermal break between roof framing and roof steel are doing a severe disservice, in my opinion. It is so easy to accomplish at time of construction with products such as a Reflective Radiant Barrier or Integral Condensation Control. There is not a good option for an underside of purlins vapor barrier, as it is nearly impossible to adequately seal it. Your only real solution, at this point, would be to use two inches of closed cell spray foam on underside of your roof steel.
 DEAR POLE BARN GURU:
  DEAR POLE BARN GURU:
 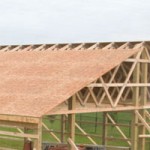 DEAR TAMI: Most pole building roof systems are designed to support a bare minimum roof dead load – usually 2.5 to 3.3 psf (pounds per square foot). If this is your case, then your structure would not be able to support this added weight. We made a decision a year ago to use a minimum top chord (roof) dead load on all our roof trusses spanning 40 feet or less of five psf – just in case our clients decided to sheet their roofs with OSB or plywood with an underlayment and didn’t tell us about it in advance.
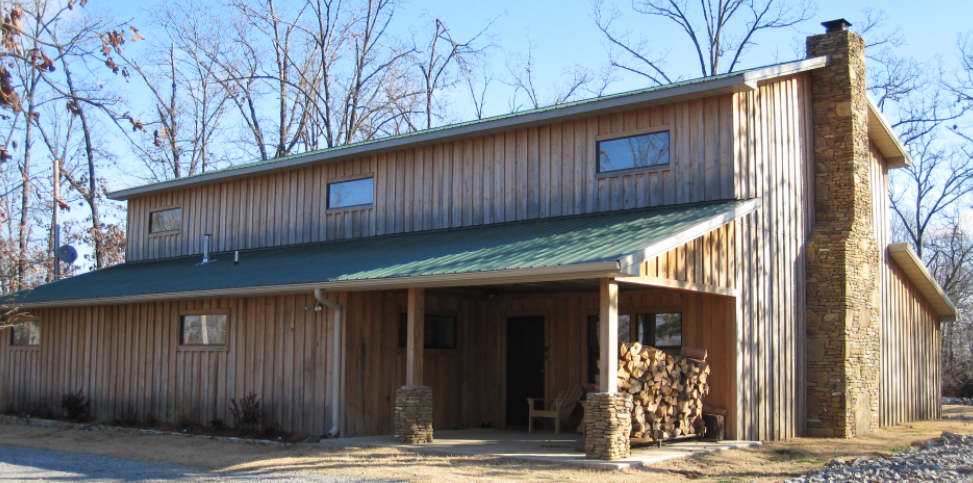
 DEAR POLE BARN GURU:
 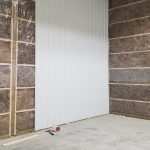 Walls – use a well-sealed Weather Resistant Barrier (WRB) between framing and steel siding. Read more about WRBs here –
 Hansen Pole Buildings are carefully designed and engineered to exacting and stringent standards. Included with these structural design solutions are some components an average individual cannot just go buy off a shelf at your local lumber dealer or big box store. Due to liability issues with materials specified on plans not being able to be readily acquired by general populace members, our third-party engineers are unable and unwilling to put their seals and signatures on plans where we are not providing components. Even if they were to do so (and you could find parts as specified) we have so much buying power, we are able to provide materials at a price level competitive to anything you would be able to acquire on your own.
 DEAR JODY: First step is to take care of your source. Pour a concrete slab on grade with a well sealed 10-15mil vapor barrier underneath. As you have no thermal break between your warm moist air inside building and roof steel, have two inches of closed cell spray foam insulation applied to underside of roofing. You would be better served to vent eaves and ridge, than just gable vents. If gable vents are your choice, look for vinyl vents with a snap ring as they can be installed on ribbed steel siding.
 DEAR NANCY: Thank you for your interest in a new Hansen Pole Building. Every building we provide is custom designed to best meet the wants, needs and budget of our clients. We offer a floor plan design service for folks just like you:
 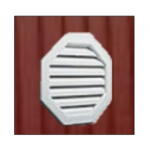 DEAR POLE BARN GURU:
 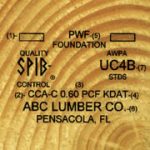 DEAR MATT:
  If you are getting condensation inside of your WRB it is due to excess moisture in your building. You need to eliminate or minimize sources of water vapor (seal any concrete slabs-on-grade if a well-sealed vapor barrier was not installed beneath). Proper ventilation from eave to ridge will also help to alleviate this challenge.
 Kevin is now experiencing joys associated with buildings sold ‘on the cheap’ – with barely enough materials to get a roof on with a minimal budget. It would have been so simple for this building to have been originally sold and erected with provisions to control roof condensation. Either a Reflective Radiant Barrier (RRB) or an Integral Condensation Control (ICC) would have easily avoided your current situation.
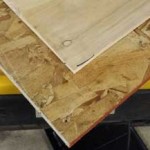 Rated at 44NG (2/3rds of a perm), 7/16 inch OSB sheathing can be a reasonably good vapor barrier, however you may want to consider instead using 3/8″ CDX plywood as it has a 57 NG rating. Do not seal it (paint is a seal) or tape seams and your wall is probably okay.
 #1 Controlling source – if there is not a well-sealed vapor barrier under your concrete slab on grade, you should be planning on two coats of a good sealant for it. If you do not know if there is a vapor barrier under it or not, leave a wrench on it overnight. Next day, pick the wrench up and if there is a dark place on the floor surface where the wrench was, you have no under slab vapor barrier.
 DEAR POLE BARN GURU: How thick does the edge of concrete need to be to support a pole barn if using the bolt on top of existing slab? CHRIS
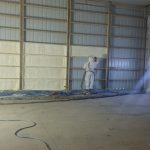 DEAR POLE BARN GURU:
 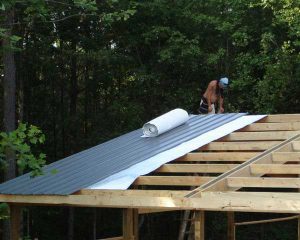 Commonly (when addressed at all during construction) solutions to this problem have often involved creating a thermal break. A thermal break reduces contact between a structure’s warm interior air and cooler metal roofing, thereby reducing or eliminating overall condensation. Installing a reflective radiant barrier, often termed Vapor Barrier, involves laying rolls of faced ‘bubble wrap’ across your building’s purlins prior to roof steel installation. Ideal weather conditions are required for this as even a slight wind can make this a challenging or altogether impossible task. This can cause jobsite delays and may bring progress to a halt while a structure remains unprotected to weather. Even when ideal weather conditions are present, installing a reflective radiant barrier can be a very dangerous task, requiring builders to expose themselves to awkward material handling on a building’s bare roof framing. These risks and delays often generate additional costs for both owners and builders, but have often been necessary with reflective radiant barrier being the only relatively affordable option to prevent interior dripping.
  DEAR POLE BARN GURU:
 DEAR MARK:
  DEAR POLE BARN GURU:
 DEAR POLE BARN GURU:
 I did not include materials for a bearing wall at the floor truss center. Features listed above ran roughly $6000 more to go two floors. Also, with the two floor version, you will lose 50 square feet of usable floor on each level due to stairs.
 True doubled trusses (not two single trusses spaced apart by blocking) afford many structural advantages (
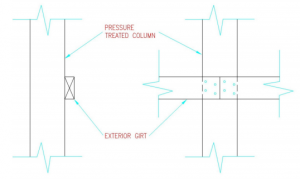 Wall girts flat on column exteriors are inadequate to carry imposed loads and will not meet deflection limitations. I would suggest you reinforce each of them to create either an “L” or a “T”. Assuming you have 6×6 wall columns, you could place a 2×8 bookshelf style girt on top or bottom of each girt, nailing through 2×8 into existing girts with a 10d common nail at say 12 inches on center. This will create an insulation cavity and allow for easy interior finish.
 Least expensive financially, but does take some extra labor hours, especially if it is windy – a single air cell layer reflective radiant barrier. Six foot widths will install much quicker than four foot. Make sure to order with a six foot width NET COVERAGE and an adhesive tab along one edge with a pull strip. Without an adhesive tab all butt edges will require seam tape, not expensive, but adds lots of time. Do not waste your money on adding an extra approximate R 0.5 for double bubble (two layers of air cells).
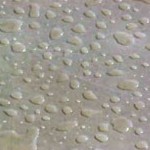 Condensation is visible evidence of excess air moisture. It may appear as water, frost, or ice on window or door surfaces. This occurs more frequently during winter months because of extreme differences between inside and outside air temperatures. Warmer air holds more water meaning air in any given room center will hold more water than air adjacent to window or exterior door walls, since this area is always cooler. When warm, moisture laden air moves toward cooler window or door walls, it becomes cooler and cannot hold as much moisture as it held when it was warmer. This moisture is dropped and appears as water on glass and frames of windows and doors.
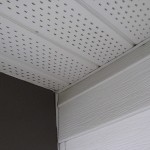 Insufficient attic ventilation and/or soffit ventilation traps moisture in barndominiums. Having sufficient soffit vents to allow adequate air flow in and ridge vents for exhaust will allow moisture and humidity to escape. Excessive humidity may be a result of poor ventilation but can also be a result of an imbalanced heating and air system or a need to add additional ventilation. Inadequate (or missing) vapor barriers under concrete slabs on grade. While Building Codes require a vapor barrier under any concrete slabs in heated buildings, it is all too often overlooked.
 DEAR CRAIG: You can if you want your building to collapse in a moderate snow event. Along with your trusses, you should have received an engineer sealed truss drawing with all specifics as to what can be carried by it and spacing. If you did not, and they are prefabricated metal connector plated wood trusses, there should be a manufacturer’s stamp somewhere on truss bottom chords. You could then contact them and give them truss specifics (and probably a few photos showing lumber grades, web configuration and steel connector plate sizes. From this, they may be able to determine what you have actually spent your hard earned money on.
 The two best things you can do are to seal your concrete floor (
 Standing pilot lights are actually fairly simple in design. A gas line terminates in a small burner, where the flame is created. A bit of composite metal wire, called a “thermocouple,” connects the burner to a gas line valve. When the pilot light is lit, thermocouple registers heat and generates an electric current. This current travels down thermocouple to the gas valve and opens it. This is what keeps the pilot light burning. When the pilot light goes out, thermocouple’s electric current stops and gas valve closes. This is a safety measure to prevent gas from flooding your home.
 Now, I believe, time has come to stop selling price to post frame building clients and sell benefits. Safety becomes easiest to sell – no one wants to live with a fear of their building collapsing and injuring them, their loved ones, or destroying their valued possessions. Flexibility in future use – also an easy sell, if a future building owner decides they want to add a ceiling they can safely do so.
  When you apply sealer can be important as well. Allow new concrete to cure completely (28 days or more, as recommended). Most sealers must be applied under dry conditions, since applying sealant to damp concrete could cause haziness or loss of adhesion. Air temperatures are also important and should typically be above 50°F during and for 24 hours or more after sealer application. Always allow sealer to dry completely before exposing it to foot or vehicle traffic. Drying times before exposure to heavy traffic can be as long as three days.
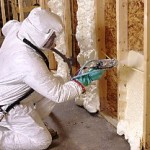
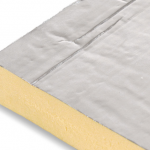
 Replace your present overhead and sliding doors with insulated overhead doors. Tear out foil “insulation” and throw it away. Keeping eave and ridge vents sealed, use closed cell spray foam insulation across walls and underside of roof deck. An absolute minimum thickness will be two inches, providing approximately R-14. You will need to weigh benefits of greater R values against investment.
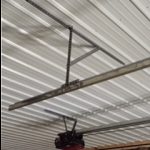 DEAR MICHAEL: Before consider this move confirm your trusses are designed to support added ceiling weight across bottom chords. Also, make certain to adequately ventilate dead attic space you will be creating (read about adequate ventilation here:
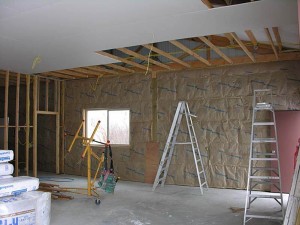
  DEAR LISA: Gypsum wallboard (sheetrock) will certain be most common as well as most popular option. If you go with 5/8″ thick Type X, it will also be fire rated. You can use any material for covering walls one would find in any type of building – however most of them are still installed over sheetrock. If for a shop building, 7/16″ OSB proves to be quite popular. Some people like steel liner panels, however I find them difficult to attach things like shelves and cabinets to and they get dented.
 “I am having some condensation issues. And I was curious about insulating the building. Also wanted to ask if my building is able to have a ceiling installed. Thanks for the fast reply.”
 If you poured a slab without a well-sealed vapor barrier underneath, it will contribute to excessive moisture challenges. If no vapor barrier, top of slab should be sealed:
 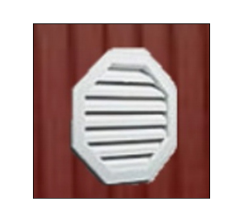 If this does not resolve problems, then you need ventilation. I will surmise your building does not have enclosed vented soffits and a vented ridge. Can’t go back and correct lack of overhang issues now, but you can add gable vents – a minimum of 242 square inches net free ventilation area in each endwall with vents located in top half of each gable.
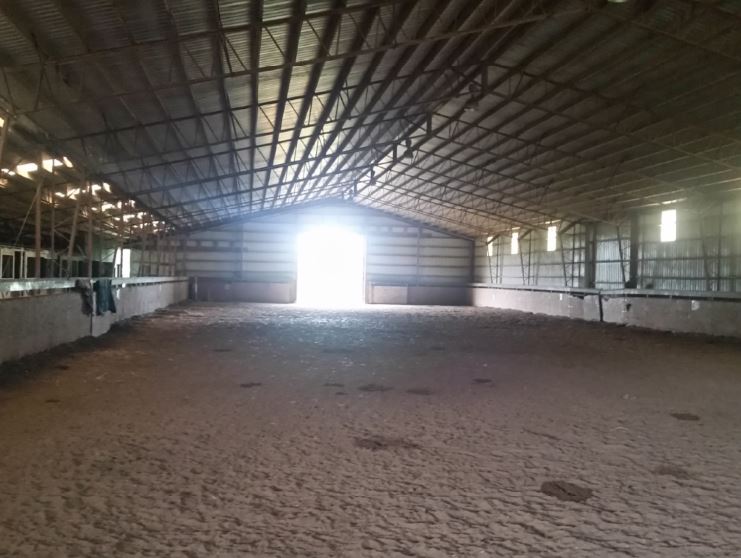
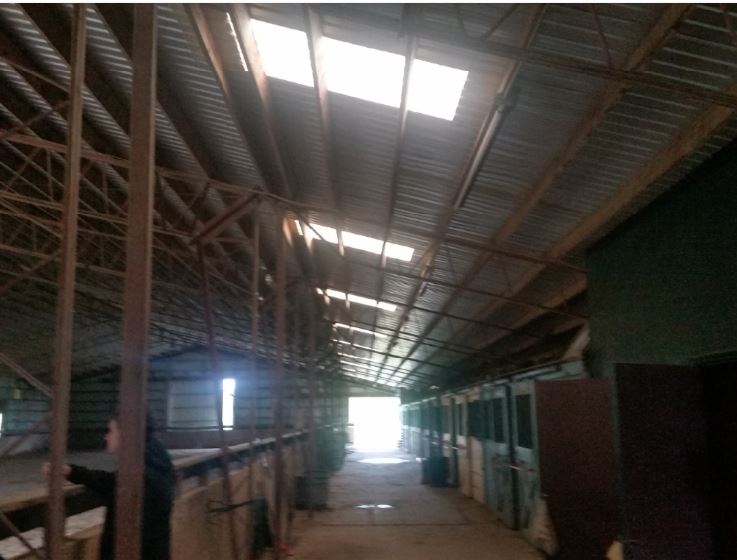
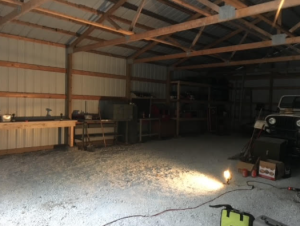
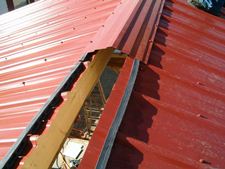
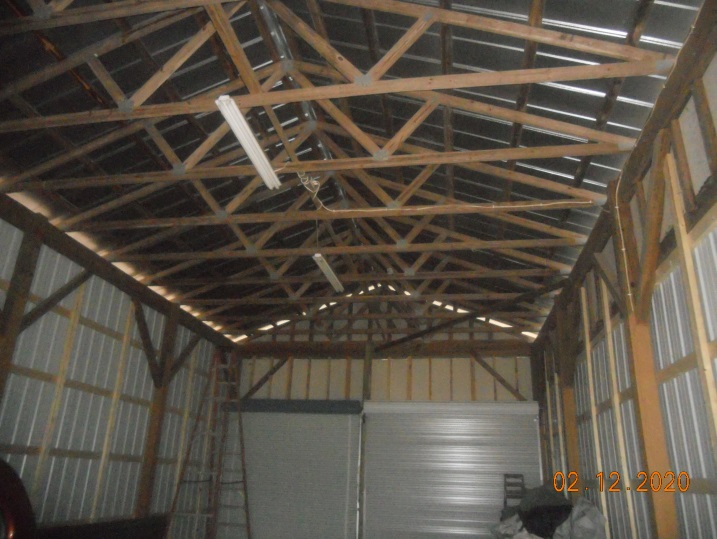
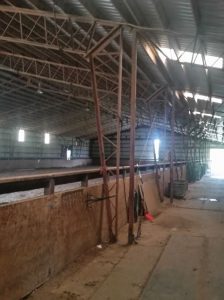 Some observations from your photos – minor discolorations appearing as “runs” down sides of roof purlins are due to condensation. No steel roofed building should be constructed without some sort of mechanism to minimize condensation. Only realistic fix for future condensation control would be to have closed cell spray foam insulation placed below roof surface. This insulation should be a minimum thickness of two inches and in most areas a going rate of about a dollar per square foot, per inch of thickness. You could be seeing a $30,000 bill.
 I am a bit geographically inconvenient to be able to come and see your building. However, based upon experience and what I would do if it was my own building, I will give you some free advice. You are welcome to use it, or discard it as best you see fit.
 Detached cold storage buildings are constructed with a sole purpose of producing or storing goods in low temperatures. Think of them as typical heated buildings turned inside out. Instead of keeping heat in during cold weather, they keep heat out during warm weather.
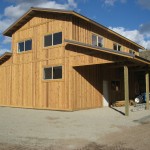
 Building access should be through a wide 14 foot tall insulated overhead door in each endwall. Industry standard storage bins are four feet square and three feet tall. Bins can be stacked five high, leaving room for mechanical equipment above with a 20 foot interior clear height.
 DEAR CANDICE: This would not be a good idea as you are creating a space between two vapor barriers in which condensation could occur and moisture problems develop. Your best bet is to remove the steel siding, one wall at a time, install a well sealed building wrap (like Tyvek), then reinstall the steel.
 DEAR REBECCA: Here are quick links to your answers:
 DEAR KRISTEN: Thank you very much for your interest. We do have sliding doors which would fit, however due to shipping challenges we only provide them with the investment in a complete post frame building kit package. We would suggest you visit the ProDesk at your local The Home Depot®.
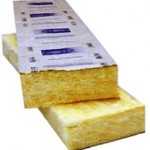 DEAR JON:
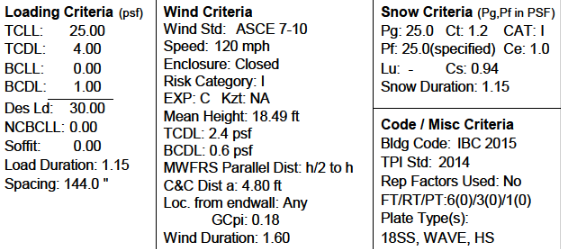
  Since January 1973 anemograph stations within the United Kingdom have tabulated for each clock hour the mean hourly speed and the maximum gust (of approximately three second duration). The ratio of maximum gust speed to the mean speed for individual hours as an effective height of 10 meters is referred to as the gust ratio. The mean wind ration is the ratio of the extreme gust speed to the extreme hourly mean speed, both having a return period of 50 years. This ratio turns out to be 1.60.
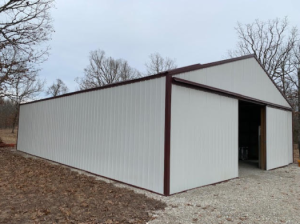
 Here are a few details about our current building:
 Take off the steel siding, remove the reflective radiant barrier from the walls and install a quality building wrap (like Tyvek), then put the siding back on. The barrier is keeping moisture in your building, whereas a building wrap allows moisture to exit. Completely fill the wall cavities with insulation. Place a well sealed vapor barrier between framing and gypsum wallboard to be installed on the walls. Do not place a vapor barrier between the ceiling drywall and the roof framing above.