Tag Archives: condensation control blanket

Avoid Metal Building Insulation

One More Reason to Avoid Metal Building Insulation


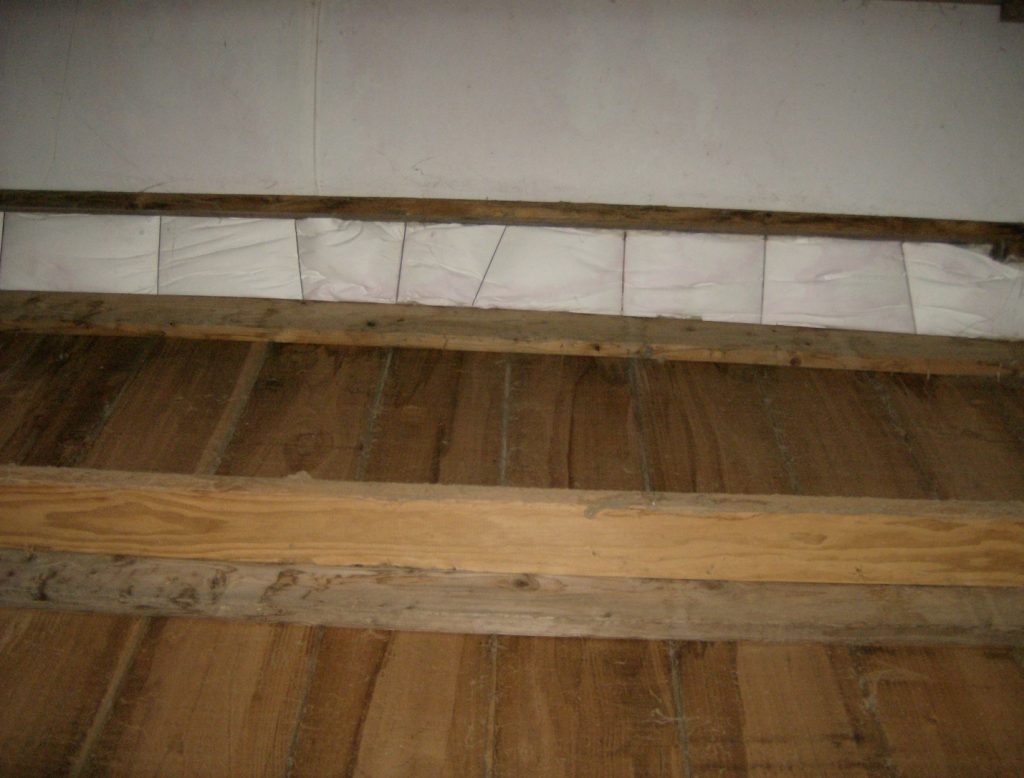
Photo isn’t showing the inside of a Hansen Pole Building. This view happens to be inside of an eave sidewall looking up underneath a post frame building roof. White vinyl facing happens to be underside of a product commonly known as Metal Building Insulation, having actual R values so low it should be more appropriately described as Condensation Control Blanket.

For previous words of wisdom in regards to Metal Building Insulation, read more here: https://www.hansenpolebuildings.com/2015/05/metal-building-insulation-3/.

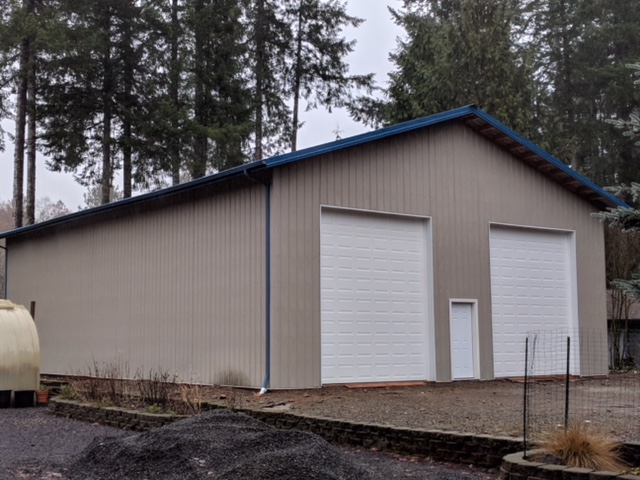
This particular building can be found in Western Washington. 20 years old, construction was done by current building owners. A horse barn, building has a concrete slab floor, other than in horse stalls. Each side of building has open (no soffits) overhangs.
Now our challenge – certain days, with high humidity and fog, building has a problem with water ‘leaking’ along first purlin inside building.

My take regarding the problem’s root cause:
Properly installed in a roof, each roll of Metal Building Insulation should be stretched two inches past eave strut (eave purlin). Fiberglass adhered to vinyl facing should be removed from these two inches, folded back over top of intact fiberglass, then fastened securely to eave strut top until steel roofing installation. This takes a bit more effort than merely cutting rolls off flush with eave strut outside and calling it a day.

My guess, this building’s owners were not given instructions advising how to properly install Condensation Control Blanket, so it was done a quicker and easier way. This leaves a raw edge of fiberglass above the eave strut. When those chilly high humidity days occur, underside of roof steel in eave overhang has condensation collecting. Some of this moisture then contacts raw fiberglass edge and wicks up into building. Please note, in photo the apparent puffiness of insulation between sidewall and first purlin up roof. This would be an indicator water has sat above white vinyl vapor barrier.

A solution exists – remove screws from roofing above fascia and eave strut. Insert form fitted inside closures above eave strut, making certain no fiberglass remains exposed to overhang. More information about inside closures here: https://www.hansenpolebuildings.com/2015/12/the-lowly-inside-closure/)

Replace screws (using larger diameter than original screws). Roofing should be screwed to both sides of high ribs into fascia board. We recommend use of 1-1/2″ Diaphragm screws as a replacement.

The Drip, Drip, Drip of Condensation

Reader JIM in HOODSPORT writes about condensation issues:

“New Completed 40’ x 60’ pole barn with 16’ side walls and 24’ peak. Walls and ceiling insulated, 60’ long ridge roof vent. Full cement Pad with plastic vapor barrier under it. Cement was 60 days old when barn was completed.. rained just about every day. No windows or vents, using for RV storage and Shop. 2 – 12’x14’ roll up doors. 1 entry door. Will eventually have some sort of heat and ceiling fans installed.

Live in Hoodsport, Wa. Very near Olympic Mtns.

Issue is that the barn does not want to dry out … getting condensation on ceiling insulation…had contractor come out and clear out excess insulation that may have been blocking vent and make sure ridge is secure and no blowing rain can get in….had entire roof check for holes…

Still dripping..thought the vent and insulation would take care of the issue?

Afraid if I start putting vents all over the place I would be wasting the heat while I work in shop.

On a warm day should I open doors and get large fans and vent area of excess moisture? Get heaters in to dry out? Don’t propane heaters put moisture in the air?

Please Help…”


The short term solution is to open up the overhead doors and leave them open until it dries out.

Why you have the problem – your concrete floor is poured over a vapor barrier (excellent choice), however it does not allow any moisture to escape into the ground. You have a vented ridge, which will not work as it needs an air intake in order for air to escape from it. Your building should have had enclosed vented soffits – which would have allowed for airflow in at the eaves and out at the ridge.

Now – let us address the bigger and long term problem – you want to heat this building. As it stands currently, you might as well just put a heater out in the yard and expect it to warm your building. The “insulation” you have is nothing more than a condensation control blanket – it has an R value right close to absolute zero every time it crosses a wall girt or roof purlin. If your plan is to try to take the chill off a bit for an hour or two using a space heater, then you might as well plug up the ridge vent, which isn’t working anyhow.

If you want to be able to do a decent job of heating, you have some work to do.

First, get an engineered repair to upgrade your roof trusses to support at least a five psf (pounds per square foot) ceiling load. This can be obtained at a nominal charge from the company which manufactured your trusses.

Second, remove all of the wall steel. Take off the condensation control blanket in the walls and throw it away.

Third, install enclosed soffits with level returns on the eave sides. This will entail having to shorten the wall steel and adding some framing. Now the ridge vent will actually work. Put housewrap (think Tyvek) on all of the walls and reinstall the wall steel.

Fourth, after repairing the trusses, install ceiling joists between the trusses (2×6 #2 every 24 inches with joist hangers), install 5/8″ drywall on the underside and then blow in 15-20 inches of fiberglass insulation, making sure to allow at least an inch, if not two, of clear air flow at the eaves so you do not block the vents. This will mean a lesser R value at the sidewalls. You could have four inches of spray foam insulation placed on top of the drywall in the two feet closest to each sidewall, which would help.

Lastly the walls – fill the insulation cavity completely with unfaced insulation, cover with 6 mil clear visqueen, then gypsum wallboard.

Oh, another sidebar, please check the engineered truss drawings for your building – there may be some truss web bracing which is missing, most likely on the diagonal webs going up from the bottom chord at the center of the trusses.