Tag Archives: concrete slab

Adding a Slab, Code Requirements, and Getting Started

Today’s Ask the Guru takes on reader questions about adding a slab to a pole barn with a dirt floor, and how that might transfer pressure to the columns, whether or not Hansen Buildings packages meet “2018 International Building Code and all codes adopted by Pennsylvania for commercial construction,” and landowners looking to get started but not sure how.

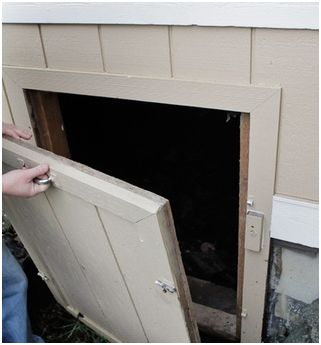
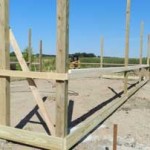
DEAR POLE BARN GURU: I have an existing 24ft by 32ft pole barn with dirt floor. I would like to poor a slab and I understand the need for construction joints in the concrete. I am concerned about expansion pressure from the concrete against the existing posts. Could the expansion of the floor slab put enough pressure on the posts to damage them? My posts are 4×6 treated pine. TIM in APEX

DEAR TIM: As far as actually damaging posts themselves, highly unlikely. If your 4×6 columns are not adequately anchored in ground by a concrete bottom collar, concrete encasement, or other properly compacted backfill, there is a potential for them to be shifted out of place when concrete is poured. Depending upon method of pressure treatment, ph of concrete against pressure treated pine can cause brown-rot fungi. If your columns were treated with ACQ-D or MCA, it might be prudent to isolate columns from concrete with a waterproof barrier. A barrier can be created as simply as running your under-slab vapor barrier (6mil or thicker black plastic) up and over top of your pressure treated splash planks and around sides of columns to top of slab.


DEAR POLE BARN GURU: Do your pole building packages meet the 2018 International Building Code and all codes adopted by Pennsylvania for commercial construction? ANDREW in HOLLIDAYSBURG


DEAR ANDREW: Every Hansen Pole Building is fully engineered to meet all structural requirements of applicable Codes where building is to be erected. Besides your engineer sealed blueprints, our engineers also provide sealed verifying calculations.


About Hansen BuildingsDEAR POLE BARN GURU: We own the land however we don’t where to get started with this Process? TONY in FLORENCE

DEAR TONY: Your Hansen Pole Buildings’ Designer can be a great resource in assisting you with this process. Many of our clients have found resources in this article of prove helpful: https://www.hansenpolebuildings.com/2021/02/a-shortlist-for-smooth-barndominium-sailing/

Wire Mesh in Slabs on Concrete

Many concrete finishers have switched to synthetic fiber mesh reinforcement for concrete slabs to help reduce surface cracking. In doing so, many of these finishers have completely eliminated traditional welded wire mesh (WWM).

But while fiber mesh has advantages, it also comes with potentially costly drawbacks.

This may sound surprising, given fiber mesh’s big appeal is its time and money savings. By using it, finishers don’t have to pay a premium for WWM, and don’t have to take time to correctly install it. Some concrete finishers actually offer a price break for fiber mesh.

While fiber does reduce surface cracking, it won’t eliminate cracks completely. Worse, when a crack does develop, lack of WWM can be a real weakness.

rebar
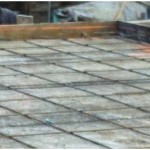
This is because properly installed WWM will keep concrete on both sides of a crack from separating further and will keep them on the same plane— preventing differential settling. Fiber mesh won’t.

Repairs to differential settling don’t leave a great impression on new post frame building owners. You have to grind down the surface on either side of the crack, fill the gap with epoxy and try to smooth it all out. Even when done well, this leaves a visible scar.

While such scars are mostly cosmetic, they scream “poor workmanship” to clients, leading many to doubt the slab’s structural integrity. 

As the use of fiber mesh has grown, more and more of these problems have been seen on job sites, however finishers are beginning to take notice. Soon after switching to fiber mesh, one found a dozen cracking and settling slabs at a given time. They reintroduced WWM and these problems virtually disappeared.

Chances of differential settling depends largely on underlying soils. Where soil is sandy and stable, settling is less likely and fiber alone can be a reasonable choice.

However, in areas with clay and other expansive soils, correcting problems caused by elimination of WWM can cost more in the long run than initial cost savings associated with fiber mesh.

In fact, the best way to minimize chances of cracking and settling is to use fiber mesh and WWM together.

Like any structural product, WWM won’t do its job unless it’s installed correctly. Unfortunately, this is not always done.

Proper installation to provide maximum strength requires mesh to be raised off the ground so when concrete sets, it is in the slab’s depth lower third. This means placing WWM on chairs to hold it at the correct height.

It is crucial to ensure WWM be placed on proper height chairs. Otherwise, WWM will not effectively hold the slab together. 

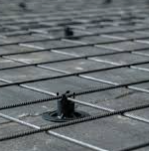
Wire not placed on chairs will not be effective. But in a rush to get jobs done, some crews eliminate chairs and roll WWM directly out over Code required under slab plastic sheeting covering underlying properly compacted fill. And when installers do use chairs, they must take care not to knock WWM off the chairs during pour. If they do, then they need to reset WWM.

Making sure all of this gets done right can be a training and quality assurance challenge for finishers, and avoiding this challenge may be one reason why so many opt for synthetic fiber for these applications.

However, in soils or poorly prepared sites making settling likely, this type of oversight really needs to be a priority.

How to Pour a Slab on Grade

How to Pour a Slab on Grade in an Existing Barndominium

Reader PAUL writes:

“I have an opportunity to purchase a barndominium that has the posts set in 20” wide 40” deep peers. Unfortunately the county where this is located does not require a footing. All city codes in this area require an 8”X 36” footing. What solutions do you recommend for pouring the slab now that the shell has been erected?”

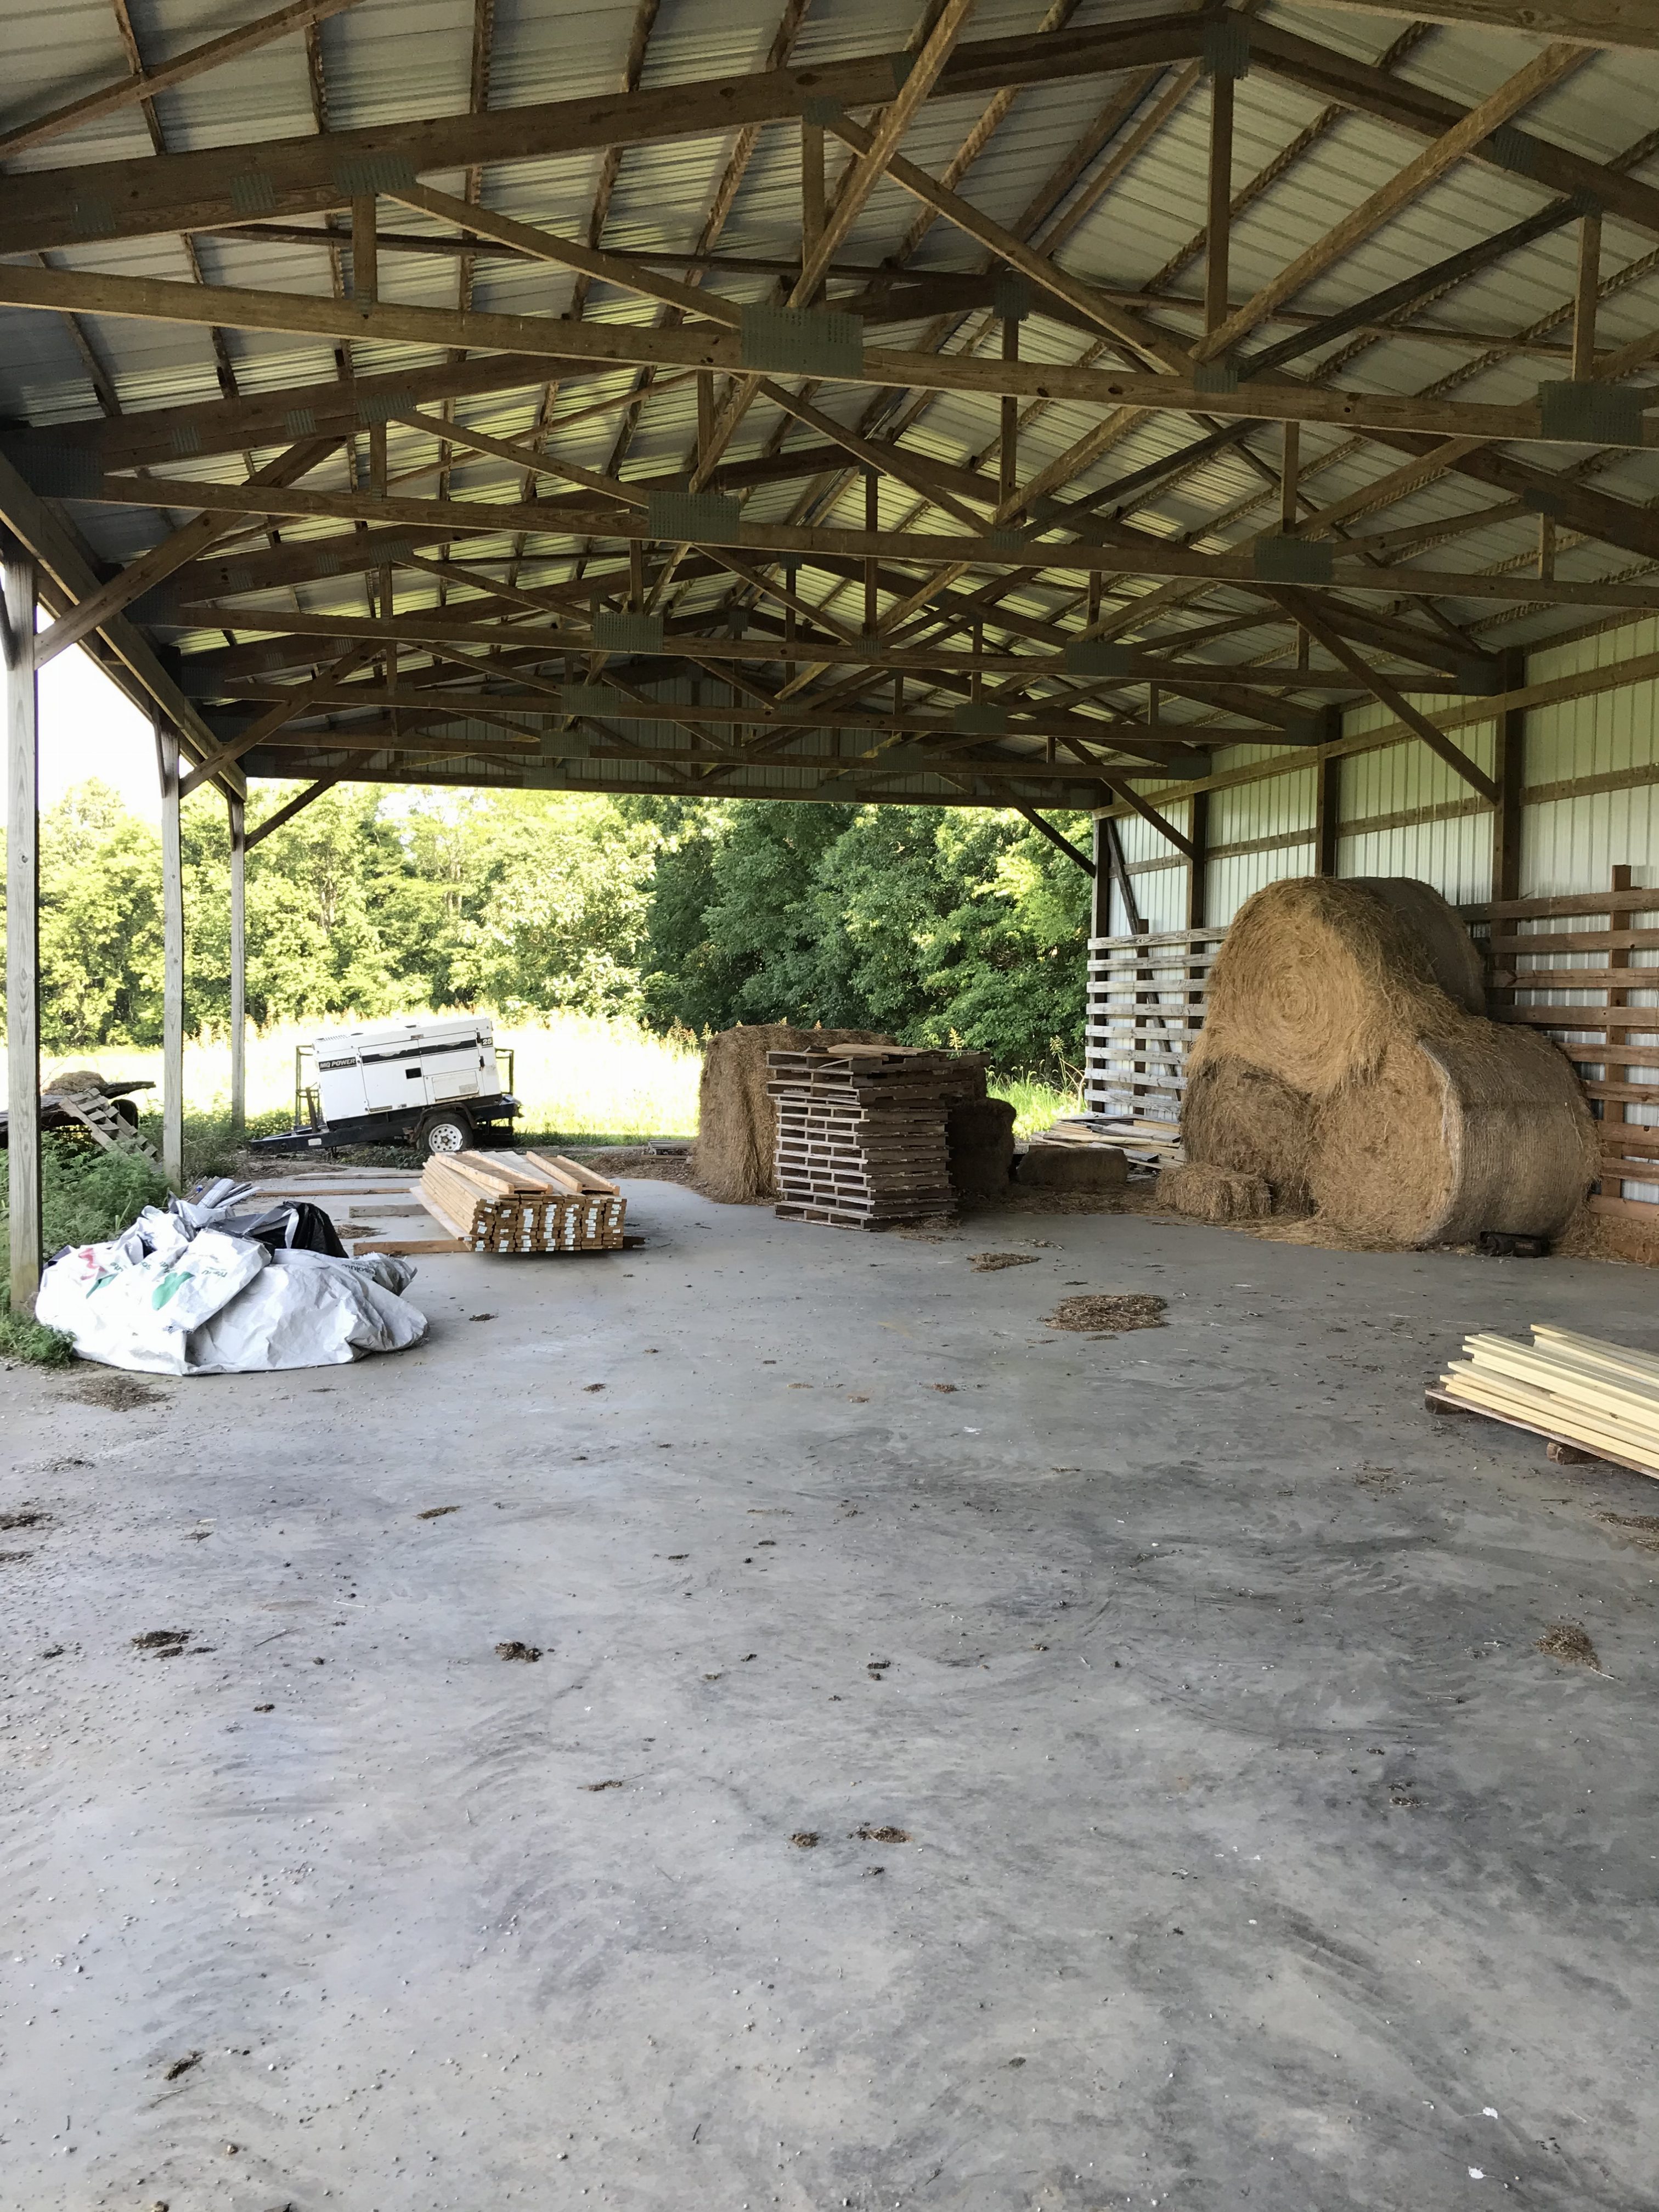
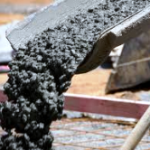
Most post frame buildings have shells erected then slab poured, so this should not be an issue. A pressure preservative treated splash plank should be in place around this building’s perimeter. It will become forms for your slab. Snap a chalk line on the inside of splash planks up 3-1/2″ from bottom, this will be top of your slab.

In Climate Zones other than 1 through 3, you will need to frost protect the building perimeter. This can be done by trenching around the edge of the building to required depth – 24″ in zones 4 and 5, 48″ in 6 and greater. It is usually easiest to install R-10 rigid insulation on the inside of the splash plank, with top of insulation even with top of slab to be poured. This also precludes any need to UV protect vertical insulation.

Depending upon how the site was prepared, you may need to excavate inside of this building. 

If in “frost country” a sub-base 6” or thicker should be first placed across the site. To maintain frost-free soils sub-base should be such as no more than 5% (by weight) will pass through a No. 200 sieve, and it is further desired no more than 2% be finer than .02 mm.

Prior to pouring, 2” to 6” of clean and drained sand or sandy gravel is spread below where concrete is to be poured. Mechanically compact fill to at least 90% of a Modified Proctor Density, otherwise slab could sink.

In areas prone to subterranean termites treat prepared soil with a termiticide barrier at a rate of one gallon of chemical solution per every 10 square feet.

Install a good, well-sealed 15mil vapor barrier below any interior pour, to stop moisture from traveling up into the slab through capillary action. Overlap all vapor barrier seams by a minimum of six inches, then tape. Vapor barrier should extend up column sides and to splash plank top. 

Minimum R-5 (R-10 being preferred) insulation shall be provided under full slab area of a heated slab in addition to required slab edge insulation R-value for slabs as indicated in International Energy Conservation Code (IECC) Table R402.1.2 Footnote (d).

In most instances, over properly compacted fill, 15 psi (pounds per square inch)  EPS (expanded polystyrene) or XPS (extruded polystyrene) insulation has adequate compressive strength to support a five yard dump truck on a nominal four inch slab on grade.

Consider this: 15 psi equals 2160 psf (pounds per square foot), making this greater than assumed compressive strength of most soil types.

If not using fiber-mesh or similar reinforcement additives to concrete mixture, place rebar (reinforcing steel rods) in slab center to add rigidity to concrete to aid in minimizing cracking.

Isolating Heated and Unheated Barndominium Concrete Floors

Isolating Heated and Unheated Barndominium Concrete Floors

Loyal reader MIKE in COUPEVILLE writes:

“I see you recently posted a detailed drawing on insulating the perimeter of a pole barn, very helpful. 

https://www.hansenpolebuildings.com/2020/03/meeting-barndominium-slab-requirements/

I’m currently looking at purchasing a large pole barn, it will be 84’x42′ with posts 12′ apart.  I plan to make 2 of the 12’x42′ bays on one end a heated living quarters in the near future.  I’m curious how you would propose to insulate/isolate the 4” slab of the heated living quarter’s side from the unheated shop/garage side.  I’m thinking more 2” high density foam laid vertically basically making them two separate slabs one 24’x42′ for the heated living quarters and the other 60’x42′ for the unheated shop.  The issue I see with this method is it is effectively separating the slabs and I’m assuming the engineering of the building, I’m especially concerned about this because the insulation/break would be the whole 42′ width of the slab and right where the 12′ on center posts are.  Will this method compromise the structural integrity of the building?  Will your engineers call it out in the plans if asked to?  Or is there some other way to insulate the slab between heated and unheated portions of a build? 

Thanks for your time and I’ve enjoyed reading many of your blog posts.”

Mike the Pole Barn Guru responds:

Thank you for being a loyal reader and for your kind words, they are appreciated.

One question I have often asked clients is, “Do you mind if I treat your building as if it was going to be my own”? 


If your building was going to be mine, I would place vertical wall insulation around the building’s entire perimeter. This shop may be unheated today, but it would not take me very many winters of working in it to decide I want heat in it. I would also put rigid insulation under my entire floor surface as well as pex-al-pex tubes for radiant heat – divided into zones so shop and living quarters could be heated independent of each other.


As to your idea of a thermal break across your building’s width, there would be no structural detriment from it as it would (for practical purposes) function as a very large expansion joint. As your building’s weight does not rest upon its slab on grade, your slab’s structural contribution to your overall structure is in reducing wind shear forces having to be transferred from roof surface, through endwalls to ground, creating a constrained condition. https://www.hansenpolebuildings.com/2018/11/importance-of-constrained-posts/

If requested we can have our engineers include this detail within your sealed plans.

Barn Conversions, Raising a Building, and Pole Barns on Concrete Slabs

Today’s Pole Barn Guru discusses a possible conversion of an old pole barn, raising a building, and how site preparation helps with concrete slabs.

DEAR POLE BARN GURU: Have a 40’ x 100’, 2 sides enclosed, pole barn I would like to convert to a house / garage combo. Columns are 20’ on center in the front and 10’ O/c in side and back. (Pics attached). Is this doable in Ky and roughly cost per sq ft.? We plan on 3 bed, 2 bath, open concept, 40 x 50 living and 40 x 50 garage. Thank you for your input / knowledge. JIM in FRANKLIN

DEAR JIM: Pole barns for agricultural use are rarely designed by a Registered Professional Engineer and in many cases do not require a Building Permit. If it did happen to be both of those things, it was probably designed to a lower set of design standards than a residence would be. Is it doable? Perhaps, however it may cost so much to upgrade your existing building so as to make it financially unrealistic. If you want to pursue this avenue further, it would be best to invest in services of a competent local Registered Professional Engineer who can do a physical examination of your building and make detailed recommendations as to what it would take to make necessary structural upgrades.

Your best solution might be to erect a new building properly engineered to residential requirements.


DEAR POLE BARN GURU: I have a newer pole barn, 30 ft wide, standard trusses 10ft. above the floor. What options do I have to raise the clearance to 14ft? Trusses with a kick up, add a knee wall, scissor trusses? Would prefer whole area at 14ft but could consider just the center 12 ft or so to accommodate a travel trailer. RON in MANISTEE

DEAR RON: It could be possible to increase height of some or all of your building however it will take some significant structural engineering (as well as a serious investment of labor and materials) in order to do so – a competent Registered Professional Engineer should be engaged to visit your existing building, do an analysis and provide a design solution. My educated guess is it will prove to be less expensive to erect a new post frame (pole barn) building to fit over your travel trailer, than to make an attempt to remodel what you have.

pole spacing

DEAR POLE BARN GURU: Builders in the northwest Ohio area don’t seem interested in building a pole barn house with a concrete slab. They said not a good idea do to cracking but there are all sorts of commercial pole barn facilities built on concrete pads. Couldn’t I just use fiber in the concrete to help with expansion? MATT in ARLINGTON

DEAR MATT: Your top factor for getting a good result from a slab on grade concrete slab in a post frame (pole barn) home is proper site preparation. (Read more beginning here: https://www.hansenpolebuildings.com/2011/11/site-preparation/) Just adding fibermesh to your concrete mixture is unlikely to be a satisfactory solution unless you have a great site prepped.

For a pole barn house, you might want to consider building over a crawl space – investment is probably fairly similar, however wood is so much more comfortable to live on.


Reduce Heat, Garage Kits, and Updates to Aging Building

Reduce Heat, Garage Kits, and Updates to Aging Building

DEAR POLE BARN GURU: I’m looking to build a 40×48 monitor style barn with a 16×48 loft in the center. I don’t plan to heat or cool the loft but would like to reduce the heat in the summer. My first plan is to use a light color or Galvalume for roof metal. My second idea and where I need more advice is on insulating the roof. I was thinking about first laying down foam board insulation and then putting metal roof down. I’m sure there are issues with this option please help me out. I also want to use the insulation to help deaden the sound when it’s raining. MICHAEL in ENTERPRISE

Wood Horse Barn
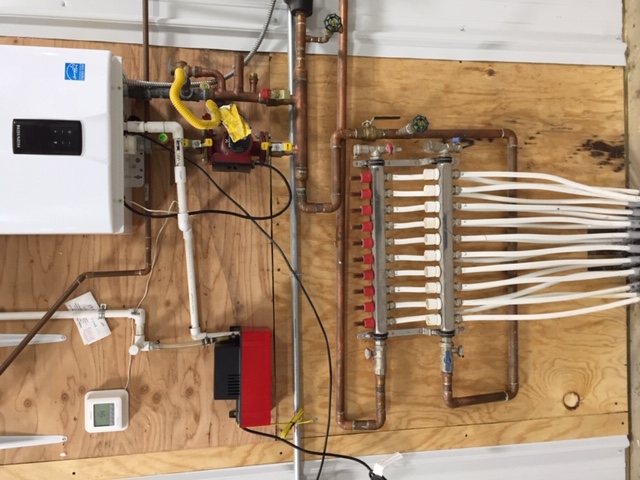
DEAR MICHAEL: Many different colors of “cool roof” steel are now available, which adds far more flexibility in aesthetics – one is no longer limited to bare Galvalume or galvanized, or white- https://www.hansenpolebuildings.com/selecting-building-colors/
Foam board insulation between the roof purlins and the steel roofing would be one of the worst possible choices you could make, from a structural standpoint. It allows for the roof screws to flex within the thickness of the insulation, creating leaks and reducing the strength of the roof steel to resist wind shear. Some other options would range from installing a radiant reflective barrier under the roof steel, or (better yet, although more expensive) using closed cell spray foam insulation.

DEAR POLE BARN GURU: Hello, I am interested in one of the garage kits I found on The Home Depot’s website. I would like to see floor plans and interior dimensions for this kit. And what size would a cement pad need to be to fit under this structure? 48ftx60ft? Hope to hear back soon. Thank you! DAYNA in EAST TEXAS

DEAR DAYNA: The beauty of post frame buildings is a concrete slab is not required in order to support the building. As to floor plans – unless otherwise requested by a client, most post frame buildings are clearspan structures, without any interior columns or partitions. This allows for the total flexibility to place walls wherever one chooses, if any. The quickest way to hear back soon is to include an email address to send responses to.


DEAR POLE BARN GURU: Hello. We are starting to look into getting some new insulation and facing put in our shop. The current product is at least 15-20 years old. We were going to just carefully wipe down the dirty putter facing and postpone this project for another year or two, but that job in itself quickly became a hassle. As we are currently looking into which insulation and facing we will replace it with, we are trying to figure out what kind of insulation facing was originally put on that we have right now. The facing itself is exposed on the walls and ceiling besides the first 8’ of wall cover at the bottom. Do you know of any way to determine what type of facing we have? I attached a few pictures of it in case you might be able to help out with any guesses…

Thanks a lot for your help! JON in HANOVER

DEAR JON: Your metal building insulation has a WMP-10 facing, which is generally used in a typical metal building application where the walls are exposed to light to moderate traffic. It obtains a mid-grade durability. The front side is composed of polypropylene insulation facing, with a white kraft paper backing on back side. WMP-10 is slightly heavier than WMP-VR facing.


Should Poly Plastic Barrier be Used on Interior of Walls and Ceiling?

Reader JUSTIN in MONROE writes: “Hello. Hopefully an easily answered question? I have built a 52×30 post frame, steel siding and roof. Walls have Tyvek between steel and girts. Roof is steel directly on purlins with no barrier of any kind. It has a concrete slab and I plan to periodically heat it during winter months. I’d like to insulate but not sure of best method with my situation and climate. I plan to use R-19 for walls and possibly ceiling. Or blow in for ceiling. Also I have 50% soffit ventilation with 18″ overhang as well as 40 ft of ridge vent. Should I use poly plastic on interior of walls and ceiling? I’m concerned I will create a moisture problem. I’m open to doing things whichever way is best. Things are always easier and cheaper to do it correctly the first time. Any advice would be greatly appreciated. Thanks”

Dear Justin,

housewrapI agree things are always best when done correctly the first time around. While it is not always less of an investment, when the long term problems arise and things have to be corrected, it makes it nearly not as fun and cheap becomes expensive. Usually in a quick hurry.

If the roof trusses are not designed for at least a five pounds per square foot bottom chord dead load, you are sunk on adding a ceiling without an engineered truss repair. This would be the place to start, as it will dictate the solution.

I will approach the building as if it is my own and from where it is now.

On the floor – I am hoping you have a vapor barrier beneath the concrete slab. If not, use a high quality sealer on top of the floor.

A penetrating concrete floor sealer is likely the best bet to protect and maintain a concrete floor. These concrete floor sealers penetrate deep into the concrete’s pores coming into contact with the alkali and calcium ions, forming a gel.

This gel expands filling the pores and hairline cracks inside the concrete, turning the concrete into a solid mass. This process will prevent moisture and vapor migration up through the concrete floor, as well as down into it.

Look for a penetrating concrete floor sealer which is water based and says silicate penetrating solution on the specifications. These sealers can be applied with a pump up sprayer.

On the Walls-you did good with the Tyvek. Kudos! If your building has girts flat on the outside of the columns, you can add another set to the inside of the columns. If you have 6×6 columns, your post frame building will now have an 8.5 inches thick insulation cavity. I would use BIBs (read about BIBs here: https://www.hansenpolebuildings.com/2011/11/bibs/) for my wall insulation, and would have a deep enough cavity to get around R-35. There does need to be a vapor barrier on the inside (heated) side of the wall, under the gypsum wallboard.

Roof– the underside of the roof steel needs to be isolated from any warm moist air which would enter the attic. Use closed cell spray foam directly sprayed directly onto the underside of the roof steel. Assuming your building’s roof trusses are strong enough to support a ceiling, blown in insulation is going to be your most economical. Hopefully you (or your builder) had the foresight to order roof trusses with a raised heel so the insulation will remain full thickness from wall to wall. If not you may want to have closed cell spray foam insulation on the “cold” side of the ceiling in the area with a couple of feet from the sidewalls. Make sure to allow a provision for air in the overhangs to not be blocked from venting the attic.

Do not put a vapor barrier between the trusses and the ceiling. You want the warm moist air inside your building to be able to rise into the attic and be vented out through the ridge. And if you are going to insulate your ceiling, R-19 is really not near enough. At a minimum I’d think about R-38 or 45 blown in.

Thank you for allowing me to share some insight into insulation.

Mike the Pole Barn Guru

Sloping Concrete Floors

Another great and well thought out question, which is best answered at length.

Customizable Workshop for Large HobbiesDear Pole Barn Guru: The construction manual states that concrete slab floors should be poured so there is 3-3/4” of skirt board left exposed above the slab. What do you do if you want or need to have a typical slab slope toward the front of the building? On my 36’ garage that might be around a 4.5” change in slab height from back to front. Since I’m using sheetrock inside (not steel) my thought is that I really only need to have the recommended slab height around my doors at the front of the building to avoid problems and the slab could be poured higher in the back. Appreciate the input! DAN in EVERGREEN

DEAR DAN: The IBC (International Building Code) vaguely addresses this issue: where the minimum per IBC Section 406.1.3 is stated as, “….The area of floor used for parking of automobiles or other vehicles shall be sloped to facilitate the movement of liquids to a drain or toward the main vehicle entry doorway….”.
The command has been given. However the Code does not specifically give an amount of slope. The general consensus is the minimum slope should be 1/8” per foot. This would work out to exactly the 4.5 inches in 36 feet which you had guesstimated.
The important part is to have the top of the slab at door openings be at the 3-3/4” of exposed skirt board left. I’ve come up with different solutions in different buildings of my own. In my oldest, small 22 x 24 garage, the floor is all sloped from front to back. In my two most recent buildings, central floor drains were installed and the floors slope to the drains.

floor-drainI have found I truly like having the floor drains. This allows the floor around the perimeter to all be poured to the same level, which aids in being able to apply inside finishes (such as gypsum wallboard) without the need to custom cut every piece – so it is easier to construct. This also minimizes the overall slope amount, as your 36’ floor could drop the 1/8” per foot in 18 feet for 2-1/4”. By excavating down, instead of having to build up, the amount of compacted fill is reduced (again saving money).
I also happen to live where it is below freezing for more months than I like to think about. By having a central floor drain, I can wash my vehicles in my nice heated spaces and have the wash water go down the drain, as opposed to forming an ice dam in front of my doors.

Pole Building Gone Wrong

There is Something Wrong with This Picture

building problemsMy disclaimer, this is NOT a Hansen Pole Building. It was advertised on Craigslist by a builder in Kentucky. There are some odd things about this pole building – one of them which is crucial and the building owner is going to hate probably forever.

Maybe longer.

The first odd thing about this building is the builder even put the picture up on the internet.

As you read on, you will find out why.

Look at the sliding door at the center of the front endwall of the building. Notice, the bottom of the sliding doors are what looks to be about four inches above the bottom of the neighboring walls.

This four inch hold up is ideal for pouring a nominal four inch thick concrete floor using the splash plank as a perimeter form.

There is a plethora of information out there on the internet about pouring concrete slabs on grade. I am not the world’s most knowledgeable person when it comes to concrete, so I have gleaned information both from my own reading as well as talking to the experts. Here is my take: https://www.hansenpolebuildings.com/2012/05/concrete-slab-2/

Now, if you will, please look immediately adjacent to each side of the sliding door. The wall steel is run all the way to the ground.

This is directly from the steel warranty of American Building Products : https://www.abcmetalroofing.com/Learn-More/Warranties/

  1. g) Damage to the coated Metal caused by contact with corrosive substances, or allowing panel cut edges to be in continual contact with water, damp insulation, soil or vegetation i.e. setting wall panels directly on the concrete sheeting notch or base trim.

I changed the font to BOLD to make a point – the bottom edge of the siding is going to be in contact with the ground. Voiding the warranty.

Walk your eyes around the corner of the building photo to the entry door (formerly man door, which was deemed politically incorrect). See the steel siding below the entry door?

Building Codes require a landing outside of entry doors (here is the proof: https://www.hansenpolebuildings.com/2015/02/landings/ ).

When the landing concrete is poured, it will not be directly onto the wall steel – again, not good.

When something so important is not only neglected, but promoted as examples of good work, it makes me wonder if more things are done improperly or just plain left out.

To their credit, I can say at least they (this builder) do have a website, not just a Facebook page. I give them at least this amount of credit and place them above Chuck-in-a-truck.

There are also two very important reasons I would never consider having them build a building for me. They are not Better Business Bureau (www.bbb.org) members in one. Although the BBB might be slightly off kilter at times, it does lend credibility to a business – and it is not expensive, so why cheap out?

The other reason?

They are not members of the National Frame Building Association (www.NFBA.org ). If one is not willing to invest in the success of their own business, what does it mean for the success to you of your new building?

An Engineer Didn’t Design This Building

If an Engineer Didn’t Structurally Design This Building, Then Who Did?

Many of you have been reading the ongoing and sad saga of Jimmy’s building…..here is the next installment:

Jimmy: “You should go buy a lottery ticket, I asked the builder, he told me only on industrial buildings do they use engineering plans. There is the concrete discs the post sit on, but other than that….it’s just sandy dirt mix supporting the posts.

 Can I take pics or take measurements…and send them or is there somewhere I can tell someone what I’ve got material wise and see if it would work. I think what they’re doing is using the minimum requirements. I originally ordered and paid for the trusses to be built on 2×8 top and bottom chords (on a gentleman’s agreement), when they arrived they were built on 2×6 top and bottom chords, when I contacted the guy he said the truss company made a revision since the attic was going to be for storage and not hay that 2x6s would be suffice for the top and chords. Well that was the straw that broke the camel’s back, so I said either get me the trusses I paid for or give me the difference between the 2×6 and 2×8 trusses, he said I’m not giving you any money. And because it was on a gentleman’s agreement I don’t have a leg to stand on (everything from now on will always be in writing). I asked the builder what he honestly thought, he said the 4×6’s will be fine, but if my father would have went wider than 30 foot he definitely would have gone with 6×6’s. I’m going to follow through on what I added to the original build, but if there’s a way I can prove this guy is building a structurally unsound building I will take him to court.

 What’s your thoughts on concrete? We are planning to insulate the underneath with foam (250 psi) was recommended, and the concrete will be reinforced with fiber, but not with metal screen.”

Dear Jimmy: Please feel free to send any photos or measurements to me for review and I will give you my best honest opinion. My question always is – if an engineer didn’t structurally design this building, then who did?

truss-drawing-150x150The 2×6 top and bottom chords may very well be sufficient, as it will depend as much on the grade of the material used, than just the size. There should have been a sealed truss drawing delivered with the trusses – scan it and send it to me. I spent many years in the truss industry, so if something is amiss, chances are good I will catch it.

Sadly, you already have a building which is structurally unsound. There is no way those “concrete discs” are going to be adequate to prevent your building from settling. It might not happen immediately, but it will happen. A good building, takes a good foundation, it is just this simple.

As to your concrete floor, the best way to get a great floor, is with great site preparation. I’ve written extensively on this topic in the past: https://www.hansenpolebuildings.com/2011/11/site-preparation/. Fibermesh is a product I have used in my own floors and have been pleased with the results. Unless you or someone in the future is going to climate control the building, there is no reason to put insulation under the slab. If you are considering a future with climate control then you should also be reading this article: https://www.hansenpolebuildings.com/2016/08/pex-tubing/
For all you gentle readers I implore you to take to heart the following advice – regardless of whom you invest in a building with:

  1. Never, ever invest in a building which does not have the seal of a Registered Design Professional (RDP – engineer or architect) on the plans. Unless your builder happens to be a RDP, he is just winging it.
  2. Make sure the plans are specific to YOUR building, with exactly the dimensions you ordered, showing your doors. The plans should have your name and the site address on them.
  3. GET IT IN WRITING https://www.hansenpolebuildings.com/2015/04/successful-relationship/

Crawl Space

When I was a teenager, I worked summers for my Dad and Uncles, who were the largest framing contractors in the Spokane, WA area.

crawl-spaceOne of their frequent clients was a developer named Terry Lettic. I remember Terry and my Dad discussing the pros and cons of apartments built with concrete slabs versus over crawl spaces, back in 1976. Maybe my Dad was just trying to keep us in work when he recommended framed over crawl spaces. In any case, I know I personally would much prefer living over a crawl space, as walking or standing on concrete slab floors is just too tough on my knees!

In a post frame building home, a crawl space foundation is building a wooden first floor framework 12 or more inches above grade on short pressure treated columns. This style of foundation allows easy access to plumbing, wiring and ventilation ducts. Crawl spaces also allow airflow under the pole building home. In some cases, the perimeter of the crawl space is insulated and the crawl space is used as a return air plenum for the heating system.

In addition to providing access under the floor, a crawl space allows ventilating air to travel beneath the floor. This can improve cooling in the summer and reduce any moisture in the soil below the building.

A crawl space disadvantage is the same air cooling the pole building in the summer can freeze (unless adequately insulated) the post frame house in winter. The need for additional insulation underneath can raise construction costs. Depending on the climate and location, water can collect under the floor and provide breeding areas for insects. Also, crawl spaces on raised foundations can have settling problems if the soil is not completely stable or properly compacted prior to construction.

The alternative to a crawl space is a non-structural floating concrete slab. Usually, plumbing and possibly wiring conduits are placed directly in the slab area and sealed in the concrete.

The biggest advantage to a slab foundation is cost. Pouring a large area of concrete costs much less than placing short structural columns, encased in concrete, and framing floor beams and joists to support an osb (oriented strand board) or plywood floor. Depending upon the HVAC (heating, ventilation, air conditioning) system the slab home may be easier to cool and heat as there is no air space under the floor which is affected by the seasons.

The slab foundation disadvantages include any plumbing problem associated with the sewer drain, or a broken pipe, may mean removing concrete from the slab to gain access. All ventilation ductwork must be channeled through the attic and other spaces in the walls. Finally, the slab floor is only inches off the ground. Potential flooding of only a few inches of rain is a definite possibility depending on the building’s location and surrounding topography.

In the case of my knees, for the dollar or so per square foot of cost difference, give me the crawl space every time. Being pain free is well worth it.

Ask The Pole Barn Guru: Where Can I Buy Concrete Brackets?

Greetings…and WELCOME to my new blog Feature – Dear Pole Barn Guru!

Starting today….each Monday I will post questions submitted to me about pole buildings and pole barn construction, products for use in pole buildings, along with my answers.  Scroll to the bottom if you have a burning question for the Pole Barn Guru, and look for the answer in an upcoming Monday segment of Dear Pole Barn Guru.

Concrete Bracket - Drill-SetDEAR POLE BARN GURU: Where can I buy the post to concrete heavy duty brackets? – DETACHED IN SOUTH CAROLINA

DEAR DETACHED: There are numerous brackets to attach pole building columns to concrete foundations. We’ve found only one which is capable of withstanding the moment (bending forces) which are introduced into the building columns by the wind. Contact Eric at Hansen Buildings (866)200-9657 for delivered pricing on concrete brackets.


DEAR POLE BARN GURU: When is the concrete floor installed and by whom?—FLAT IN LIVINGSTON

DEAR FLAT: If the pole building has a door or doors tall enough to get the premix truck inside the building, I prefer to have all of the roofing and siding on. This allows the pour to be done, without the threats of weather (baked by the sun, or whipped by winds which cause curing too fast, or rained upon). If this is not possible, at least have the building roofed, prior to the concrete floor being poured inside a pole building. For some reason, when slabs are poured with only the columns set and the pressure treated splash planks (splash boards) installed, the columns tend to grow bull’s-eyes (which are seen only by pre-mix trucks).  More than once, I’ve had a column knocked out of plumb by a truck during the pour.

 As to whom? I personally have an aversion to finishing concrete. If this is outside of your skill set, most pre-mix companies can furnish a list of finishers who service your area. My recommendation is to always purchase the pre-mix yourself and pay the finisher only for labor. I’ve seen estimates of 40-50 square feet of finished floor per finisher hour. This feels very low to me, as I know of several finishers who have no problems finishing 800-1000 square feet in a day by themselves.

 While flatwork is hard work, I’d have a hard time paying more than about 50 cents per square foot in labor costs.


DEAR POLE BARN GURU: Are the supports set in or on concrete pilings? – DIGGING IN TEXAS

 DEAR DIGGING: In an ideal scenario, holes are augured into the ground (in most cases a skid loader with an appropriate diameter augur bit will dig them), the pressure preservative treated timber columns are placed in the holes and then pre-mix concrete is poured to flow both below and around the columns. This is going to be the least expensive and most structurally sound scenario. Temporarily nailing a couple of 2×4’s horizontally to the post will help to keep the columns at the required distance “floating” above the bottom of the hole until the concrete is set.

Alternatively, the holes could be completely filled with pre-mix and engineered wet-set brackets are placed in the concrete to mount the columns to.


HAVE A QUESTION FOR THE GURU? https://www.hansenpolebuildings.com/ask-the-pole-barn-guru.php


Post Tension Slab

Bob, one of our Building Designers, comes up with some truly great questions. I appreciate him keeping me thinking!

Today Bob writes, “Any reason why a client in Louisiana would not be able to have a post-tension slab installed in one of our buildings? Apparently it’s a slab suggested in his area because of the type of soil and the tendency for slabs to otherwise crack. Sounds like he could erect the posts and roof as usual, and before pouring install additional posts that would be only be used for the post-tension slab along with cables that they would tension before the pour.”

Even though concrete is a very rigid material, it has a natural weakness when it comes to tension. It is limited with respect to what length of floor can be made out of it. One way to be able to build these structures with longer spans than would be possible with ordinary concrete is through a technique called pre-stressing. A post-tension slab is a slab of concrete which has been pre-stressed using a specific method to increase the strength of the concrete.

Several methods exist for pre-stressing concrete, with post-tensioning being a very common one. Before a post-tension slab is poured, high-strength steel strands or cables, called tendons, are laid in a tight grid. These help support and give strength to the slab once it has cured. The tendons are sheathed in plastic so they do not directly touch the concrete. After the grid is made, the concrete is poured, with extra care taken to make sure the tendons remain at the correct depth.

The concrete is allowed to cure to about 75% of the way, at which point post-tensioning occurs. Each of the tendons in the post-tension slab is pulled tight, using a hydraulic jack. The tensing of the cables occurs after the concrete has mostly cured, hence the term “post-tension.” The tendons are usually pulled to a tension of 25,000 pounds per square inch. Once the cables have reached the designated tension, they are anchored in the concrete, and the slab is allowed to fully cure.

This method of pre-stressing concrete is especially useful in areas where the soil expands and contracts relative to weather conditions.

Using a post-tension slab rather than ordinary concrete often makes good economic sense. Because there is a smaller depth of concrete used to obtain the same end result, construction costs are reduced.

When the floor thickness is reduced, so is the weight of the structure. A lighter building means the cost of building the foundation is reduced.

The answer for Bob’s client – there is no reason to not have a post-tension slab in a post frame building.

Concrete Guarantee

When I was a general contractor constructing pole buildings, we provided a fair number of concrete slabs in buildings. We always guaranteed one thing – the floor will crack!

Not the answer people wanted to hear, but it was the truth.

Concrete may be the longest lasting and most economical building material of all time. When placed properly and in the right application it will last a long, long time. In 1997 I traveled to the Rotary International Convention in Glasgow, Scotland. Having never been to the British Isles before, we made the trip into a three week tour. One of the stops was at Bath, where we walked on concrete roadways built by the Romans! Now this is longevity.

However, nothing good lasts forever and concrete is no exception. It will crack; it is just a matter of when. Look at any flat concrete surface – it has cracks.

Some of those cracks appeared within hours of pouring. Others took many years to develop. One might believe technology is such to allow concrete to be made which will not crack.

The answer is seriously complicated.

Cracks fall into one or more of several categories. These are plastic shrinkage, settlement, drying shrinkage, chemical, corrosion and overload. By knowing what causes cracks the severity can be reduced, if not avoided.

Plastic shrinkage cracks occur when water evaporates too quickly from the surface. This causes the top of the slab to dry more quickly than the bottom and they pull each apart. This is more likely to happen when it is hot, windy or there is low humidity. To avoid this use proper curing procedures. The key is to keep the surface moist. This can be done by placing wet burlap, mats or towels on the concrete. Place a sprinkler on the mist setting and let it run. There are also chemicals which can be applied to slow down the water evaporation. The time to begin any of these processes is after the final trowel application and the concrete has stiffened to the point where a wet burlap bag would not leave an impression on the concrete. In very warm weather this may need to be continued for several days. It may seem silly to water new concrete the way one would new grass, but this is exactly what should be done. It is possible on cool, overcast days to not need to take any of these measures.

Settlement cracks occur when the ground under the concrete moves. This can be the result of poorly compacted soil, the wrong kind of soil (sand), water erosion or tree roots. Poorly compactable soil should be dug out and replaced with crushed stone before placing the concrete. Do not plant trees near concrete slabs, over time, the pressure from the tree roots will cause the slab to crack.

Drying shrinkage occurs when a slab which is restrained is drying and shrinking. This usually does not occur on what is called a “free floating slab”. It is more of a problem when a slab is tied into another structure like a wall with rebar.

There are two ways chemical reactions can crack concrete. The first is because the concrete itself contains aggregates or cements which are not compatible. This isn’t something to be overly concerned about, as local premix companies know which issues happen in their geographic area.  In ice and snow country – DO NOT PUT SALT on a slab to melt it away, use sand for traction instead.

Corrosion occurs when concrete containing contains steel re-bar or steel wire mesh gets wet and comes in contact with oxygen. The only way this can happen is when small cracks develop in the concrete due to one of the reasons stated above and channel water into the crack. When water reaches the steel it begins to rust. Rust is expansive. As the steel rusts it pushes out and causes even more cracking. The prevention here is to make sure you treat all little cracks before they become big cracks. See my other blogs for fixing cracks.

Concrete is designed to take a certain load. Most sidewalks and residential driveways are designed to take the weight of a car or small truck. If backing up a loaded tandem axle dump truck or say a tank on a driveway, don’t be surprised if it cracks.

It is important to know the way the pros avoid at least some types of cracks. They use control joints. Control joints are an acknowledgment concrete will crack. The control joints can help to eliminate cracks or channel where the cracks will appear. Notice how sidewalks or driveways have either dividers essentially making several slabs out of one big slab or cuts running through every three or four feet? These are control joints.

Accept the inevitable, cracks happen – and take the appropriate steps to minimize or prevent them when you can.