This week the Pole Barn Guru tackles reader questions about cupola sizes, the proper way to insulate a shed ceiling, and a structural materials question.
 DEAR POLE BARN GURU: What base size and height is correct for a cupolas for a 32’ wide by 36’ long by 35-40’ high with a 10 over 12 pitch roof? Thank you for your answer. NANCY in SPENCER
DEAR NANCY: This may answer some of your questions: https://www.hansenpolebuildings.com/2015/09/cupola/. As to actual height of your cupola(s) – this is totally subjective based upon what you feel looks best.
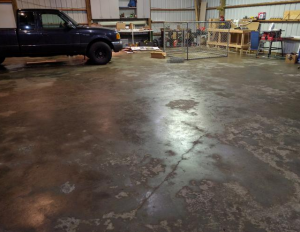
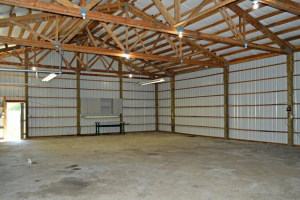
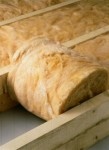
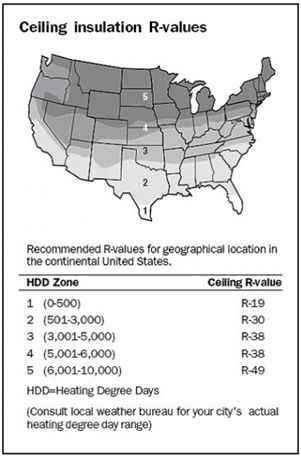
DEAR POLE BARN GURU: I’m desperately trying to figure out the proper way to insulate my pole shed ceiling. The Purlins run parallel rather than peak to eves. And there are no soffits or vents to be had. I have metal roofing with fiberglass roll insulation between roofing and purlins that has the vapor barrier backing. I’m afraid to slice holes in this vapor barrier as it may cause the metal roofing to condensate. My purlins are conducting cold temps in winter and when the heat hits them, they grow mold in some places as they’re very cold – or hot in the summer. Can I install the paper back fiberglass between purlins and be okay? I’m hoping would slow moisture down. but allow it to dry as well. IDK I’m in the NW mountains of Oregon, we do get low temps and snow and the shop is mildly heated in winter. I can’t afford to redo the roof or go with blown in foam. Is there another way? Can I use fiberglass batting safely? My end goal is to have tin roofing on the ceiling, is that okay? Sorry to bother you with such a common question but I haven’t found anyone with my exact issue. Thanks so much for your time and I sincerely hope to hear from you, big fan, DAVE in GALES CREEK
 DEAR DAVE: Appreciate your being a big fan – thank you!
No, you cannot/should not install paper (kraft faced) backed fiberglass insulation between your building’s roof purlins. This would create a system with two vapor barriers, trapping moisture between them. Start by looking to what is probably your source of moisture – your concrete floor. If you do not have a well-sealed vapor barrier underneath it, use a sealant on top of your concrete to reduce moisture coming up through your slab. After you have your steel ceiling in place, blow in fiberglass insulation above it, and install vents in each gable end and under your ridge cap.
DEAR POLE BARN GURU: What is the type of steel (cold roll, stainless, etc.) used and the thickness of the trusses and main poles holding the structure up. ERIC in PAHRUMP
 DEAR ERIC: 40 years ago I provided a post frame building kit package for a tire dealer in Pahrump!
Most steel roofing and siding is cold roll formed. These panels most typically have SMP paint (https://www.hansenpolebuildings.com/2014/05/smp/) over a galvanized or galvalume substrate. There are Building Code minimum requirements for residential steel roofing substrates (https://www.hansenpolebuildings.com/2020/11/minimum-steel-substrate-coating/). Hansen Pole Buildings use two-ply (for interior spans) 1-1/2″ width (2x lumber) chords and webs for prefabricated roof trusses, assembled with 16, 18 or 20 gauge galvanized steel pressed in connector plates. Plate thickness is determined by truss engineers to meet tension requirements. Main roof supporting members may be either glulaminated or solid sawn timbers, depending upon eave heights, roof slope, applied wind and/or snow loads, dead weight of roof assembly and availability of materials in a given market. Actual sizing will be determined by our third-party engineers.
 DEAR SHARON: Typically when I hear people talk about birds having destroyed pole building insulation I think of what is commonly known as Metal Building Insulation. Usually this is a thin layer of fiberglass with a white vinyl face – and once birds get started into it, there is no turning back
  DEAR TIM: Always a pleasure to hear from a “lumber guy”. Our blueprints are actually drafted individually on AutoCAD, however we are gradually transitioning to where most fairly straightforward work will be automated from our trademarked and proprietary “Instant Pricing” system. We searched everywhere trying to find a computer program able to actually accurately do a structural analysis of post frame buildings and found none existed. We created our own and added to it abilities to do real time quotes for any climactic condition and anywhere in America. Our program does quotes, invoices, material takeoffs, creates purchase orders and interfaces with our client data base.
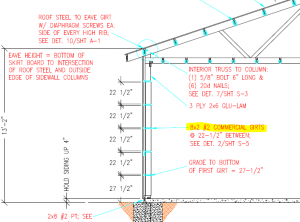 DEAR POLE BARN GURU:
 Seven Reasons Why Your Next Barndominium Should Be Pole Frame Construction
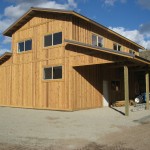 DEAR POLE BARN GURU:
  DEAR JIM:
  DEAR SCOTT: Regardless of whether your addition will be open, enclosed, or somewhere in between uplift should always be a consideration. Ideally the original EOR (Engineer of Record) who designed your 40′ x 80′ building would be consulted, not only because of a potential uplift issue, but also due to what affect open carport will have upon existing building. You may be placing wind shear issues upon endwall closest to addition and these will need to be addressed, as well as if endwall column footings will be adequate to support added weight (not just dead load, but also potential weight of a snowfall). An issue of drifting needs to be reviewed also, as snow could build up upon carport roof against existing endwall.
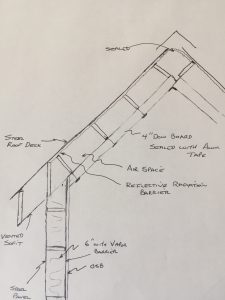 I love my two pole buildings I purchased from you guys. Just need some help on insulating the roof on my last building.
  DEAR PATRICK: Back when I was a contractor we would run into this situation occasionally. Our solution then was to stand columns in holes, brace them and then backfill with pre-mix concrete with very little water in it. Concrete weight would displace water in hole. It did take a significant amount of concrete, however it was only about $30 a yard then.