Getting Screwed, a Powder Coated Screw Story
Thank you to our Guest Blogger today-from our Boss – Eric Graff – owner of Hansen Buildings
Hansen Buildings is very proud that we are one of very few pole building kit suppliers offering our customers powder coated screws. There is nothing more unsightly to me than a new pole building that has just completed construction and a large portion of the paint is missing from the screw heads. I know what most of you are thinking, how different can our screws be from our competitors fasteners? Extremely different actually, some competitors don’t even use screws to fasten their steel, they use nails! As someone who works daily out of another manufacturers building that has the steel siding and roofing nailed, never consider this option.
Pole building screws vary in every way possible. You will see many different paint systems, different lengths, diameters, head sizes and designs, screw designs, washers and coatings that it will make your head spin. Keep in mind that although screws are a small part of an entire structure they are one of the most important pieces in the buildings’ overall design.
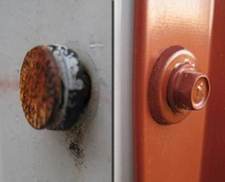
This summer I happened to visit one of our clients’ buildings who also happens to be a friend. He needed a couple of wainscot panels replaced that were scratched. I brought with me the three panels I was going to replace for him and a handful of screws. While removing the existing panels I noticed some flaking off the heads of the screws. This confused me as our powder coated screws should show very little or no signs of paint coming off during installation. In fact our supplier offers a warranty against this when you use their approved lobular drive bits:
https://www.hansenpolebuildings.com/blog/2012/08/lobular-powder-coated-screws/
I finished replacing the panels and took the problem screws back with me.
 As soon as I got back to our warehouse I grabbed a different color of screw and a couple different stitch screws for fastening trims to see how they fared. Unfortunately it was the same results regardless of type of screw or color. My first thought was, “where are all the customer complaints on this”? To me this was a major malfunction. I called our supplier and explained what I was seeing and sent photos to go along with our experience. They confirmed after some back and forth that there was indeed something very wrong with the paint on these particular screws.
I then thought back to a visit to the NFBA (National Frame Builders Association) Expo that we attended in St. Louis, MO in the spring of 2012. I remember visiting one booth in particular that was trying to sell us on their screws. I stood there and listened attentively with the Pole Barn Guru standing next to me who I could see was ready to ask some very pointed questions. The first question to leave his lips was, “Do you powder coat your screws”? The answer was a clear NO and a look of… “why does that even matter?”. After further discussion this supplier tried to explain to us that standard paint is just as good. When asked if all the paint will stay on after installation we were told, “Industry standard requires that a maximum of 25% of the paint can come off during installation to meet grade”. I could tell Mike The Pole Barn Guru was saying to himself, “Are you kidding me? 25% of the paint coming off new screws on our building would look hideous”. This confirmed to me why powder coated screws, when working as promised, are a much better product and worth the added cost.
Getting back to my screw situation required months of testing with the supplier before the issue was found. The cause ended up being the zinc plating on the steel below the paint that was not allowing the paint to properly adhere to the screw. We have since gone to a new plating to resolve all issues.
I learned a few things on this screw journey. Our screw supplier tests each run of screws in a laboratory controlled setting. The drills that test each screw run only at one speed, one pressure, at a perfectly straight angle by running a screw through 29g steel into a framing member. Yes I know, this is a far cry from the actual end user who uses these with a variety of drills and within many different environments.
Screw Rules:
- Always use a drill that has a variable clutch feature so that you can adjust the level of torque before it stops driving the screw.
- Do not over drive the screws. They should seat firmly without squishing the washer out like a muffin top.
- Under drive the screw and you will have building leaks.
- Keep the angle of your drill as close to perpendicular to whatever you are driving into as possible so as not to slip and cause bloody knuckles or scratches on your panels.
- Never use a pneumatic drill.
- You will have an easier time driving and avoiding mistakes by pre-drilling your steel.
- Drive speed matters. The faster you drive the screw through steel the less impact it will have on the face of the screw.
- If using our screws, purchase the lobular bits as they must be used to maintain the warranty.
- Make sure to use the right screw in the right location. Hansen Buildings provides stitch (for installing trims only) and diaphragm screws (for installing roof and siding panels).
Stick to these rules and you are well on your way to constructing the best building possible. Screws are one of the most important parts to the complete design of your building. Hansen Buildings takes great care to provide the best possible building along with a keen eye for any product defects. We could be just another building kit supplier, but we chose long ago not to be. Every component in our building has been chosen with quality and experience in mind to provide the best value building kit on the market.


