How to Cut and Install Base Trim at a Corner
In yesterday’s column, I mentioned how the base trim was improperly installed. Back in the 1990’s when I was constructing buildings, one of my building crew chiefs shared this trick with me. When properly done, it eliminates the ability of critters to climb up inside of the corner trims as well as gets rid of any sharp point which could catch the ankle of an unsuspecting small person (aka child).
Direct from the Hansen Pole Buildings’ Construction Manual, here is how to do it:
Base Trim
Install base trim straight, with “drip leg” lower edge 4” up from splash plank bottom.
See Figure 20-2
There is no base trim across any door openings.
 Hansen Buildings and the major domestic steel mills recommend steel panels not be exposed to standing water. Panels subjected to standing water may exhibit cosmetic rust staining, premature corrosion, or harm to paint coating. Wainscot, base, or lower J Channel (where “J” can catch water) conditions are conductive to exposing panel to standing water.
As such, we offer the following recommendation. The lower wall panel edge, in any condition, is not to rest directly on any trim’s horizontal surface. Rather, panel is to be spaced 1/4” from wainscot or base trim horizontal surface, 1/2” for J Channel (Ex.: above door openings). This will help keep panel’s cut edge out of standing water.
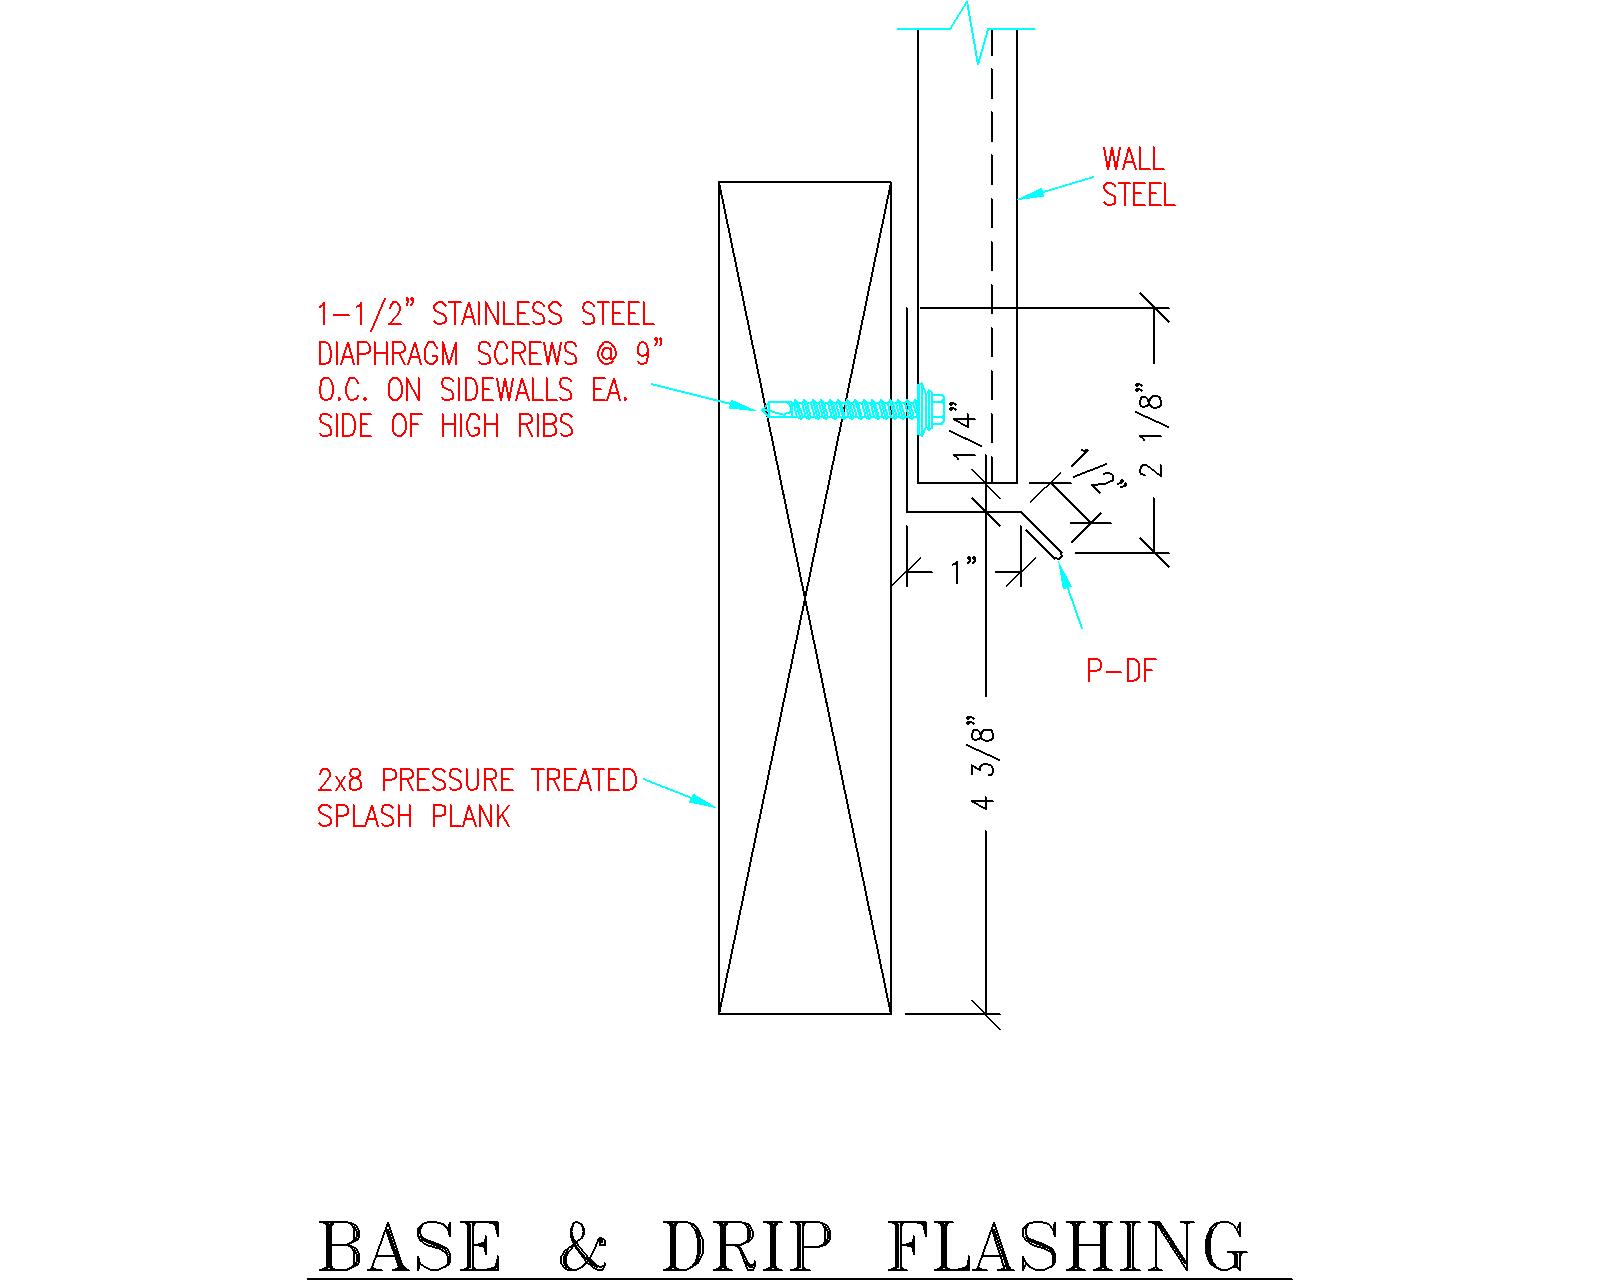
Figure 20-2: Base & Drip Flashing
For base metal cutting at corners of building See Figure 20-3

Figure 20-3: Side View Of Base And Drip Flashing
Steps to create base trim corner (“A” = the dimension of the base trim “flat”):
a) Make Cut #1 in vertical leg of base trim.
b) From Cut #1 bottom, make Cut #2 across “flat” at a 45 degree angle, stopping at bend to “drip leg”.
c) From intersection of Cut #2 with drip leg bend, make Cut #3 across flat at a 90 degree
angle to vertical leg.
d) From intersection of Cuts #1 and Cut #2, make Cut #4 along the bend between vertical
leg and flat, in direction of (and passing by) Cut #3. Cut #4 will be twice the length of
Cut #3.
e) Remove the triangle of steel created by Cuts #2, #3 and #4.
f) Make folds as indicated so B goes behind A and E is beneath D.
Voilà! You are now an expert and can teach others how to properly cut and install base trim at a corner.


FYI you don’t have cut # 2 labeled in your drawing
Thank you Mark – good eye 🙂
Does anyone offer trim for the top of wainscoating on an existing metal pole barn? I was told Morton has top trim that follows the corrigations that eliminates cutting the existing metal to insert trim under and over new wainscoating. Visited a Morton store and they would not sell anything unless you own a Morton Building.
Besides overlapping wall panels over wainscot (bad IMHO), I have only ever seen a Z flashing used between the two. If a ribbed trim exists, it would require precision placement of upper and lower wall panels in order for it to fit properly.